Inventory : Inventory Workflows: Subcontracting
Purpose
This document covers the workflow associated with purchasing a sub-contracted product without incorporating the supply of components to the subcontractor in Odoo 16.
Process
Getting Started
Enable Subcontracting
FIrst, navigate to the Manufacturing app.
Once there, click configuration > Settings and enable Subcontracting.
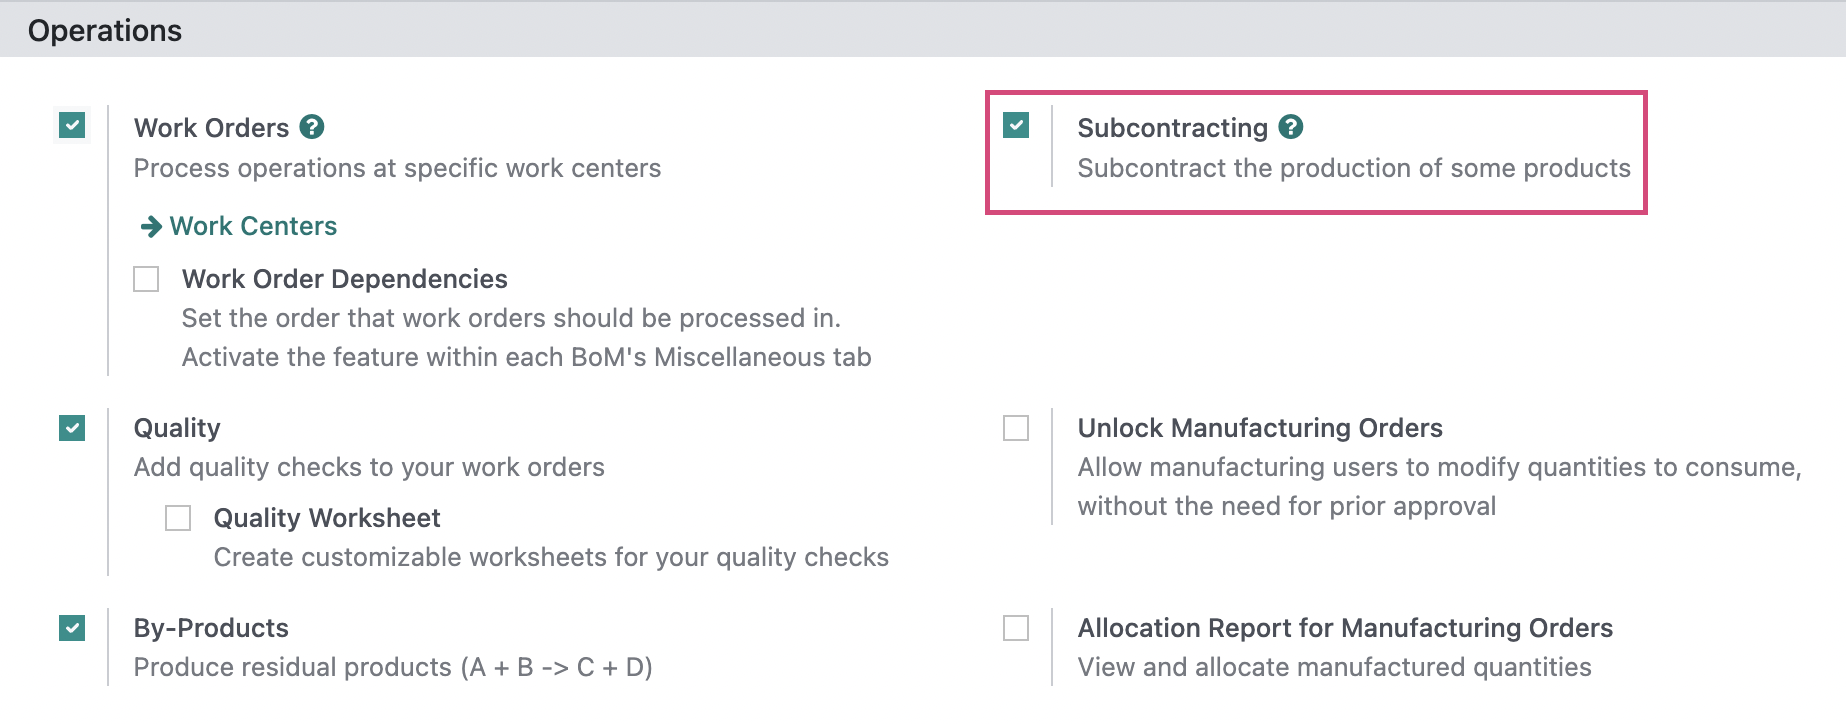
When you're ready, click Save.
Next, navigate to the Inventory app.
Product Configuration
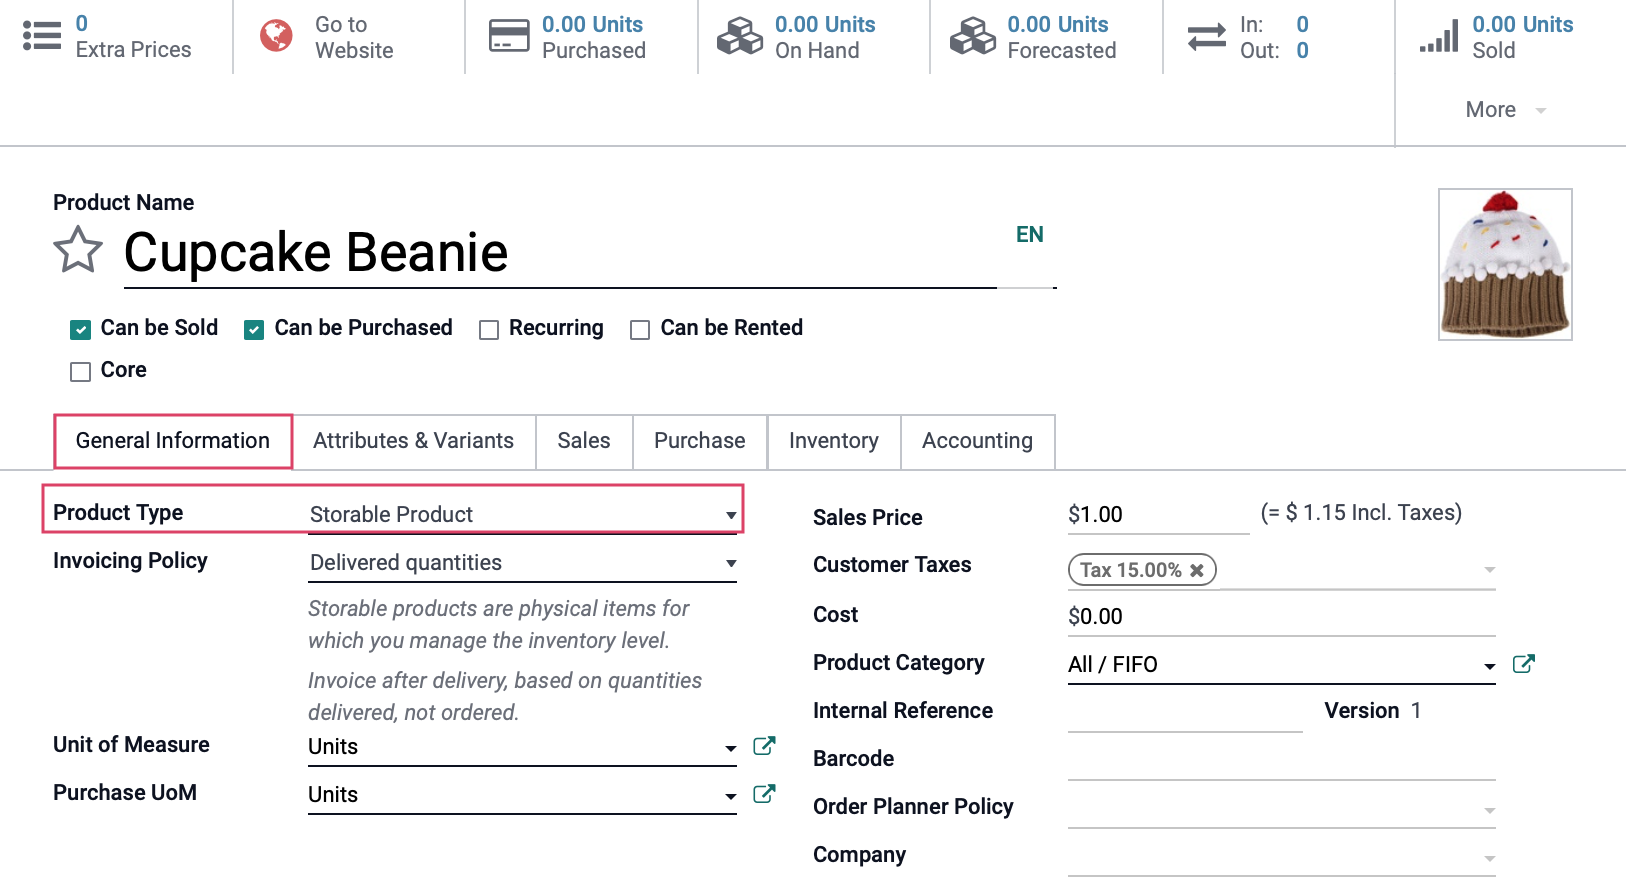
Once there, go to Products > Products. Here you can either Create a new product, or open and edit an exiting product. A product that is purchased from a subcontractor, using your components, must have a specific configuration. The key areas of configuration as as follows:
Can be Purchased: Enabled
Product Type: Storable Product
Under the Purchase tab, click add a line. From here, add the subcontractor as a vendor. Note that you can not yet check the box for "Subcontracted." We will address this in a moment.
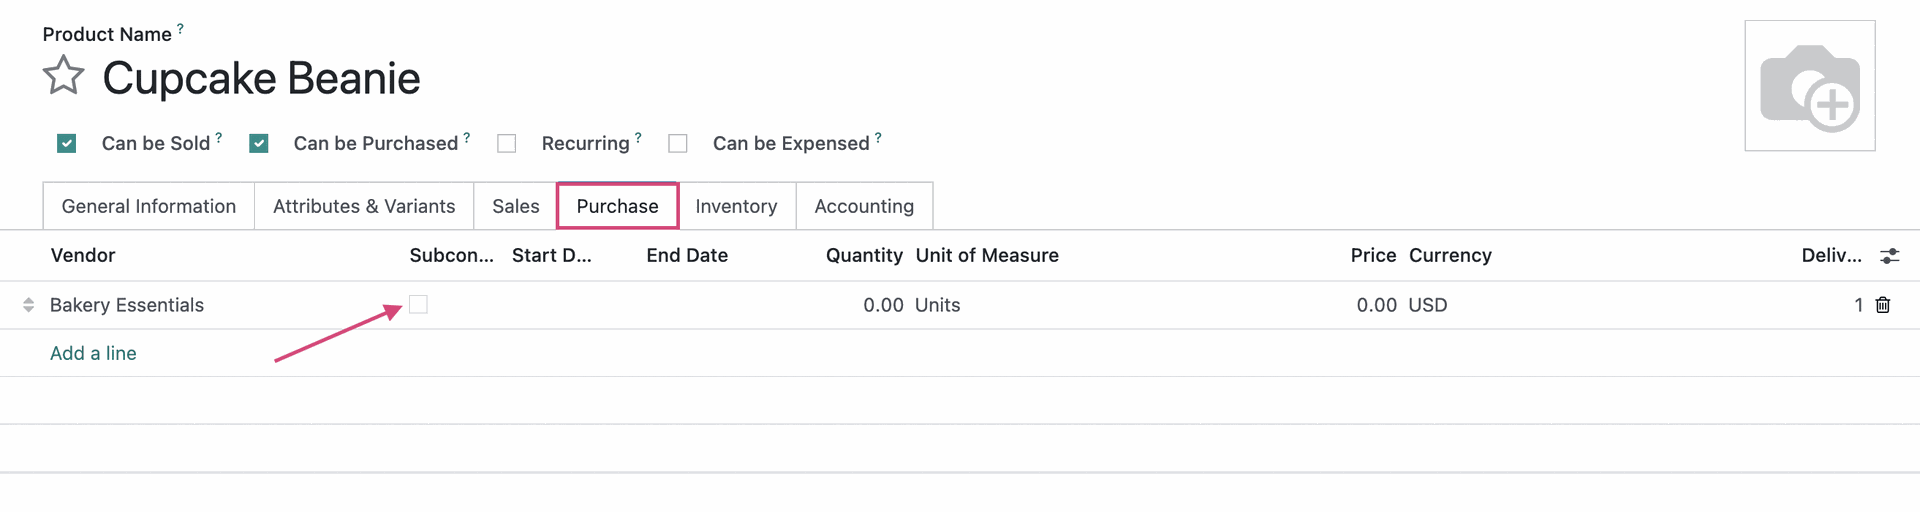
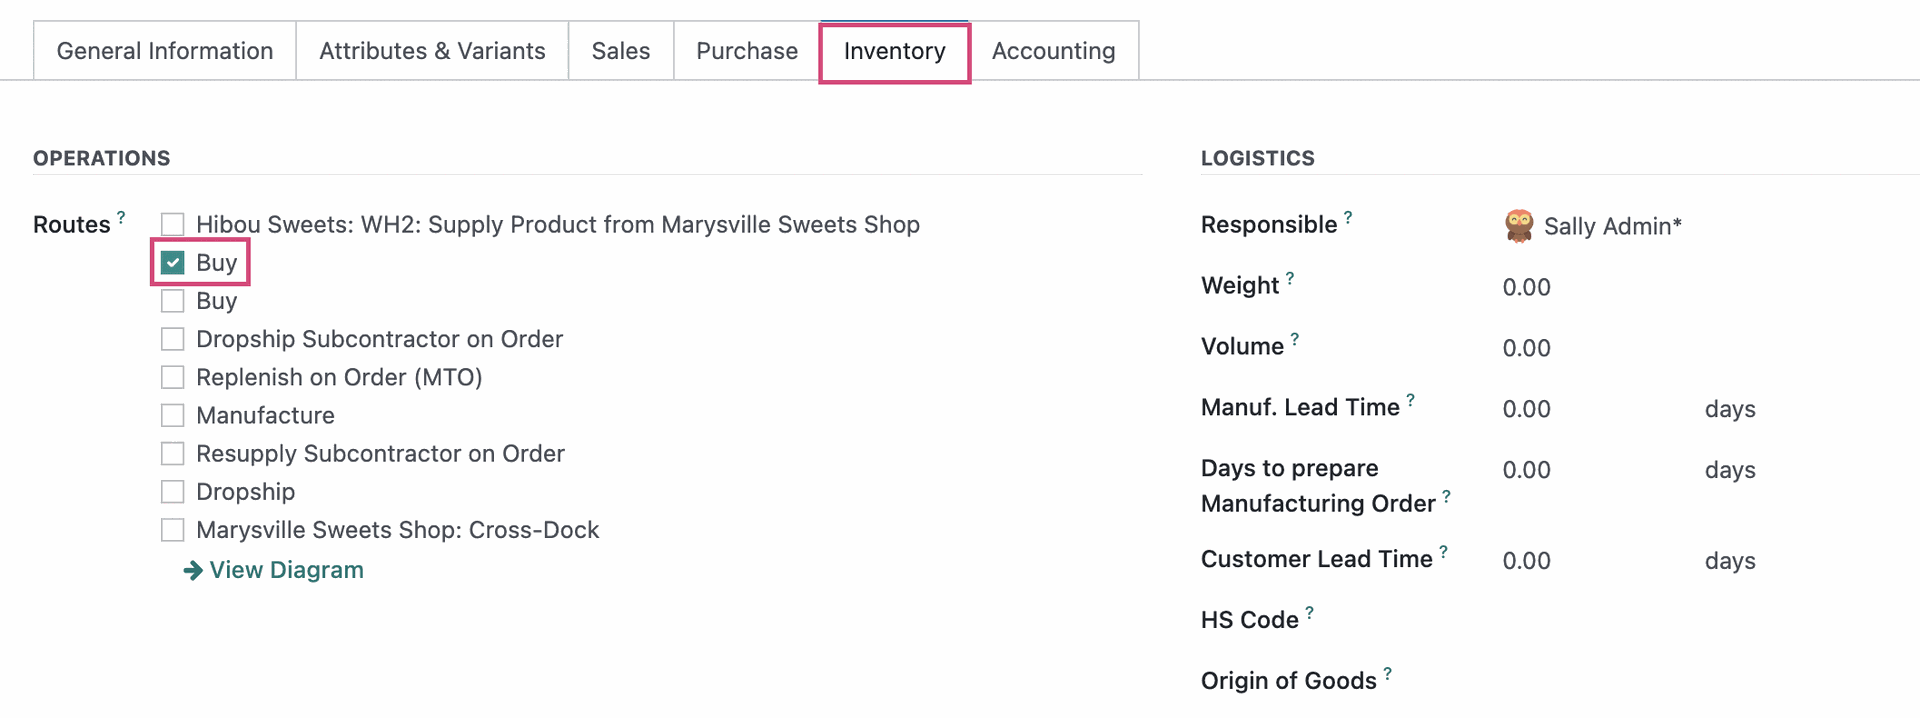
Under the Inventory tab, set the Route to Buy.
Bill of Materials (BoM)
From the product, click the Bill of Materials smart button.

Next, click NEW. Complete the following fields:
Product: The product being manufactured.
Product Variant: Select a variant, if it applies.
Quantity: How many products will this BoM create? It is recommended to create a BoM for one product, only.
Reference: Leave this field empty.
BoM Type: Set this to Subcontracting. Once selected, you'll then add the Subcontractor(s) with the ability to manufacture this product for you. This field should match at least one of the vendors you selected on the product template.
Company: This field pre-populates with the company you're working in.
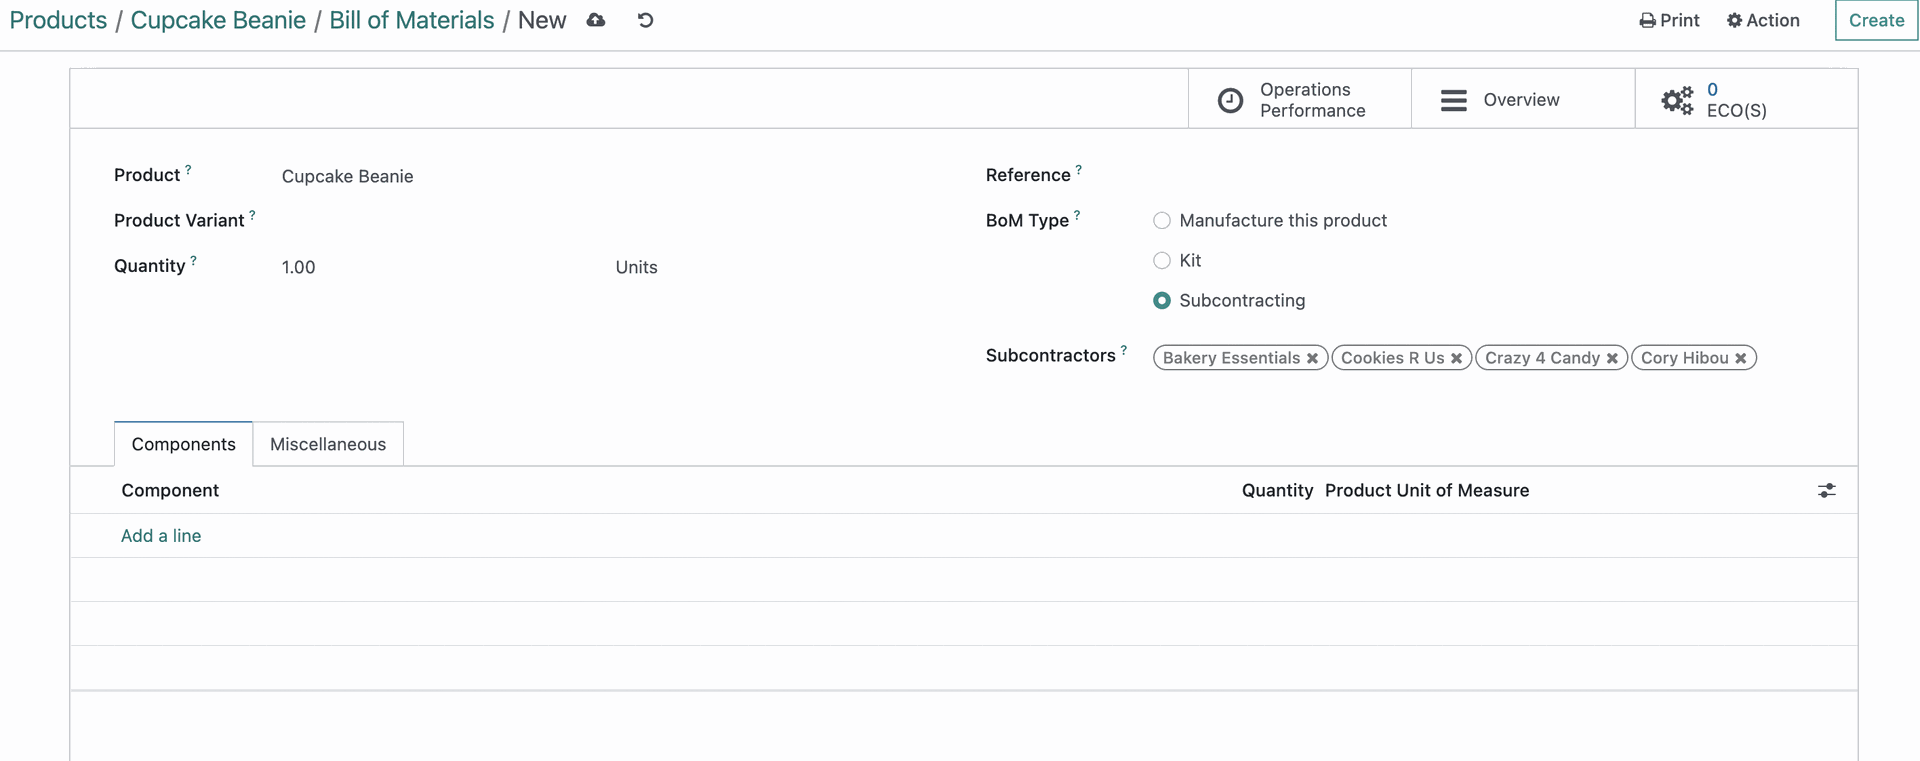
Under the Components tab, click Add a Line and select your product component. Repeat this for every component.

When you're done, use your breadcrumbs to return to the product form.

You will now see that the field for Subcontracting has been checked based on the BoM we just saved. Note: You may need to enable the ability to view this column by selecting it from the toggle menu (located to the right of "Delivery Lead Time").

Watch It Work
Navigate to the Purchase app.
Create the Purchase Order
Go to Orders > Purchase Orders, then click NEW. Use the form to make a Purchase Order from your selected Subcontractor for the product you configured to be manufactured.
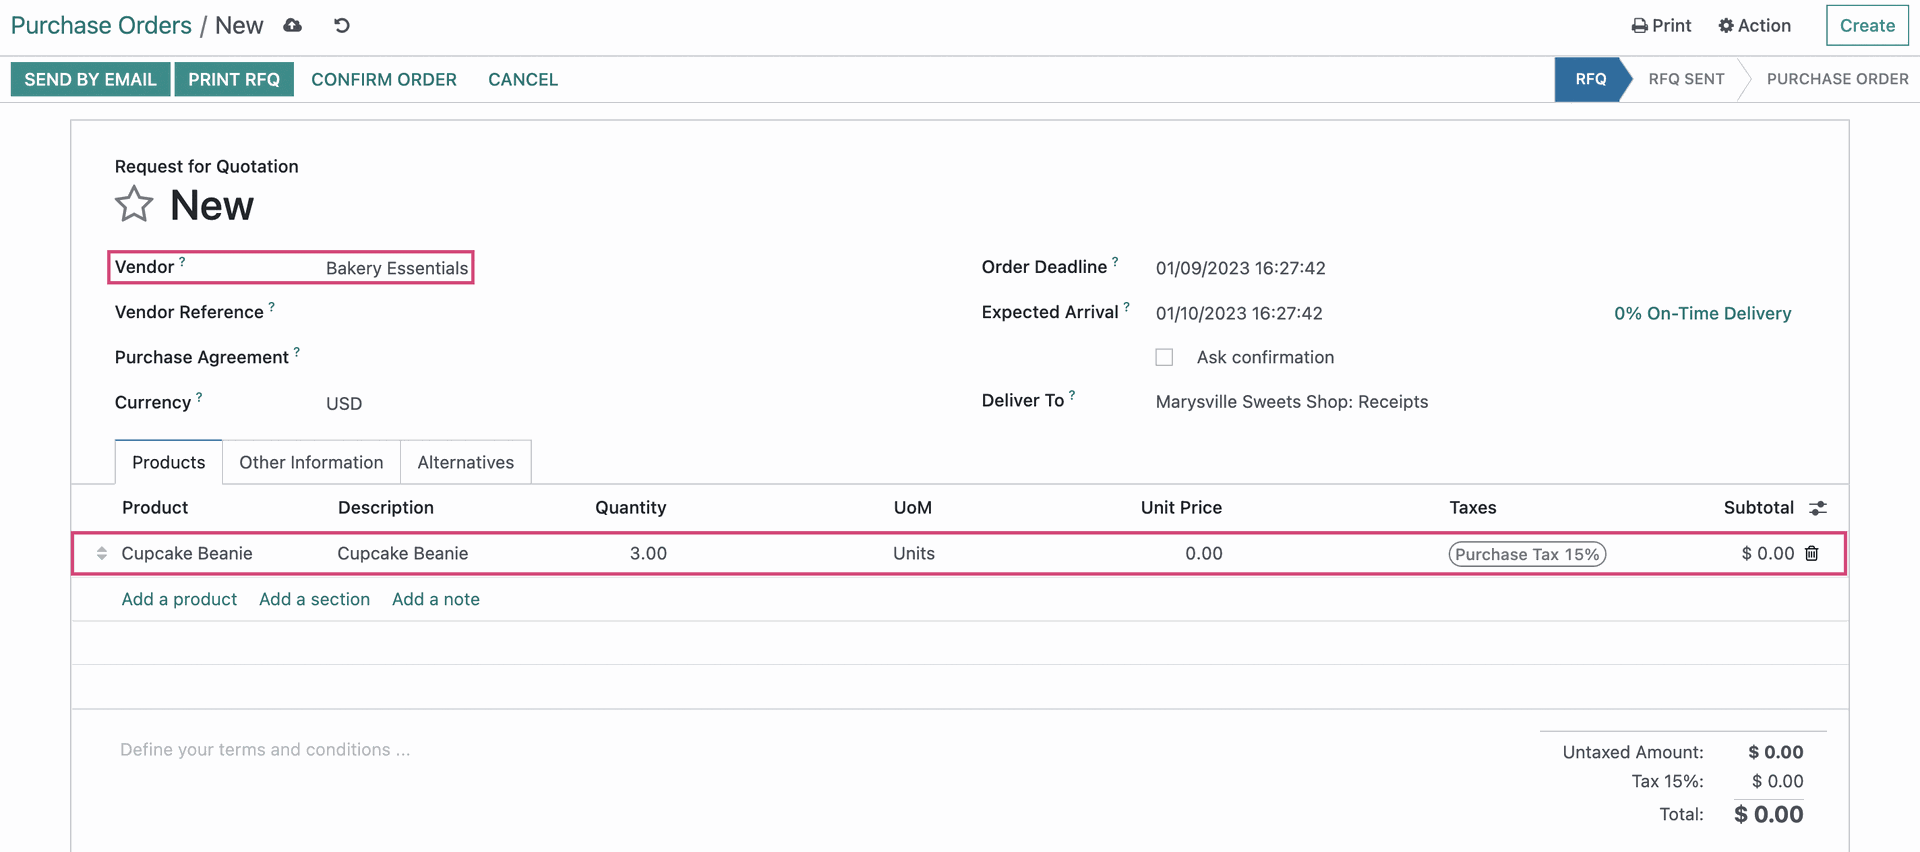
When you're done, click CONFIRM ORDER.

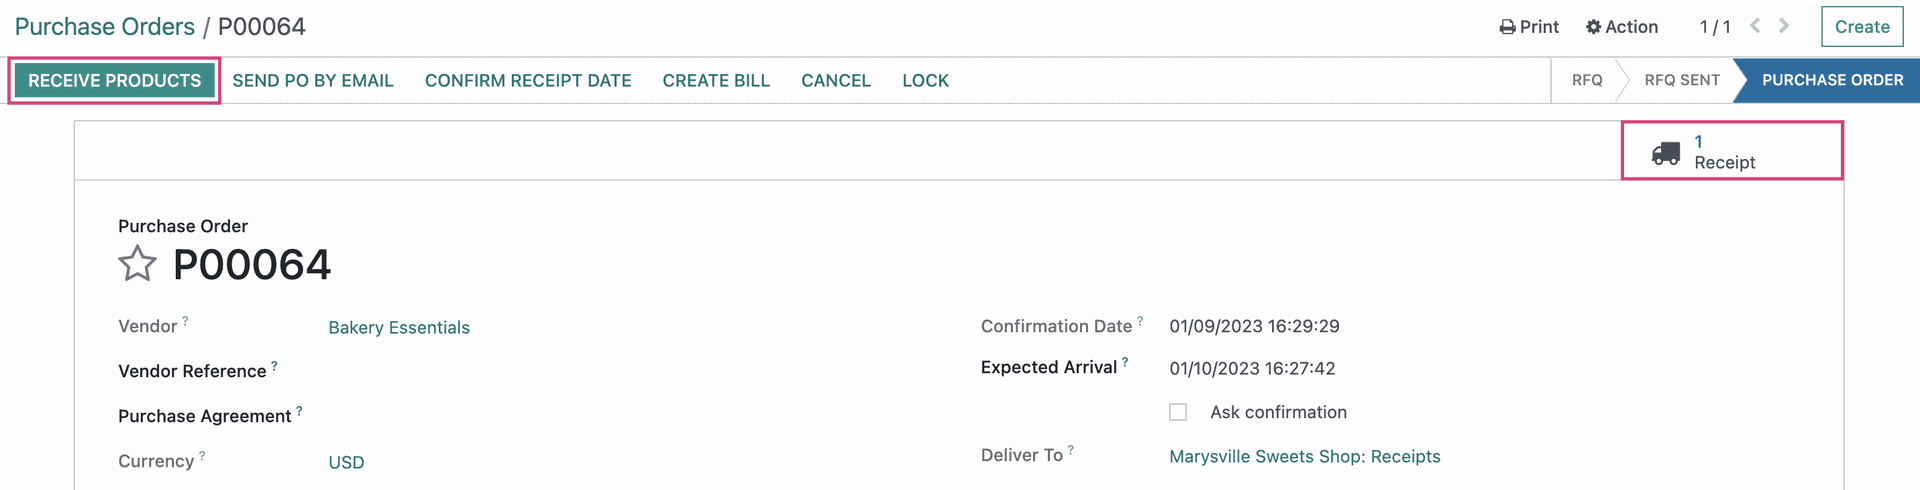
Receive the Finished Product from the Subcontractor
From the Purchase Order, click Receive Products and then complete the receiving process. Documentation for this workflow can be found here: Receiving Products.
Review Stock Moves
From the Inventory app, click REPORTING > MOVES HISTORY. From this page, search for the finished good and component products to display their product moves. You'll see our Yarn moved from the Subcontracting Location to the Production location, while the completed Beanies moved from the Production location to the Subcontracting location, and then from Subcontracting into our Stock location.
