Inventory : Products / Master Data: Product Variants
Purpose
This document shows you how to view and manage Product Variants in the Inventory application of Odoo 14. Product variants are product records built on one base template with configurable attributes, such as size, style, or color.
Process
To get started, navigate to the Inventory app.
Enabling Variants
Click configuration > settings. In the Product Catalog section, enable Variants.
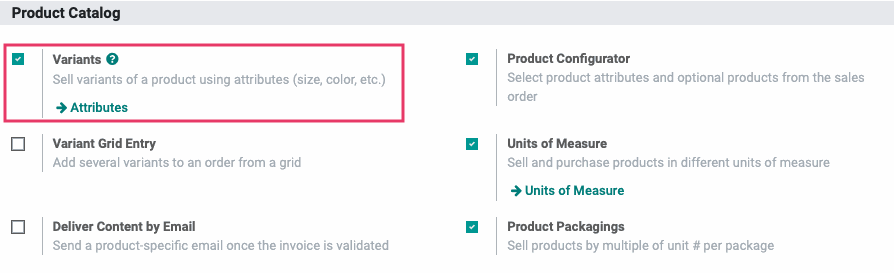
When you're ready, click Save.
Creating Variants
To create a product variant, navigate to Products > Products and select a product. From the product template, click Edit.
Under the Variants tab, click Add a Line and select the first Attribute to add. Then, under the Values column, select all possible values for this product. Don't worry about a certrain combination not being available, we'll cover customizing and archiving in the following sections.
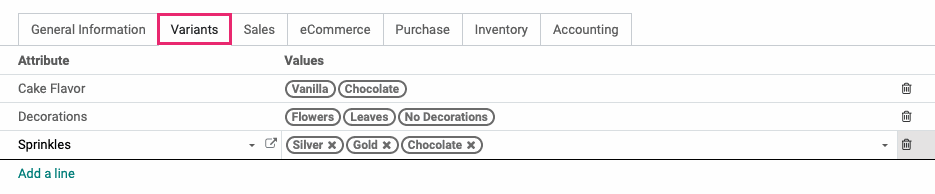
When you're ready, click Save. After saving, Odoo will generate all possible variants.
Viewing Variants
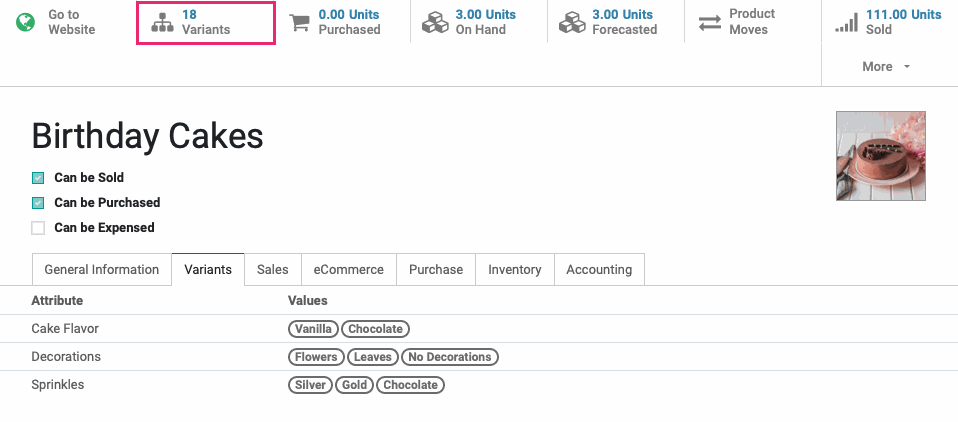
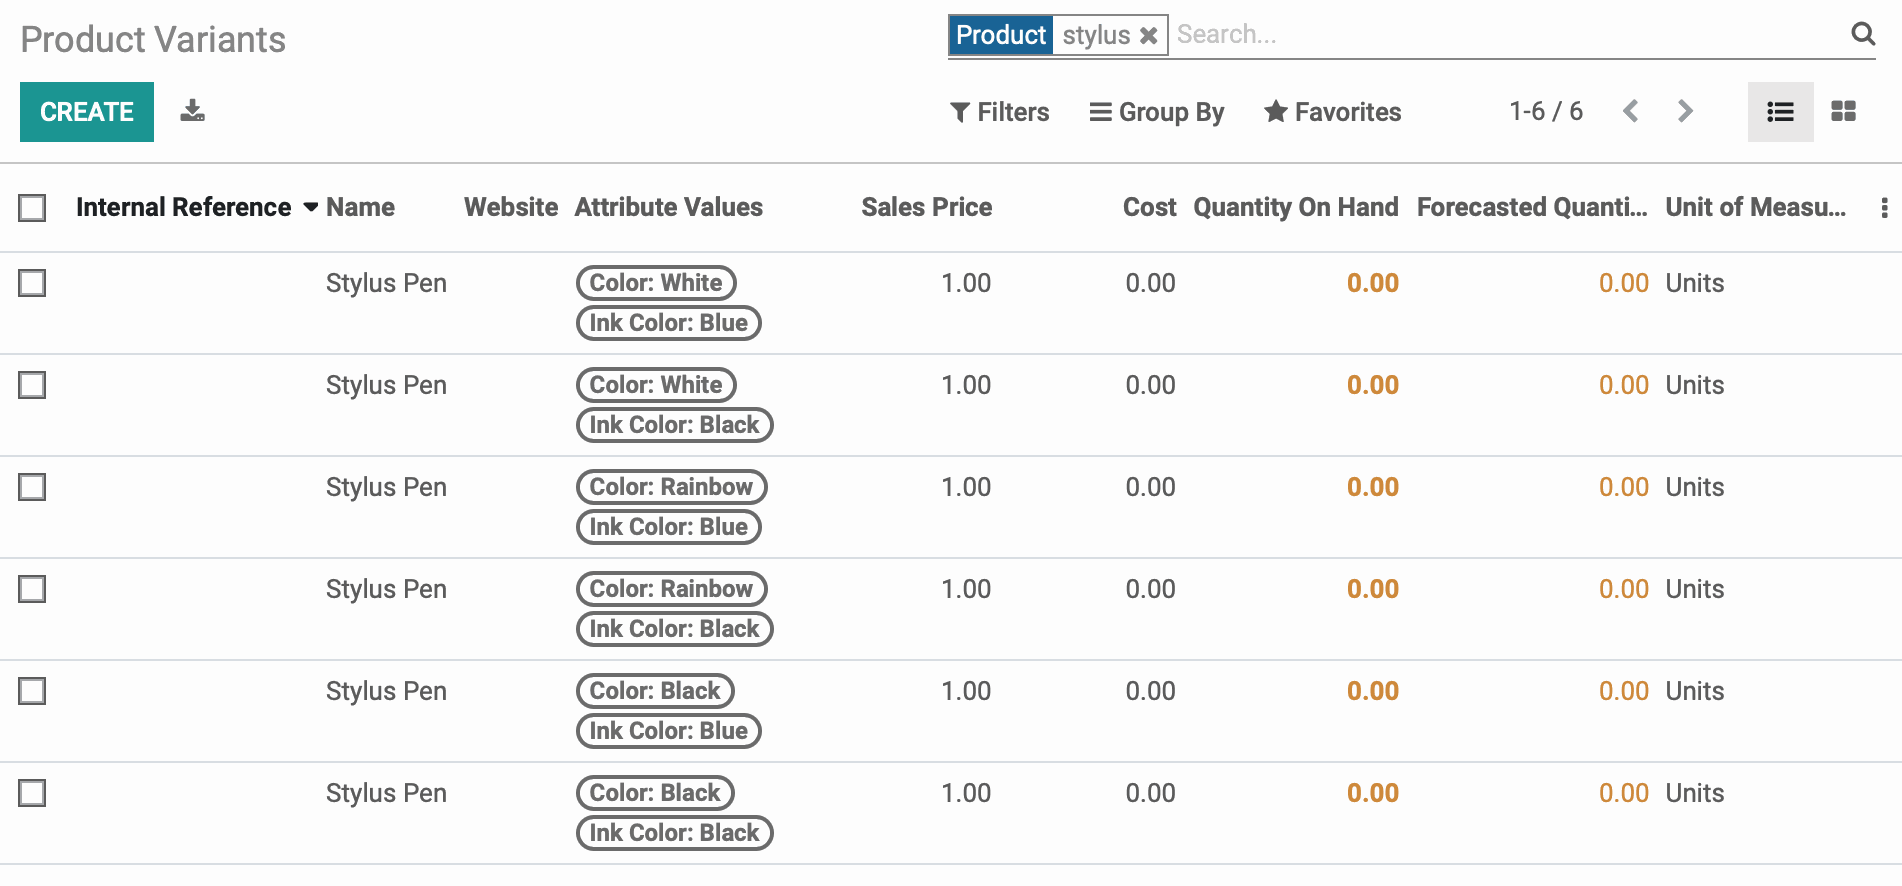
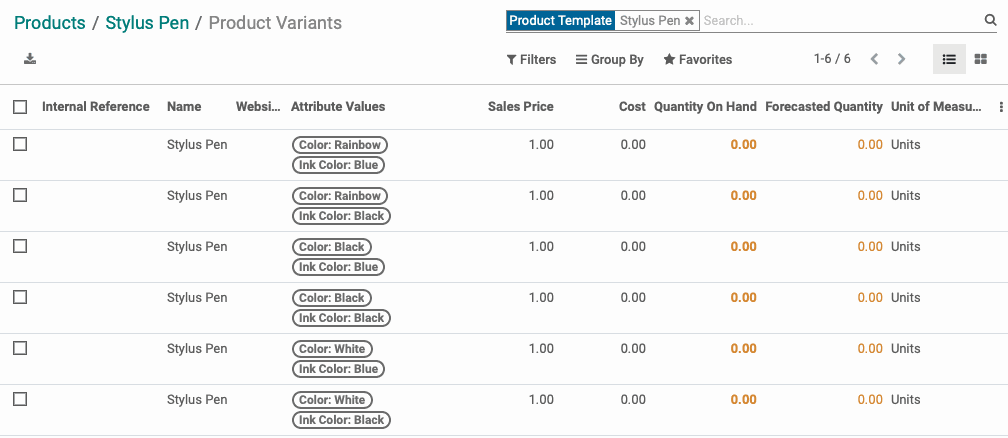
To view all product variants, click PRODUCTS > PRODUCT VARIANTS. This brings you to a list of all product attribute combinations. Narrow the results to a specific product by using the search tools. Each line represents a different variant of the product you search for.
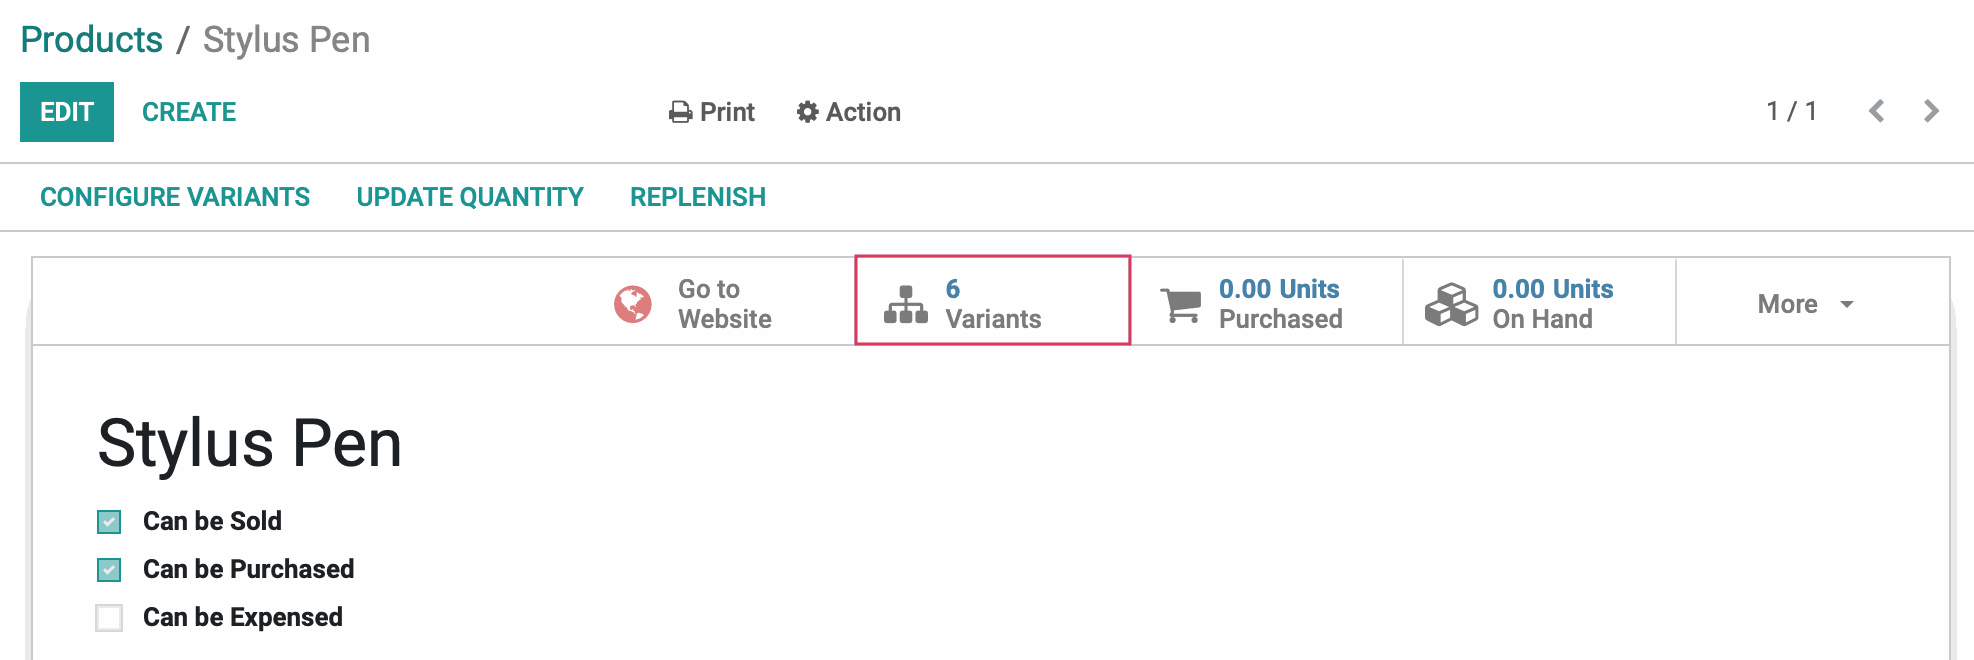
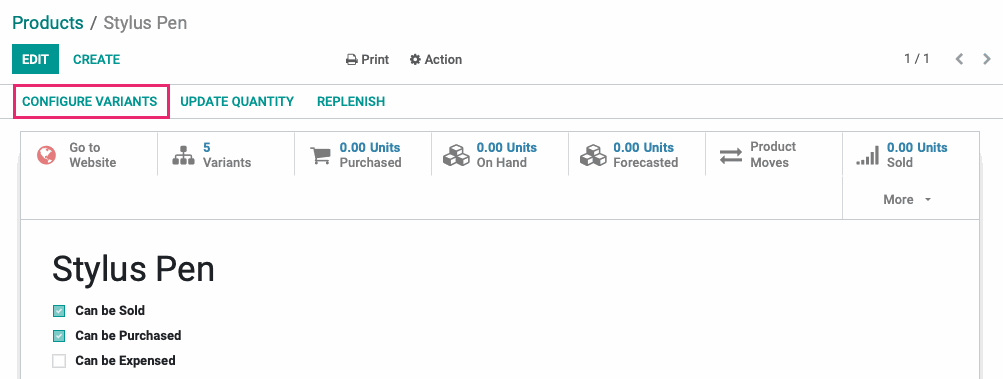
To see the variants for a specific product, first navigate to PRODUCTS > PRODUCTS, select any product from the list, then click the Variants smart button on the product record.
Modifying an Individual Variant
To modify a variant, select an entry from the list of variants in the previous step.
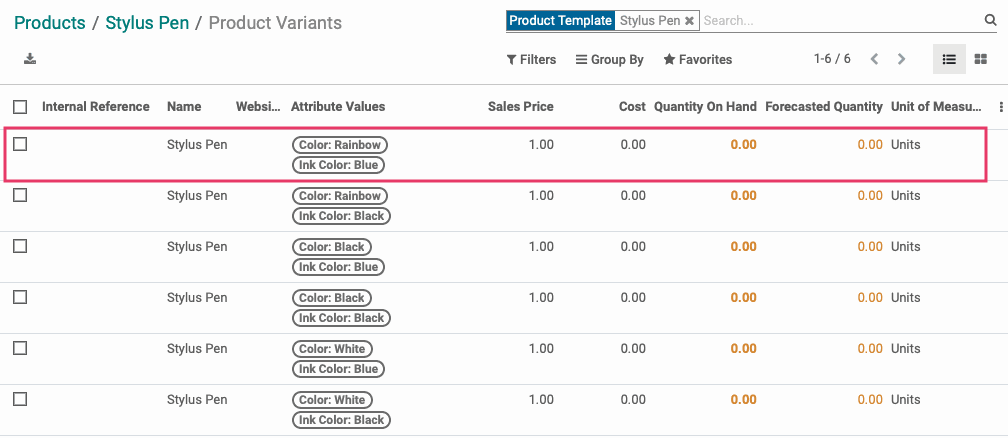
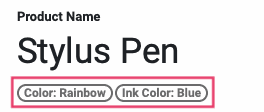
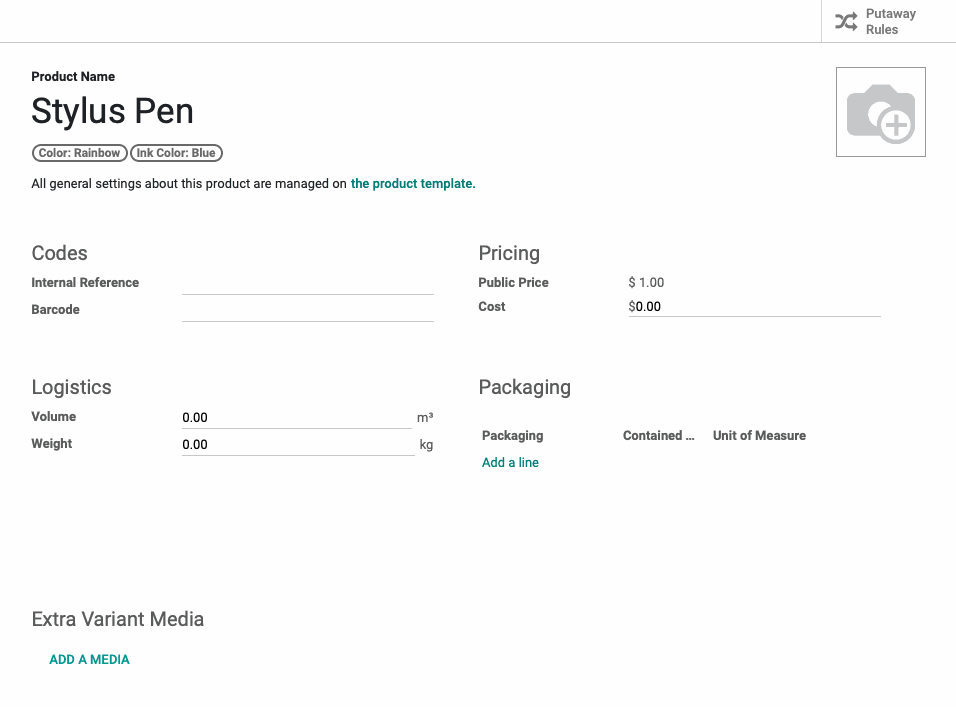
Click Edit to see all configuration options. In our example, you will see that the product variant of the Stylus Pen we chose has two attributes:
Color: The product variant we chose is Rainbow.
Ink Color: the product variant we chose has Blue ink.
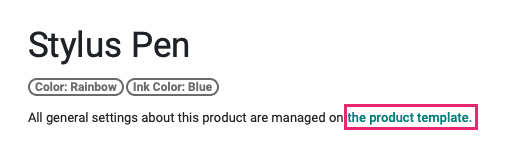
As a result, all of the configurable fields on this page will apply only to the specific product variant chosen: Rainbow Stylus with Blue Ink
To access the base product template from this window, click the product template.
Product Image: Hover the image and click the pencil icon to upload an image of this variant.
Codes
Internal Reference: Enter the internal reference number or code for tracking this variant.
Barcode: Enter the barcode for this variant. This is the International Article Number used for product identification.
Pricing
Public Price: This price is hard-coded and cannot be changed from this page. It is calculated from base price of the product, and the price of any applied attributes.
Cost: This is the cost to purchase this product variant. Changing this cost will not affect the base product or its other variants.
Logistics
Volume: Enter the volume of this product variant.
Weight: Enter the weight of this product variant.
Packaging: Click ADD A LINE to add one, or several, Product Packaging types for this product variant.
Extra Variant Media: If you have another image of, or documentation for, this specific product variant, add it here by clicking ADD A MEDIA.
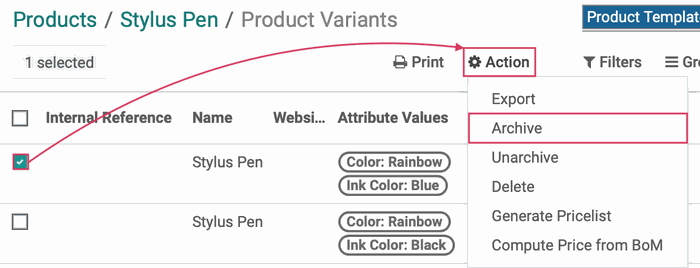
Archiving a Variant
There will be some scenarios where a product combination isn't available or possible. To archive a variant, select it from the list and choose Action > Archive
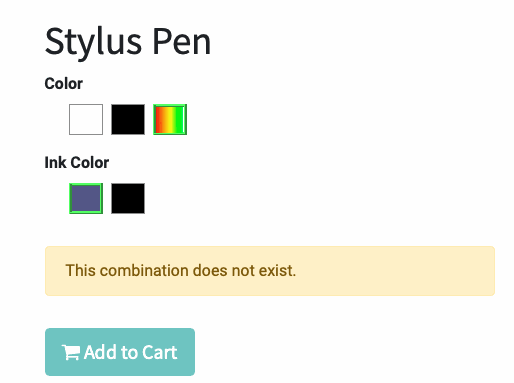
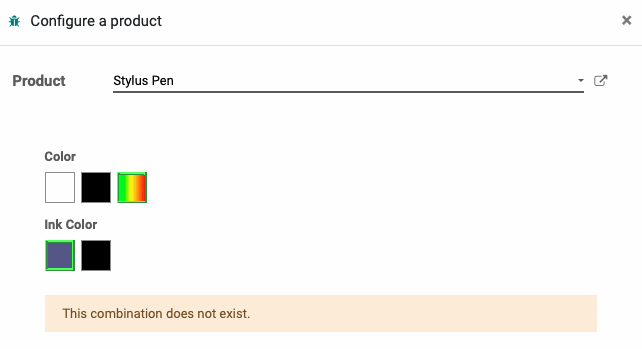
If someone tries to purchase this configuration from the website, or add it to a quote or sales order, they'll see a message stating that the combination does not exist.
†Website:
†Sale Order:
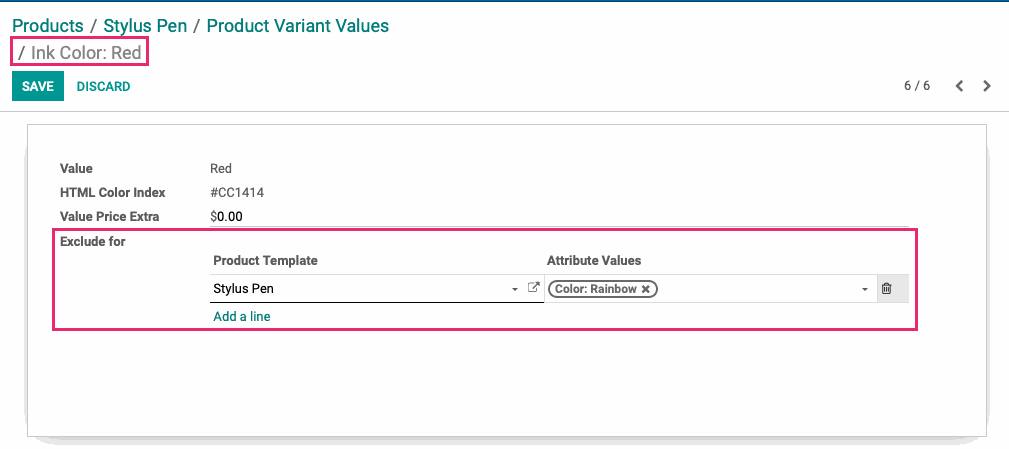
Configuring Individual Product Variant Values
It is possible to have a product variant value (i.e., attribute value) carry an additional price, and/or be excluded from applying to specific product templates. To configure this, go to PRODUCT > PRODUCTS and select a product with variants. From the product template, click CONFIGURE VARIANTS.
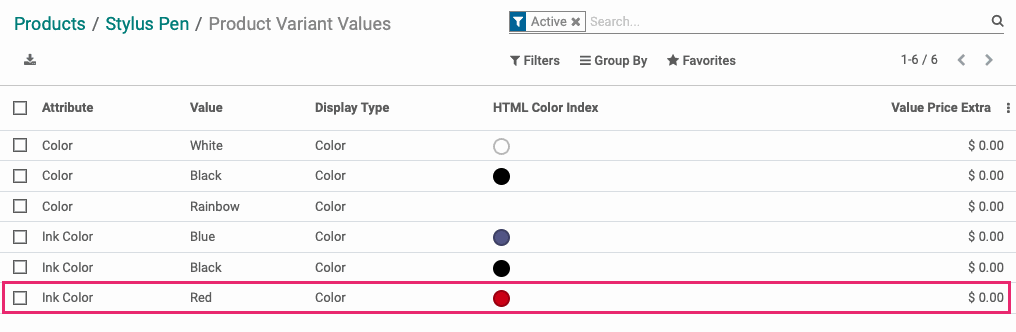
This brings up a list of all values for this product. Select any value from the list.
Click EDIT.
To add an additional cost for this value, on this specific product, add it in the Value Price Extra field. To prevent this value from being added to a specific variant of the product, select it in the Exclude For section. Click SAVE when you're done.
In our example, this configuration shows that the red ink color is not available in any rainbow-colored pens.
On the front end website, when Rainbow† is selected, the red ink color will be x'ed out and not selectable.
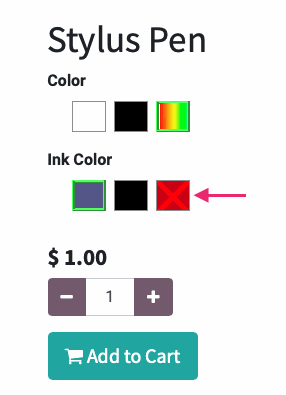
† The "Rainbow" color option was added to the screenshots, above, with a graphics program for the purpose of this document.