Inventory : Operations: Landed Costs
Purpose
This document outlines the use case and processes associated with Landed Costs in Odoo 14. Landed costs are the total additional costs of a landed shipment, including:
Freight
Insurance
Other Costs up to the Port of Destination.
In some instances, it may also include the customs duties and other taxes levied on the shipment.
In other words, landed costs allow you to incorporate extra costs into the total cost of a product once it has arrived at your door (e.g., Cost of Product + Shipping + Customs).
Important!
Category Configuration
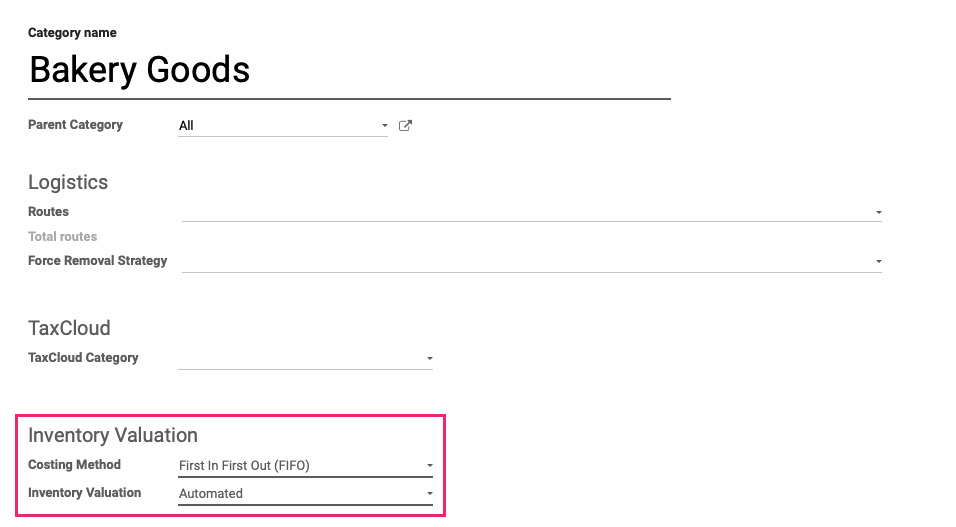
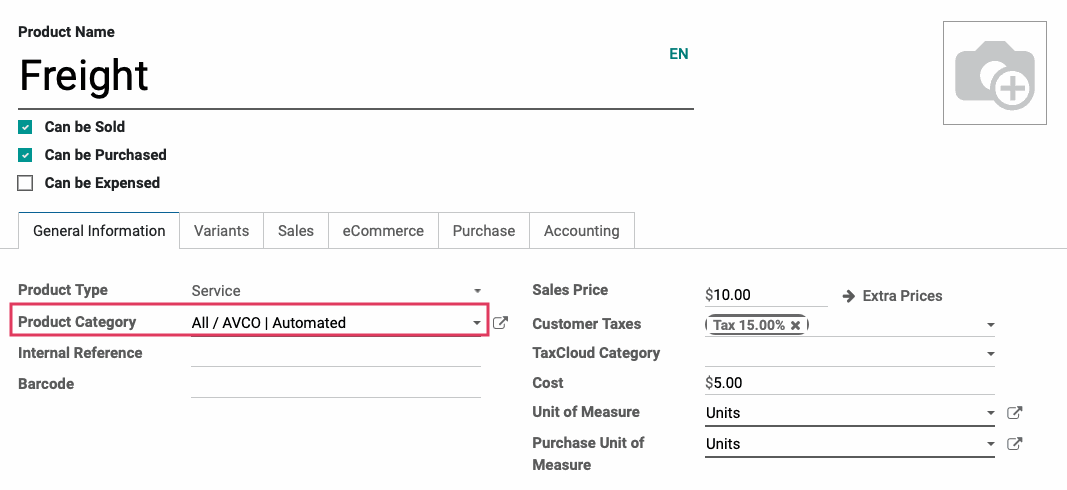
A Landed Cost can only be used on products in categories that are configured with the FIFO and AVCO costing methods. The costing method for a product is configured at the product category level, as shown below.
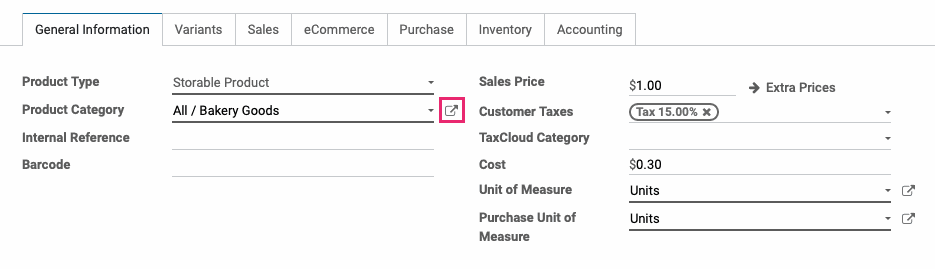
This applies to all products listed in an order that you want to apply landed costs to. To ensure the proper configuration, add a product line to a Sale Order, then click the external link icon to see how it's configured.

When the Open: Product window opens, go to the Product Category field and, again, click the external link icon to see its configuration.
Getting Started
Enable Landed Costs
Navigate to the Inventory app.
Once there, go to Configuration > Settings. Under the Valuation field, enable Landed Costs.
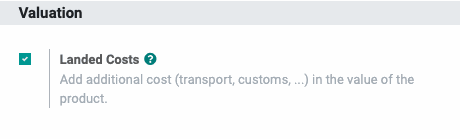
When you're ready, click SAVE.
Process
Create a Landed Cost Product
Follow the Products Creation documentation to create a new product. On the product template, be sure to select a Product Category that is configured with either a FIFO or AVCO costing method, as explained above.
Under the PURCHASE tab, find the Landed Costs section.
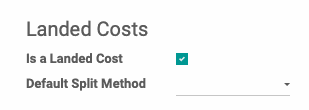
Is a Landed Cost: Check this box to denote this product as a Landed Cost.
Default Split Method: If applicable, decide how this Landed Cost should be dispersed among all qualifying products in the order.
When you're ready, click Save.
Add Landed Costs to Vendor Bill
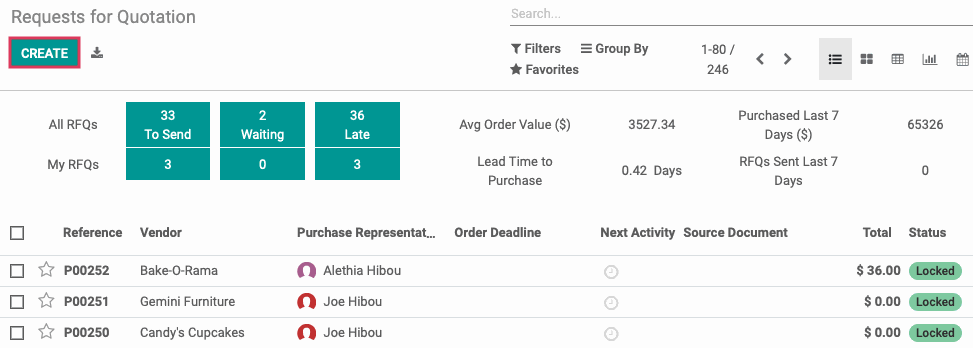
Since Landed Cost is based on delivery of goods, we'll first need to create a Purchase Order. To get started, navigate to the Purchase app.
![]()
Click Create to start a new Request for Quotation.
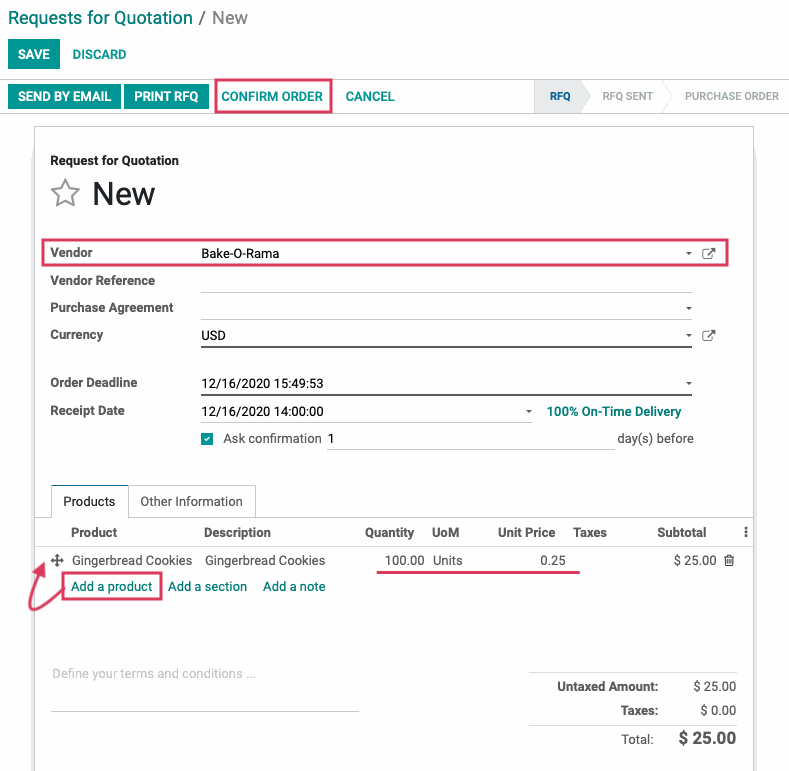
In the New RFQ form, first select a Vendor. Next under the Products tab, click Add a Product and select the product you'll be purchasing. Be sure to adjust the Quantity and Unit Price.
When done, click Confirm Order. This will convert it the RFQ to a Purchase Order.
When the page reloads, click Receive Products, or the Receipt smart button.
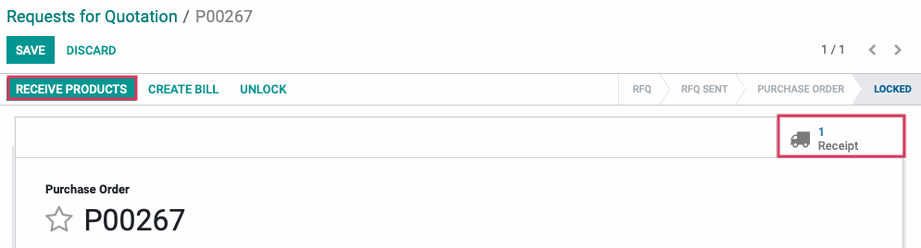
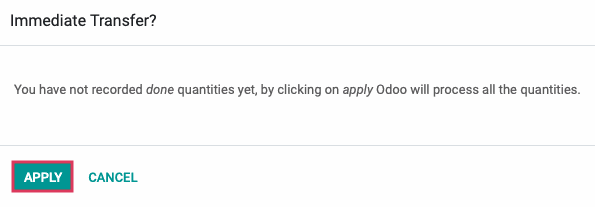
Click Validate.

On the modal window, click Apply to verify that the full order is being received.
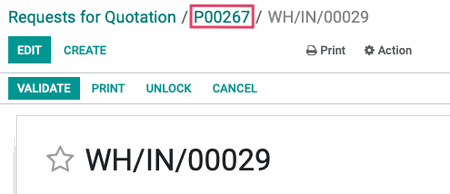
Copy the Transfer reference (e.g. WH/IN/00029). You'll need to add this reference to the Landed Costs form.

Navigate back to the Purchase Order using the breadcrumbs.
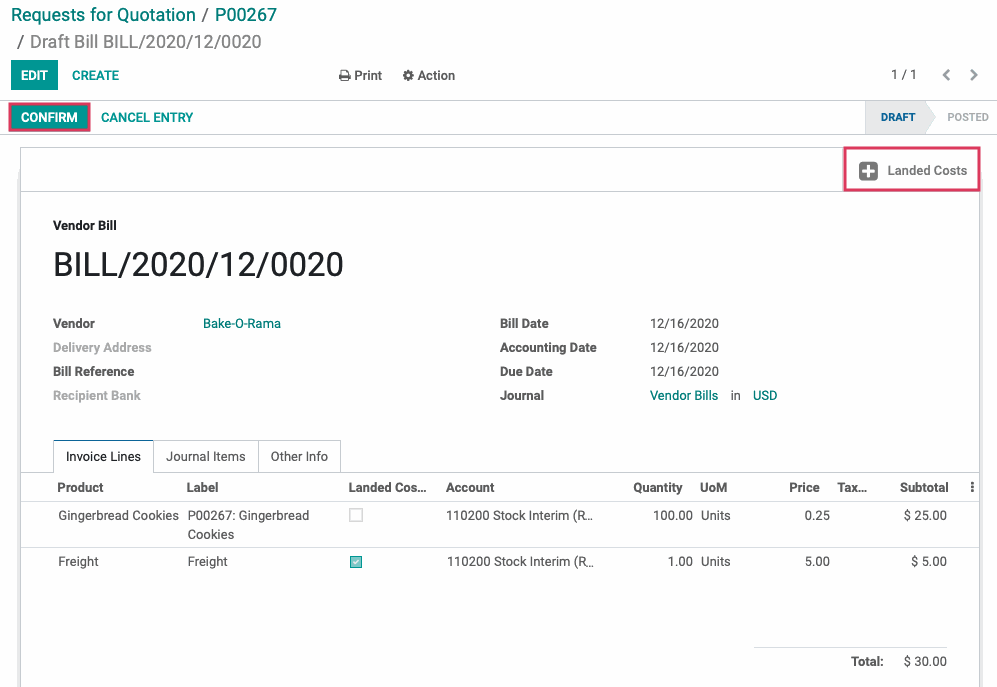
To bill the products, click Create Bill, then EDIT.

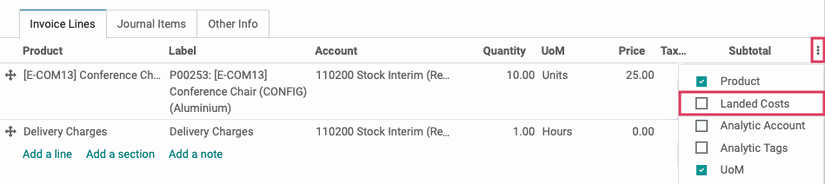
Under the Invoice Lines tab, click Add a Line and enter any additional Landed Costs from this vendor. Mark the entry as a Landed Cost in the respective column.
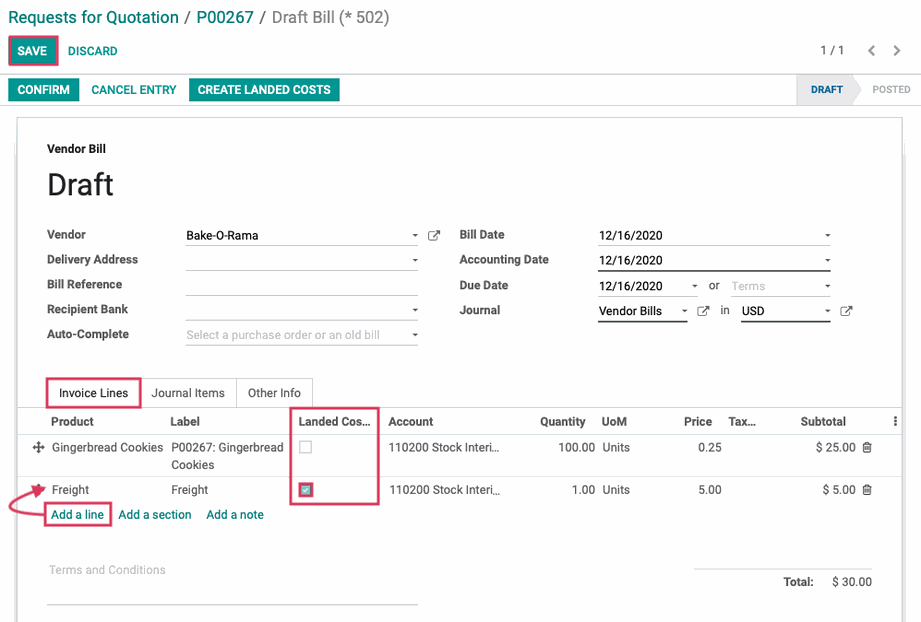
Click Save before continuing.
Good to Know!
No Landed Costs column?
If you don't see the Landed Costs column, click the icon to the far right and select it from the drop-down.
After saving, click the Created Landed Costs button, which appears as soon as you designate an Invoice Line as a Landed Cost.
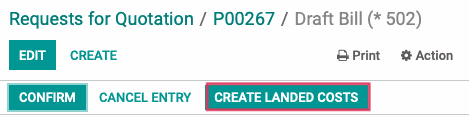
This brings you to the Landed Cost form for this draft bill. Click Edit and complete the fields, as shown.
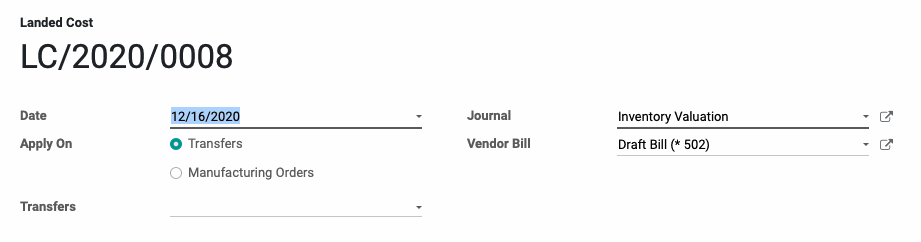
Date: This will auto-populate with the current date, but you can adjust it to the day of receipt, as needed.
Apply On: Select whether you would like this landed cost to apply on Transfers or Manufacturing Orders. Your selection will dictate if the next field is titled Transfers or Manufacturing Orders.
Transfers/Manufacturing Orders: Add the Transfer or Manufacturing Order reference you copied at the time of product receipt, then select the matching entry from the drop-down. For our example, this is WH/IN/00029.

Journal: This is the Journal configured to record Landed Costs settings.
Vendor Bill: This field will auto-populate with the draft bill reference.
Under the ADDITIONAL COSTS tab, the product you designated as a Landed cost will appear. To add additional product lines to the Landed Costs of this Purchase Order, click ADD A LINE.

Product: This is where you'll add your additional costs, whether they be shipping fees, duties, handling, carrier charges, etc. We've summarized this as "Landed Costs" for the purpose of this example.
Description: This will auto-populate with the product name, or you can add more information here.
Account: This will auto-populate with the product's set Account.
Split Method: This is where you'll decide how to distribute the Landed Costs within the Transfers.
Equal: Cost will be equally divided by the moved lines. This is the most common method.
By Quantity: Cost will be divided based on the product quantity.
By Current Cost: Cost will be divided based on the product's current cost.
Weight: Cost will be divided based on weight.
Volume: Cost will be divided based on volume.
Cost: The total cost of this line.
When you're done, click Save, then click Compute.
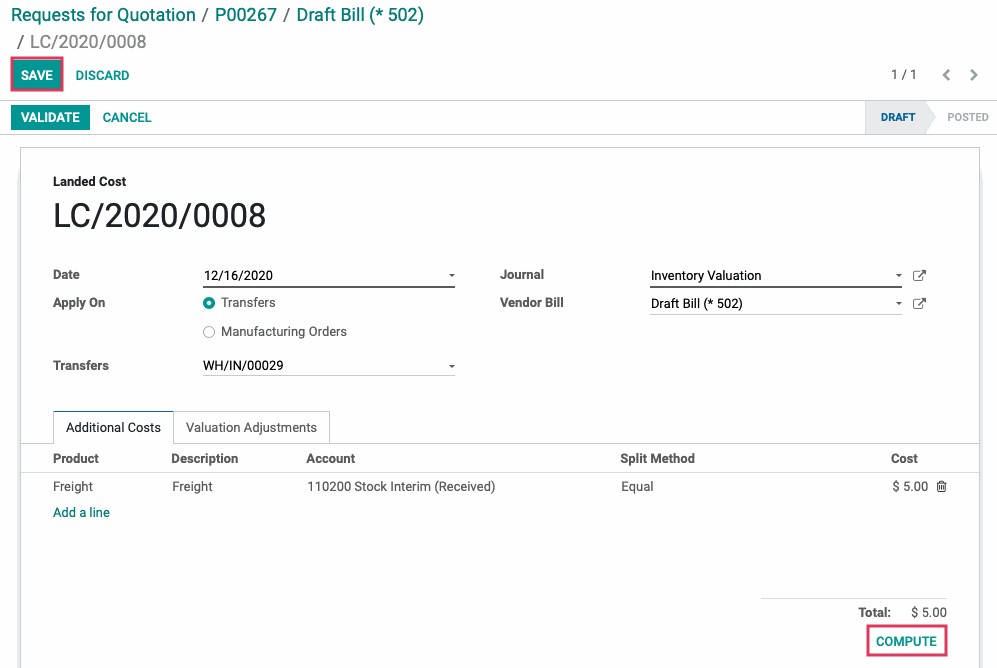
This calculates the New Value of the product with Landed Costs included. You can see this information under the Valuation Adjustments tab. When you're ready, click VALIDATE
After validation, navigate back to the bill using the breadcrumbs.

Now you'll see the new Landed Costs smart button that was added to the bill. You can always go back to the Landed Cost record using this shortcut.
Verify the information on the bill, then click confirm.
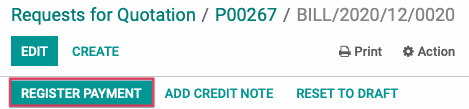
Click Register Payment.
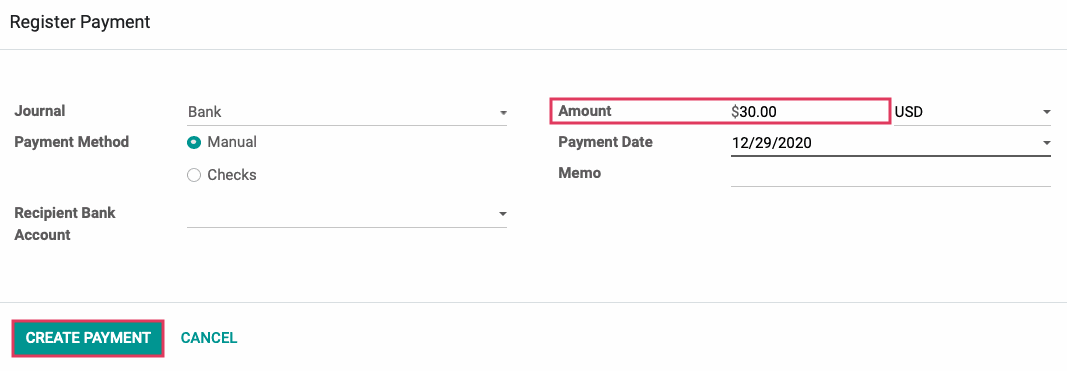
On the modal window, you will notice the price in the Amount field reflects the total, including the Landed Costs. Enter the payment information and click create payment.
Your products have now been received to the warehouse, and your vendor has been paid for both the product and the associated costs.