Inventory : Products / Master Data: Packages
Purpose
This document outlines the Packages feature of the Odoo 14 Inventory application. A package is a physical container that holds one or several products. This feature allows you to manage one or more packages when recording transfers.
To get started, open the Inventory app.
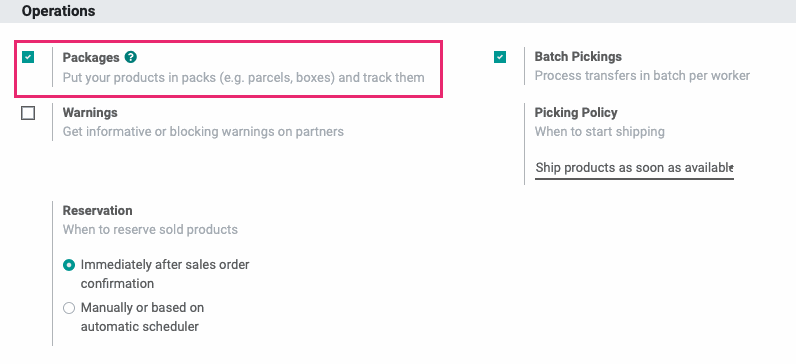
Once there, click CONFIGURATION > SETTINGS. Under the Operations section, enable Packages then click Save.
Next, click Products > Packages.
Creating a New Package
On the Packages page, you'll see existing package types.If you do need to make a new packaging, click CREATE. This opens the Packages form.
In this example, we're adding a packaging for some Display Cases we get on a regular basis. We already know they ship in DHL pallets and weight 270kg each. This is how we'll fill out the form.
Package Reference: Odoo will generate a unique name, or you can enter your own. This is helpful if you already know the contents and details of the package.
Package Type: Select the type of package you're creating. You may also Create and Edit... if you have a new package type.
Shipping Weight: Enter the shipping weight of this empty package.
Package Use
Disposable Box: These containers are not reused and are considered part of the transfer.
Reusable Box: These containers are used for batch pickings and emptied for reuse. They are not considered part of the transfer.
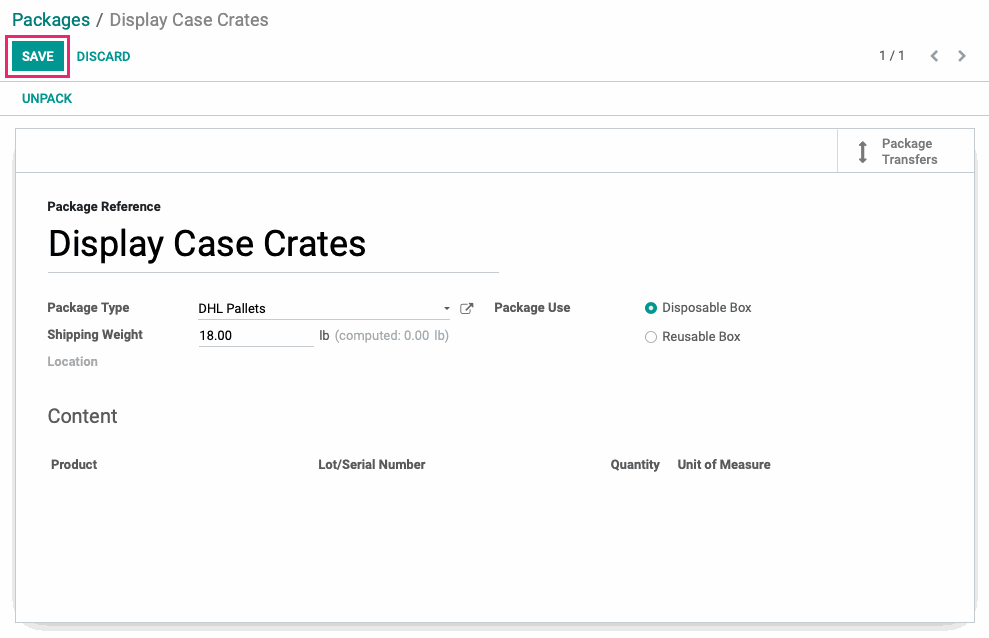
When you're ready, click Save. This packaging is now available to use throughout Odoo.
Workflow: Adding Packages During a Transfer
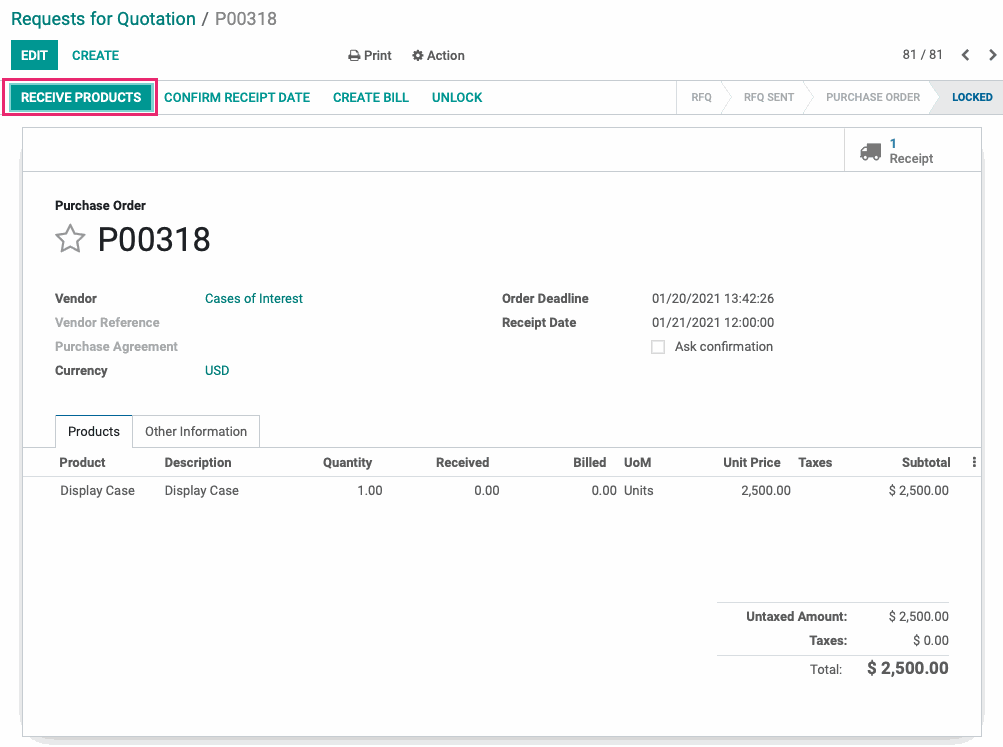
Packages can be created at the time of completing a transfer. To try this out, first create a Purchase Order for multiple products. Follow the workflow until you're ready to receive products.
In our example, we're receiving 24 cupcakes but we want to box them into dozens before we put them into our inventory. To get started, we'll click Receive Products.
The incoming transfer is where we'll add our products to packagings. Once on this page, click Edit. Then, under the Operations tab, we'll need to create a line for each package we're creating. To do so, click the Detailed Operations icon.

A Detailed Operations modal window will open. Click Add a Line.
Product: This field is auto-populated with the product name.
Demand: This field is auto-populated with the demand.
Quantity Done: This field will auto-populate once the Done qty is entered, below.
To package this product, click Add a Line. This opens a new line:
To: This field is auto-populated with the destination location.
Destination Package: Select the package you created to package this item.
Done: Enter the quantity of the product, above, being added to this package. If you have multiple products, you can distribute them into several packages.
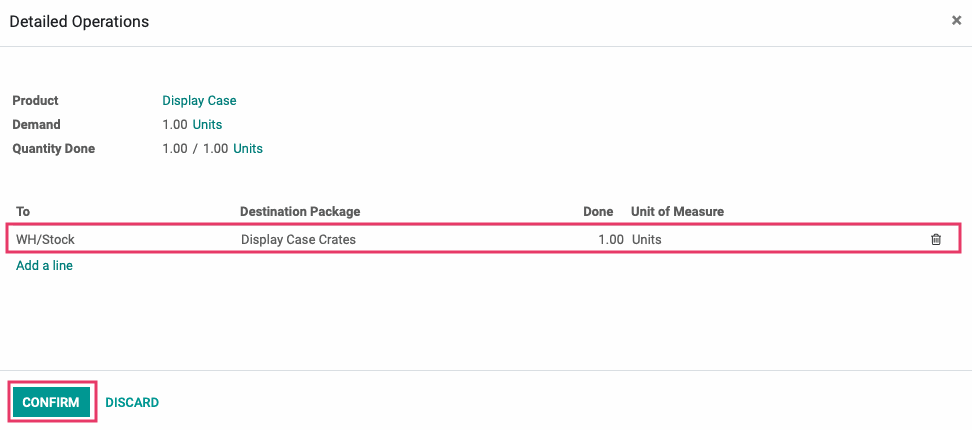
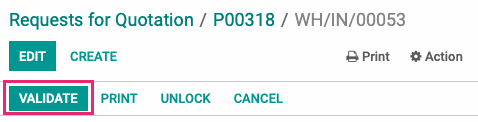
When you're ready, click Confirm. This brings you back to the Purchase Order. When you're ready, click Validate.
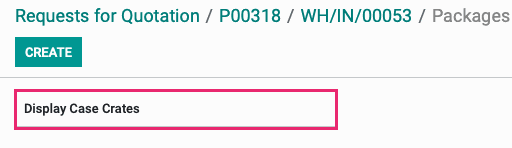
Click the new Packages smart button on the top-right of the record.
This displays all packages associated with this PO. Click the package from the kanban view.
This shows you the details of this particular package, and you can click the PackageTransfers smart button to see the transfers that used this packaging type.
![]()
Clicking this line would bring us full-circle back to our original Purchase Order!
