Inventory : Inventory Workflows: Product Creation
Purpose
This is a step-by-step guide to creating and configuring a new product in the Odoo 13 Inventory application.
Process
To get started, navigate to the Inventory app.
Once there, go to MASTER DATA > PRODUCTS. All active products will be listed in kanban view. Click CREATE to make a new product record. You'll be presented with the following options:
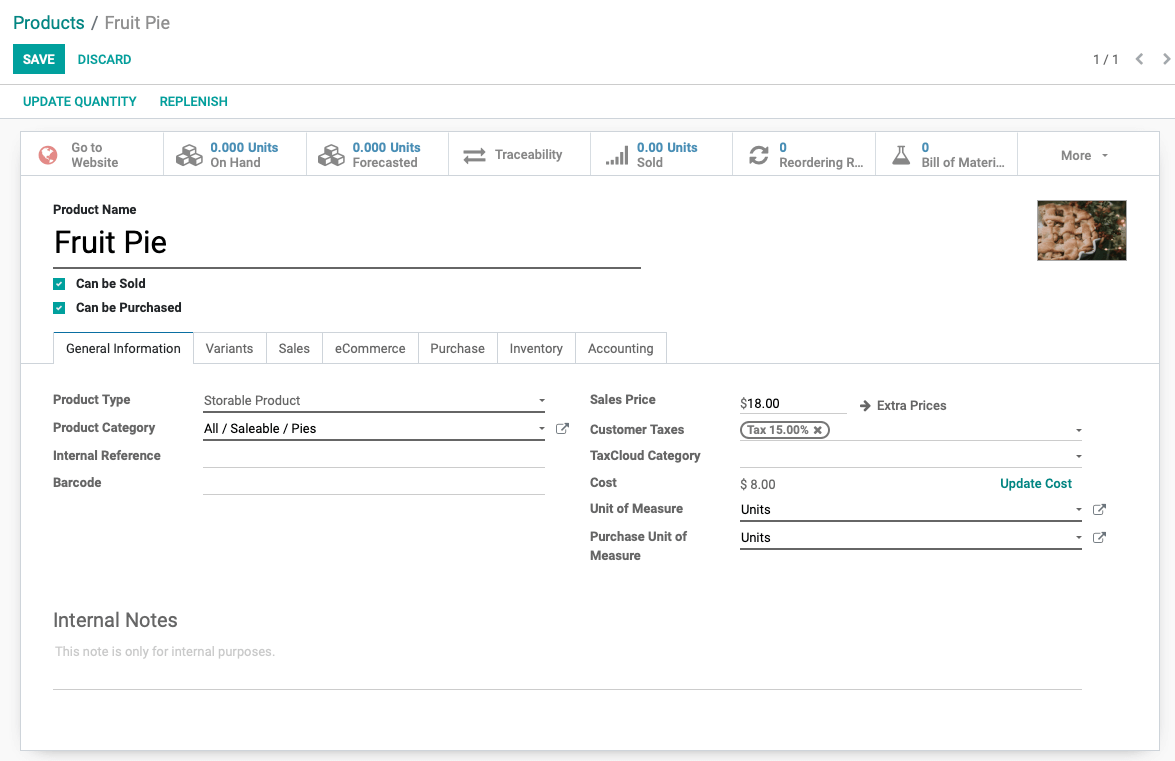
Product Name: Name your product and decide whether or not it will be sold, purchased, or both, by checking the boxes under the product name.
Under the General Information Tab:
Product Type
Consumable: This product type can be sold and/or purchased, but is used as needed, and does not track inventory. A good example would be envelopes that you purchase from an office supply store and use in daily business operations.
Service: This product type is not tangible. It could be a block of time you offer (e.g. for website development or product repair), or additional service-based fees.
Storable: This product type is tracked in inventory and will display an On Hand Quantity smart button. You'll be able to adjust inventory, create reordering rules, replenish, etc.
Set the remainder of the fields to your needs, such as Sales Price, Cost, Unit of Measure. Refer to Master Data > Product documentation for detailed information on each field.
Good to Know!
The product cost can only be set manually if the costing method on the product’s category is Standard Price. In Average and FIFO costing methods, this field will be updated based on purchasing and other product movements
Variants Settings
Variants are a way to set all available options for a base product, thus allowing Odoo to automatically create individual products (Product Variants) for every possible configuration.
In our example, we're adding the Fruit attribute to Fruit Pie. Within that attribute, each fruit type will be represented an an option.
You can create Attributes and Variants in Configuration > Attributes, or you can do it directly from the product creation form. You can learn about this, in detail, in the Master Data > Product Variants documentation.
For now, we'll outline the method of adding directly from the product.
From the Variants tab, click Add a Line then type your attribute name in the new line that appears. Our example will be "Fruit". Because this attribute doesn't exist, we'll then click Create and Edit from the drop-down menu.

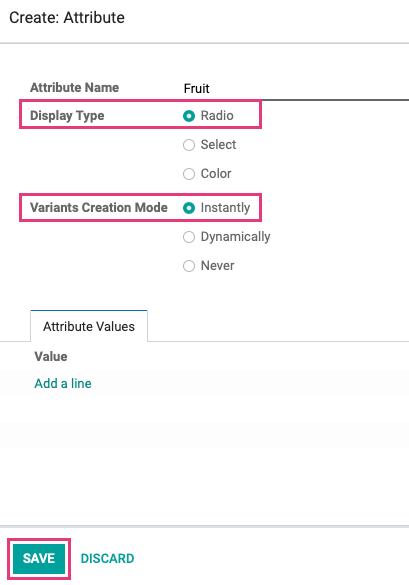
On the next screen, select your preferred Display Type and leave the Variants Creation Mode at Instantly. This will allow us to create variants on-the-fly from our product page. Click Save.
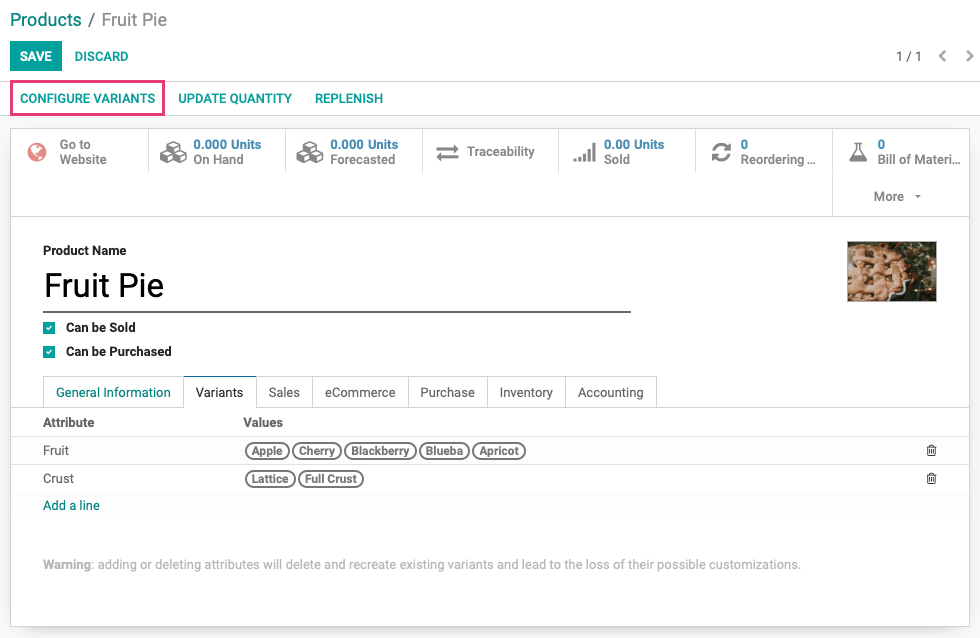
After saving, you'll be back on your product creation form. You can start adding variants to your attribute simply by typing them in and hitting enter, or clicking Create from the drop-down menu. Enter as many as you need.

If some of your variants increase or decrease the product price, you can click the Configure Variants button to make those adjustments. You will be able to assign a price to each attribute value under the variant so that it automatically calculates the price difference on the sales order line.
Once on the Configure Variants page, click the variant that you would like to create the custom pricing for, then click EDIT.
You will be presented with the option to adjust the cost based on that variant. You can also create a list of other Attribute Values that will be excluded if this Attribute Value is selected. This can be useful to indicate an incompatibility between choices.
Take a look at the following example product: Pumpkin Pie
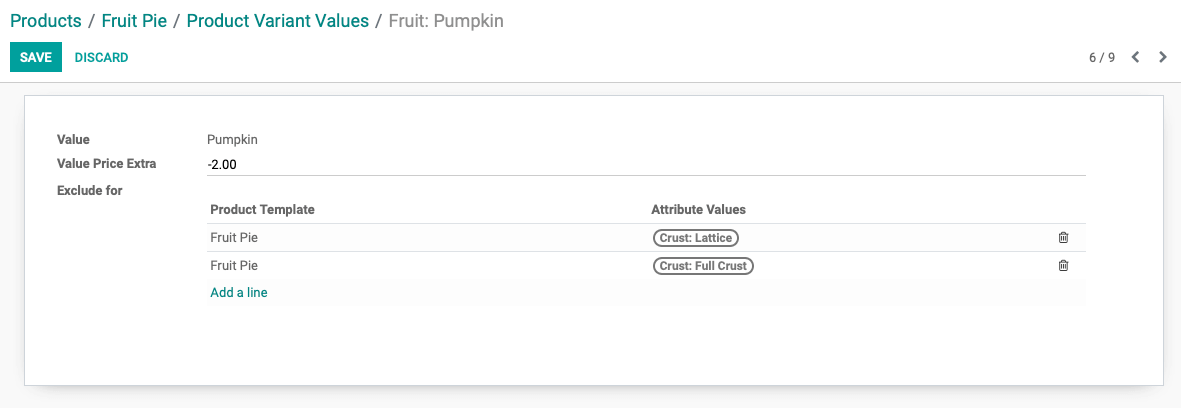
Value: Pumpkin is the fruit variant we've chosen to modify values on.
Value Price Extra: In this case, pumpkin is less expensive for us to manufacture so we're decreasing the cost by $2.00 (-2.00).
Exclude for: Pumpkin pie doesn't need a top crust, so we're excluding those options here.
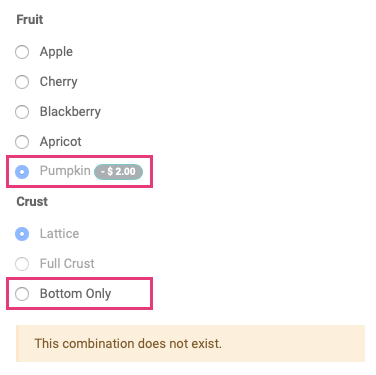
Now, if you try to order the Pumpkin Pie with a Lattice Crust, this is what you'll see:
Purchasing
To set a specific vendor for a product, click ADD A LINE under the Purchase tab. Select the vendor from which you'd like to purchase the product, along with the agreed-upon prices and quantity.
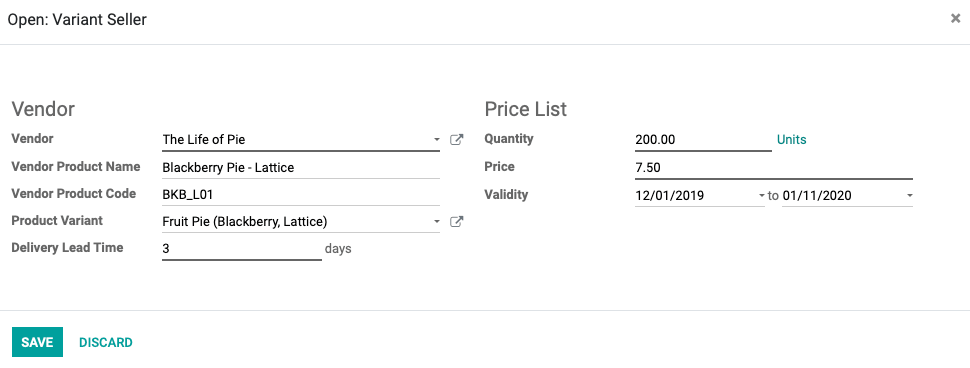
You can list multiple vendors under a single product so that if one is out of stock, a secondary Request for Quotation can be made to keep the sales flow moving. You can also specify that a particular product variant is only available from a certain vendor.
In the following example, we clicked the menu to the far-right to display all vendor details. This shows clearly that the vendors we've listed specialize in different variants of the same product.

Once you've added your vendors, click SAVE.