Inventory : Procurement Methods: Dropshipping
Purpose
This document reviews the Dropshipping feature in Odoo 14. The dropshipping option allows you to create and manage a product that you will not physically stock in your warehouse. The product is then delivered directly to your customer from the vendor.
Process
To get started, navigate to the Purchase app.
Configuration
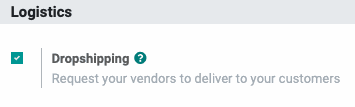
Navigate to CONFIGURATION > SETTINGS and scroll down to the Logistics section. Enable Dropshipping, then click SAVE.
Dropship Categories
If you have many dropship products, and you'd like to separate them into their own category, then configuring the category with the dropship route will save you time. To do so, navigate to to Inventory app.
Once there, go to Configuration > Product Categories. From the list of, select the category you wish to set as Dropship.
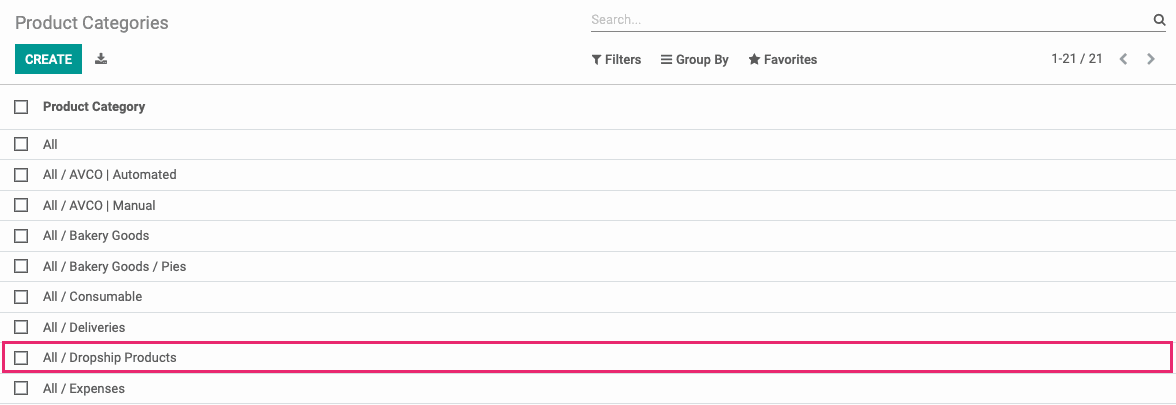
From within the category, click Edit. Under the Logistics section, set the Routes field to "Dropship".
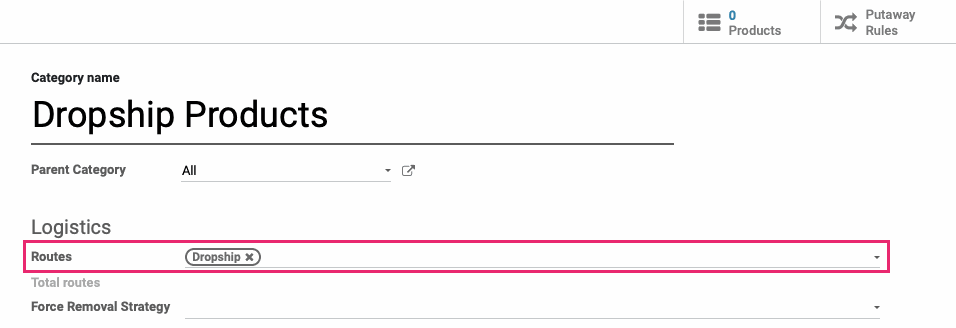
When you're ready, click Save.
Click the Products smart button. This brings you to a list of products within the category. Use the Create button to add products that should have the Dropship option.
Good to Know!
Dropship Category Products
Adding a product to a category with the Dropship route does not configure products with the Dropship route. Instead, products within this category will have the Dropship route option when added to a Sale Order.
Dropship Products
If you only have a handful of products to dropship, and don't want to separate them by category, you can set the route directly on the product.
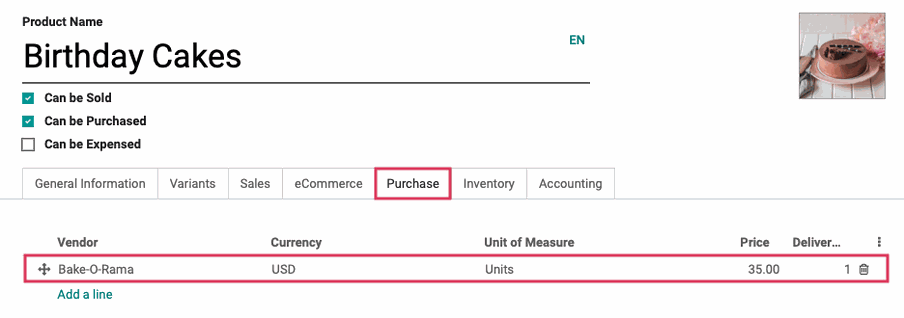
To create a product for dropshipping, follow this Products documentation until you reach the Inventory Settings. In order for Dropship functionality to work properly, a product must have the correct route assigned, and a vendor assigned.
Under the Inventory tab, for the Routes field, check Dropship.

Adding a Dropship Product to a Sale Order
Navigate to the Sales application.

Once there, go to Orders > Orders, then click Create. Select a customer, then under the Order Lines tab, click Add a Product and select the dropship product you've just configured.
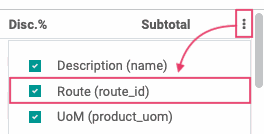
If you don't see a Route column for the product, use the ellipses menu to enable it.
After adding a line to a Sale Order, select "Dropship" from the dropdown in the Route field.
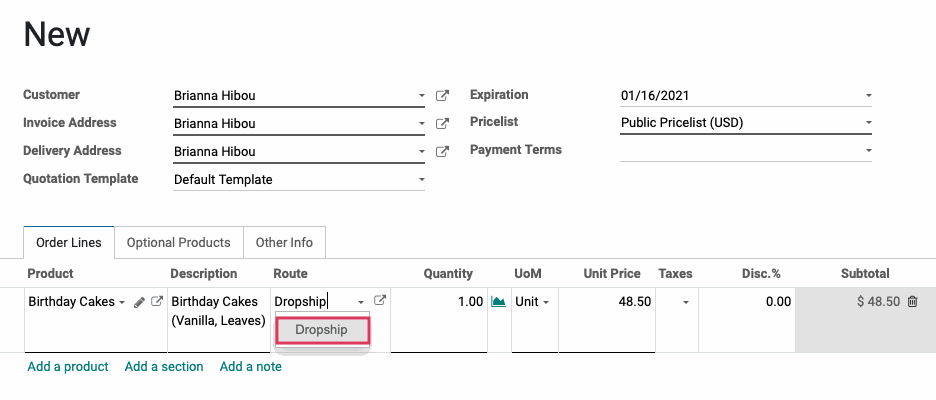
This column can be really helpful when selling in bulk, or when your Sales Order is large. It allows you to quickly see which line items are designated as dropship on the quotation.

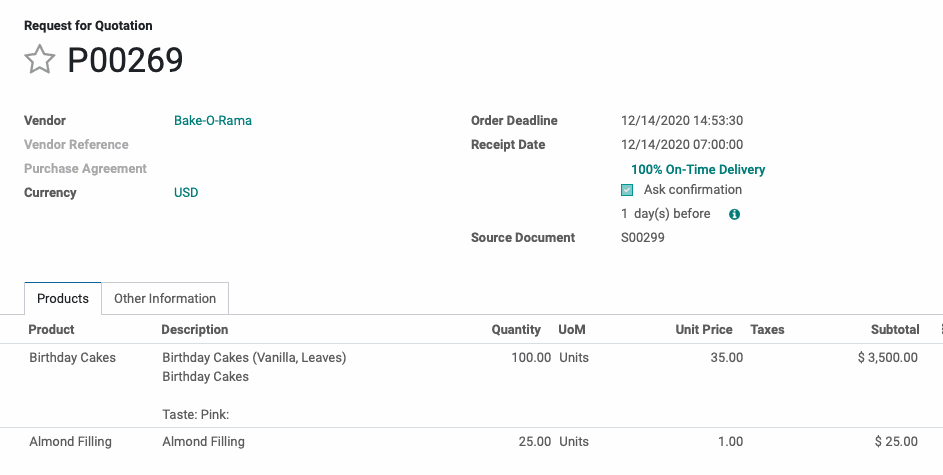
Submit + Confirm Purchase Order
Once you're in the RFQ, you'll notice that the only product lines are for the products that will be dropshipped. To submit this RFQ to the vendor, use the Send by Email button to send it digitally. Alternatively, use the Print RFQ to deliver a physical copy.
Once the vendor agrees to the terms of the RFQ, you can then click Confirm Order to convert it to a Purchase Order.
Receive Products
The method by which you record receipt of dropshipped products will depend on your business practices. Because the product is being delivered directly to the customer, you might follow the tracking number on the package to ensure it is delivered, or confirm directly with your customer.
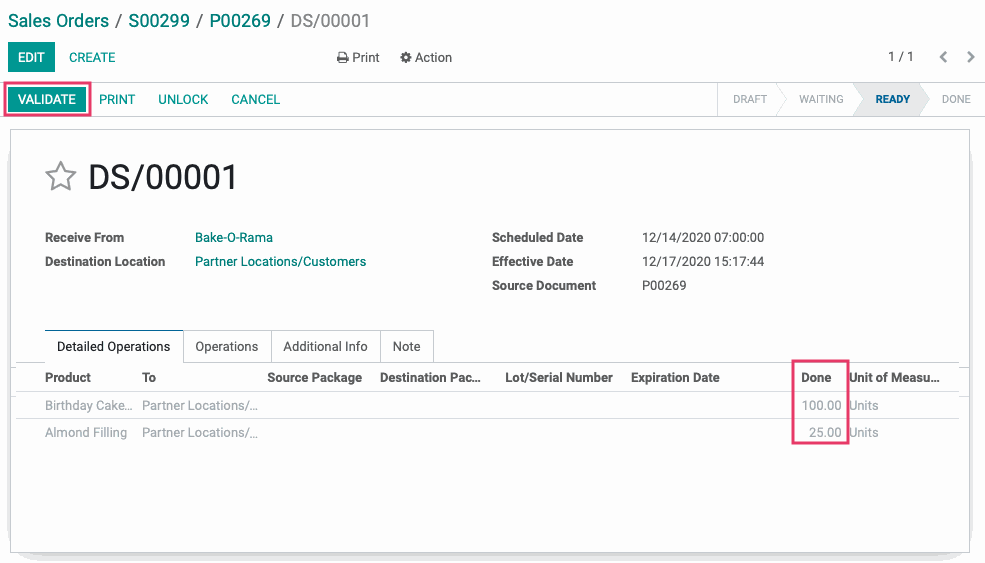
When you've confirmed the product was delivered, you can complete the Receipt process on the Purchase Order. To do this, click Receive Products, or the Receipt smart button, on the Purchase Order.
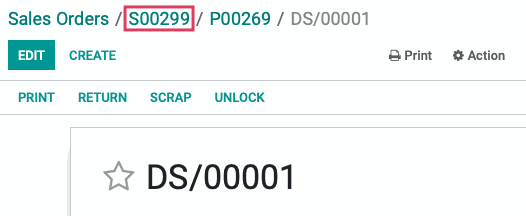
Note that a dropship receipt record begins with DS, making it easy to identify. From within this receipt, click Edit. Under Detailed Operations tab, enter the quantity of each product received in the Done column. When you're ready, click Save, then click Validate.
Good to Know!
Get the Tracking Number
Recording the tracking number, provided by the vendor, on the Sale Order record is a good habit to get into, and it keeps your customer in-the-loop.
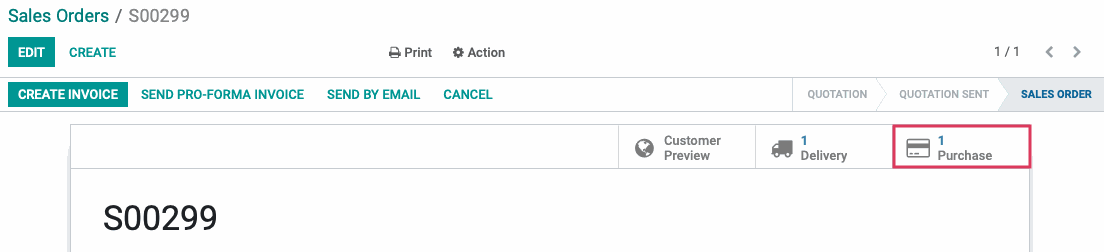
After validating the transfer, navigate back to the Sale Order using the breadcrumbs.
Once you return to the Sales Order, click Delivery to see the transfers associated with this order.
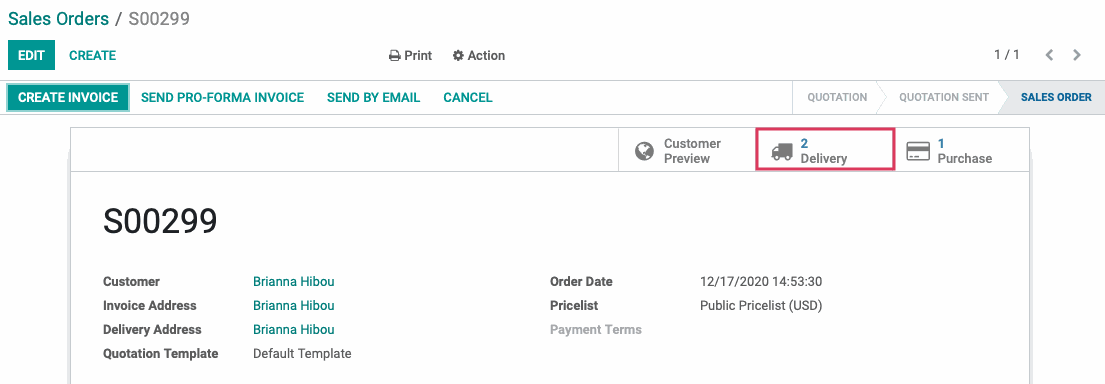
Reviewing the Sales Order's delivery transfers, you will see the dropship transfer (Reference starts with DS), and another transfer for the other stackable products on this order being shipped via usual methods.
