Inventory : Operations: Inventory Adjustments
Purpose
The purpose of this document is to show you how to make Inventory Adjustments in Odoo 13. This is necessary when the recorded quantity doesn't match the product on hand.
Process
To get started, navigate to the Inventory app.

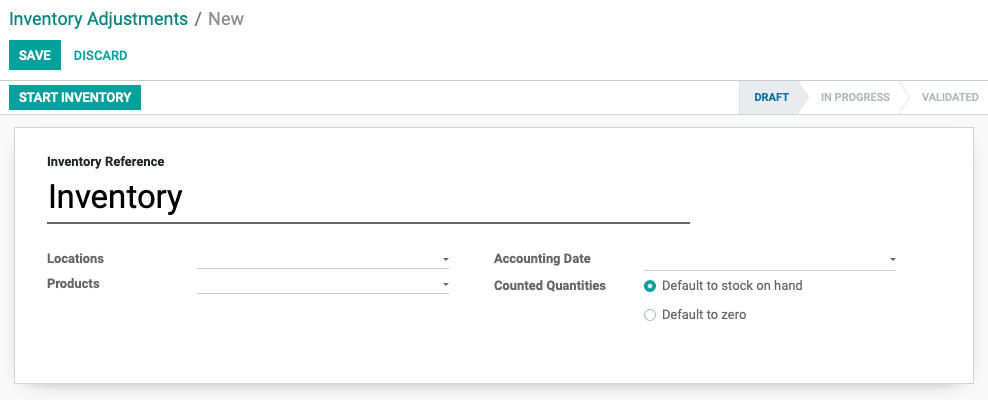
Once there, click OPERATIONS > INVENTORY ADJUSTMENTS. The initial view will be a list of recorded Inventory Adjustments. To record a new Inventory Adjustment, click Create. You'll be presented with the following options:

Inventory Reference: Enter the name, or reason, for the inventory adjustment. For example, for a planned inventory count for the first quarter, you might use "1Q2019 Inventory".
Locations: Select the location(s) included in the count and affected by the adjustment.
Products: Select the product(s) included in the count and affected by the adjustment.
Accounting Date: Enter the date of the count.
Counted Quantities: Enter the state of your initial quantities.
Default to stock on hand: This allows you to start with prefilled counted quantities for each line.
Default to zero: This option sets all counted quantities to zero.
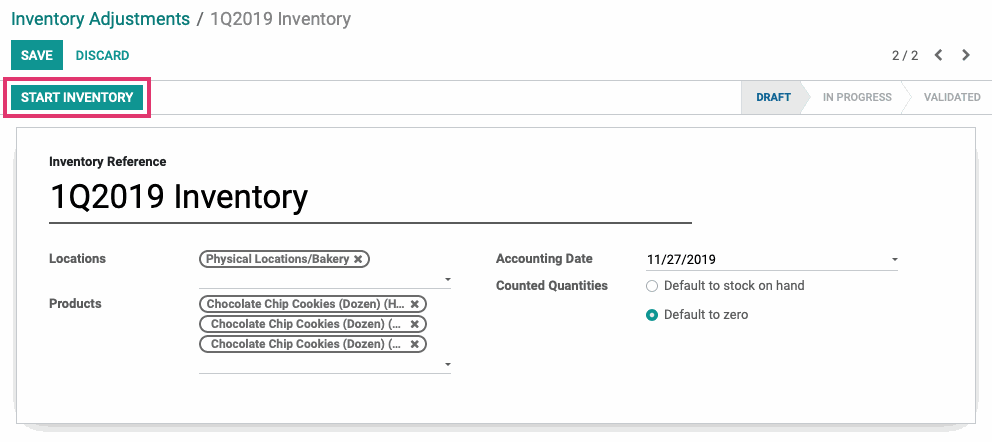
When you've entered all fields, click Start Inventory.
In our example, we're taking inventory of three variations of Chocolate Chip Cookies in our Bakery. We're setting the starting quantities to zero.

On the next screen, you'll be entering the quantities for each product we selected on the previous screen. To start, click the Create button and select the first product from the available entries. Under the Counted column, enter all counted quantities. Make sure you're recording in the correct Unit of Measure (UoM).
Note the text color of each line. When the Counted quantities don't match the quantity On Hand, the line will show as red text.
When you've added all entries, click Validate Inventory.

You'll see a quick message flash in the corner stating that "The inventory has been validated.", after which you can then view the summary.
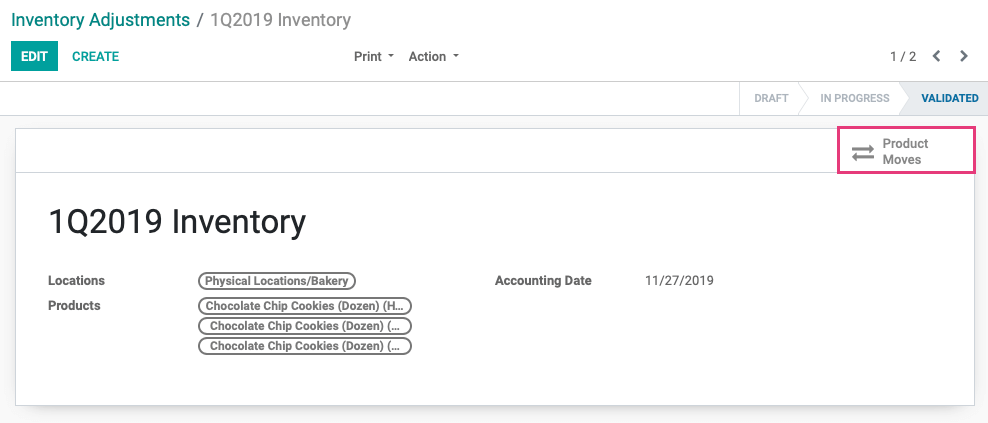
If your counted quantities did not match your previously recorded quantities, you'd see the adjustments by using the Product Moves Smart Button.

Because we adjusted the quantities for two products, those two products are now reflected in the Product Moves report.
