Inventory : Products / Master Data: Products
Purpose
This document will briefly cover the product creation options in the Odoo Inventory app.
Process
To get started, navigate to the Inventory app.
New Products
To create a new product, go to Master Data in the navigation bar and click on Products. This will bring up the existing products in kanban view or prompt you to create one if there are none in your database.
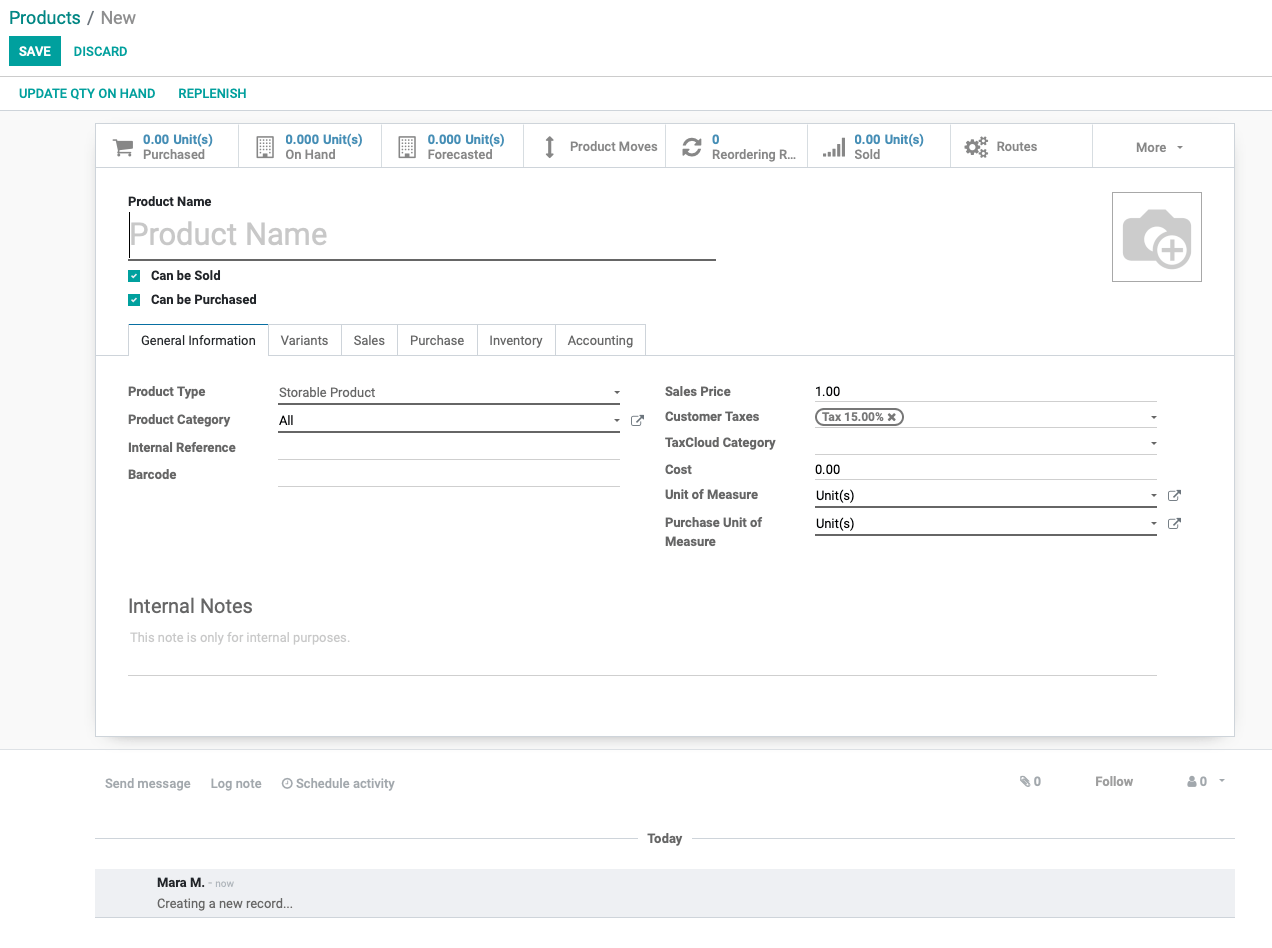
Click on Create and the following window will open. You will be able to name your product, and then select whether it Can Be Sold, Can be Purchased, or both. You can also set the product image if one is available to you.
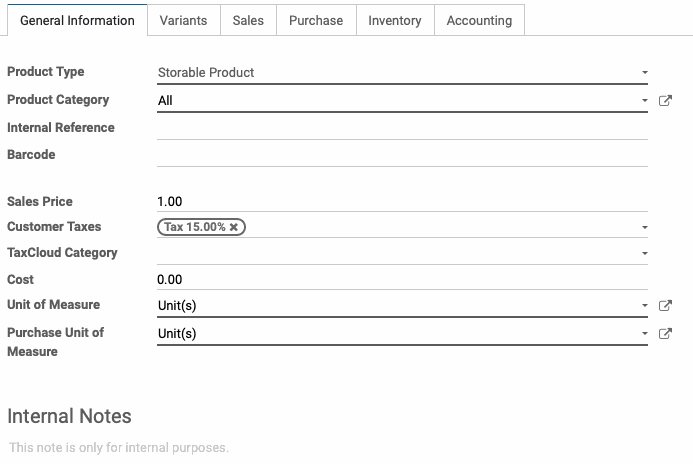
Product Type: Allows you to choose whether the product is storable and therefore will be in inventory, a service offered, or a consumable item that will not be tracked in Inventory.
Product Category: Allows to set the category path for the item, which provides default accounting, valuation and routes for products within the category. Categories can also be used in reporting and filtered in various views.
Internal Reference: Allows you to set a custom reference such as a SKU. This is a unique identifier
Barcode: If the Barcode app is installed, scanning a barcode with the digits entered here will pull up this product in POS and Inventory.
Sales Price: Allows you to set a default sale price for the item that will populate on sales orders.
Customer Taxes: Pulls from the Accounting app to assign a tax rule to the item.
TaxCloud Category: Allows you to assign TIC categories, codes, and descriptions to your products to streamline tax collection.
Cost: If Standard Price, allows you to create a fixed cost for the purchase of the item. In Average and FIFO valuations, this field will be updated based on purchasing and other product movements.
Unit of Measure: The measure by which this item will be counted in inventory.
Purchase Unit of Measure: The measure by which the item can be purchased from vendors, ie.Cases, dozens, units.

The Variants tab will allow you to assign configurable options to the product. For more information, see our documentation on Product Creation Workflow.
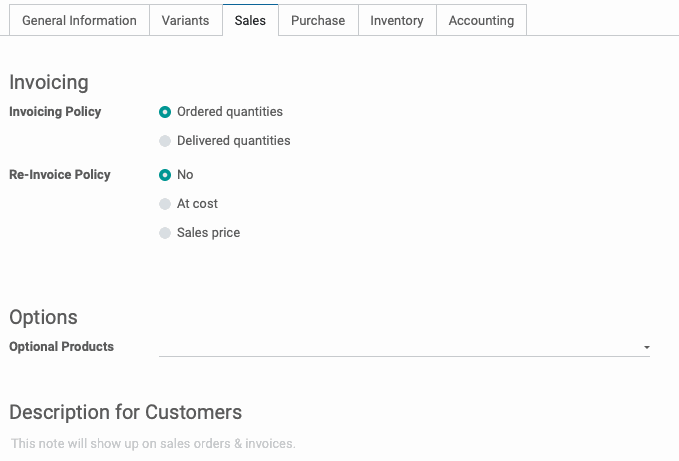
Under the Sales tab:
Invoicing: Allows you to set your preferences on Invoicing and Re-Invoicing options.
Options: Will allow you to link other relevant products to this one for use in upselling accessories.
Description for Customers: This is where the item's description should be written, and it will be included on Sales Orders and Invoices for easy reference.
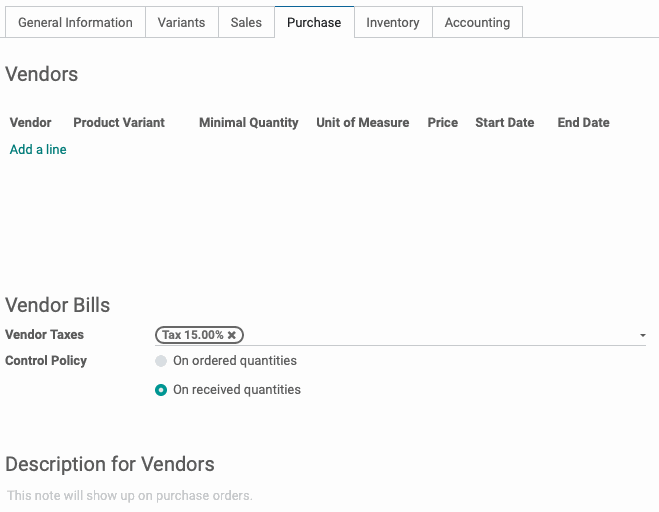
Under the Purchase tab:
Vendors: Set your preferred vendors and adjust their default increments, prices, and any specific variations you may need to differentiate on a purchase order.
Vendor Taxes: Will allow you to set the default tax rule you would like to apply to purchase orders for this item.
Control Policy: Select whether or not vendor bills from purchase orders will auto-populate all items ordered or only items received.
Description for Vendors: The item's description from the vendor should be referenced, for clarity on purchase orders.
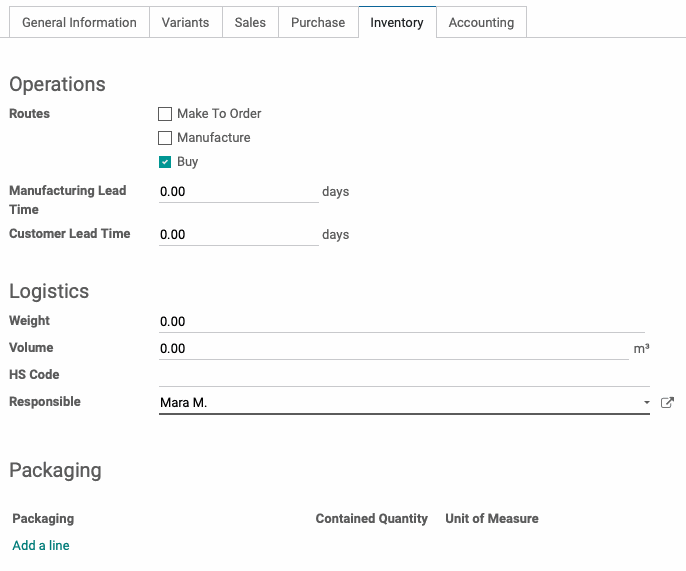
Under the Inventory tab:
Operations: Determine the routes by which this product is acquired, whether it is purchased, Made to Order, Manufactured, or some combination of the three choices. Note that checking the manufacture box will generate a manufacture order instead of purchase order. You can also schedule a manufacturing lead time and a customer lead time that will affect the timeline of the sales order.Logistics: Set the weight, volume, and the international shipping/goods declaration code for the product. You can also assign a user to be responsible for the logistic planning of the item.
Packaging: Create packaging data to aide in the tracking of inventory and how it is processed in your warehouse before being transferred to stock.
Not pictured, but available at the bottom of this tab are the following fields:
Description for Delivery Orders: This note will show up on delivery orders.
Description for Receipts: This note will show up on receipt orders (e.g. where to store the product in the warehouse).
Description for Internal Transfers: This note will show up on internal transfer orders (e.g. where to pick the product in the warehouse).
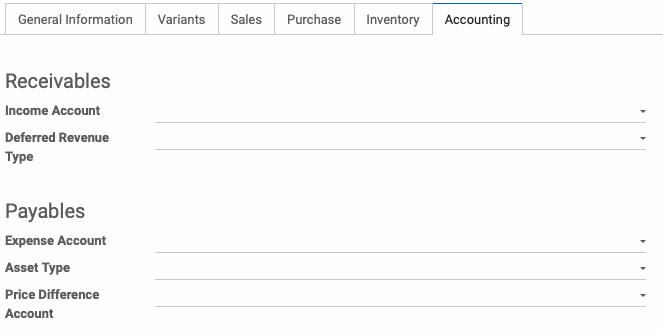
Under the Accounting tab:
Receivables: Determine the accounts for Income and Deferred Revenue.Payables: Assign the accounts for Expenses, Asset Types, and Price Differences.
These accounts are overrides to the category level accounting configuration. In general, these do not need set per-product. Once the product's information is complete, click Save.
Updating Quantities vs. Replenish
There are two methods to adjust inventory from the product page. They are Update Qty on Hand and Replenish, located at the top of the product record.

Update QTY on Hand will open a new inventory adjustment window. Select the product you'd like to edit and select Start Inventory .
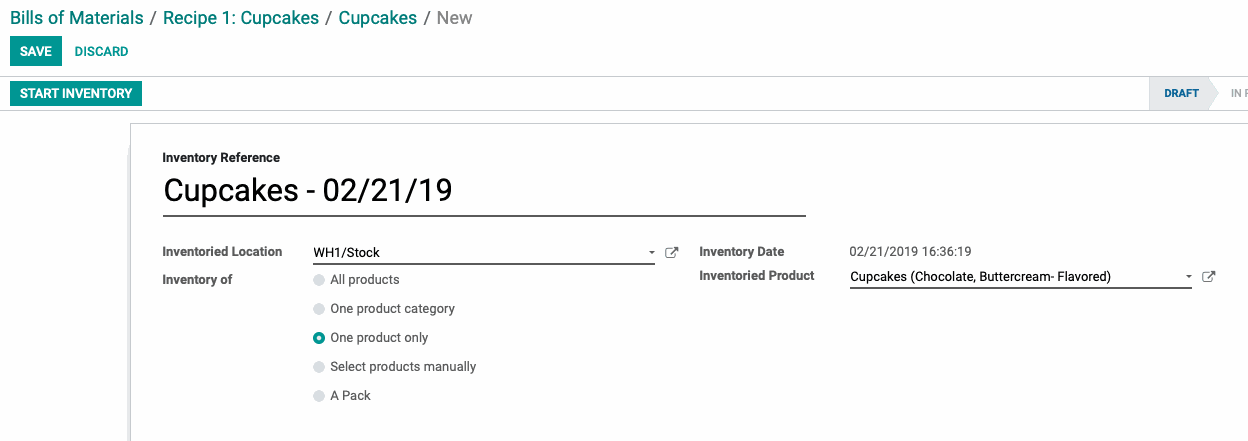
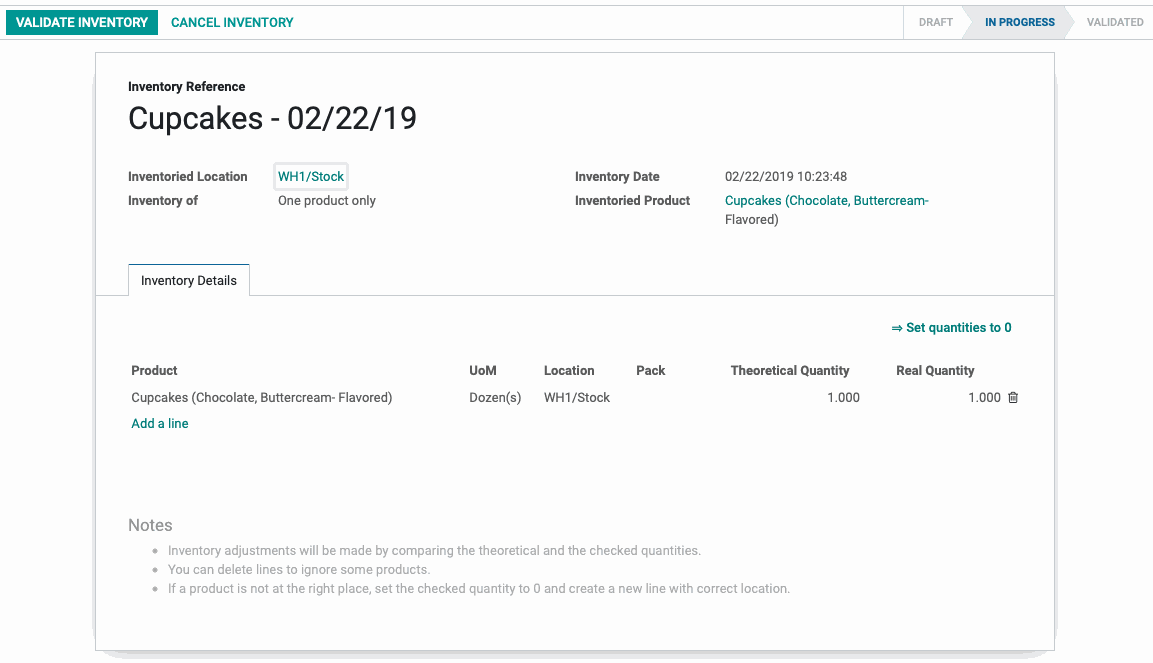
This will create a dated draft inventory that will allow you to compare the theoretical inventory to the product on hand, adjusting as needed, or, you also have the option to => SET QUANTITIES TO 0 . Clicking VALIDATE INVENTORY will save the changes you've made and update inventory quantities accordingly.
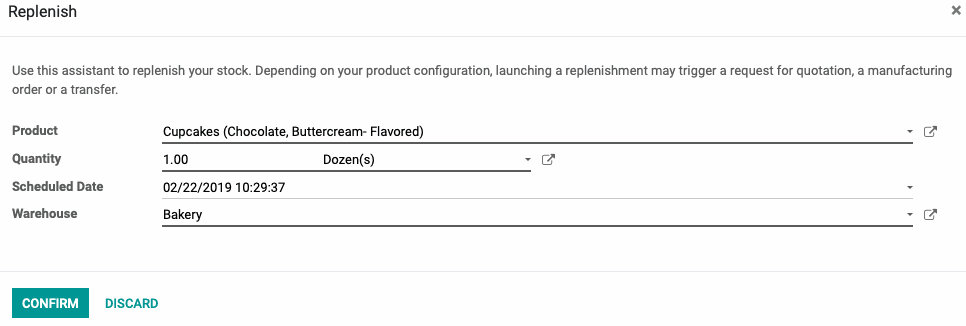
REPLENISH will trigger either a manufacturing order in the Manufacturing app, or an RFQ in the Purchasing app, depending on how your inventory options are configured in the inventory tab of the product record.
A manufacturing order will require a bill of materials, covered in the next section.
Bills of Materials
In order to manufacture a product, you will be required to create a bill of materials. Navigate to the product you wish to create and make sure that under the Inventory tab, the Manufacture box is checked.
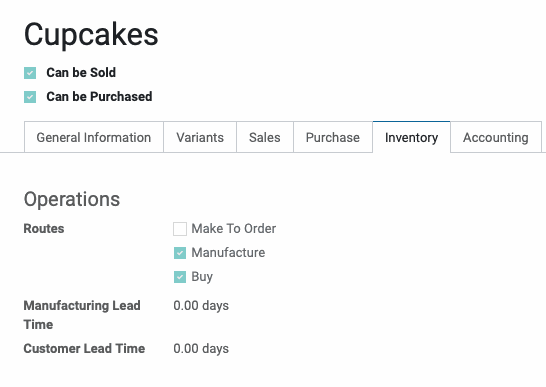
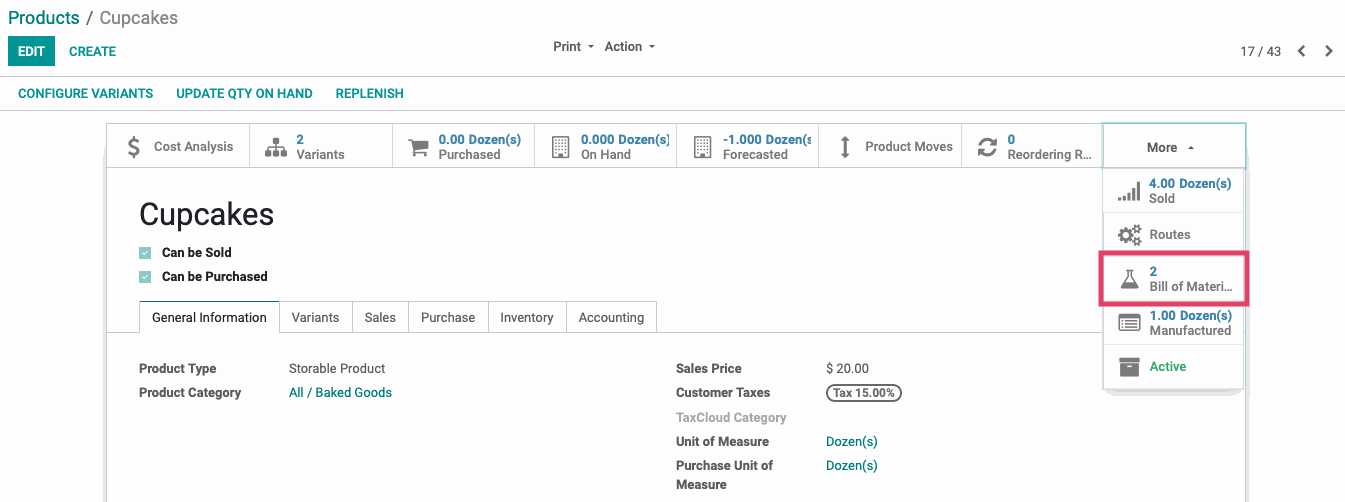
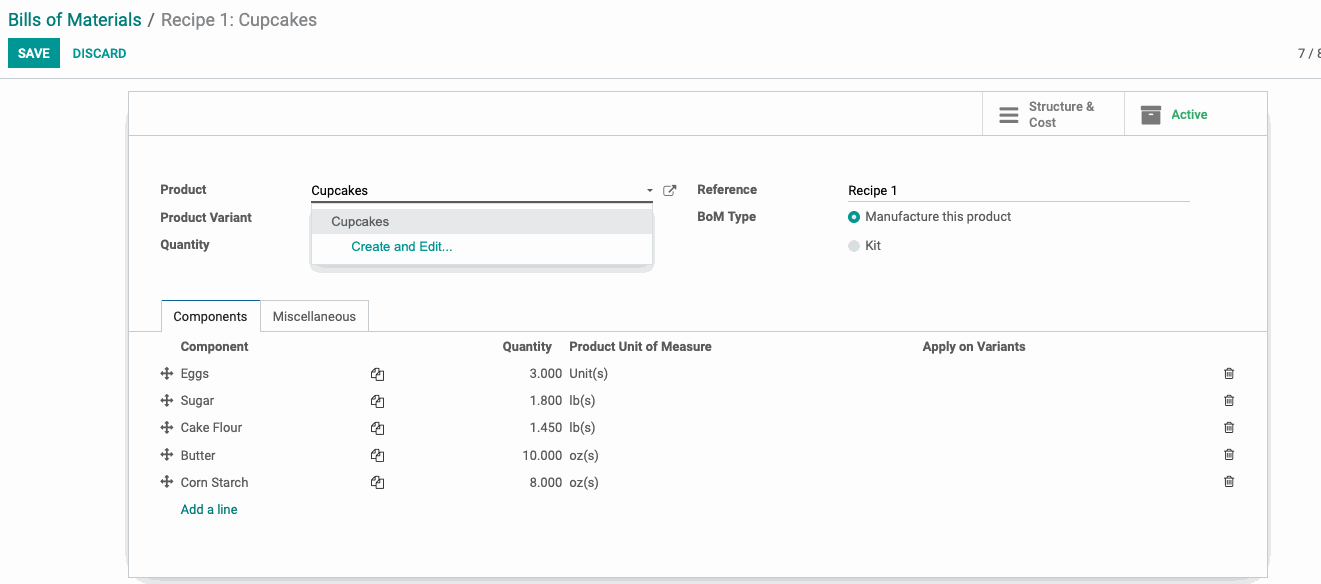
This will only appear on manufacturable items. Every manufacturing 'run' of this product will require a bill of materials. When you create a bill of materials, you will be asked to list the component products you need to use to create the item.
Select the product and variant that you are creating the BOM for, and give it a reference, such as “Original” or “v1”.
The type designates whether this product has to be produced prior to shipping, or is a 'Kit'. A kit is compilation of other products already in your inventory that do not require production, Ie. accessory or cleaning kits. Once you have completed this list click Save.
Now, if a sales order is created and the product is not on hand, clicking Replenish on the product will generate a manufacturing order. This Bill of Materials can be referenced as the original, and duplicated for simple configurations, or created as needed to complete orders.
Importing and Exporting Products
The Import/Export tool is a great way to update multiple products at once. We recommend creating three or four products first and exporting them to use as a template. View your products in List form, and check the boxes on the products you will need, and the click the Action menu and select Export.

You will be offered a suggested list of export data, but be sure to check that you want an import-compatible export. From there, you can customize the export fields to include the data you want, and then click Export to File at the bottom of the window.
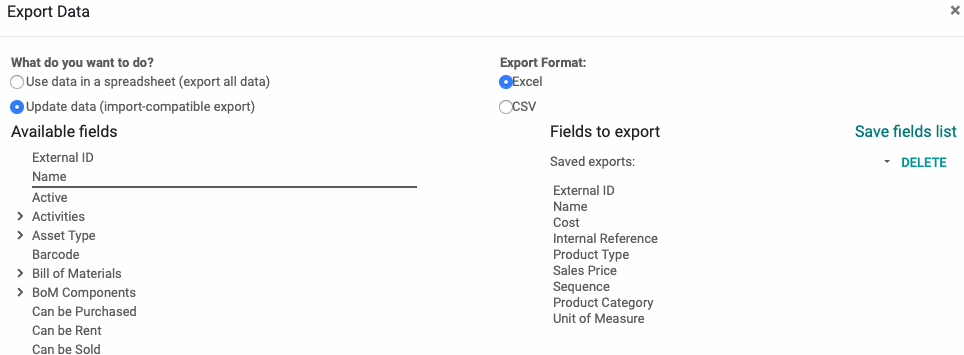
It may take some trial and error to learn how Odoo interprets its exported fields. Resist the temptation to rename the column headers, Odoo uses these to match the data to their respective fields on the product record. For more information, see our Import/Export Guide.