Inventory : Inventory Workflows: 2-Step Receiving
Purpose
The purpose of this documentation is to outline the process of implementing 2-Step Receiving in Odoo Version 12. In 2-Step Receiving, products are first received to an internal Input location before being transferred to their specific Stock location.
Process
To get started, navigate to the Inventory application.

Once there, go to CONFIGURATION > SETTINGS.
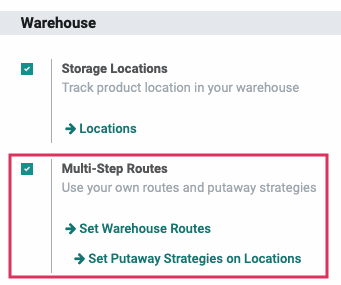
Scroll down to the Warehouse section and check Multi-Step Routes. Then, click SAVE.
Next, go to CONFIGURATION > WAREHOUSES.
Select the Warehouse you wish to configure with 2-Step Receiving, then click EDIT.
Under Shipments > Incoming Shipments, select "Receive goods in input and then stock (2 steps)."

When done, click SAVE.
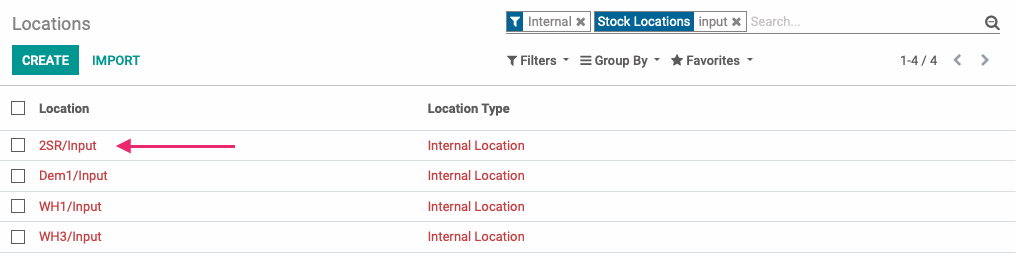
Selecting the 2-Step option means that Odoo will create an Input location to receive goods into. You can see this new location by navigating to CONFIGURATION > LOCATIONS, and using the search bar to search for "Input."
Receiving Products
Once you have set up 2-Step Receiving on your Warehouse, you will see the impact on your receipts. To get started, navigate to the Purchase application.
Once there, create a Purchase Order for a storable product. For information on how to create Purchase Orders, please refer to the Purchase Orders documentation.
Be sure the Other Information tab us using the warehouse you just configured for 2-Step Recieving.
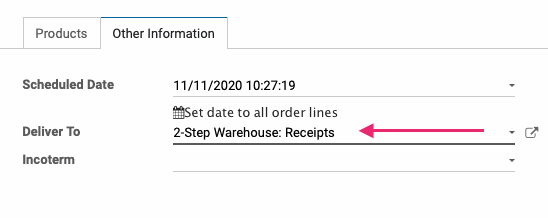
Once you have confirmed the purchase order, click either the Receipt smart button or Receive Products.
On the receipt, you will see that the Destination Location field is populated with the Input location you've just created.
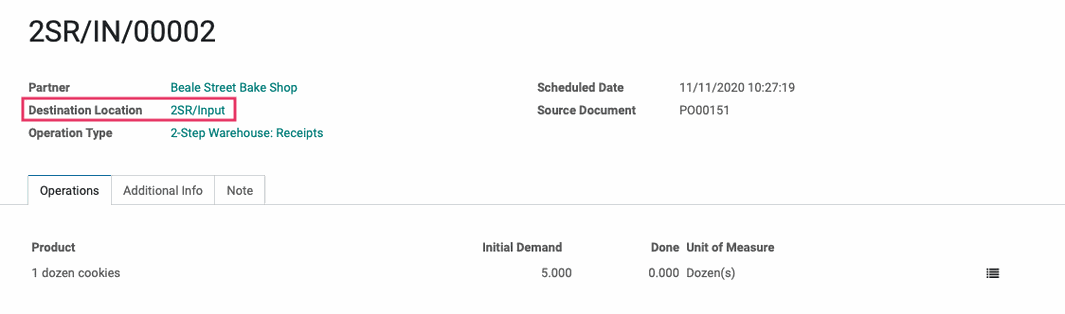
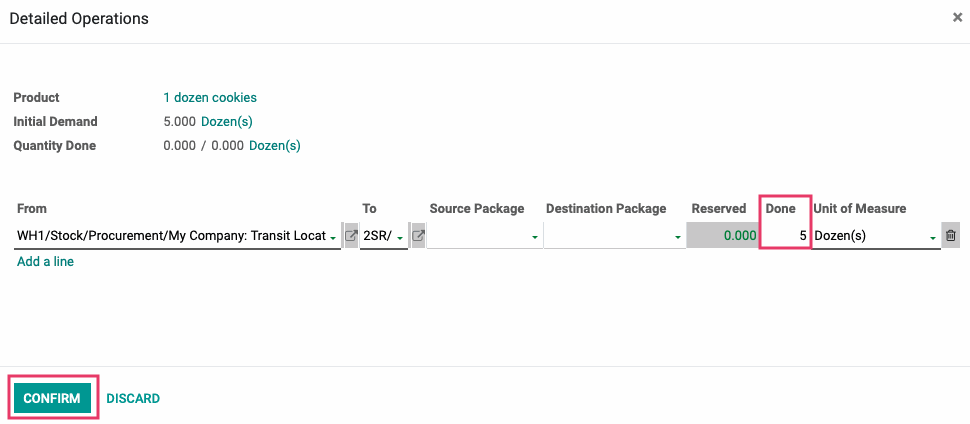
Next, click edit, then click the icon. This brings up the Detailed Operations modal window where you'll indicate how many products are being received.
Click Add a Line, top open and populate a new transfer line. Then, click into the Done field and enter the quantity of the product you have received. When you're done, click Confirm.
This brings you back to the receipt. Click Save, then click validate so your goods will be recorded in the Destination Location.
When using 2-step receiving, Odoo automatically creates a transfer that will move the received product from the Input location to the primary Stock location on your company's receipt Operation Type. Follow the steps below to validate that transfer and complete the receipt of your goods.
Processing the Internal Transfer
Navigate to the Inventory application.
Locate the Internal Transfers kanban card for your Warehouse. Click # to process.
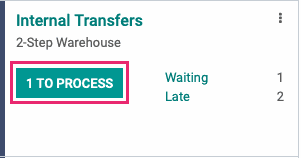
From the list of internal transfers, select the transfer that lists your Purchase Order as the Source Document.
![]()
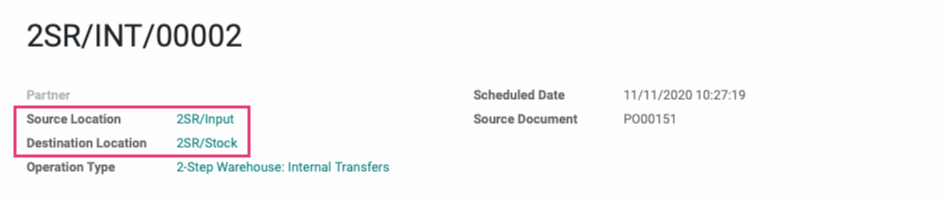
On the internal transfer, you will see that the Source Location field is populated with the Warehouse Input location, and the Destination Location field is populated with the Warehouse Stock location.
Once you have reviewed then internal transfer, click validate. Then, on the modal window, click apply. Now you can review the stock moves for the receipt to verify that the products ended up in the intended locations.
Good to Know!
Putaway Rules
If you have configured Putaway Rules on the Destination Stock Location, they will take effect once you validate the transfer. The destination location on the transfer will still reflect the main Stock location, but once processed, the products will be moved to their more specific stock locations.
For more information on Putaway Rules, please refer to the Putaway Rules documentation.
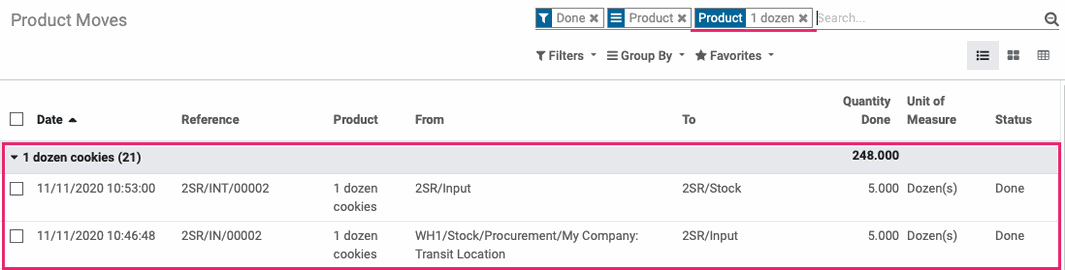
Reviewing Product Moves
In the Inventory application, navigate to REPORTING > PRODUCT MOVES. Use the search bar to locate the product you just received.
If you open the grouped entries for the product you can see its product moves.
From here, we see that our product was received in two moves: The first is from the Vendors virtual location to the WH/Input location. The second is from the WH/Input location to the WH/Stock location.