Inventory : Procurement Methods: Dropshipping
Purpose
The dropshipping option in Odoo 13 Inventory allows you to create and manage a product you will not physically stock in your warehouse. Instead of creating a delivery transfer upon confirming a Sales Order, you will instead generate an RFQ in purchasing that needs to be confirmed and received.
Process
The first step is to ensure Dropshipping is enabled. To do so, navigate to the Purchase application.
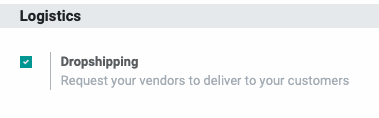
Once there, go to to Configuration > Settings. Check the box by Dropshipping under Logistics.
For the next steps, navigate to the Inventory application.
Dropship Category Routes
Odoo 13 has simplified the organization of dropship products by allowing you to assign routes to product categories. Before you create a dropship product, first create a dropship category.
From the top menu, click Configuration > Product Categories, then click Create.
Fill out the form as you would normally, following the guidelines in the Configuration > Products documentation; however, for the Logistics > Route field, select Dropship.
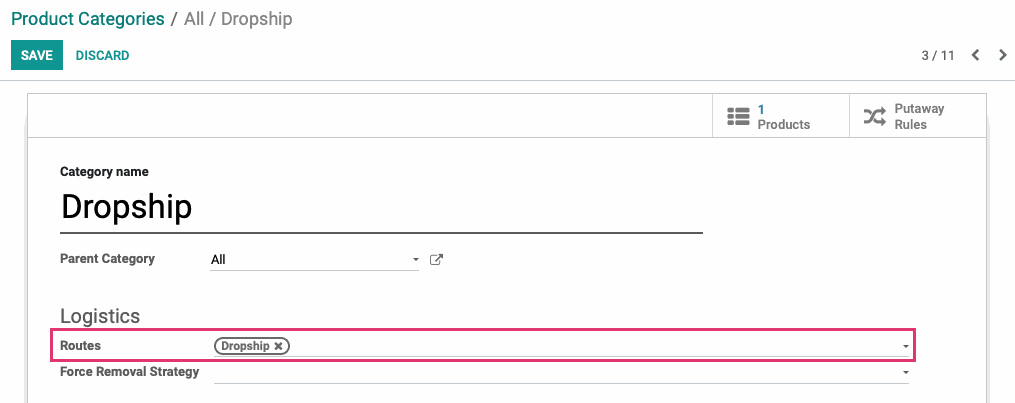
When you're ready, click SAVE.
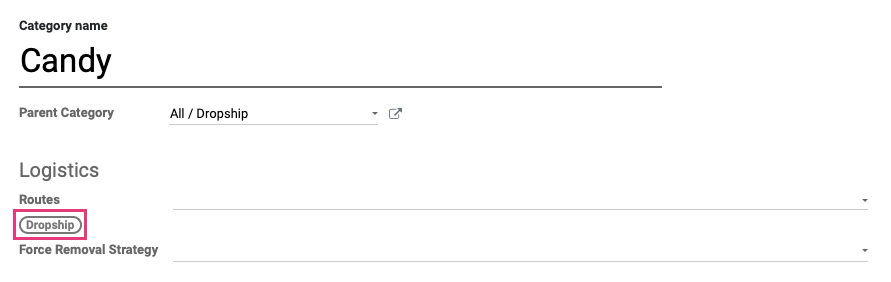
For our new product, we're creating a new child-category called Candy. Notice this new category inherits the Dropship route from its parent category. You can also add additional routes if you carry stock from this category in your warehouse.
Dropship Products
To create a product, follow the Product Creation Workflow document until you reach the Inventory Settings.
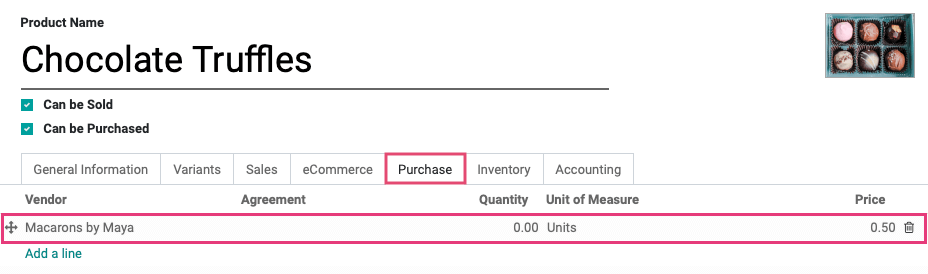
Make sure your product is assigned to a category that has a Dropship route. In our example, we've selected the All / Dropship / Candy category.

Under the Inventory tab, you will check Dropship. Now, instead of creating a delivery transfer from the stock of your warehouses, this will generate an RFQ in the purchasing app.
Under the Purchase tab, click Add a Line to add a vendor for this product.

Important!
Vendor Required
Because this item is dropshipped from a third party, the product must be configured with at least one vendor.
The next steps shown are in the Sales application. From the top menu, click Orders > QuOtation and Create a new Quotation.
Sales Order Lines
When adding products to your Sales Order, you have the option to decide the route on each individual entry. This will allow you to decide on a case-by-case basis whether you will sell from your stock, or require the Vendor to handle shipping. This is useful in bulk order scenarios, for instance, where the vendor may have better packaging options to accommodate your customer's order.
First, make sure your Route column is displaying by clicking the Columns menu to the right and enabling Route.
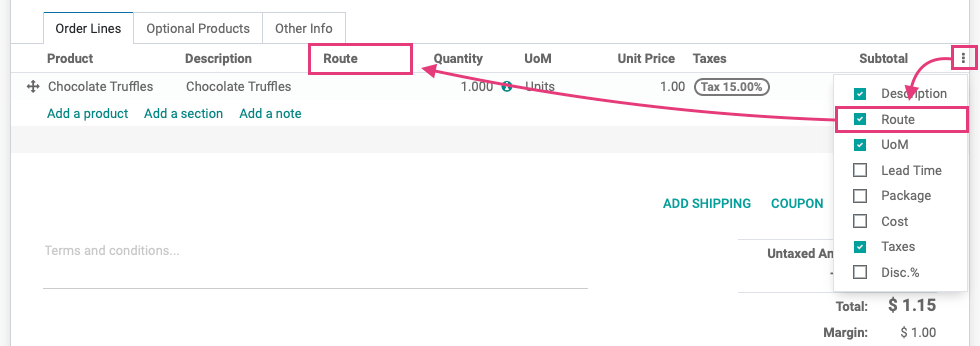
Next, click Add a Product and make your product selection. When selling a product as a dropship, the Route field will be left blank. Click into the field and select Dropship from the Route dropdown menu, as seen below.

Your initial view will be a list of your RFQs. Select the record associated with the dropship order you just created.

From here, follow the steps outlined in Purchasing Workflow to Confirm the RFQ into a Purchase Order and send the dropship request to your vendor. Next, follow the steps outlined in Operations > Transfers to Validate the transfer. A best practice tip would be to confirm the shipment from the vendor and acquire the tracking information to offer to your customer.