Inventory : Inventory Workflows: Product Creation
Purpose
This is a step by step guide to creating and configuring a new product in your inventory.
Process
To get started, navigate to the Inventory app.
To get to your Products, go to Master Data > Products.
Your current products will appear in Kanban view. Click on Create to open a new product record.
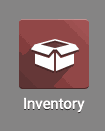
Name your product and decide whether or not it will be sold, purchased or both by checking the boxes under the product name.
In the General Information tab, you have the option to assign the product type:
A Consumable product can be sold and/or purchased, but is used as needed and does not track inventory. For example, envelopes that you purchase from an office supply store and use in daily business operations.
A Service is a non-physical block of time that you can offer to your customers for items like website development and repairs.
Storable products do track inventory and will display an On Hand quantity, allows you to create reordering rules, etc.
Set your Sales Price, Cost, and Unit of Measure. Note that Cost can only be set manually if the costing method on the product’s category is Standard Price. In Average and FIFO costing methods, this field will be updated based on purchasing and other product movements. Click Save.
Inventory Settings
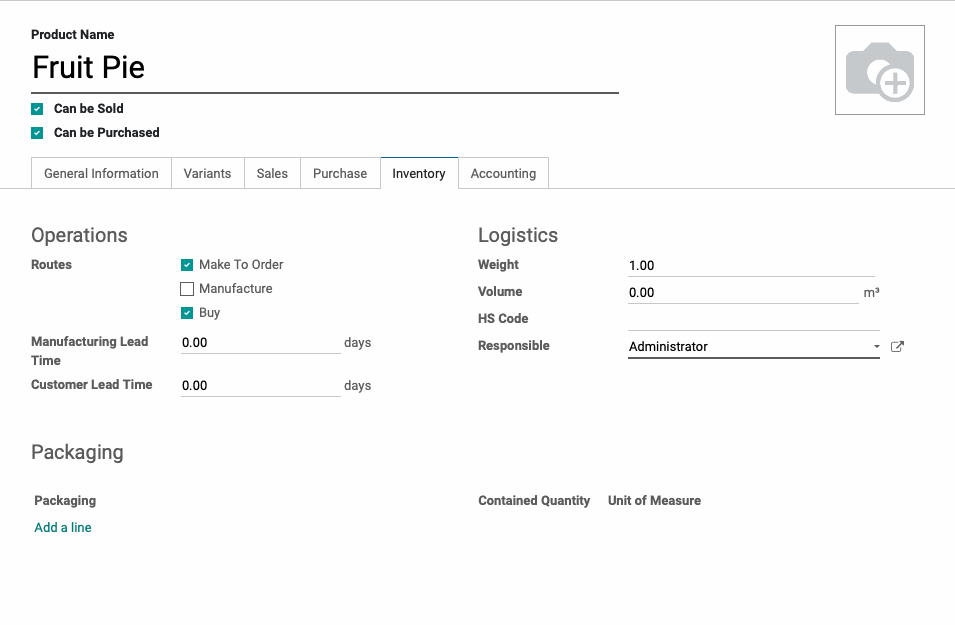
Under the Inventory Tab, you have the option to select whether the product is Made to Order, Manufactured, or Bought or a combination thereof. An item that is made to order will not show a quantity on hand or forecast until an order is placed. If the product is Make to Order, the Manufacturing route will also need to be selected.
Manufactured products will require a Bill of Materials to be written in order to be produced for sale. When managing inventory, if a product is marked for Manufacture, it will create a manufacturing order. If the product is available to be purchased, check the Buy box. This will cause Odoo to create an RFQ instead, however, that can be cancelled in favor of an MO if needed.
You also have the option to set a Manufacturing Lead Time, and a Customer Lead Time, which will offset the scheduled delivery date of the product accordingly.
If the product's shipping Weight and Volume are known, they can be set in this tab as well.
At the bottom of the screen, you can select custom Packaging options as needed and assign Descriptions of the product for various departments.
Variants Settings
Variants allow you to set customization options for your product without creating distinct products for customers to ship from.
For example, if you had product X in colors green and blue, variants allow you to simply select from product X what color you’d like to purchase instead of displaying X: Green and X: Blue to customers as separate products.
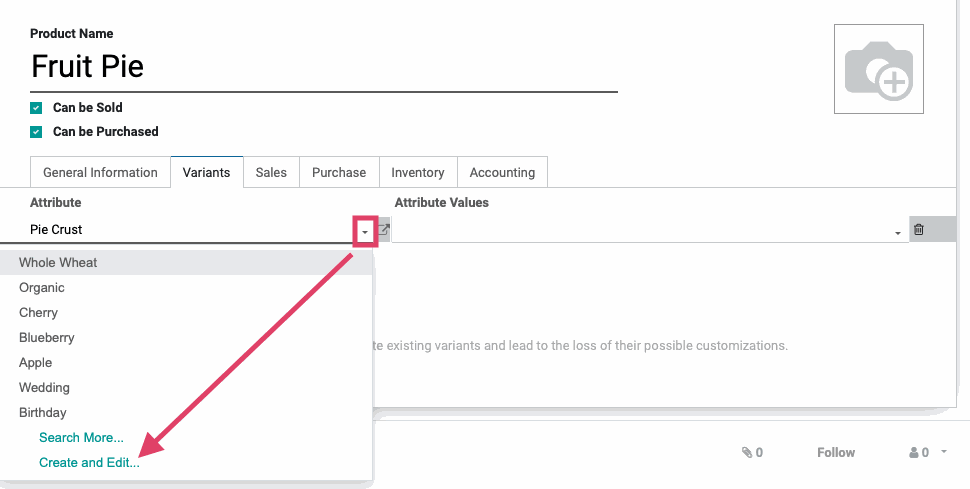
By adding attributes to a product, you are creating attributes that can be used on any products. To assign an attribute to a product, click Add a line and select the Variant (attribute set) from the drop down menu that you would like to apply.
To create a new attribute set, select create and edit from the drop down.
In the new window, you will name the customization, called an Attribute. Under Attribute Type, you can select a few styles. Radio is a button list. Select will create a drop down list in the configuration window. Color will allow you specify an HTML color index, i.e. to specify a paint color.
If you check the Custom Value box on the attribute, users will have the option to provide context to the customization, such as custom text.
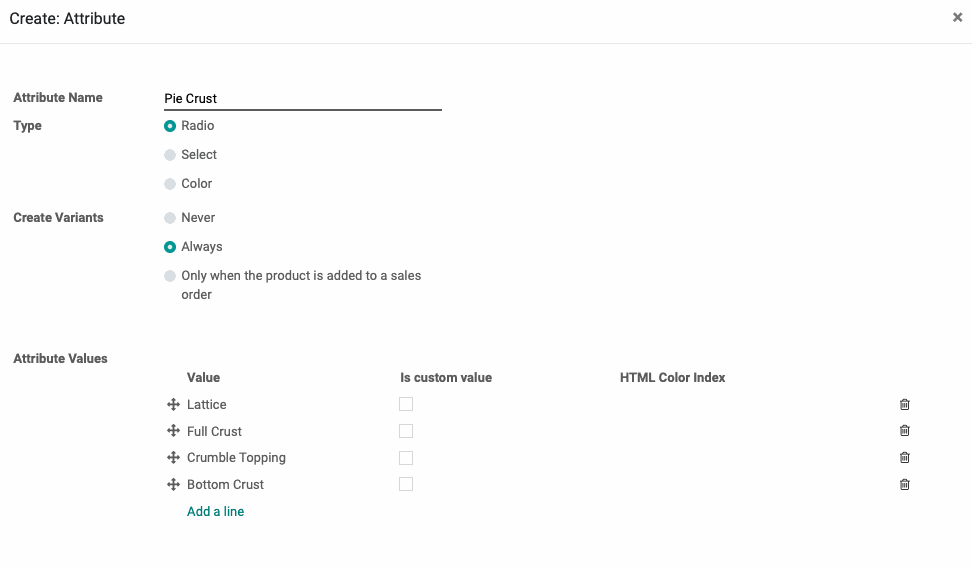
You can choose when a variant is created by selecting Never, Always, or 'Specifically when the product is added to the sales order'. When Always is selected, individual variants will be created as soon as attribute values are added and saved to a product. A good example of when to use this is when you have a reasonable number of products that would be created and you’d like to manage the inventory of the individual items.
Set your preferences and when ready, Click SAVE.
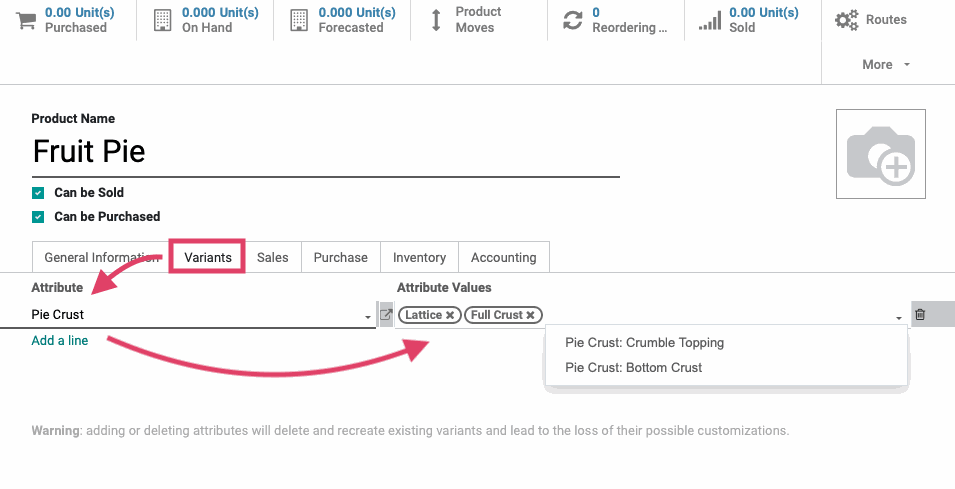
Attribute values are the choices of customization you are adding to the Attribute. The attribute should contain the various values that can be selected across all products that would use the attribute, but on the products that use the attribute you can add or remove values as needed depending on the options available.
So, for example, we want the Fruit Pie product we are creating to have the the Attribute Pie Crust, but we only want to use the Attribute Values of Lattice and Full Crust. So, we select those from the drop down menu and leave the others unselected for this product.
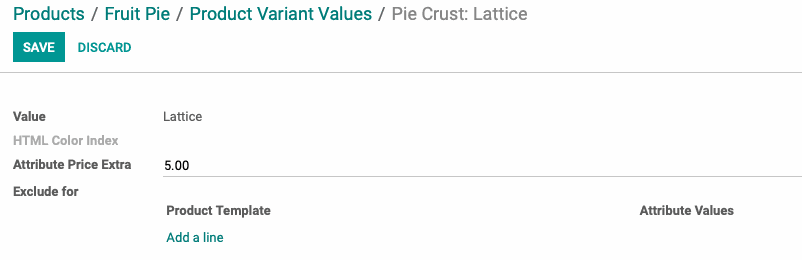
It is possible to assign price differences based on the customizations you've created. To do so, click on configure variants. You will be able to assign a price to each attribute value under the Variant, so that it automatically calculates the price difference on the sales order line.
Once on the Configure Variants page, click the variant that you would like to create the custom pricing for. Click edit.
You will be presented with the options to input an an additional cost (price) to the customer when this option is selected. Here you can also create a list of other Attribute Values that will be excluded if this Attribute Value is selected (for example, to indicate an incompatibility between choices).
Purchasing
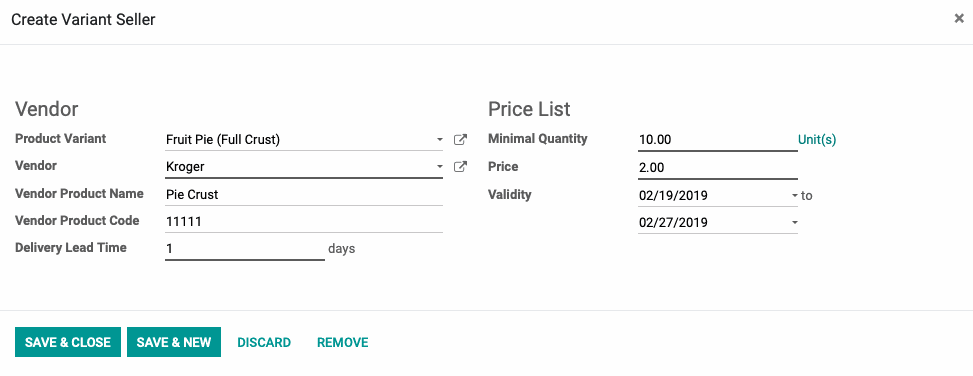
To set a specific vendor for a product, click add a line under the Purchase tab. Select the vendor you'd like to purchase the item from and the prices and quantity at which it is sold.
You can list multiple vendors under a single product, so that if one is out of stock, a secondary RFQ can be made to keep the sales flow moving. You can also specify that a particular product variant is only available from a certain vendor. Click Save.
Taking Inventory
During initial implementation, your developers will assist with using the Import function in a test environment to help assure a smooth start.
Important!
In general, an initial inventory adjustment with all or most of your products should be created with the assistance of the Hibou team (or your implementation partner) to ensure the appropriate accounting configuration. After going live, inventory should typically be increased via receipts and decreased via delivery orders instead of inventory adjustments, which are typically reserved for physical inventory counts.
Products created after that will show a quantity on hand of zero until an inventory adjustment is made, or a purchase order is confirmed and delivered.
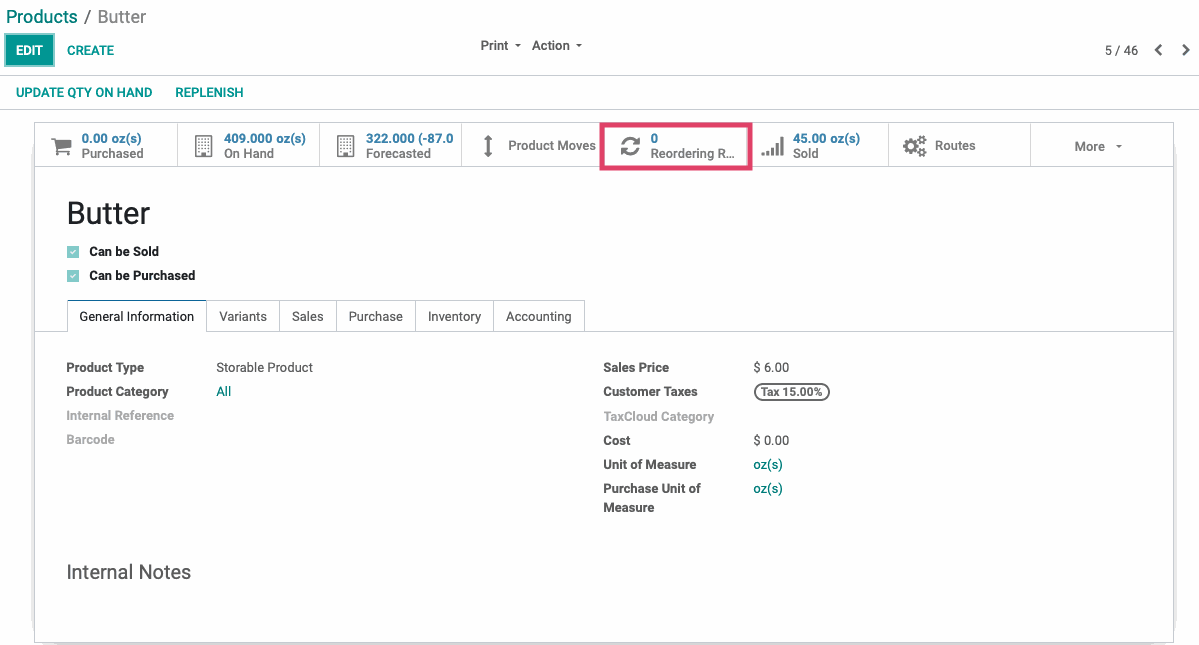
To adjust your inventory of your new product, click on theUpdate QTY On Hand button available to you at the top of the product record.

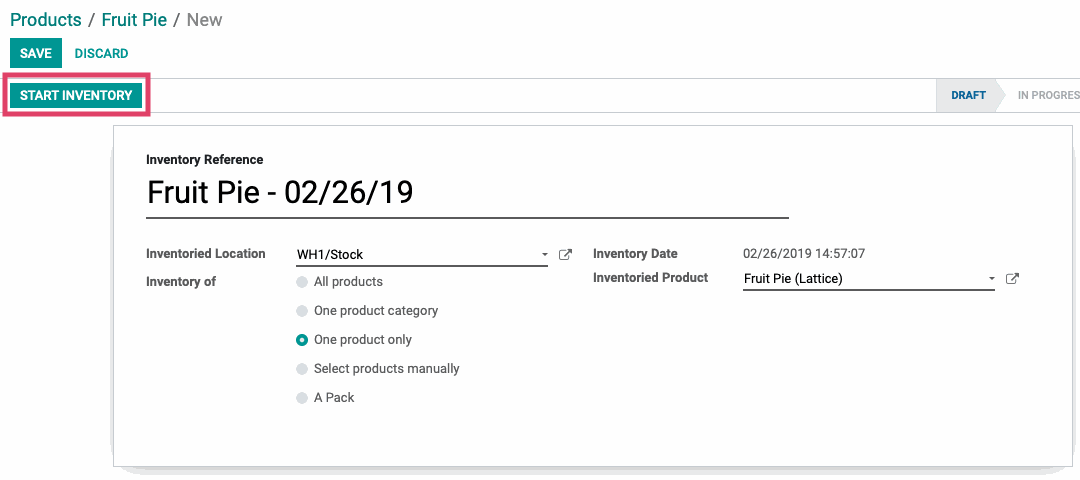
This will create a draft Inventory adjustment with a default title of the Product Name - MM/DD/YYYY. Choose your Inventory Location from the dropdown menu, and then choose the scope of Inventory with the Inventory Of selection.
If you need to include exhausted products that currently have a zero on hand quantity, you can do so with the All Products or One Product Category options. The other three, One Product Only, Select Products Manually, or A Pack, will let you decide exactly which items you are counting.
Using the Update QTY on Hand button will assume a single product count by default. Click Start Inventory from the top corner.
Add your inventory on hand. If you are updating an existing quantity, you can check the theoretical vs. actual quantities by click on the Inventory Details tab.
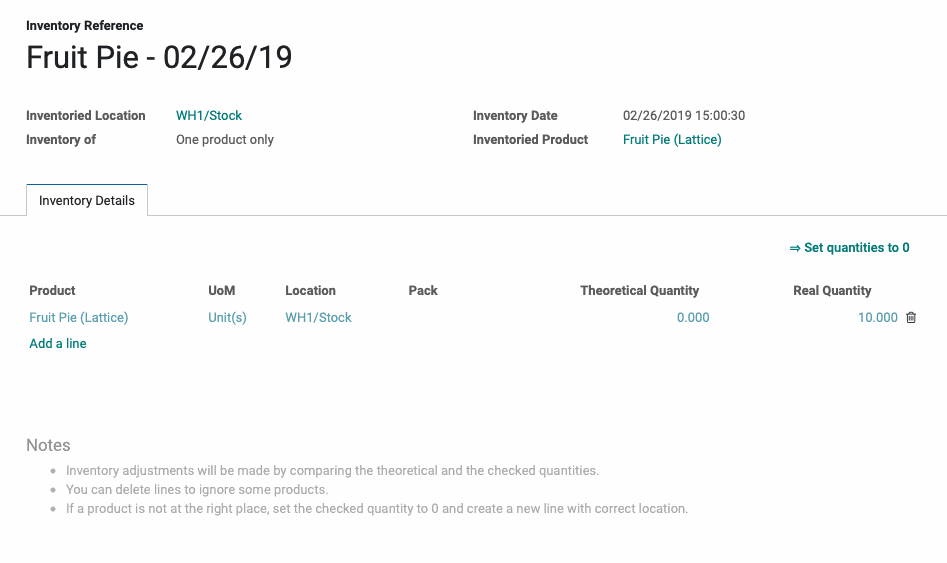
Once you have input the numbers of the products you would like to include, click Validate Inventory.
Reordering Rules
Across the top of the product page you will see smart buttons that correlate to the product's inventory configuration. Select Reordering Rules to see the rules that currently apply to this product, if any. Click CREATE in the top left corner to add a rule.
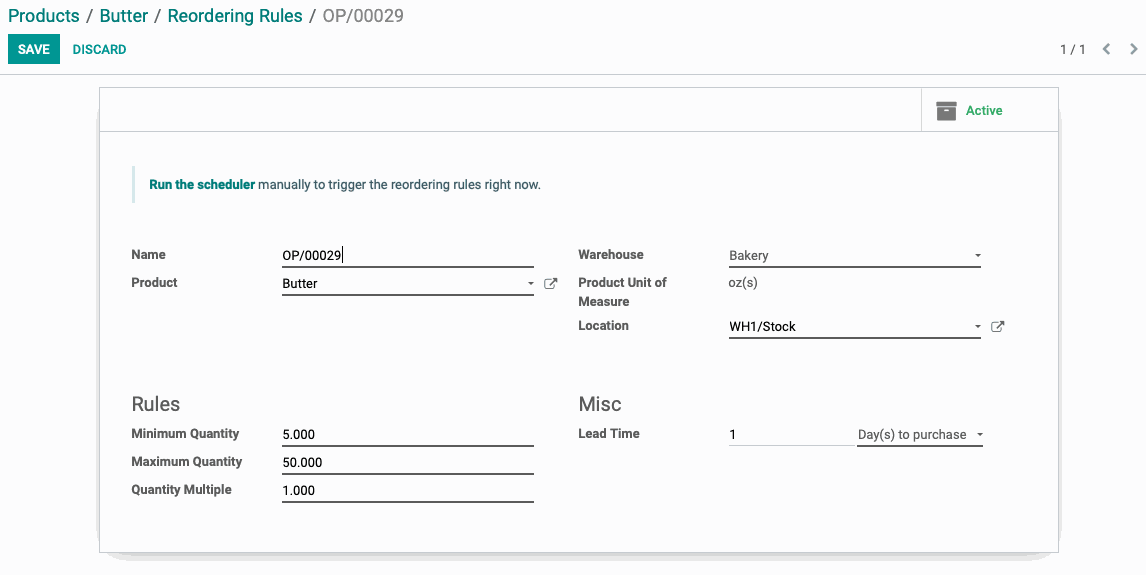
Once the rule window opens, you will have the option to Name the rule, and the product and its Unit of Measure will automatically populate in the appropriate fields. Select the Warehouse that the product will be received into once ordered and the Location to which this rule applies (when quantity on hand falls below the Minimum Quantity in this location, the rule will be triggered).
Under Rules:
Set the Minimum Quantity you would like on hand. This is the rule component that will trigger a PO/MO.
Set the Maximum Quantity you would like on hand. This will create a PO to bring quantity back to maximum.
Set the Quantity Multiple you would like Odoo to count the product. This is a rounding tool to accommodate Vendor minimum quantities.
Lead Time can be set to reflect the number of days after the order point is triggered that product arrives, or that a PO is placed to the vendor.
Once your preferences are set, Click SAVE.