Inventory : Products / Master Data: Products
Purpose
This document covers the product configuration options in the Inventory application of Odoo 16.
From here, please review the Product Creation Workflow document for best practice tips.
Please see our documentation on Rules and Routes to assign routes and our documentation on Warehouses and Locations to learn about default warehouse movements to your product once created.
Process
To get started, navigate to the Inventory app.
Product Configuration
Go to products > Products. If you have existing products, you will see them in the kanban view. If you have no existing products, you'll be prompted to create a product.
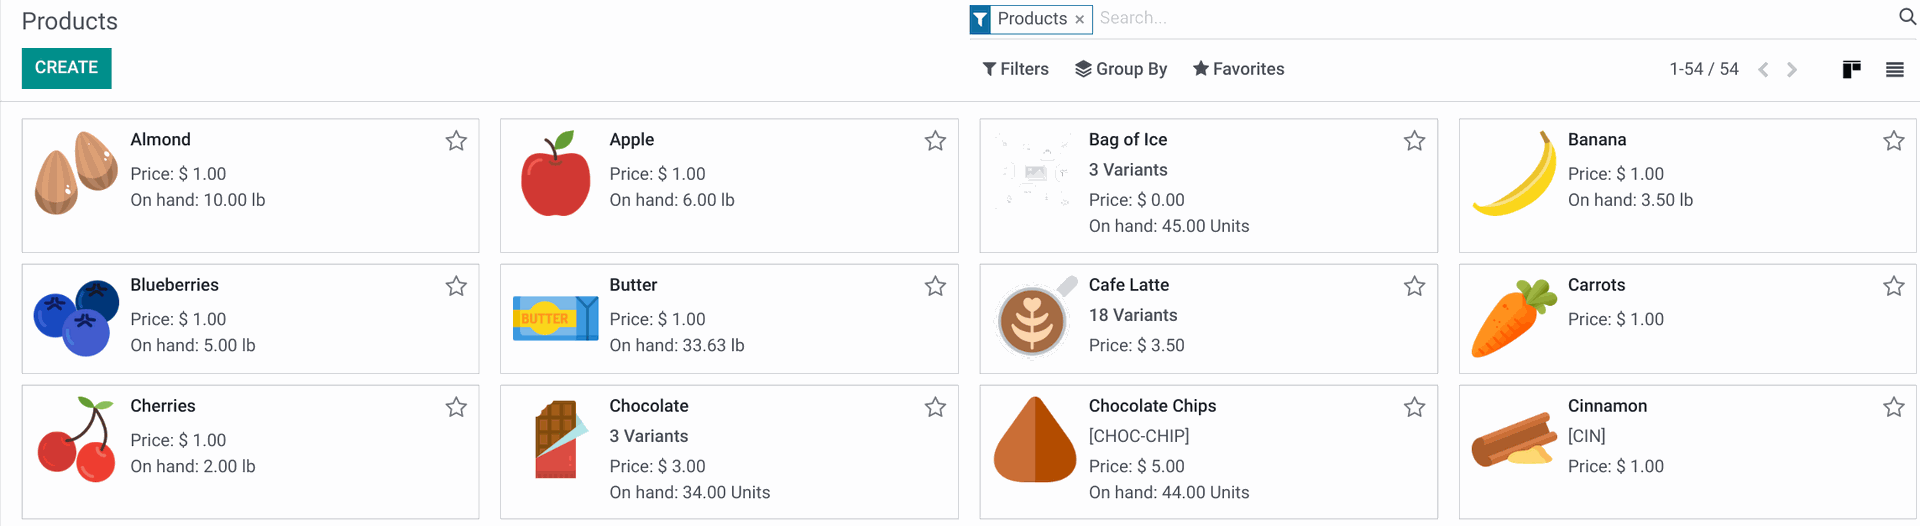
Click NEW to add a new product or select an existing product to see configuration options.
Good to Know!
Be aware that some tabs and fields may only display if you have the corresponding applications installed (e.g. eCommerce) or a particular configuration set. We will try to call out these configurations.
Product Name: Enter the unique name for your product.
Can be Sold: Check this box if the product can be sold.
Can be Purchased: Check this box if the product can be purchased.
Recurring: Check this box if the product is part of a subscription.
Image icon: Upload a product image, if desired.

Good to Know!
Restrict Products on Sale Orders
There are three ways to prevent a product from being purchased:
Leave the 'Can be Sold' option unchecked.
Archive the product.
Add a Blocking warning message to the product (covered below). This option will not remove the product from Saleable product listings, but will prevent purchase.
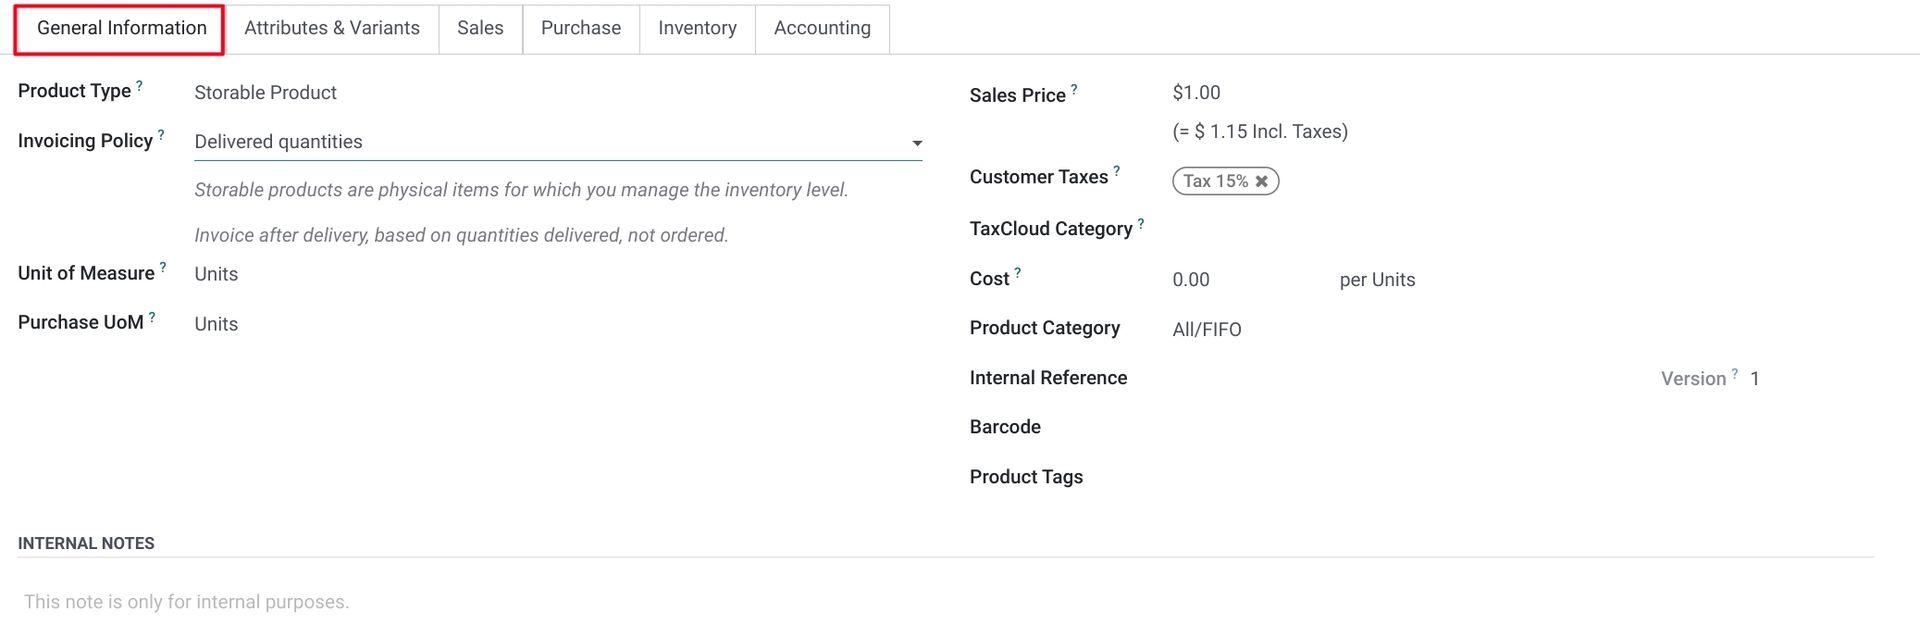
Under the General Information tab:
Product Type: Select if this product type is Storable (tracked stock), Consumable (not tracked), or Service. Others may be available depending on your configuration or having additional modules installed.
Invoicing Policy:
Ordered Quantity: Select this option to invoice this product when the order is placed by the customer.
Delivered Quantity: Select this option to invoice when this product is delivered to the customer.
Unit of Measure: The measure by which this item will be counted in inventory.
Purchase Unit of Measure: The measure by which the item can be purchased from vendors, (e.g. cases, dozens, units).
Sales Price: Allows you to set a default sale price for the item that will populate on sale orders.
Customer Taxes: This field pulls from the Accounting application to assign a tax rule to the item.
TaxCloud Category: If the TaxCloud app is installed, this allows you to assign TIC categories, codes, and descriptions to your products to streamline tax collection.
Cost: If Standard Price, this field allows you to create a fixed cost for the purchase of the item. In Average and FIFO valuations, this field will be updated based on purchasing and other product movements.
Product Category: Choose the appropriate category for this product.
Internal Reference: Allows you to set a custom unique reference, such as a SKU.
Barcode: If the Barcode app is installed, scanning a barcode with the digits entered here will pull up this product in the Point of Sale and Inventory applications.
Product Tags: Select which tag to use to easily express or identify the product.
Internal Notes: This information will be displayed to internal users only.
Under the Attributes & Variants tab you'll see all configured variants for this product. For more information, see our documentation on Product Creation Workflow.

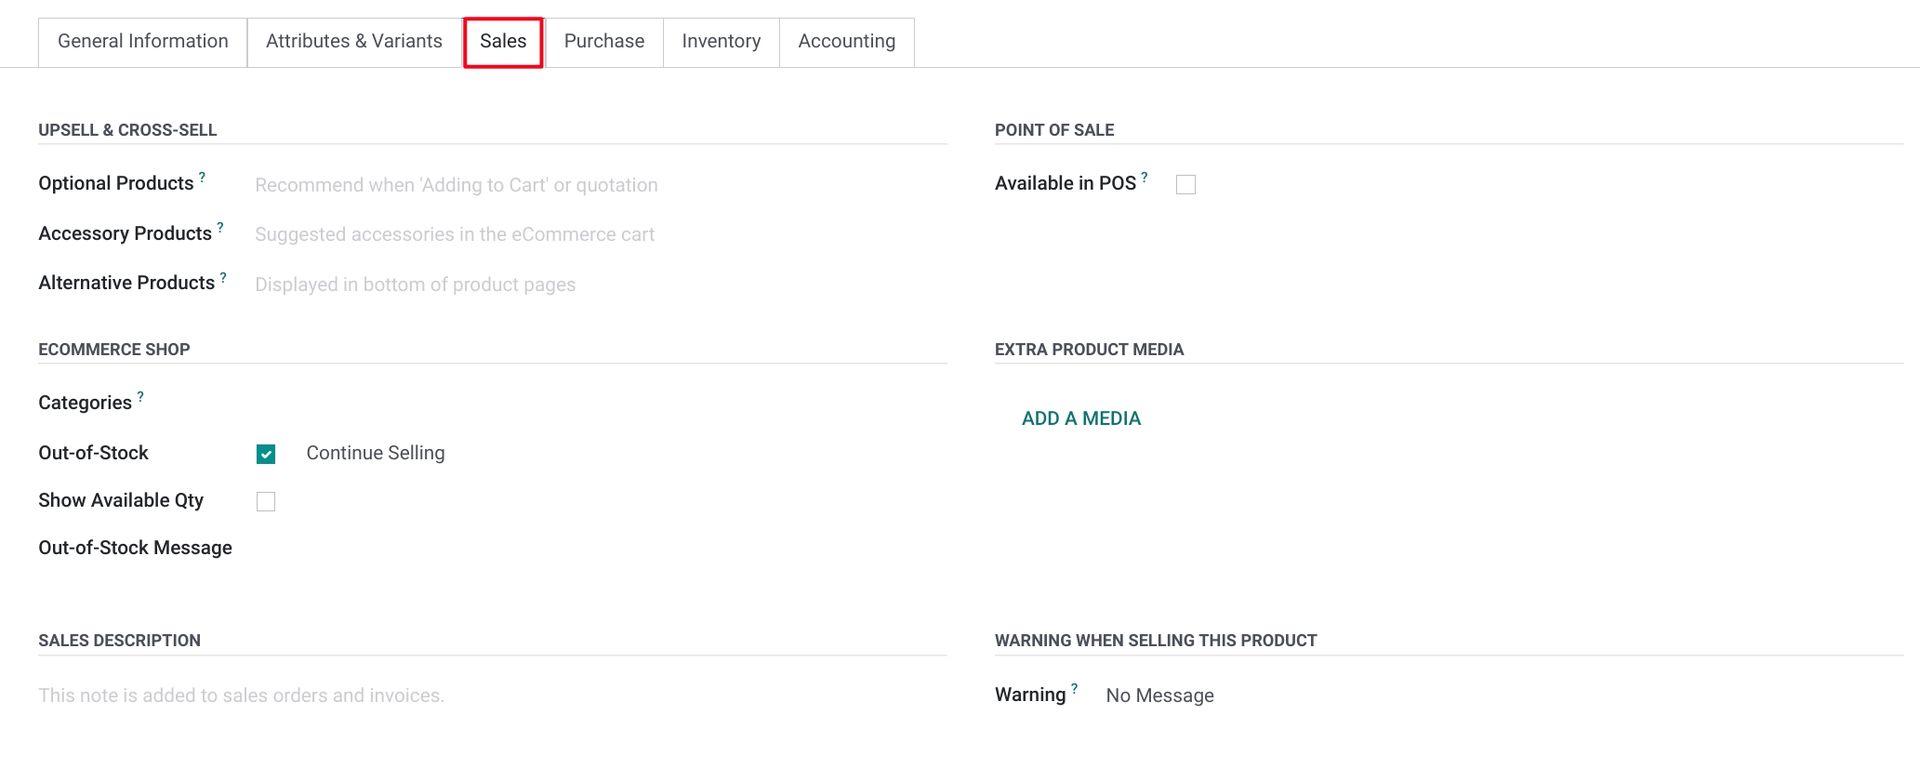
Under the Sales tab:
Upsell & Cross-Sell
- Optional Products: These products will display to the customer and allow them to Add to Cart as a cross-sell strategy. To see this field, you must have Optional Products checked in the Website application settings.
Accessory Products: If publishing this product to your website, list one or more of your other products that may complement it.
Alternative Products: If publishing this product to your website, list one or more of your other products that you'd like to present as an alternative.
Point of Sale
Available in POS: You'll see this if the 'Point of Sale' module is installed. Mark the box to have this product listed in the PoS applications.
eCommerce Shop
Website: Select the website where this product is sold.
- Categories: Select the category the product belongs to.
Out-of-Stock: Check the box to continue to offer the product on your website even if it is not in stock.
Show Available Qty: Mark this to include the On-Hand quantity on the website.
Out-of-Stock Message: Enter the text to appear on the website for this product when there are none remaining in stock.
Extra Product Media
- Add a Media: Allows you to additional media (pictures or video) that is relevant to the product.
RMA Sales
- Eligible Days: Enter the number of days this product is eligible for a return from the customer.
Warranty Eligible Days: Enter the number of days the product remains able to be returned under warranty
Sales Description: Text in this field will display on the sale orders and invoices.
Warning when Selling this Product: Select the type of message to display when a product is added to an invoice or RFQ. (These options display if you have the Sales Exceptions module installed.)
Warning: This option will display a pop-up with the text you enter on the following line.
Blocking Message: This option will throw an exception, using the text you enter on the following line, and it will also block the flow of adding the product.
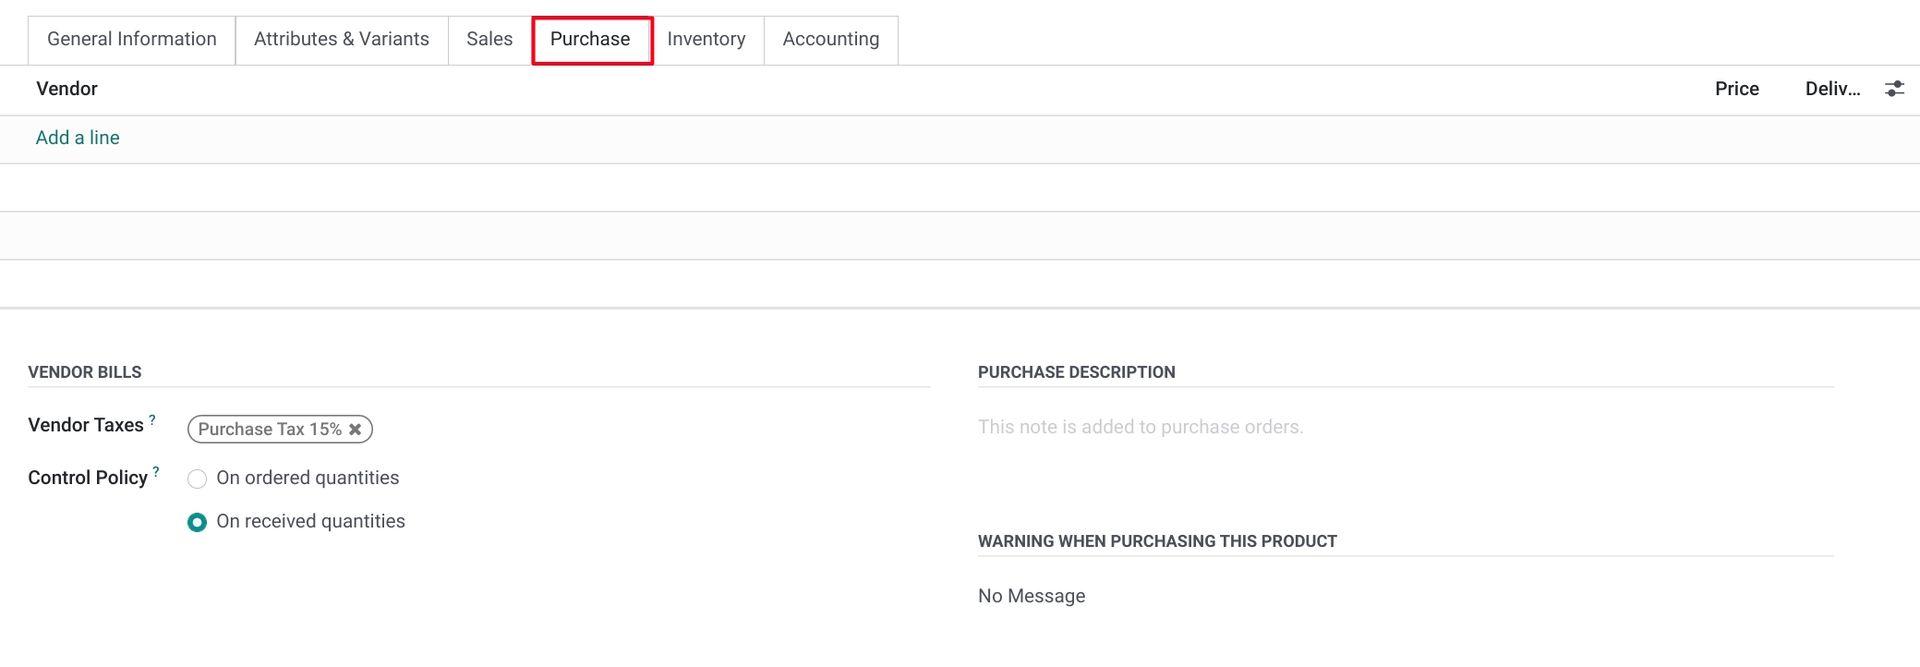
Under the PURCHASE tab:
Vendor Bills
Vendor Taxes: Enter applicable taxes for this product.
Control Policy: Select the method by which control bills are based.
On ordered quantities: Bills can be invoiced based on ordered quantities.
On received quantities: Bills are invoiced based on received quantities.
Purchase Description: Select the type of message to display when a product is added to a purchase order.
Warning: This option will display a pop-up with the text you enter on the following line.
Blocking Message: This option will throw an exception, using the text you enter on the following line, and it will also block the flow of adding the product.
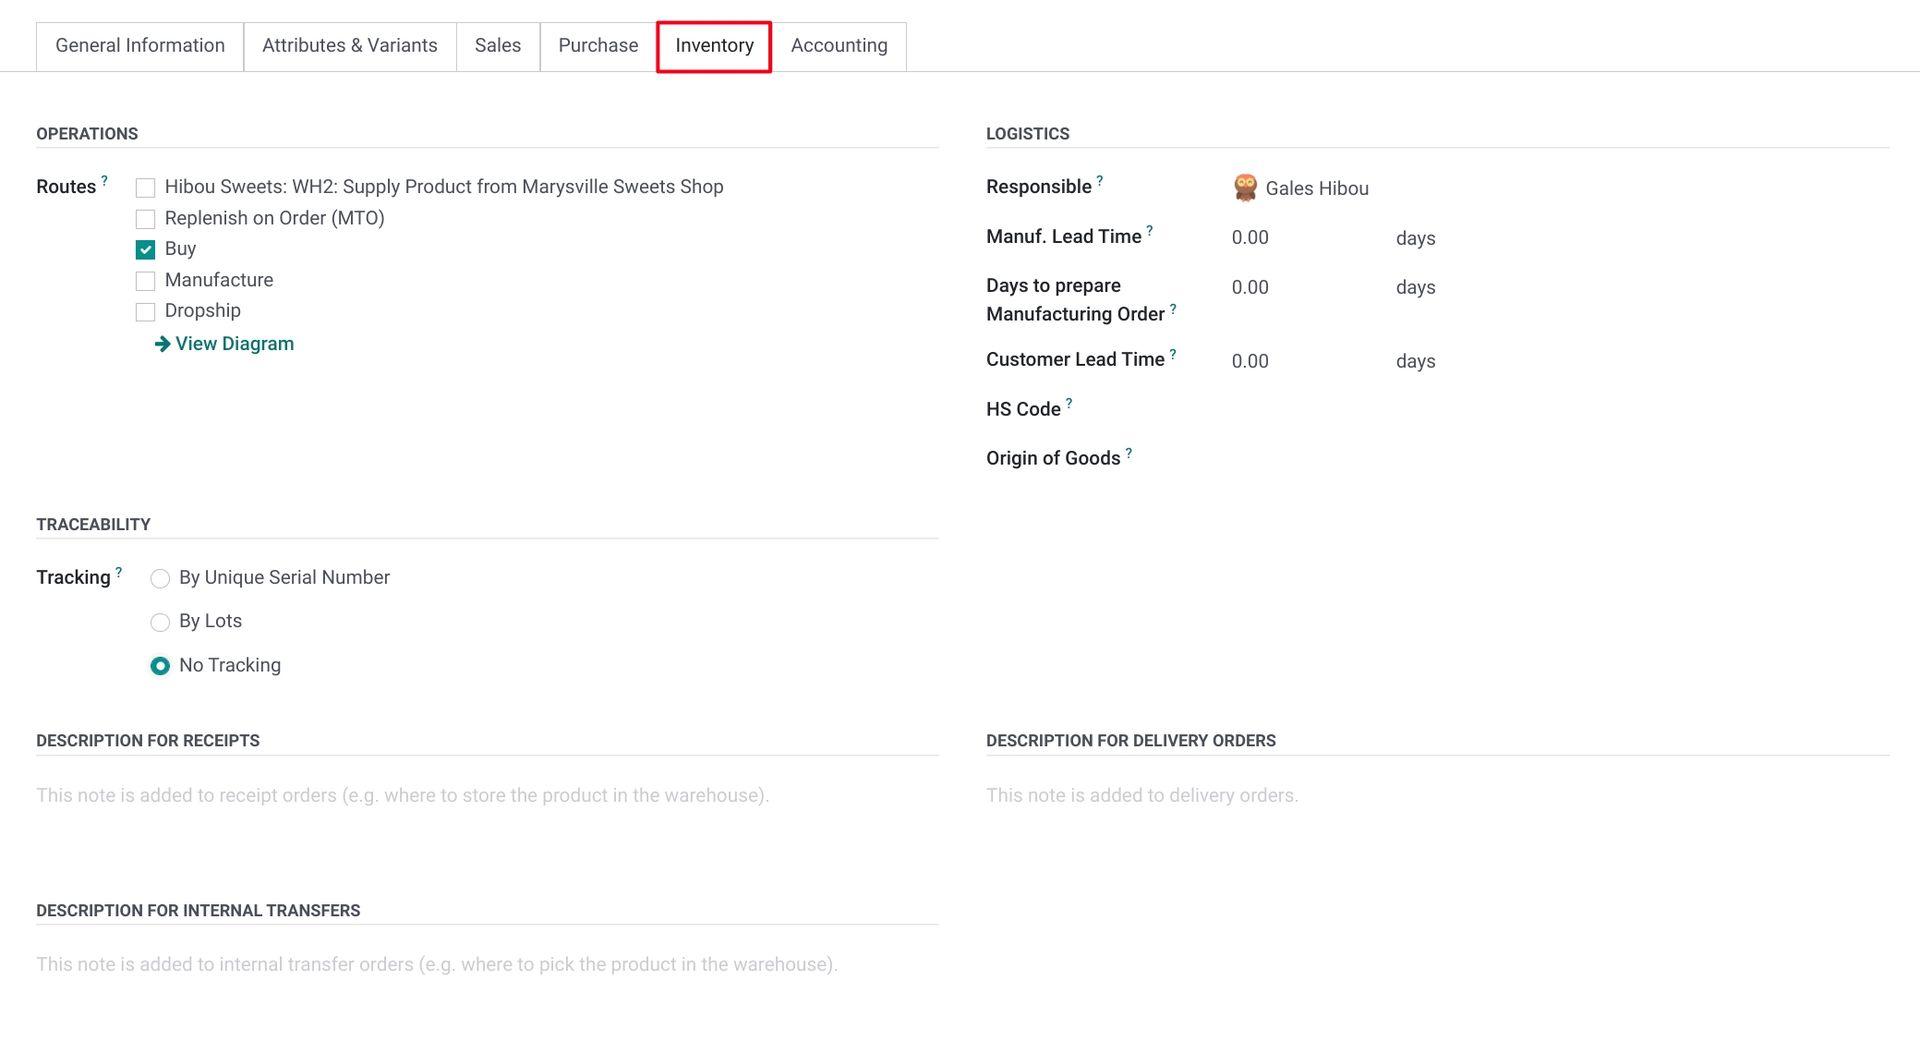
Under the Inventory tab:
Operations
Routes: Here, you can select the routes by which this product is acquired.
Good to Know!
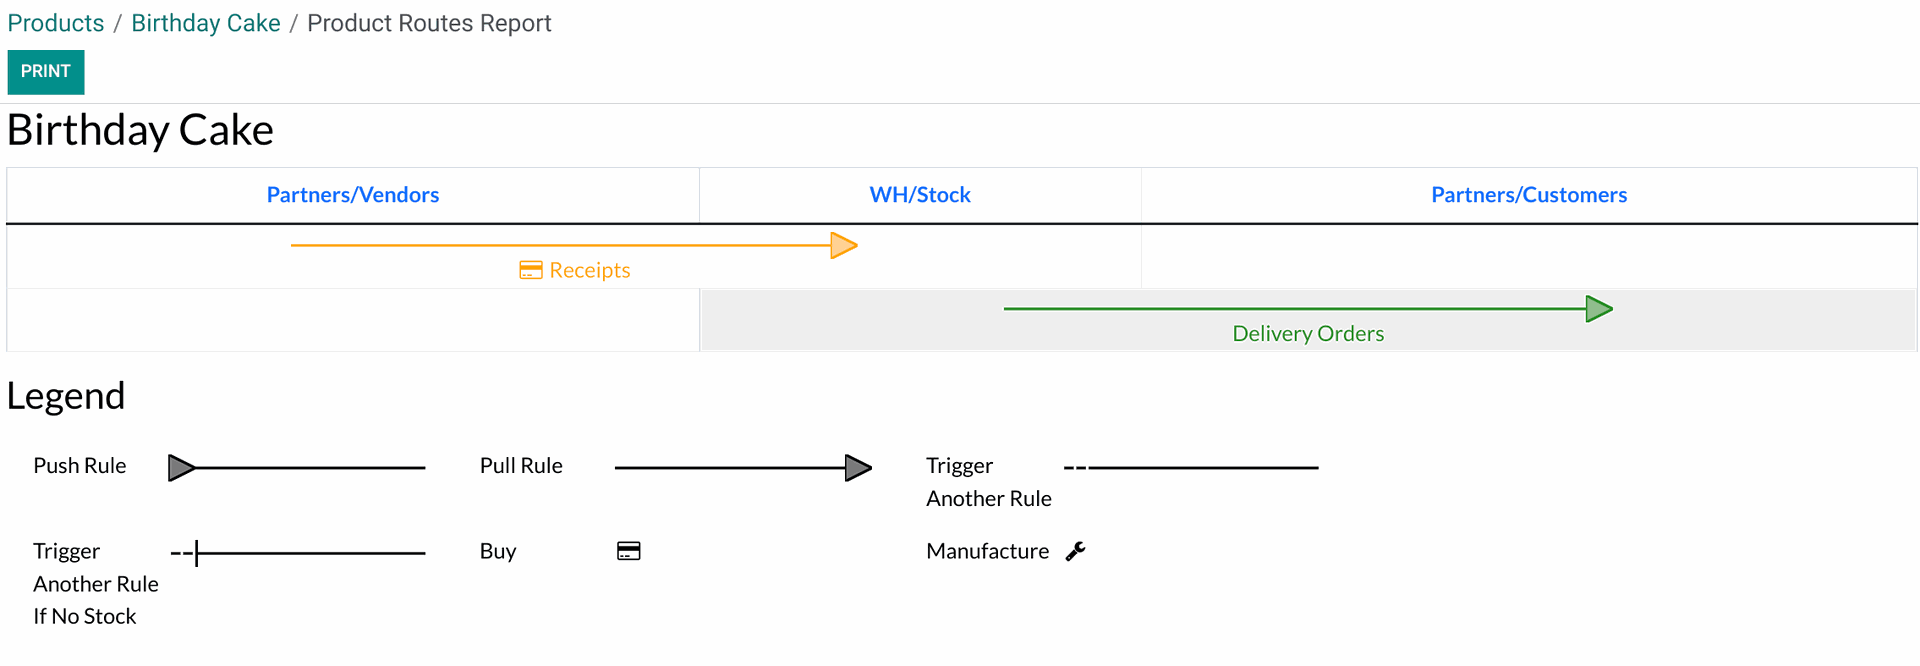
Diagrams for Routes
Clicking View Diagram below the Routes will open a Stock Rules Report window. You can apply a specific route you wish to examine the report of. Then, click Overview.
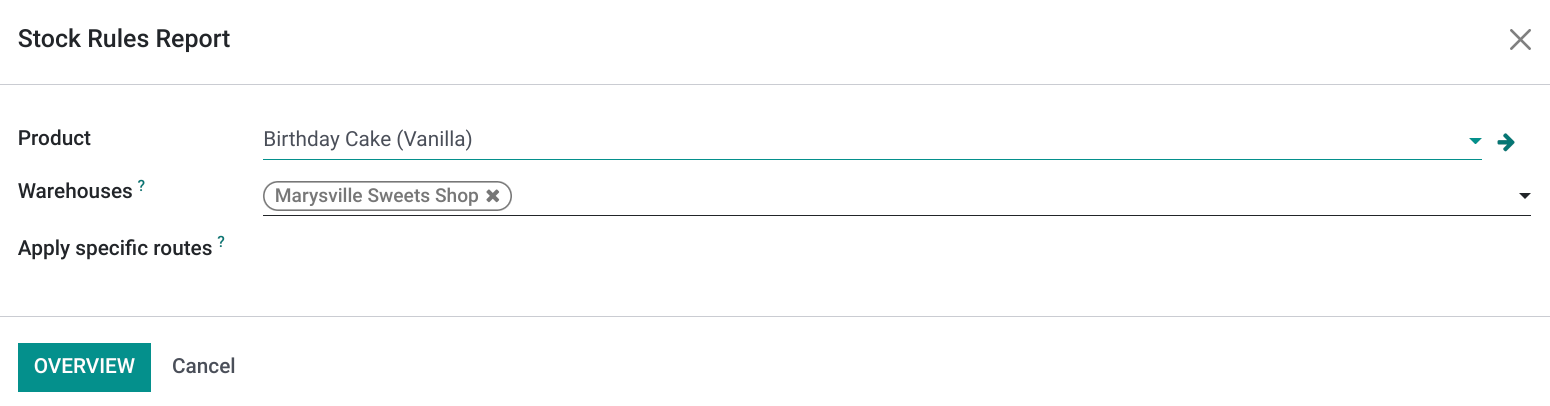
You will see a visual representation of how this route works.
Logistics
- Responsible: Select the user responsible for the next activities related to logistic operations for this product.
Manufacturing Lead Time: Enter the lead time needed to manufacture the product.
Customer Lead Time: Enter the lead time between order confirmation and delivery.
- HS Code: Enter the HS code for international shipping and customs, if applicable.
Traceability:
Tracking: This section will only appear if you have Lot/Serial Numbers activated in Inventory settings. Select the method you would like to use to track this product. You can choose to track by Serial Numbers, Lots, or not at all.
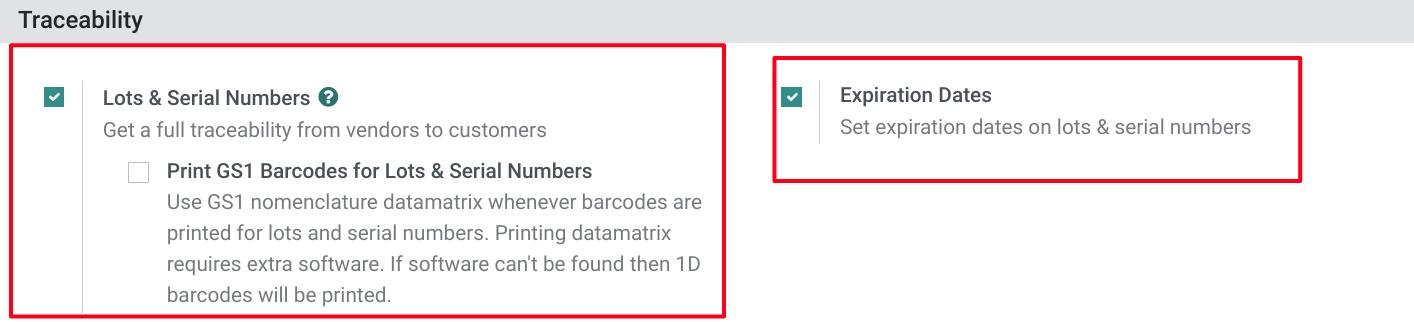
Expiration Date: If you additionally have Expiration Dates activated in settings, you will see the Expiration Date field. Once checked, you can further configure expiration dates for your product. To learn more about Lots and and Serial Numbers, please review the Master Data: Lots/Serials documentation.

Description for Receipts: This text will display on receipt orders (e.g. where to store the product in the warehouse).
Description for Delivery Orders: This text will display on delivery orders.
Description for Internal Transfers: This text will display on internal transfer orders (e.g. where to pick the product in the warehouse).
Under the Accounting tab:
These fields are for reporting purposes and can all be left blank to use the associated default accounts.
Receivables: Assign the income account (optional).
Payables: Assign the accounts for Expenses and Price Differences (optional).

Updating Quantities vs. Replenish
For storable products, there are two methods to adjust inventory from the product page: UPDATE QUANTITY and REPLENISH.

Good to Know!
The UPDATE QUANTITY and REPLENISH buttons will only display if the product type is set to Storable. You set the Product Type in the GENERAL INFORMATION tab.
Clicking UPDATE QUANTITY will initiate the Inventory Adjustment feature. You can read more about this process in the Operations: Inventory Adjustments documentation.
Use the REPLENISH option to replenish your stock. Depending on your product configuration, launching a replenishment may trigger a request for quotation, manufacturing order, or a transfer.
A manufacturing order will require a bill of materials, covered in the next section.
Good to Know!
On Hand vs. Forecasted

On Hand: This number indicates the quantity you physically have in stock. This number will adjust once products are delivered or received. Clicking this smart button will show you where each product is physically located
Forecasted:This is the number of products you're expecting to have in stock once all deliveries and receipts are processed. Clicking this smart button will show you a graph of the product, per warehouse, but more importantly you'll be able to see pending transfers. In this example, there are pending sale orders that have reserved stock.
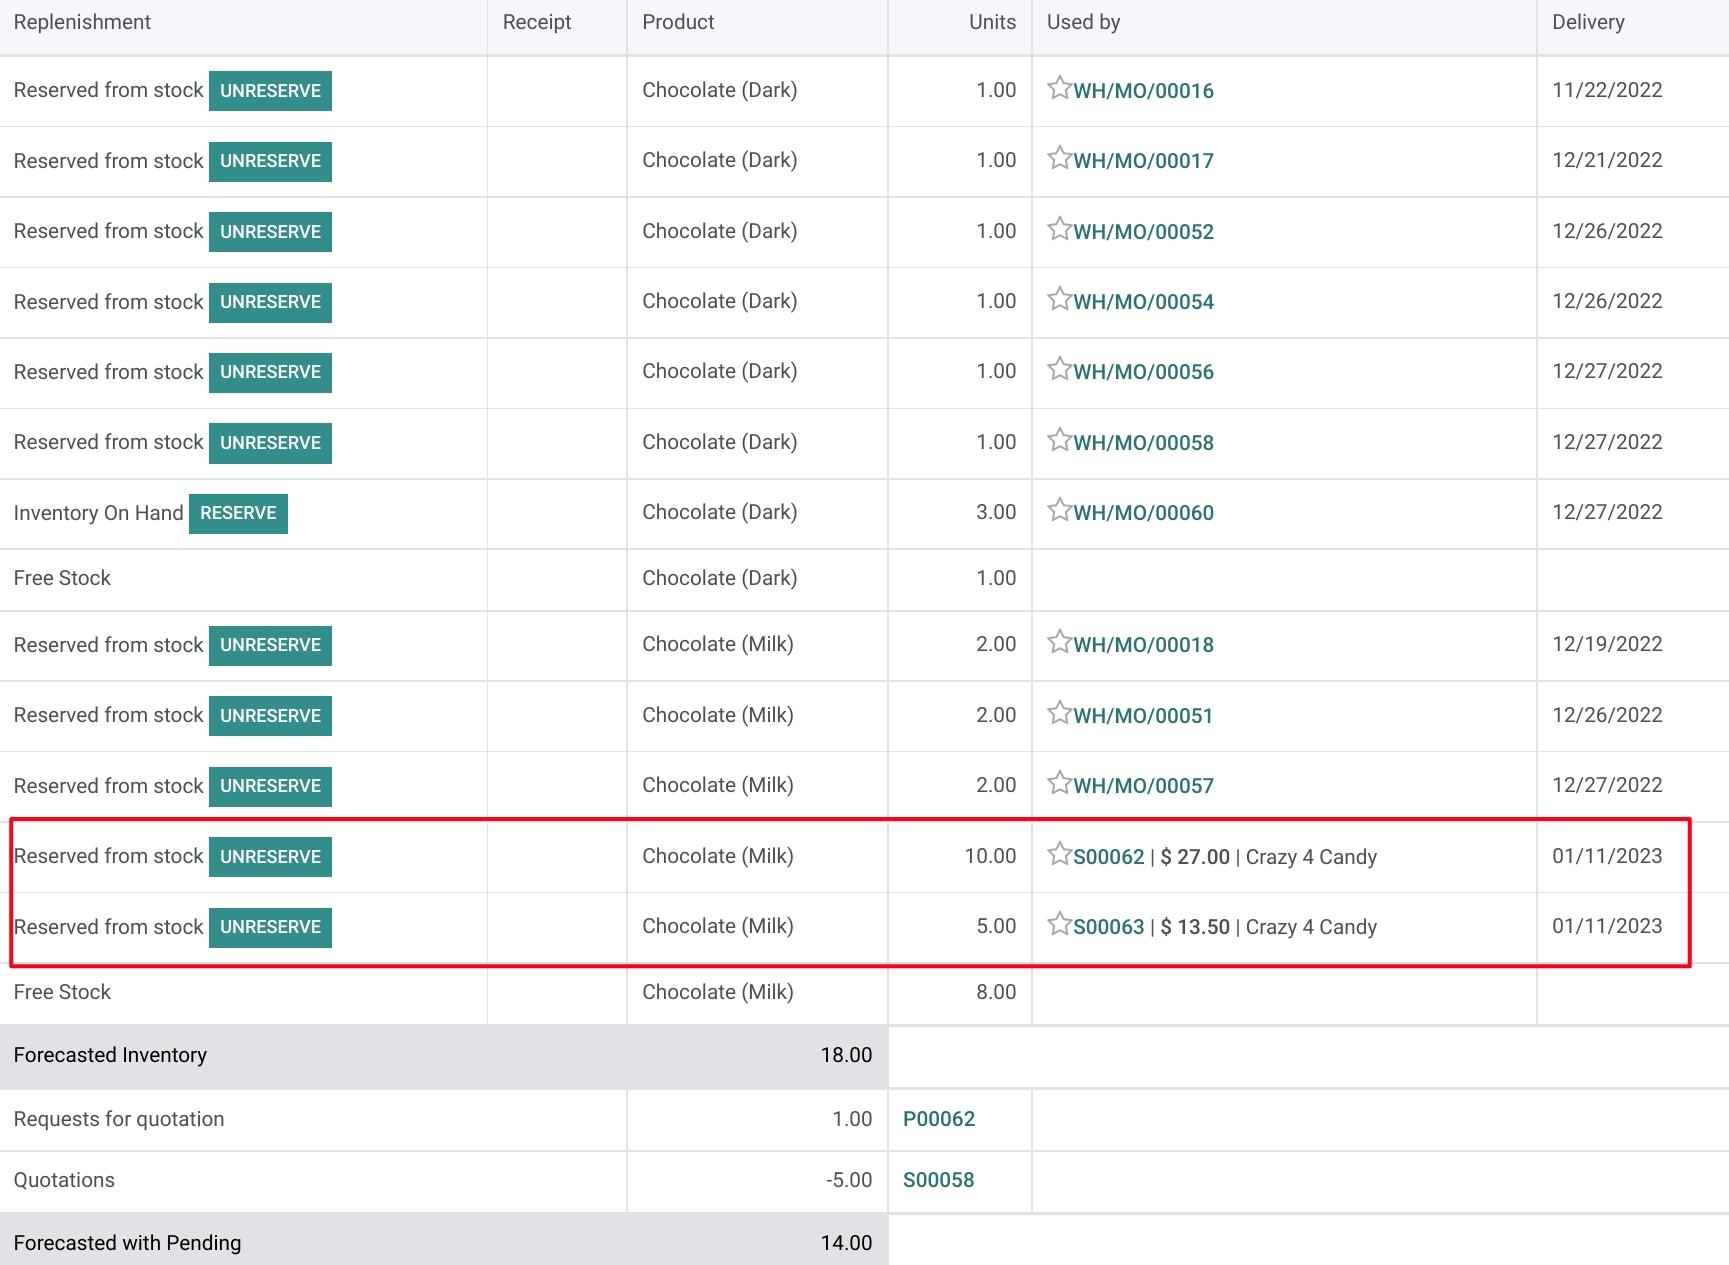
Here, on this product forecast, we can see we're expecting to receive products.

Bills of Materials (BoM)
In order to manufacture a product, you will be required to create a bill of materials. You can find more information about bills of material in the context of Manufacturing on the Bills of Material page.
Navigate to the product you wish to create and make sure that under the INVENTORY tab > Routes, the Manufacture route is checked.
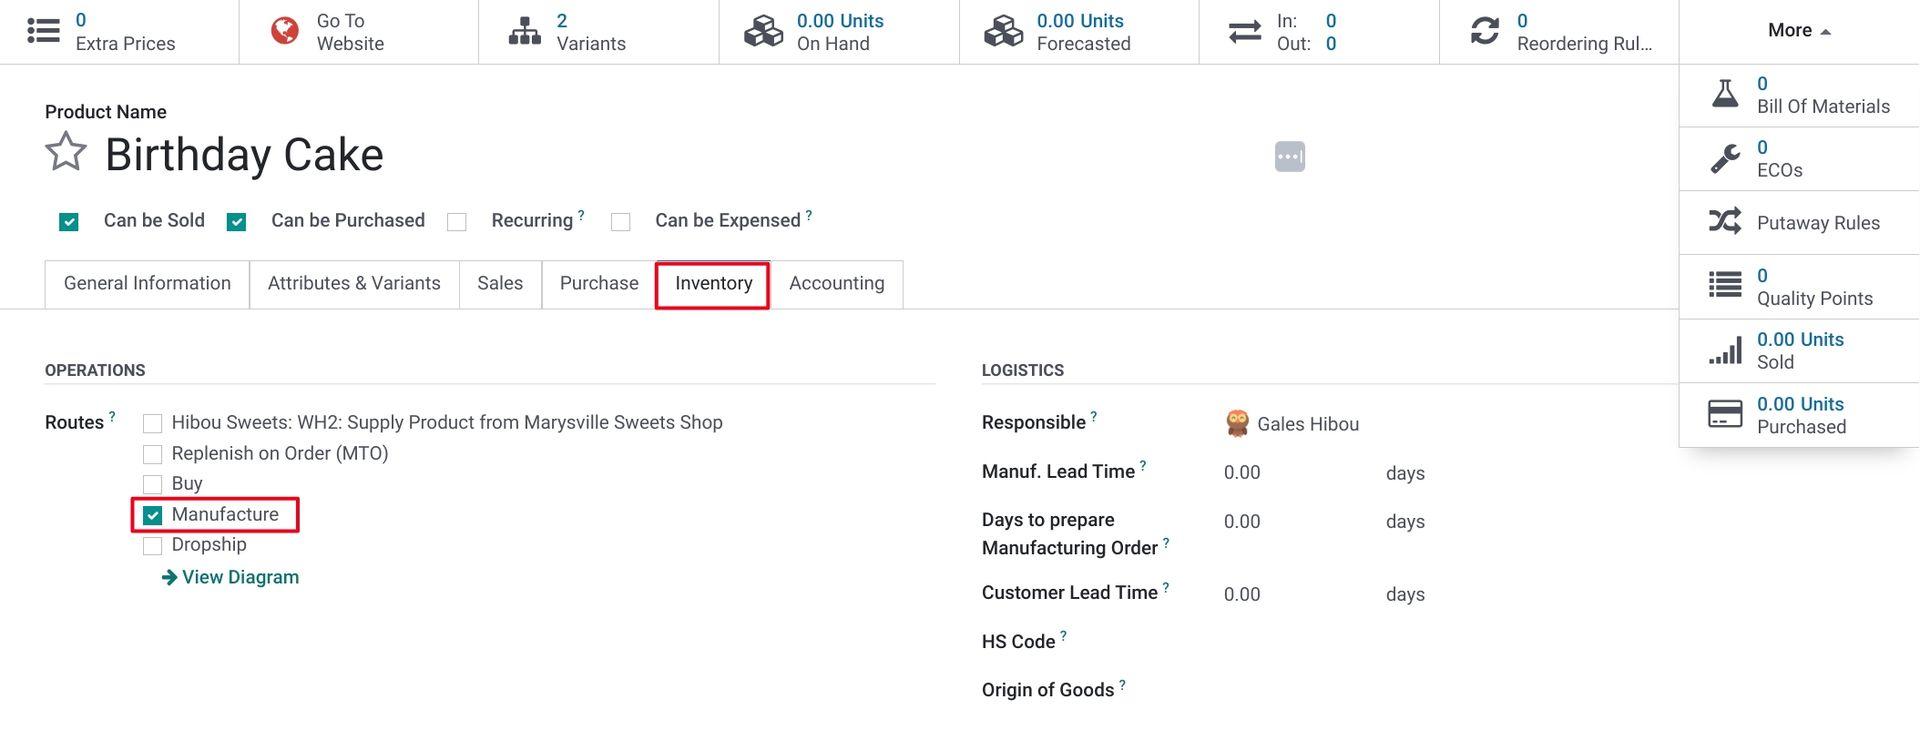
In the top right corner of the product, click the smart button for Bill of Materials. It may be under the More dropdown if you don't see it immediately.
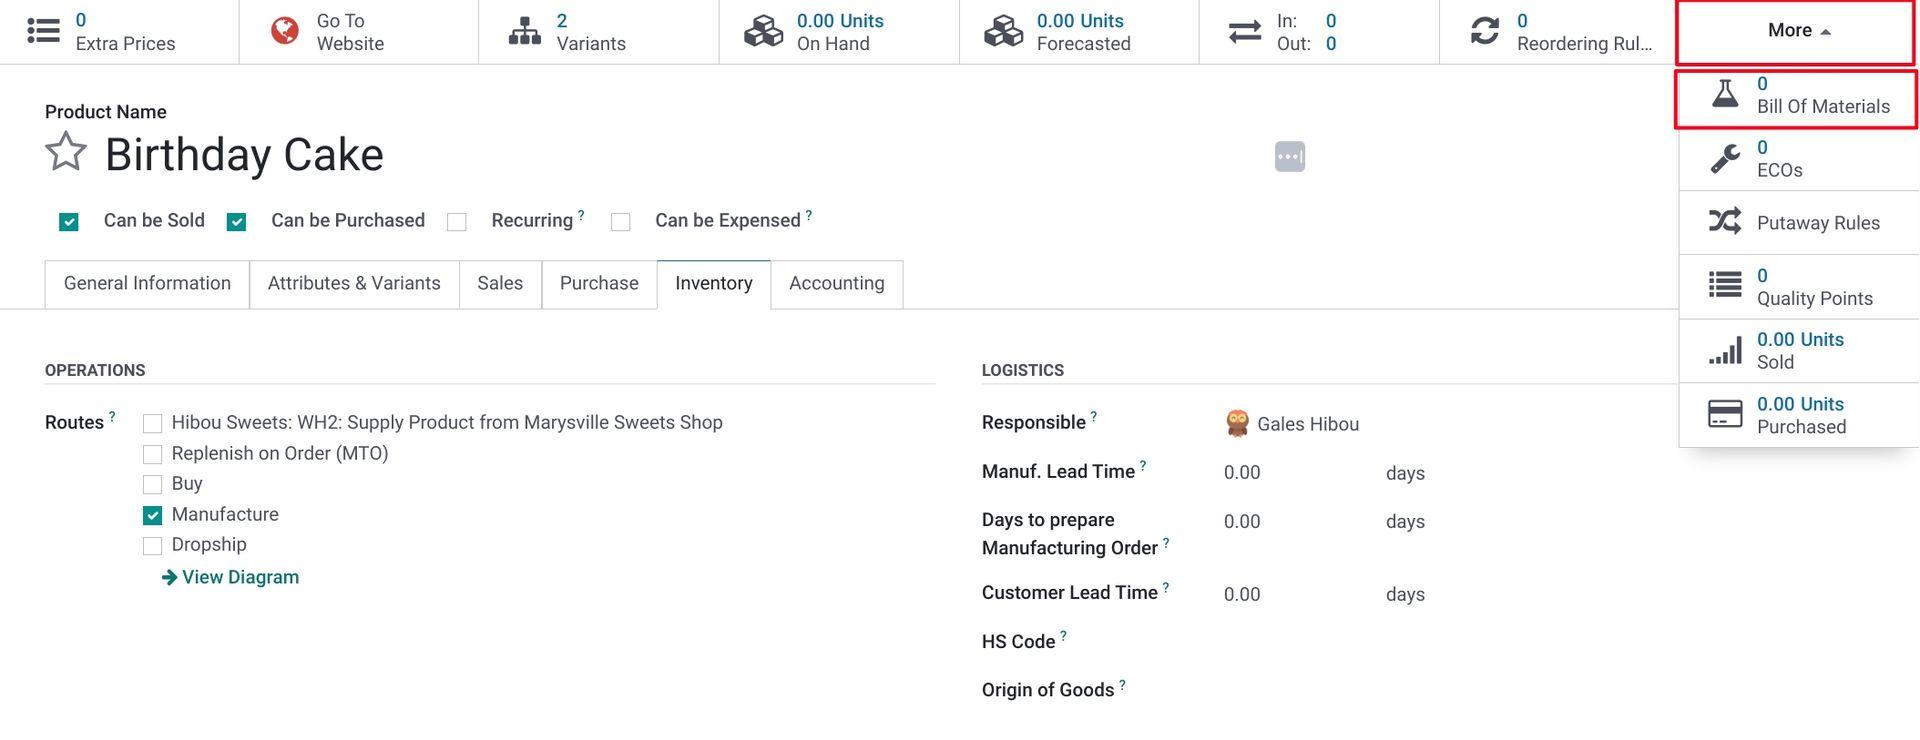
This will take you to the Bill of Materials list. Once there, click CREATE and you'll see the following screen and options.
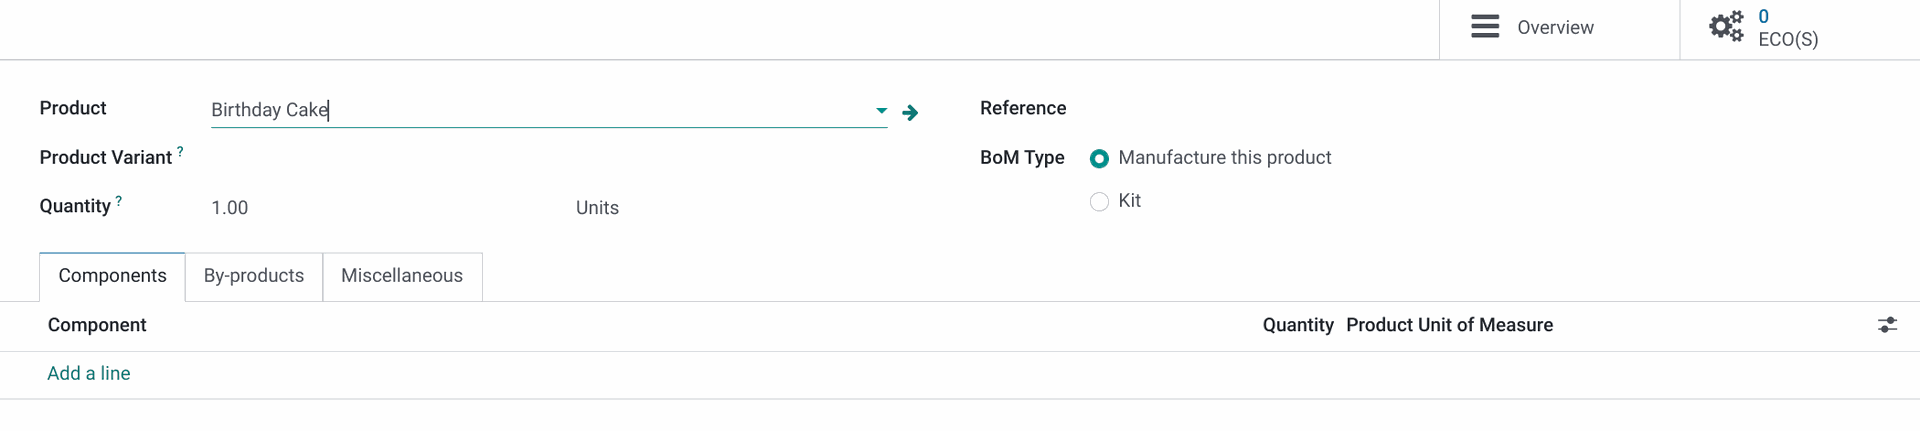
Every manufacturing "run" of this product will require a Bill of Materials. When you create a BoM, you will be asked to list the component products you need to use to create the item.
Product: Select the product to manufacture from the list. This will be pre-populated.
Product Variant: Select the variant of the product that you are creating the BOM for, if necessary.
Quantity: Enter how many are to be produced and the unit of measure.
Reference: Give the BoM a reference ID such as “Original” or “v1."
BoM Type
Manufacture this product: Select this option if the product needs to be created.
Kit: Select this option if the product is a compilation of other products already in your inventory that do not require production (e.g. accessory or cleaning kits).
Subcontracting: Select this option if you are outsourcing a portion or all of your manufacturing needs for this product. (This option displays if the Subcontracting setting is enabled in Configuration Settings.)
Depending on how your configure the BoM Type, you will see some or all of the following tabs:
Under the COMPONENTS tab, click ADD A LINE to add the Components, Quantity, Product and Unit of Measure from your inventory that are needed to manufacture your product.
Under the OPERATIONS , click ADD A LINE to add the Operations, Steps, Work Center and Duration (in minutes) needed to complete the operations to manufacture your product.
Under the by-productS tab, click ADD A LINE to add the By-products, Quantity, Unit of Measure and the Produced in Operation location needed to manufacture your product.
Under the miscellaneous tab:
Manufacturing Readiness: This defines when a manufacturing order is ready to be started. Select "When all components are available" or "When components for 1st operation are available."
- Version: If this product has multiple versions or evolutions of the Bill of Materials, you can set that here.
Flexible Consumption: This defines if you can consume more or fewer components than the quantity defined on the BoM. Select between "Allowed," "Allowed with warning" and "Blocked."
Operation: Select the warehouse and location in which your product is being manufactured.
Now, if a sales order is created and the product is not on hand, clicking REPLENISH on the product will generate a manufacturing order. This Bill of Materials can be referenced as the original, and duplicated for simple configurations, or created as needed to complete orders.
Importing and Exporting Products
The Import/Export tool is a great way to update multiple products at once. We recommend creating three or four products first and exporting them to use as a template.
To export, view your products in List View, then check the boxes on the products you will need. Use the topmost checkbox to select all products in the visible list.
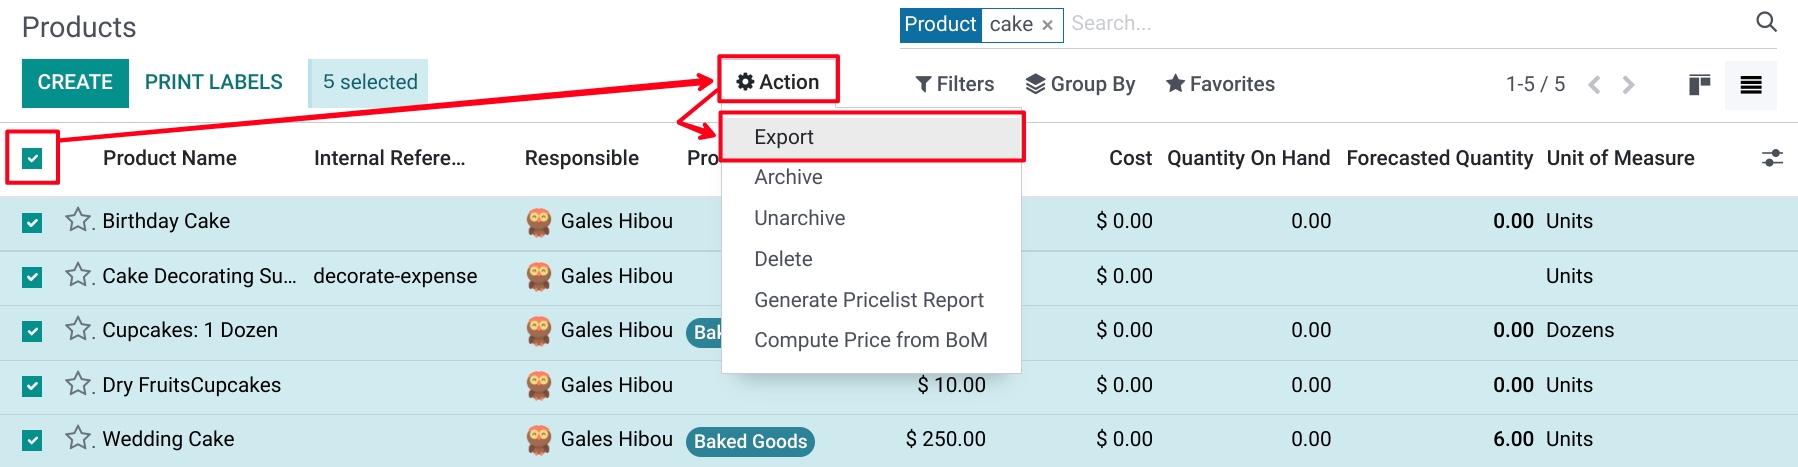
You'll then need to select the type of data to export. Odoo makes it easy by offering you an import-compatible export. Tick this box unless you'd like to customize it differently.
Export Format: Select either XLSX or CSV format, depending on your preference.
Template: If you create a custom data export, naming the Template will make it easy to use in the future.
When you're satisfied with your settings, click EXPORT. It may take some trial and error to learn how Odoo interprets its exported fields. Resist the temptation to rename the column headers, Odoo uses these to match the data to their respective fields on the product record.