Inventory : Barcodes: Processing Inventory Adjustments
Purpose
The purpose of this documentation is to explain how to conduct an Inventory Adjustment in Odoo 12 with the help of barcodes.
Process
To get started, navigate to the Barcodes application.
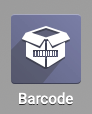
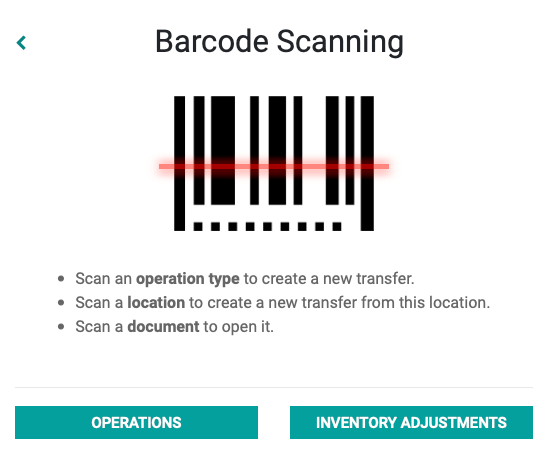
You will see the below image on screen.
Existing Operations
If an operation has already been created and only needs to be validated, click Operations.
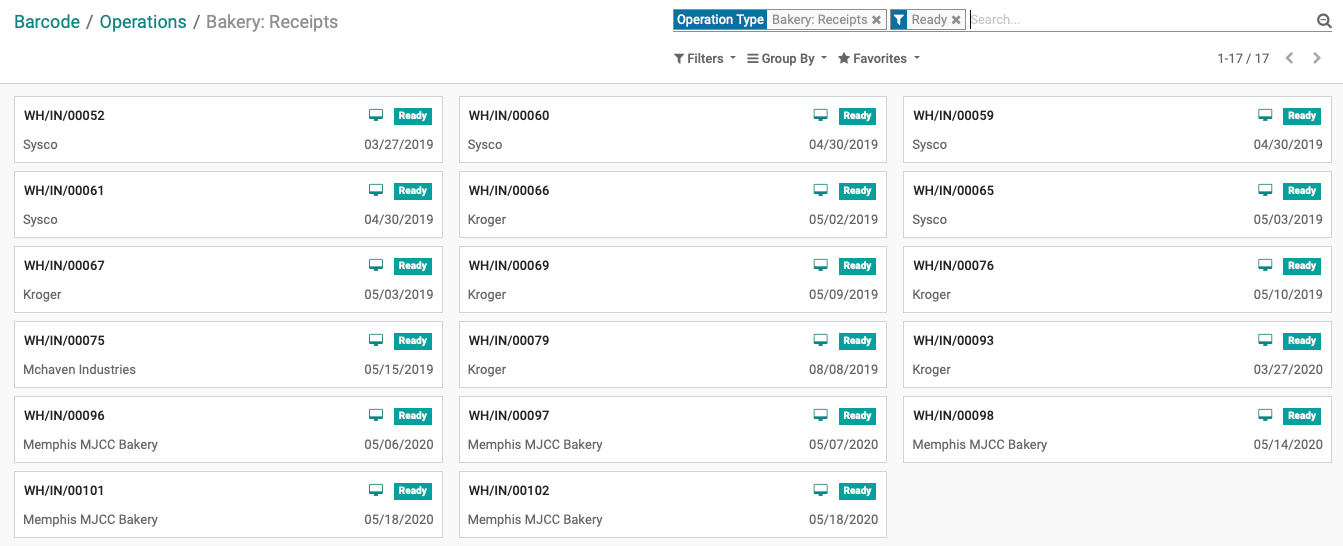
You will see a kanban view of all operations that can be made across all your warehouses. Click # to process on a kanban card.
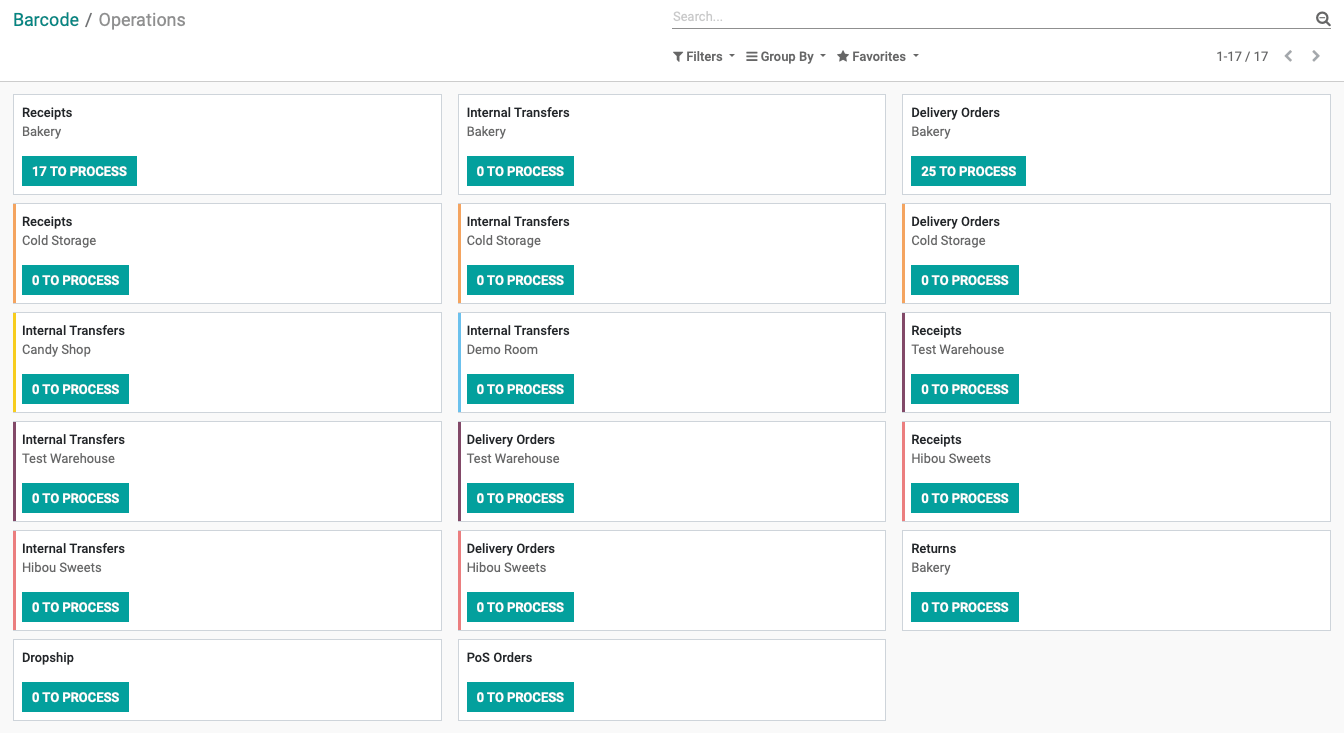
On the next page, select the operation you wish to process.
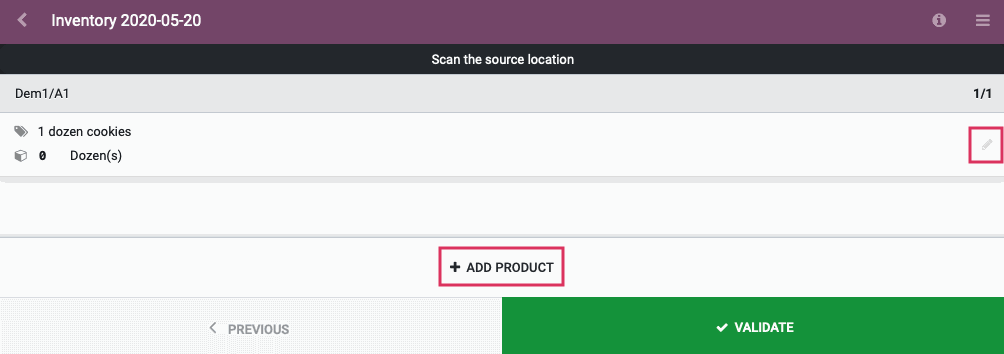
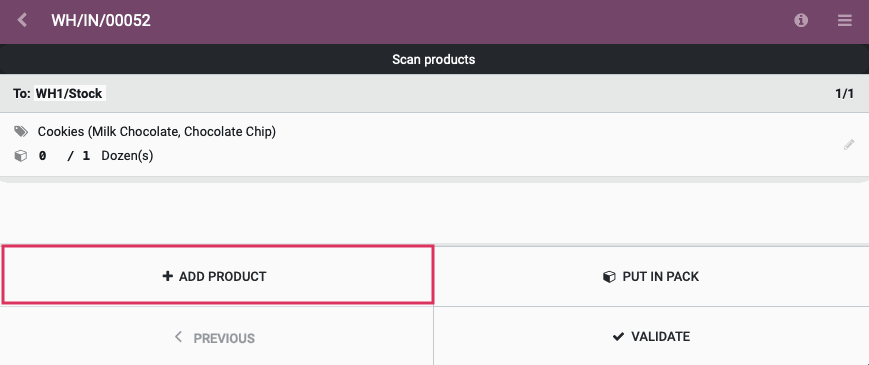
From the page below, use the scanner to scan your products, or add products manually by clicking add product.
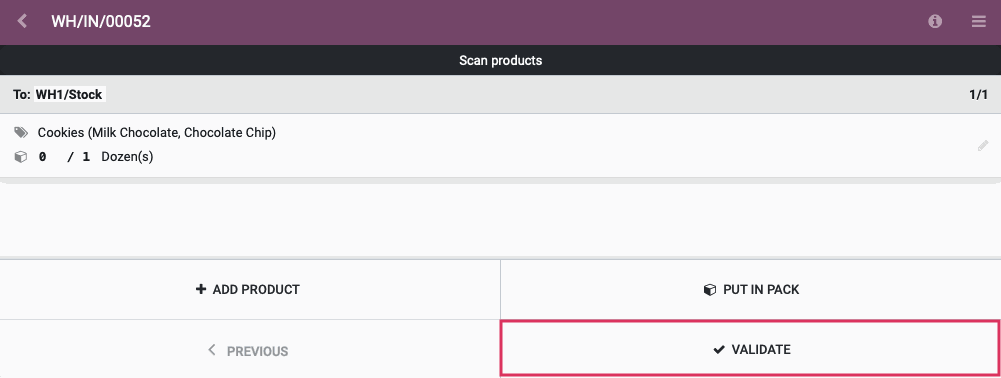
When you're done, either scan the Validate barcode (if you have one handy) or click validate.
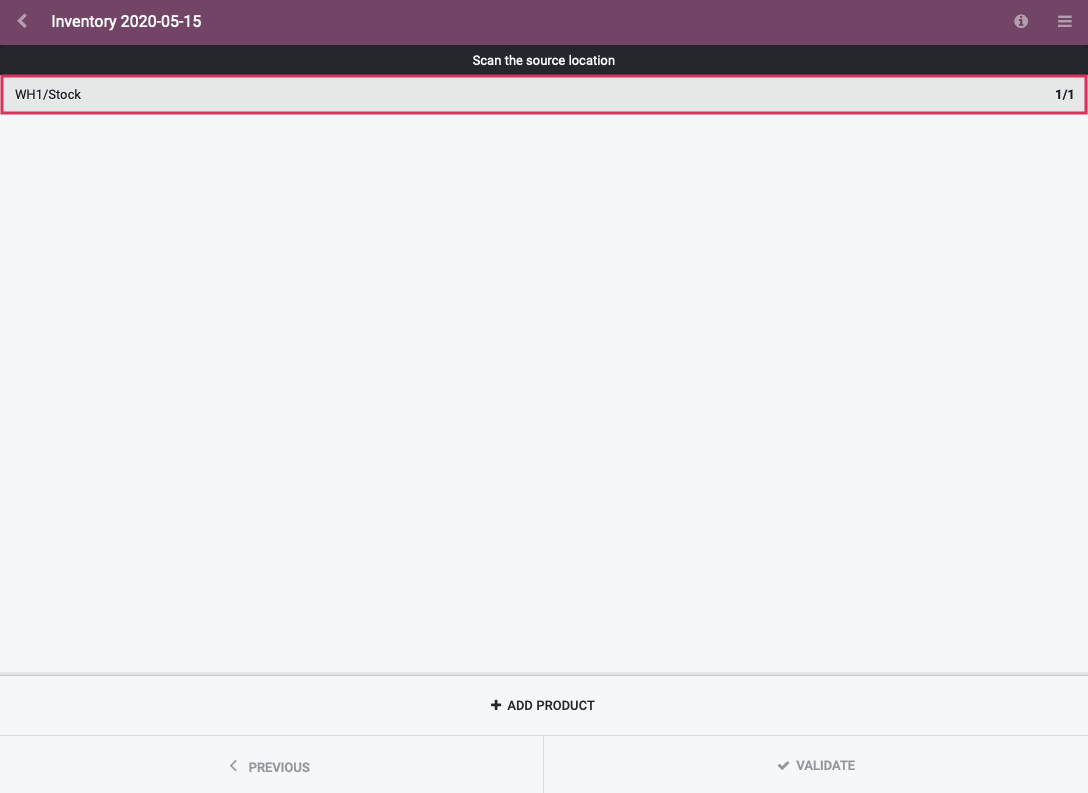
Odoo will set the default location for the Inventory Adjustment to the Stock location. You can change the location by scanning the barcode of the desired location. Alternatively, if you manually add a product, a process we outline below, you can change the location of the adjustment at that time.
If you are doing Inventory Adjustments on multiple locations, you will need to scan each location prior to scanning the products in that location.
Next, scan the products you wish to include in the inventory adjustment. Alternatively, you can add a product manually. To do this, click Add Product.

Use the drop-down menu to select the product you are doing the Inventory Adjustment for. Once you have selected the product, the following fields will auto-populate:
Theoretical Quantity: This field will display the theoretical quantity—in other words, the quantity currently listed in Odoo.
Real Quantity: The field will auto-populate as the same quantity as the theoretical quantity. You can change this quantity to reflect the actual quantity you have on hand in the location.
Product Unit of Measure: This is the unit of measure this product is recorded in.
Location: This will display the location you have scanned the barcode for, or the Stock location if you have not scanned a barcode.
Pack: If desired, select a package this product should be a part of.
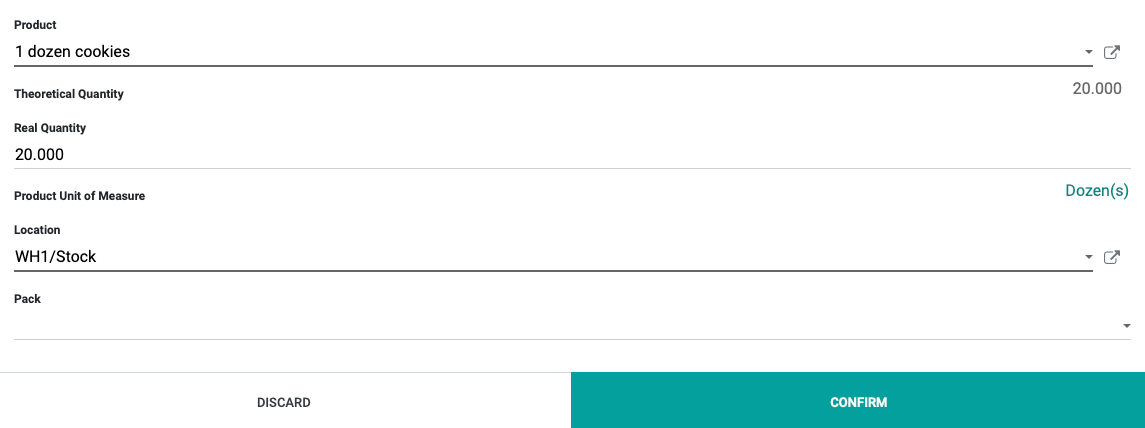
When ready, click confirm.
On the next page, you will see an overview of your Inventory Adjustment. If you need to make changes to the Inventory Adjustment, you can do so by clicking the icon at the right of the record.
You can add additional products by clicking Add Product. If you are satisfied with the Inventory Adjustment, click Validate.