Inventory : Operations: Replenishment
Purpose
This document covers how to use the Replenishment feature in the Inventory application of Odoo 16. This tool allows you to see all products with negative forecasted quantity at a glance and quickly replenish stock from your chosen vendors and routes.
Good to Know!
Replenishment Rule vs. Reordering Rule
These rules are very similar, with a few key differences.
A Reordering Rule uses the route set on the product and is triggered automatically when product on-hand reaches the Minimum Quantity on the rule.
A Replenishment Rule can use any route you choose and must be triggered manually through the Replenishment view.
Important!
Product Configuration
In order for Replenishment Rules to apply correctly, your products should be configured with the correct Routes, Vendors, and/or Bills of Materials, where they apply.
Process
To get started, navigate to the Inventory app.
Once there, go to Operations > Replenishment.
List View + Filters
Upon opening this page, you'll see there are two pre-applied filters.
To Reorder
When applied, this filter displays products with negative forecasted quantities. This accounts for the To Reorder filter.
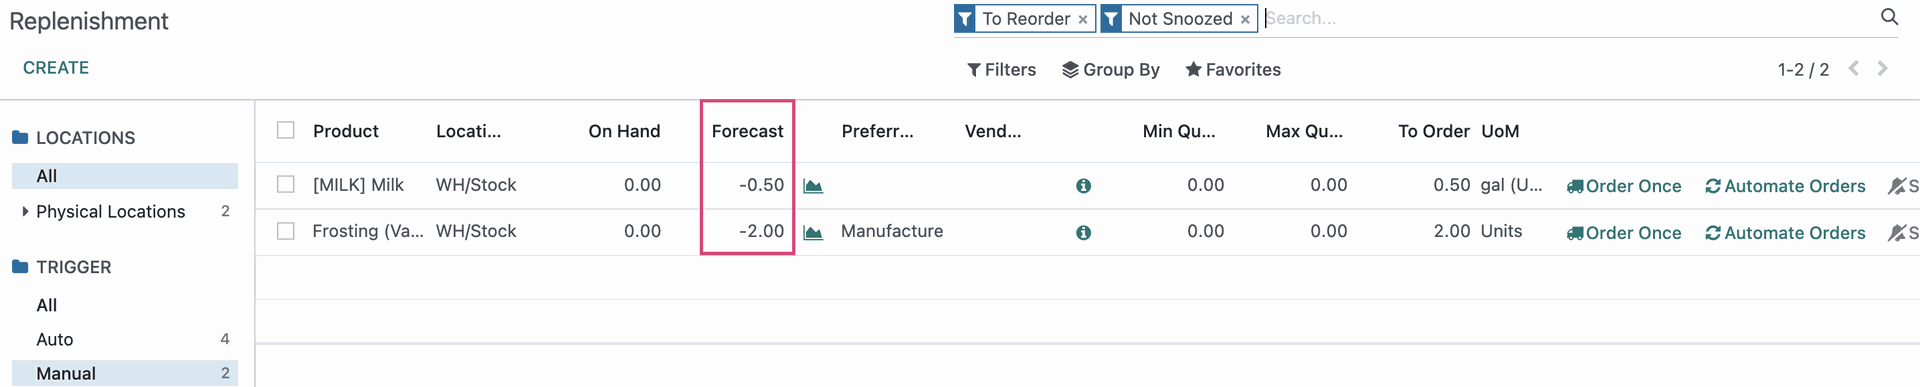
Not Snoozed
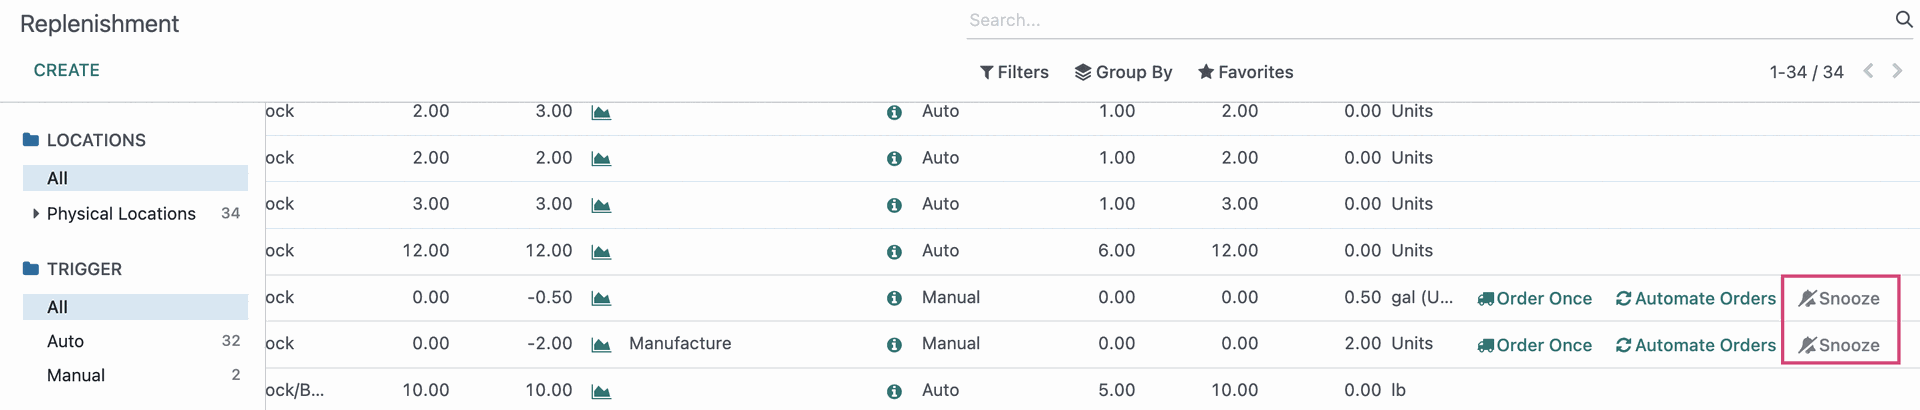
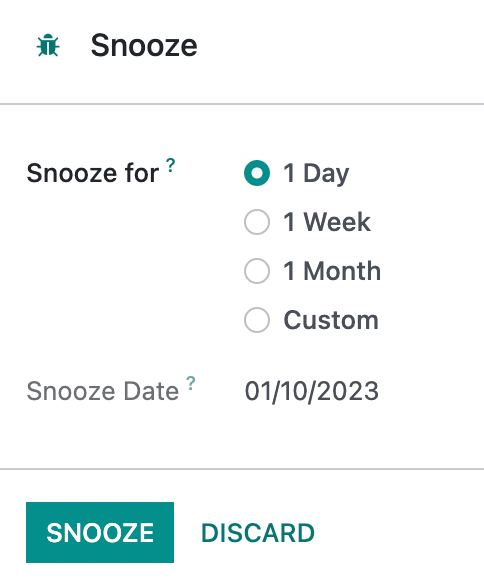
When you click Snooze on the far-right of a product, you're telling Odoo to omit this product from the Replenishment list for an amount of time determined by you.
To view all both Snoozed and Not Snoozed products in this list, simply remove the Not Snoozed filter in the search bar.

Good to Know
Un-Snooze?
To remove the Snooze condition on a rule, click the Snooze rule again, select "Custom", then choose a date in the past.
Trigger: Manual
There are two trigger types:
Manual: This rules must be manually triggered. This is the default trigger for rules created in this view.
Auto: These rules will be triggered when stock levels reach the Min Quantity to create a Purchase Order, Manufacturing Order, or Transfer, depending on the procurement route on the product. When a rule is set to use an Auto trigger, it inherently becomes a Reordering Rule.
To expose the Trigger column in this view, click the vertical ellipses on the top-right of the table, then enable Trigger.

Replenishing Product
To replenish a product, you can use an existing Replenishment Rule, or Create a new rule. Having multiple rules for one product is useful if that product can be procured in different ways.
Let's take a look at our Apples. Here we can see we have a negative forecast - this tells us we need to get more product in right away. Since there is no Reordering Rule in place, we know Odoo will not be procuring the product automatically and that we'll need to do it manually.
Finally, because we have 1 Bill of Materials and the Route is "Buy," we can deduce that this is a subcontracted product, but let's verify that!
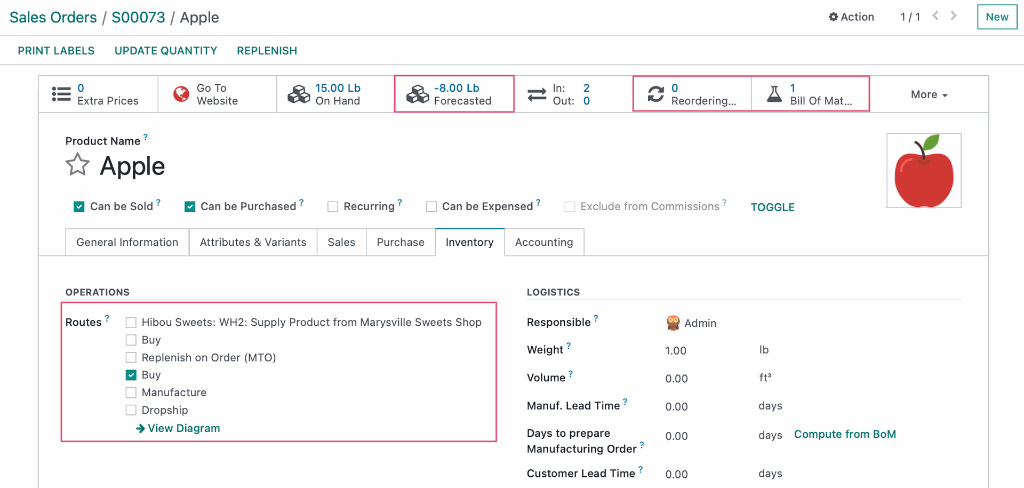
Under the Purchase tab, we see that we do, indeed, have a Subcontractor listed.

The combination of having a negative forecast and no reordering rule tells us this product will be on our Replenishment list. Go to Operations > Replenishment. You may have to remove the filter To Reorder to view the product you are looking for.

Good to Know!
Qty 0.00 Reording Rules
As soon as the Replenishment page is loaded, Odoo will create lines for products that meet the filter criteria. In doing this, that line is also represented on the product template as a Reordering Rule with 0.00 Quantities in the Min and Max fields. This Reordering Rule will not, however, actually run, as the replenishment rule that created it is still set to manual.

Our Subcontractor told us they can only produce 5 of the 10 we need before the deadline. This means we'll need to order the remaining 1 from a vendor. This is no problem - Replenishments makes it very simple.
First, we'll use the ellipses menu to expose the Vendor column.
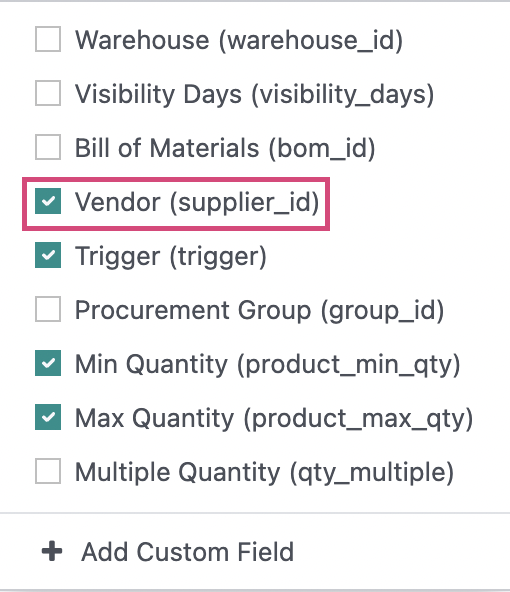
In this column, we'll need to select values for a few fields:
Preferred Route: Buy, because we're using a Subcontractor.
Vendor: Bakery Essentials, the Subcontractor to manufacture this product.
To Order: 5, the number the Subcontractor indicated they could create to meet the deadline.
Next, click Order Once.

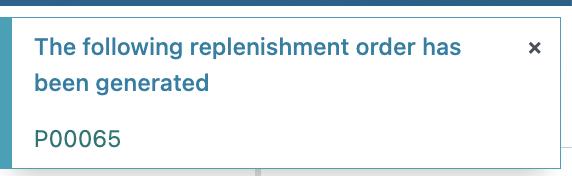
You'll see a notification on top-right corner of the screen that a Purchase Order has been created. Click the the ID shown to see that PO.
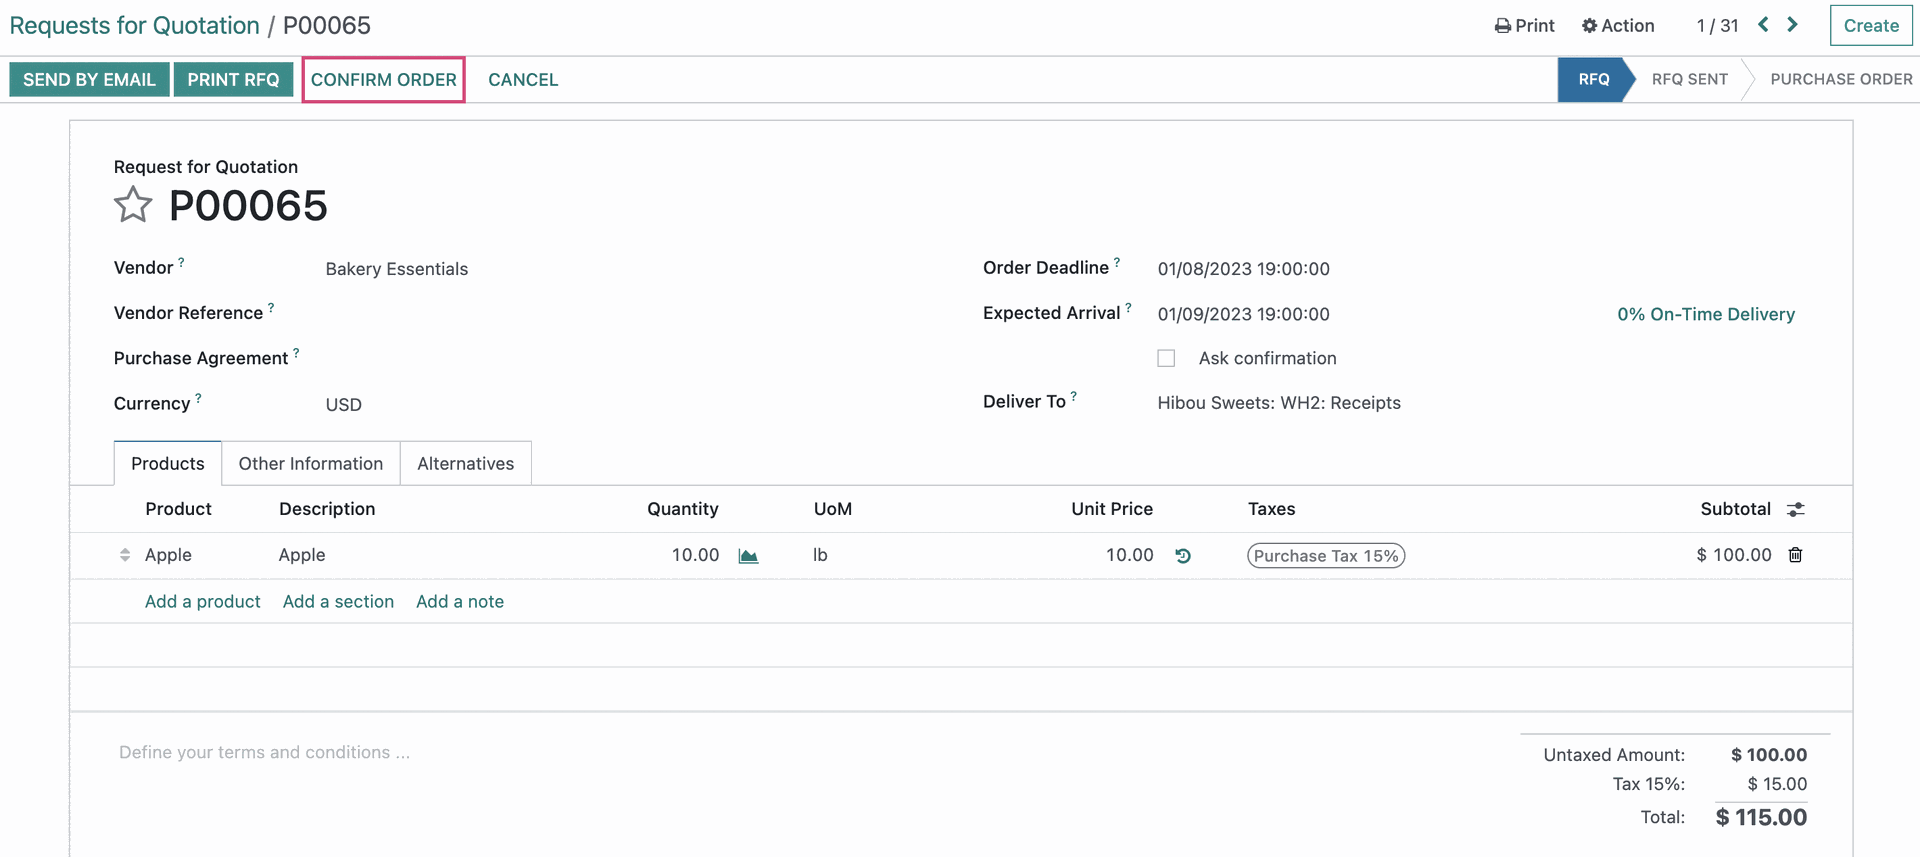
From the Purchase Order, click Confirm Order.
Navigate back to the Inventory app, then go to Operations > Replenishment. Now we see both rules for Chocolate Covered Strawberries: the empty rule, and the Subcontractor rule. Click the Vendor field on the empty rule and select a vendor to purchase the remaining product from. Notice the To Order field is pre-populated with the updated product demand.

To create a PO for the remaining quantity, click ORDER ONCE.

We'll then follow the same steps to confirm the PO created. If we revisit the Replenishments page, our Apple product will no longer be listed because there is no longer a negative forecast.

Good to Know!
Automate Replenishment
The Automate Orders button converts a Replenishment Rule into a Reordering Rule by transferring the field values and setting the Trigger to Auto. This will also immediatly create a Purchase or Manufacturing order, depending on the route.

Note that if you leave the quantities at 0.00 and click this button, the product will be replenished each time the Quantity On Hand dips below 0.00.