Inventory : Inventory Workflows: Consignment
Purpose
This document covers the workflow of setting up a Consignment Location within your warehouse, assigning an owner for Consignment goods, and how to view the information for these goods in Odoo v14.
Getting Started
Once there, go to Configuration > Settings. Scroll down to Traceability and enable Consignment. Click Save when ready.

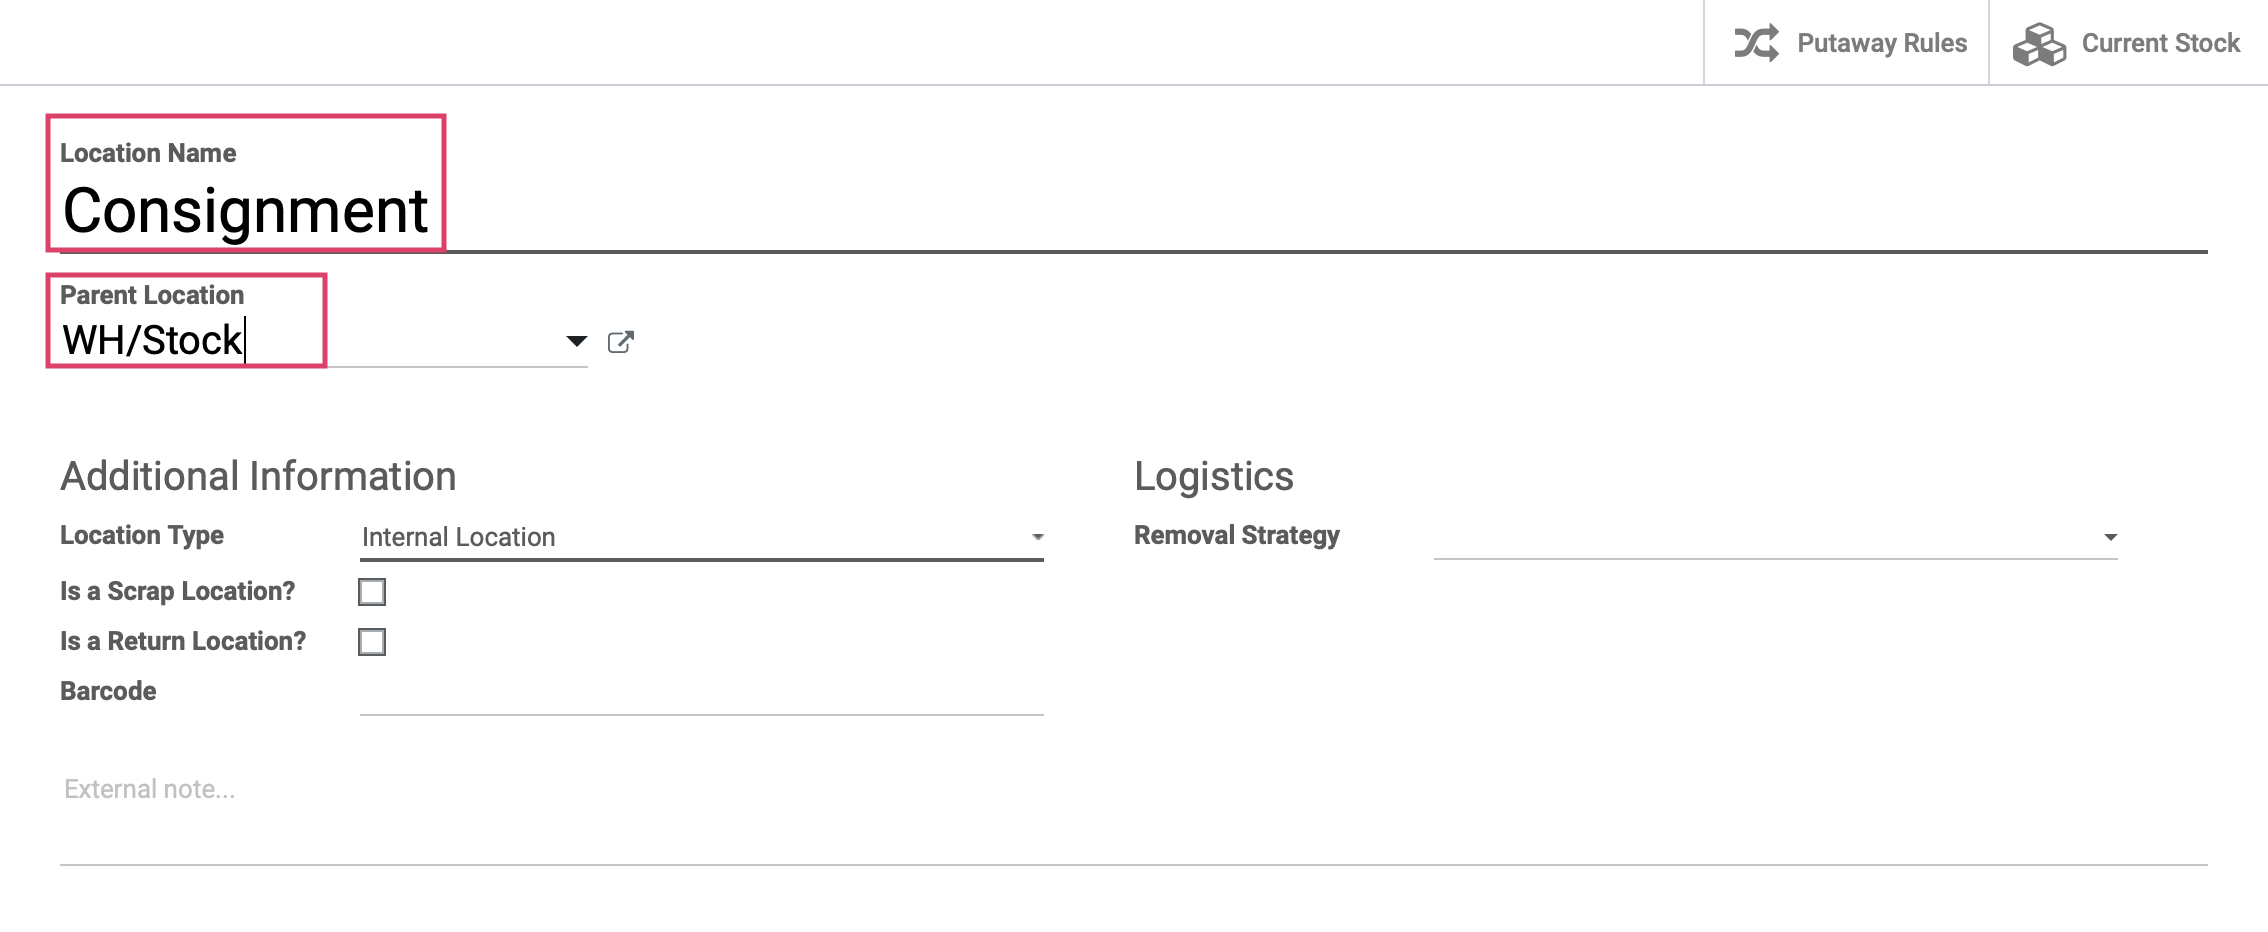
Next, go to Configuration > Locations. We will name our location "Consignment", and list the Parent Warehouse as WH/Stock. When ready, click Save.
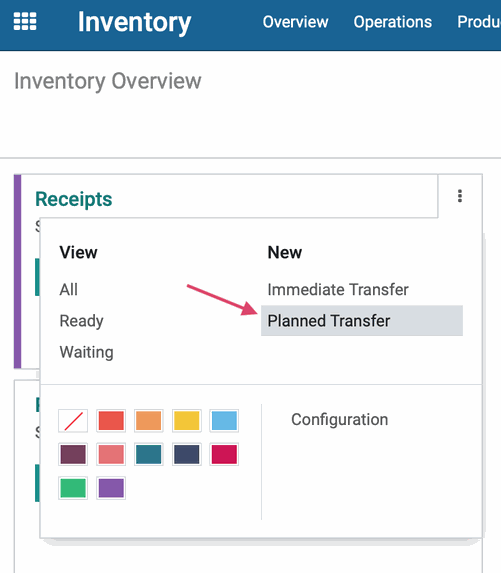
Next, we will go to Overview, then click the vertical ellipsis icon on Receipts for any location, create a Planned Transfer, and see how this works!
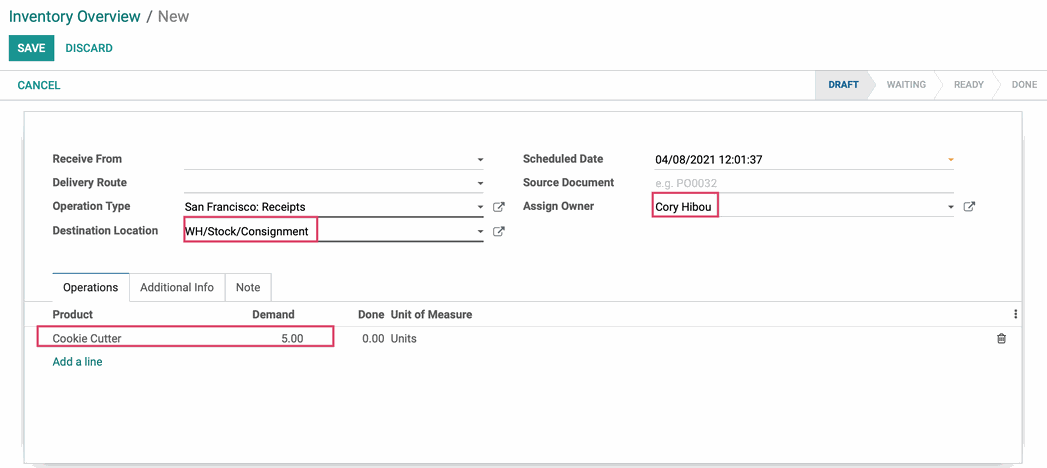
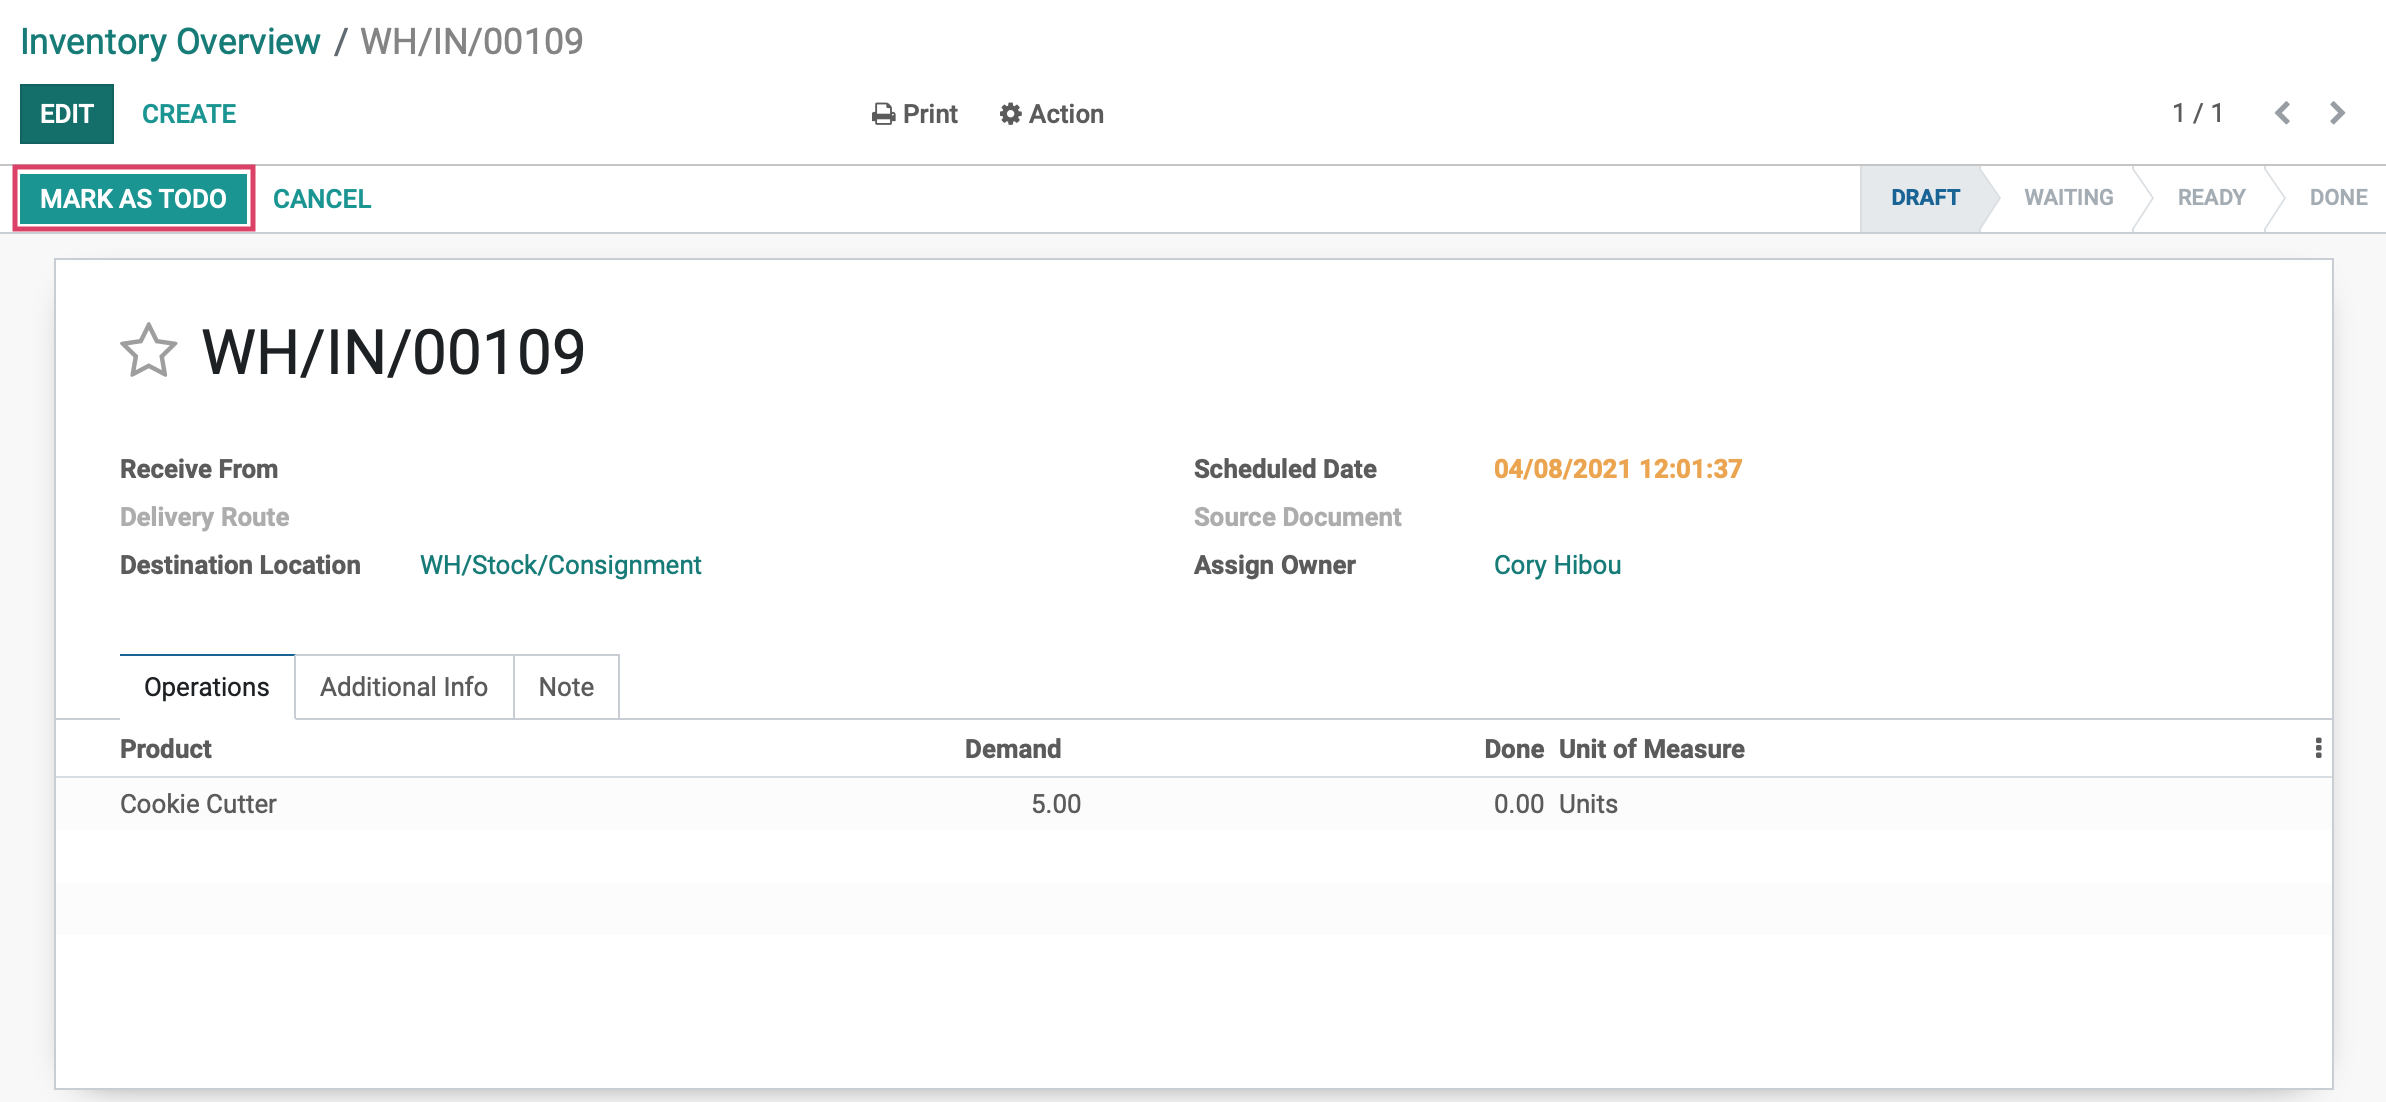
Here, we will set our Destination Location as the Consignment area we created. We will also Assign Owner, which tells us who the product belongs to, and lastly, we will add a product. Here we have 5 Cookie Cutters being sent to us on consignment. Click Save once finished.
We will then click Mark As To Do.
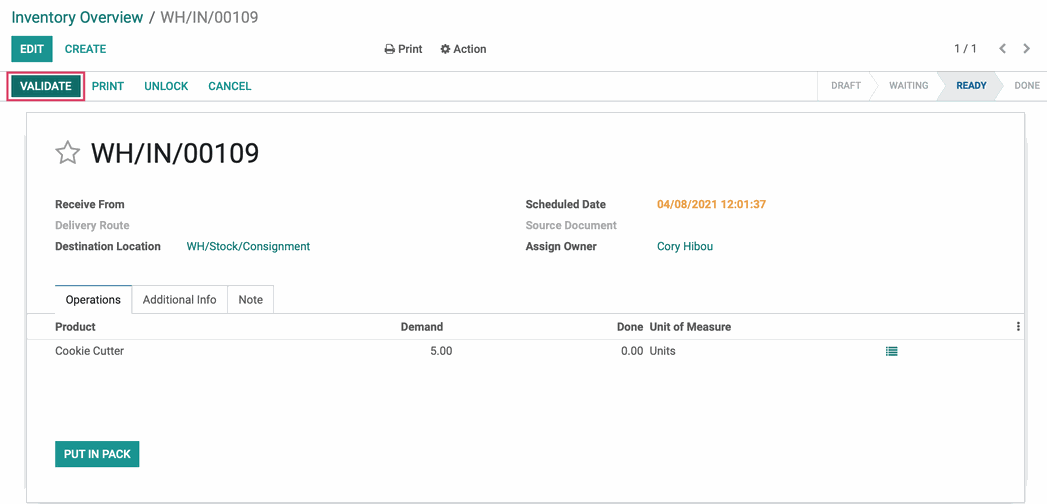
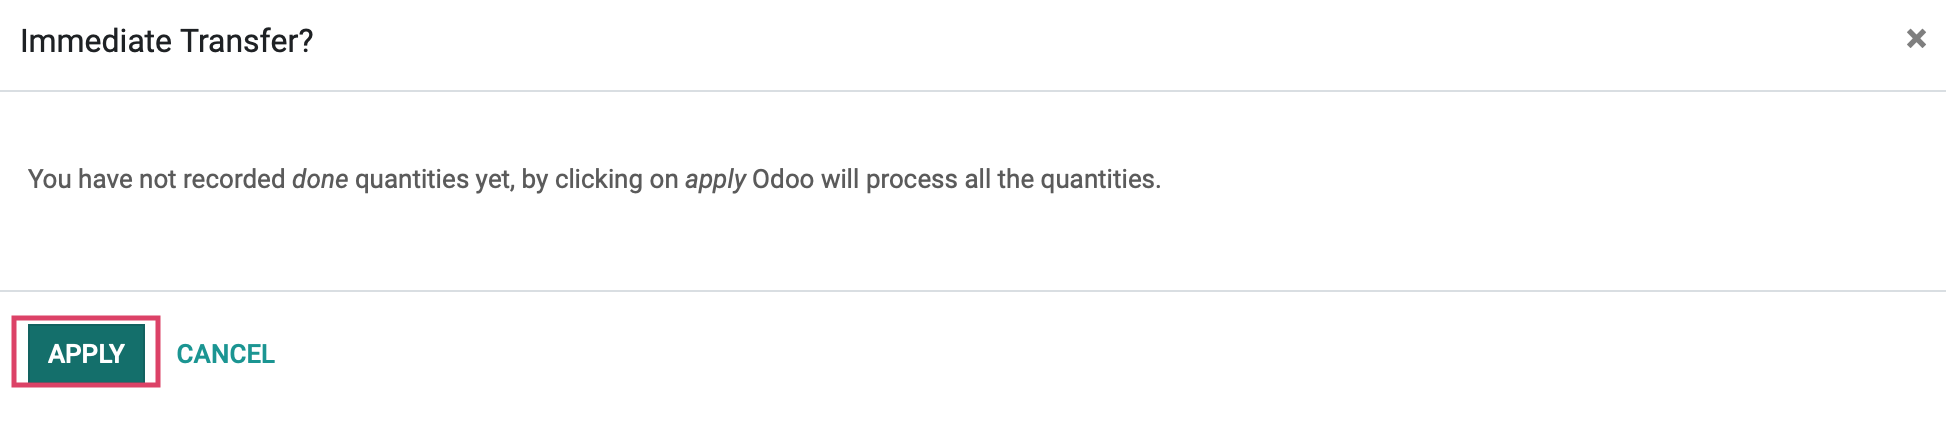
Then click Validate.
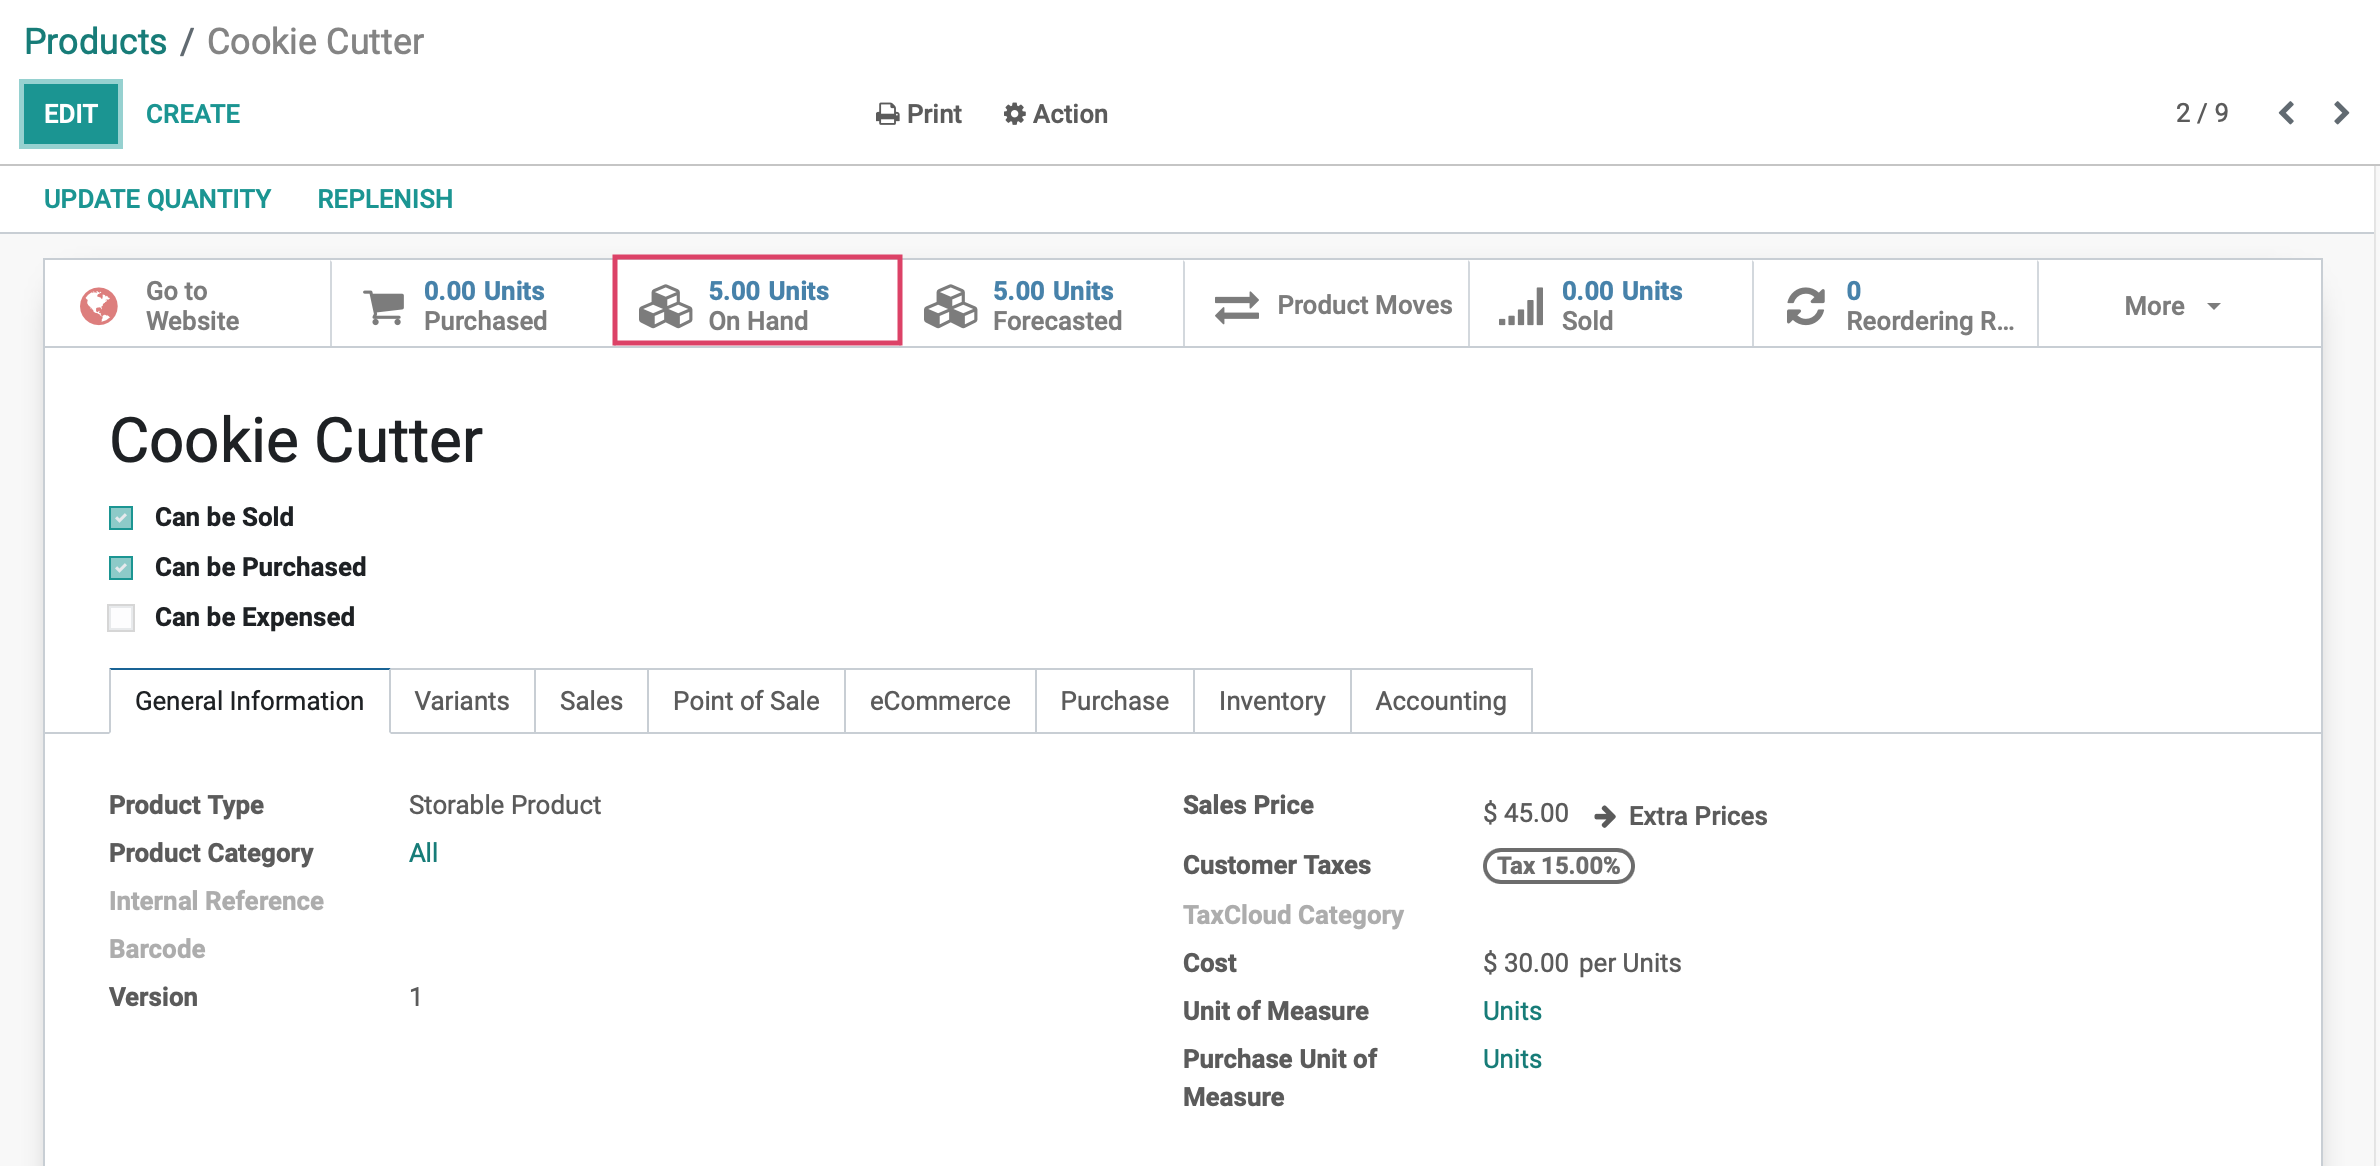
This will bring us to a Product Overview showing us the Consignment Warehouse Location we created for Consignment goods, who Owns the product, how many we have On Hand, and the Value of the product, which is $0 as it still belongs to the vendor or owner and will not be added to our own inventory valuation numbers..
