Inventory : Lead Times Overview
Purpose
In this document, we'll explain where Security Lead Times are applied and where to configure them in Odoo 13. We'll also explain what Lead Times are, where to configure them, and what they look like in a workflow.
Process
Security Lead Times
Security Lead Times are used to add extra days to the anticipated delivery, receipt, or manufacturing time. They serve as a buffer in case of delays or disruptions and preclude customer dissatisfaction.
Security Lead Times apply a constant value to each overall process, not to individual products or vendors.
There are three types of Security Lead Times:
Security Lead Time for Sales: Automatically schedules deliveries earlier by a number of days determined by you.
Security Lead Time for Purchases: Automatically schedules receipts earlier by a number of days determined by you.
Security Lead Time for Manufacturing: Automatically schedules manufacturing orders earlier a number of days determined by you.
To configure Security Lead Times times, navigate to the Settings application.
Once there, type “Lead Time” into the search bar at the top to filter all opportunities to configure lead times. You will only see Lead Times for applications you have installed.
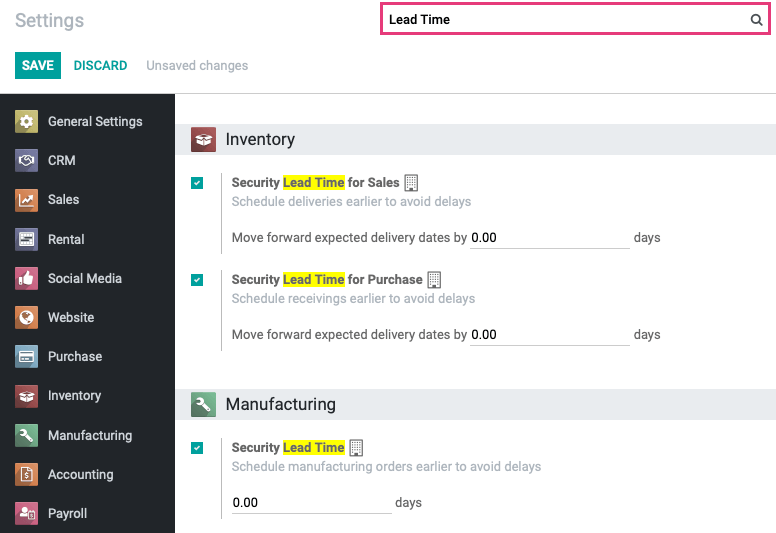
Enable and configure each Security Lead Time to suit your company's needs, then click Save.
Once enabled, these will be added to their respective Lead Times and work as a buffer to ensure you don't miss your deadlines.
Customer Lead Time
This is the average or estimated number of days between the date a Sale Order is confirmed and the date the product is delivered to the customer. This is set on the product template's Inventory tab.
To configure Customer Lead Time, navigate to the Inventory application.
Once there, go to Master Data > Products and select a product to modify.
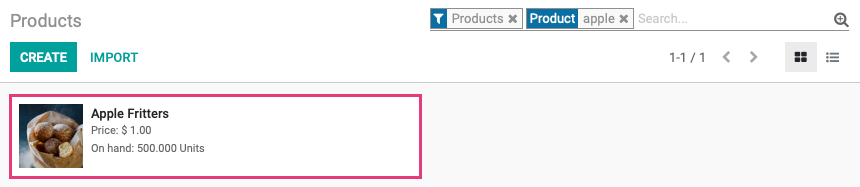
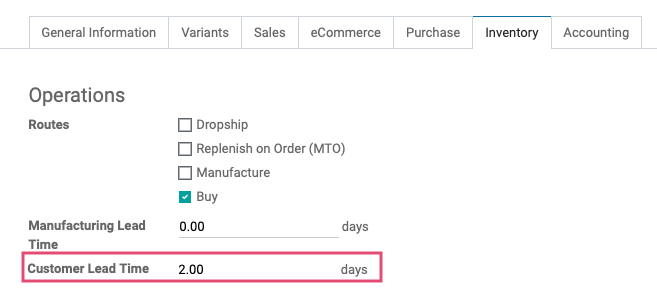
From within the product template, click Edit then go to the Inventory tab.
Under Operations, input a value for Customer Lead Time and then click Save.
Watch it Work
This number is then used to calculate dates on a Sale Order. To test this, navigate to the Sales application.

Once there, click Orders > Orders, then click Create to make a new Sale Order.
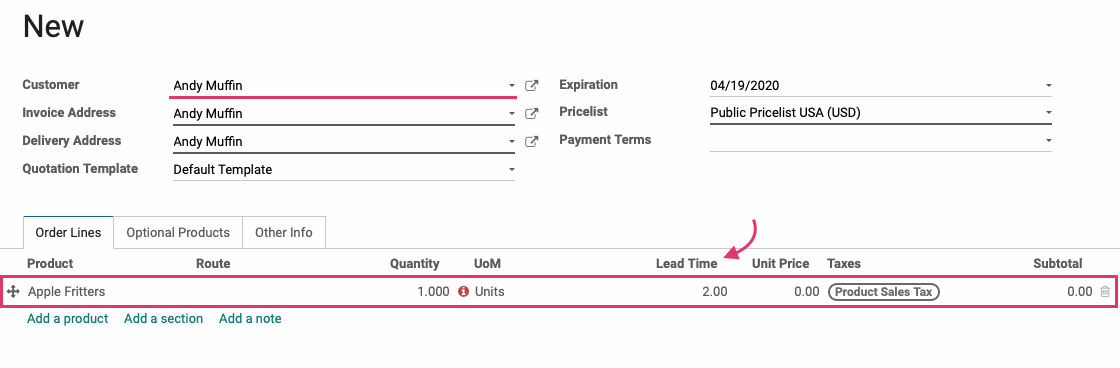
Select a Customer from the dropdown, then move down to the Order Lines tab. From there, click Add a Product and add the product you've added a Customer Lead Time to.
Note: If you have the Lead Time column enabled, you should immediately see it reflect the Customer Lead Time for that product. To display this column, click the menu icon to the right of the column headers and enable it.
Good to Know!
You can manually adjust the lead times directly from the Sale Order before the order is confirmed. Simply click into the Lead Time field and enter the number of days required.

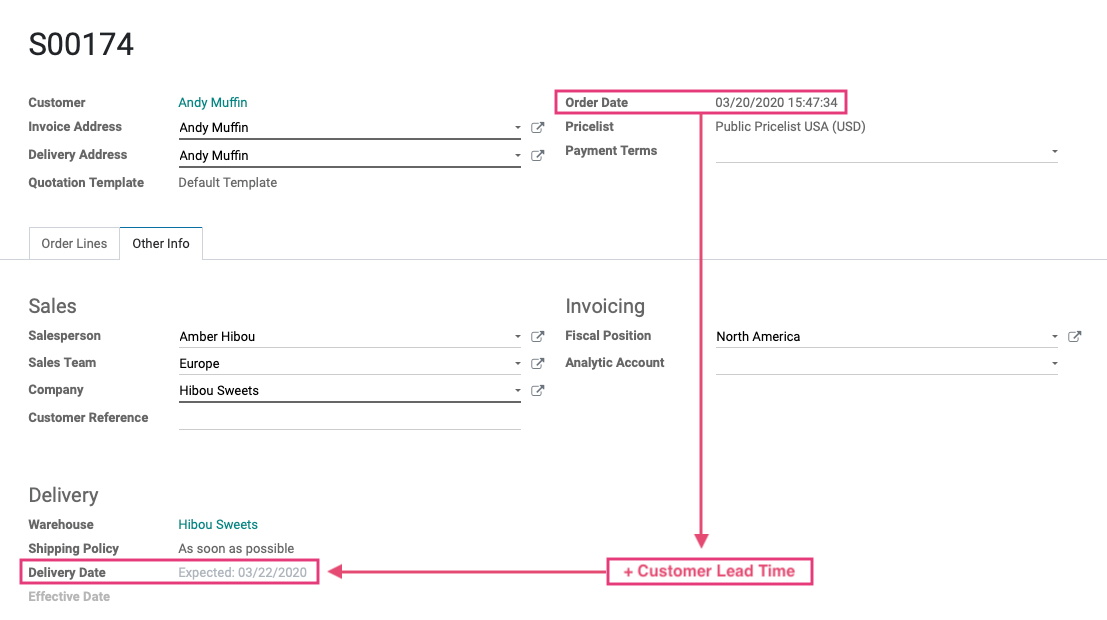
Click Confirm. Next, click the Other Info tab and you'll notice that the Customer Lead Time has been added to the Confirmed Order Date to calculate the Expected Delivery Date.
Delivery Lead Time
This is the average or estimated number of days required for a vendor to deliver products. This is set on the Vendor pricelist for a product.

To configure Delivery Lead Time, navigate to the Inventory application.
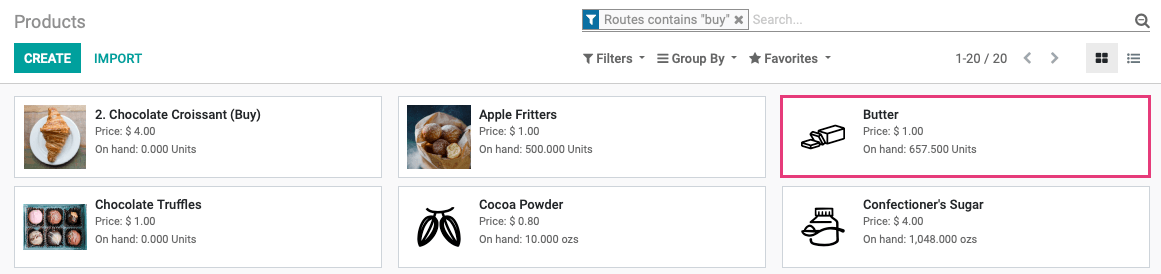
Once there, go to Master Data > Products and select a product to modify. This should be a product that is purchased, not manufactured by you.
From within the product template, click Edit then go to the purchase tab and click a vendor name from the list to open a new modal window.

In the Delivery Lead Time field, enter the number of days, on average, it takes for this vendor to deliver to you. When you're done, click Save.
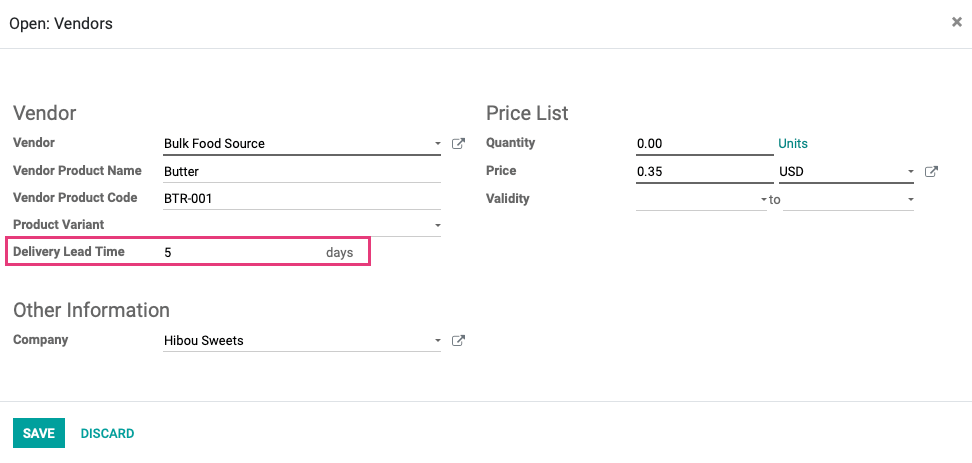
From the product template, click Save again.
Watch it Work
This number is then used to calculate dates on a Purchase Order. To test this, navigate to the Purchase application.
Once there, click Orders > purchase orders, then click Create to make a new Purchase Order.
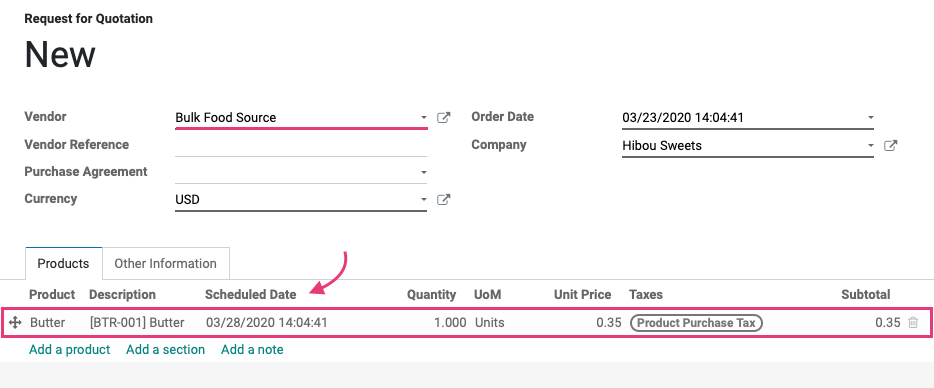
Select the Vendor you just edited from the dropdown, then move down to the products tab. From there, click Add a Product and add the product you just edited added the Delivery Lead Time to.
Note: If you have the Scheduled Date column enabled, you should immediately see it reflect the order date + Delivery Lead Time for that vendor. To display this column, click the menu icon to the right of the column headers and enable the Scheduled Date column.
Click Confirm order. Next, click Receipt smart button.
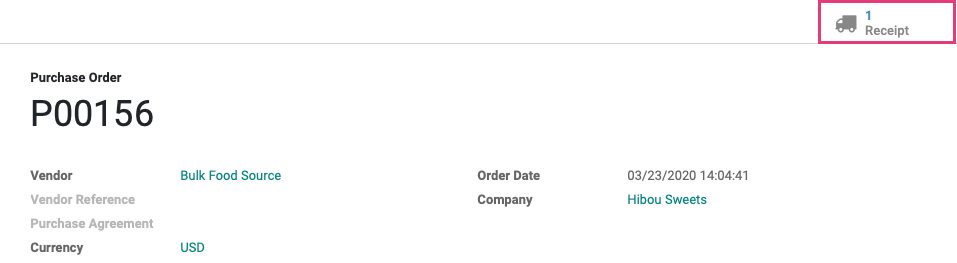
Here you'll notice that the Scheduled Date for delivery has been adjusted according to the Delivery Lead Time that we configured.
![]()
Manufacturing Lead Time
This is the average or estimated number of days required to manufacture a product. This is set on the product template's Inventory tab.
To configure Manufacturing Lead Time, navigate to the Manufacturing application.

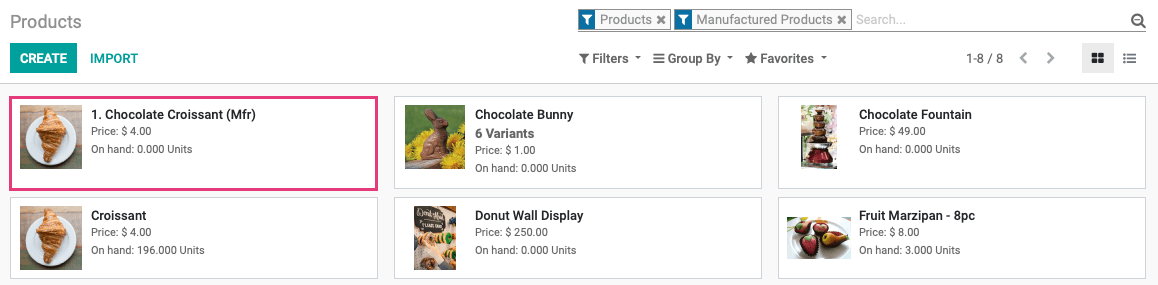
Once there, go to Master Data > Products and select a product to modify. This should be a product that is manufactured by you.
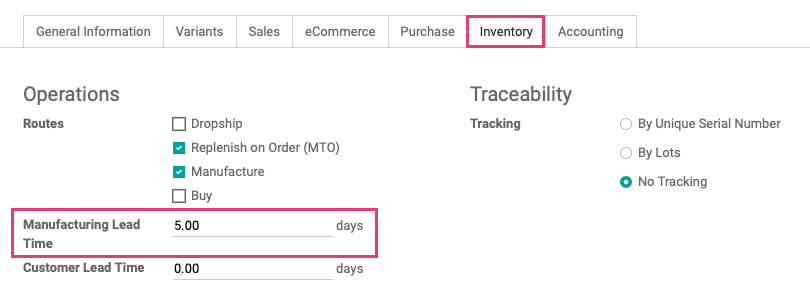
From within the product template, click Edit, then move to the inventory tab.
In the Manufacturing Lead Time field, enter the number of days, on average, required to manufacture the product. When you're done, click Save.
Watch it Work
This number is then used to calculate dates on a Sale Order. To test this, navigate to the Sales application.
Once there, click Orders > Orders, then click Create to make a new Sale Order.
Select a Customer, then move down to the Order Lines tab. From there, click Add a Product and add the product you just added the Manufacturing Lead Time to.

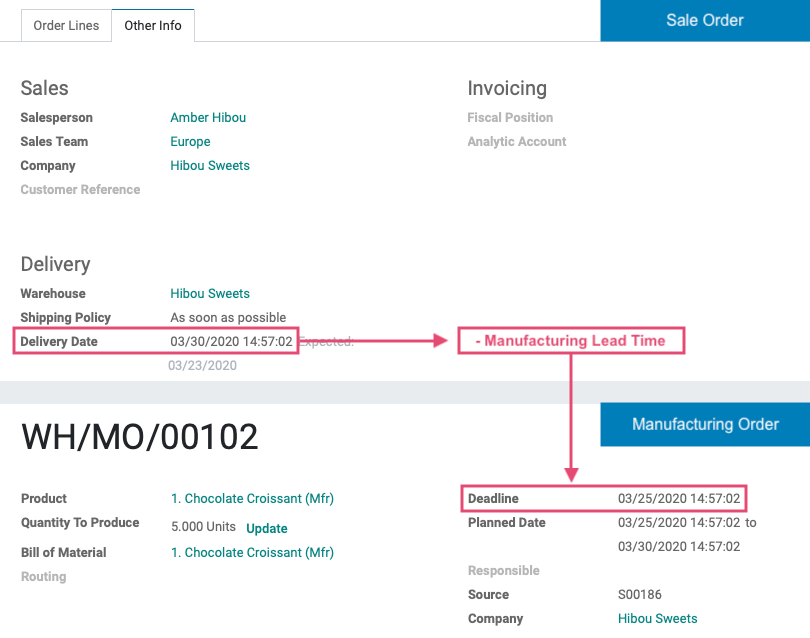
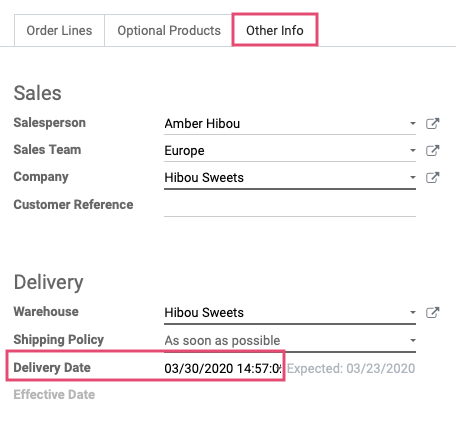
On the Other Info tab, we'll set the desired Delivery Date for one week from the order date.
Important!
Check Your Dates
Lead Times are used as a guideline and could possibly push your manufacturing deadline and scheduled date into the past.
When you've entered a date that will allow enough time for manufacturing the product, click Confirm.
Next, navigate to the Manufacturing application.
Once there, click Operations > Manufacturing Orders and select your newly generated MO from the list.

The following shows the Sale Order next to the Manufacturing Order. You can see that by subtracting the Manufacturing Lead time from the Delivery Date, Odoo has calculated the deadline by which production must begin for this product.