Accounting: Customers + Vendors: Customers: Customer Invoices
Purpose
The purpose of this document is to review the different ways of creating Invoices and how to register payment to them. We will also be reviewing how to apply a single payment across several invoices.
Process
To get started, navigate to the Accounting app.
Invoices Overview
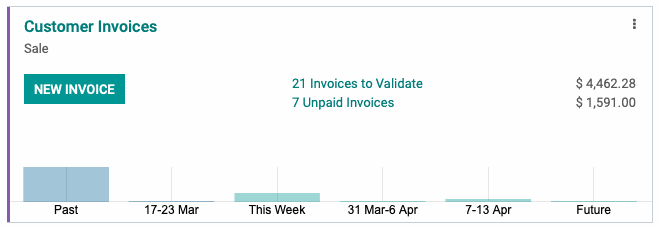
From the Accounting Overview, you will see a kanban view of your journals. As we can see below, the Customer Invoices journal will display the number of Invoices that need to be validated, the number of unpaid invoices, as well as the total dollar amount of each group of invoices.
You also have the option to create a new invoice from scratch by selecting the New Invoice button.
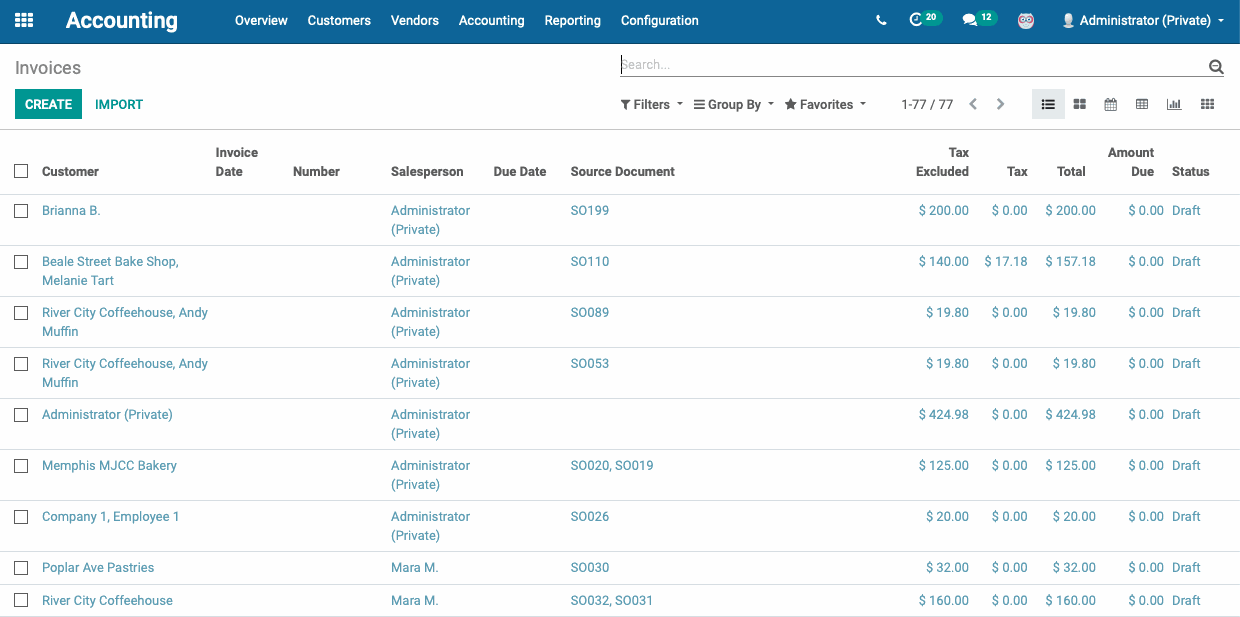
Alternatively, you can get to a complete list of your customer Invoices by navigating to CUSTOMERS > INVOICES.
Invoice Status
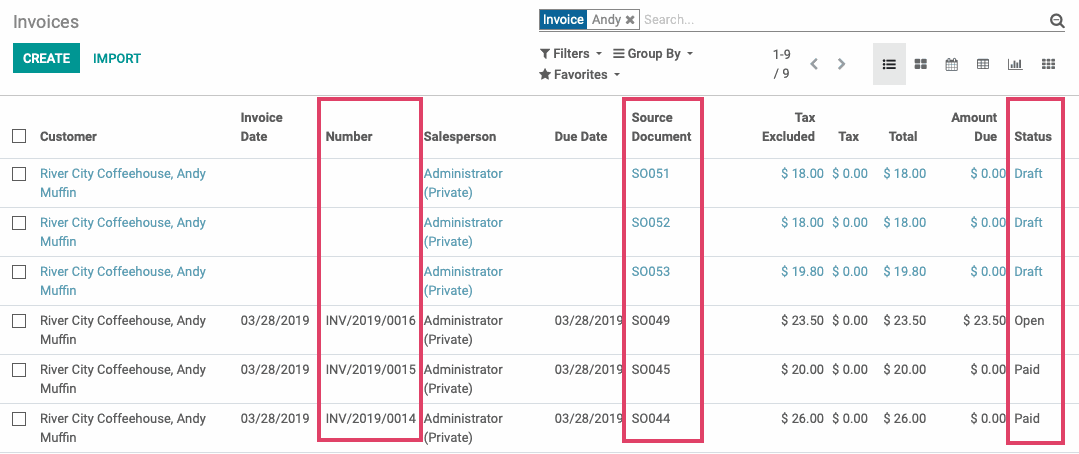
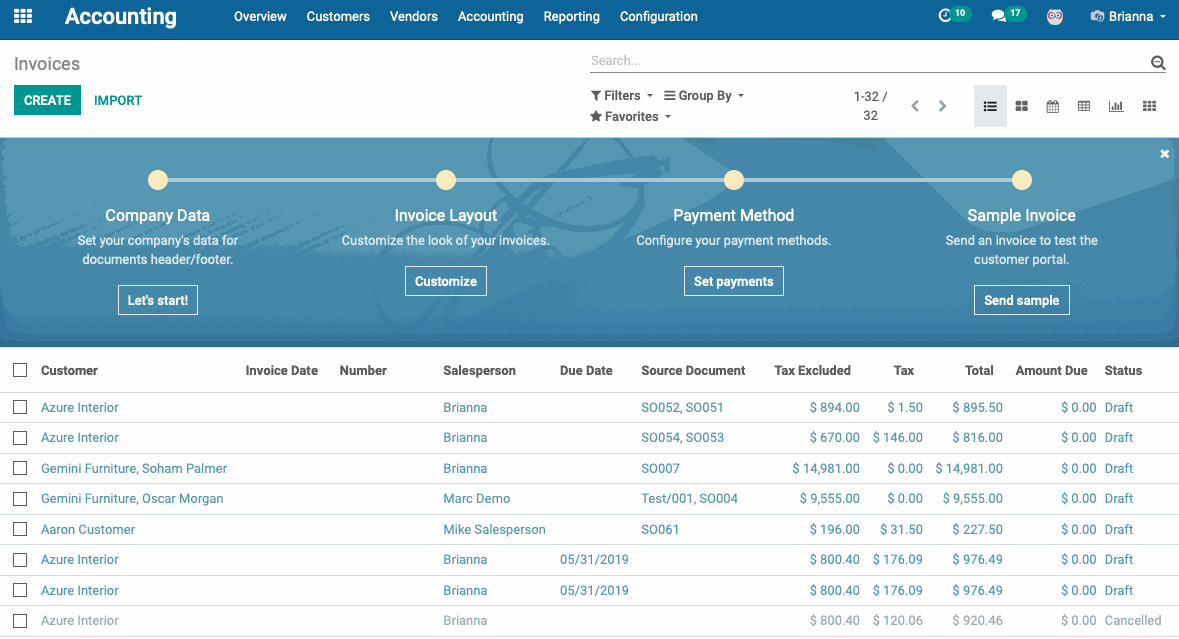
From the main Invoices page, you will see all of the Invoices that have been created in your database. At a glance you can see various pieces of information about each Invoice like the Invoice Number, the Source Document (Sale Order) it was created from, and the Status.
Invoice statuses determine how they appear on this page and how you're able to interact with them:
Draft: If an Invoice is in a Draft status, it will appear in light blue. All fields on a draft Invoice can be modified. This allows you to configure the Invoice as needed, until it is ready to be validated.
Open: Once an Invoice is validated, it will appear in black and move to the Open state. Open Invoices cannot be modified unless cancelled and reset to a Draft status. They are considered fully verified and correct.
Paid: When the Invoice has been paid, it will move to the Paid status.
If you have customers that order frequently and would prefer to have their Sale Orders invoiced in batches (as shown below), you can do this easily within Odoo. We will cover these steps in the next section.

Creating Invoices from Sale Orders
To get started, navigate to the Sales app.

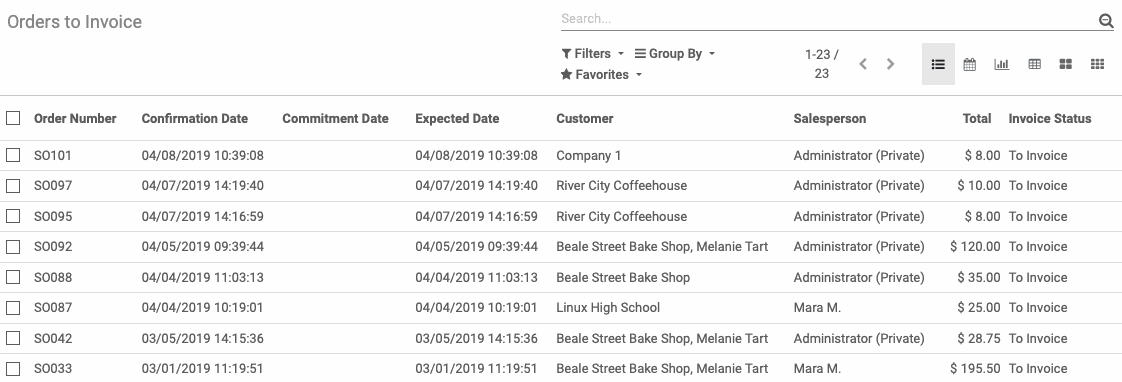
Once there, navigate to To Invoice > Orders to Invoice. From this screen, you will see all Sale Orders that have at least one line that can be invoiced.
When a specific line on a Sale Order can be invoiced depends on the Invoicing Policy set on the product (you can choose to invoice based on delivered quantities or ordered quantities).
Select the Sale Order that you would like to generate an Invoice for.
Good to Know!
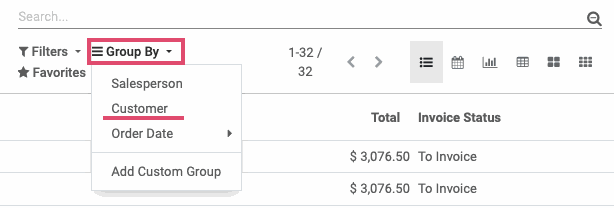
You can invoice multiple Sale Orders at once as long as they are all for the same Customer. Use your Group By options under the search bar and Group By > Customer.
You will now see all Sale Orders organized by Customer and the number of orders each customer has available to Invoice. Select the Customer that you want to create an Invoice for and then choose the Sale Orders that you want included on the Invoice.
If you want to include all Sale Orders for the customer that you have open, select the checkbox at the top of the column next to Order Number.
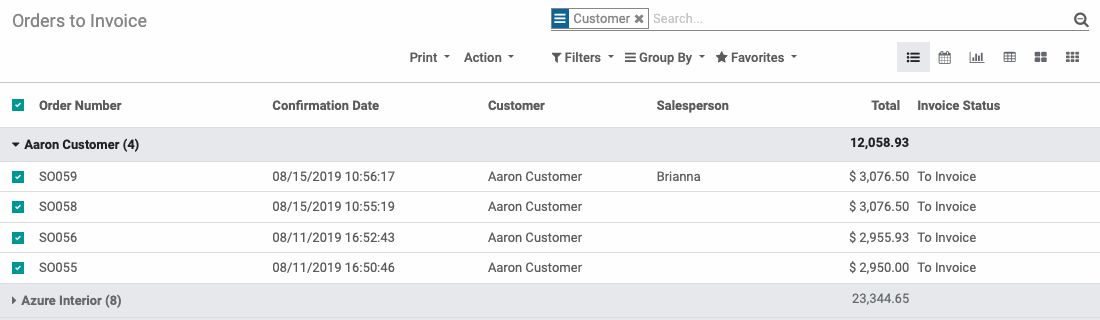
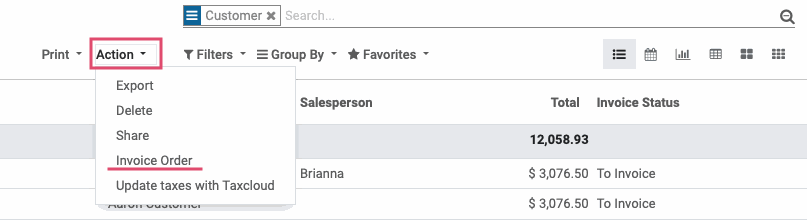
From the Action dropdown select Invoice Order.
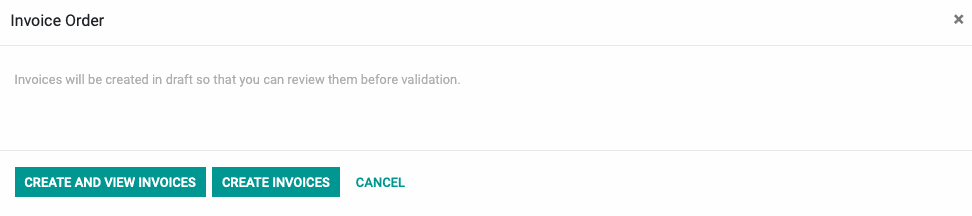
On the Invoice creation modal, you can choose whether you want to Create and View Invoices or Create Invoices.
CREATE AND VIEW INVOICES will create the Invoice and open the Invoice on your screen so that you review the Invoice details before validation.
CREATE INVOICES will create the Invoice, but you will stay on the Orders to Invoice screen. Select this option if you want to quickly create Invoices for multiple customers.
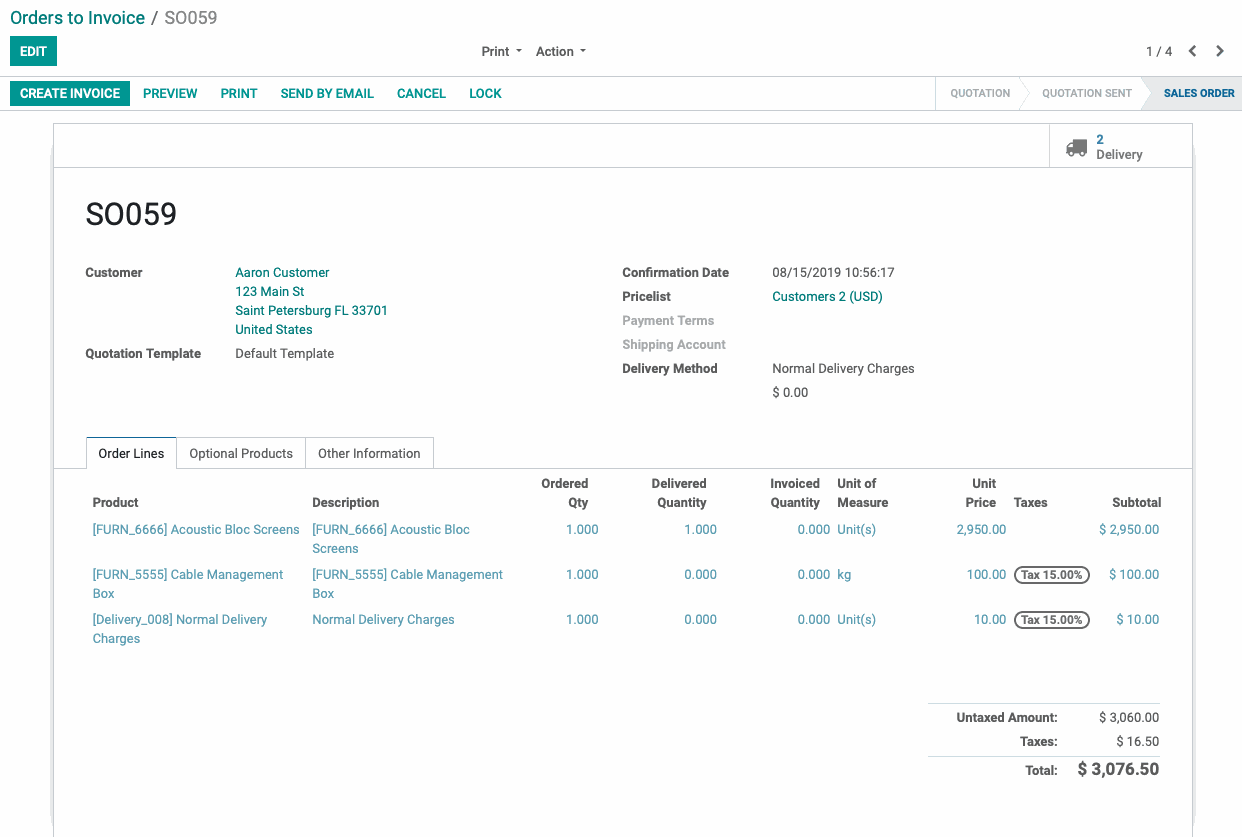
From the Sale Order, you can review the lines to see which are available to be invoiced. If a line is light blue, it will be included in the Invoice that you are about to create.
When you're ready to create your Invoice, select the CREATE INVOICE button.
You will see the Invoice Creation Modal appear that will provide you with various options as to the kind of Invoice you want to create.
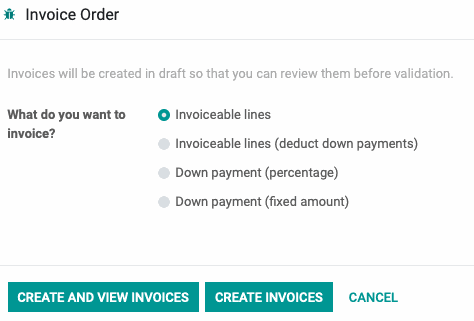
Invoiceable Lines: This will include all lines that appeared light blue on the Sale Order.
Invoiceable lines (deduct down payments): If you have previously collected funds from the customer as a down payment, you can create an Invoice that will deduct the down payment amount from the total due.
Down Payment (percentage): Select this option if you want to charge the customer a percentage of the total order as a down payment. The remaining balance will be invoiced at a later date.
Down Payment (fixed amount): Select this option if you want to charge the customer a flat amount as a down payment. The remaining balance will be invoiced at a later date.
Select your preferred option and click CREATE AND VIEW INVOICES to immediately review the Invoice. CREATE INVOICES will create the Invoice and you will stay on the Sale Order.
Once your Invoice is created, you will see it listed on the Invoices Smart Button on the Sale Order.
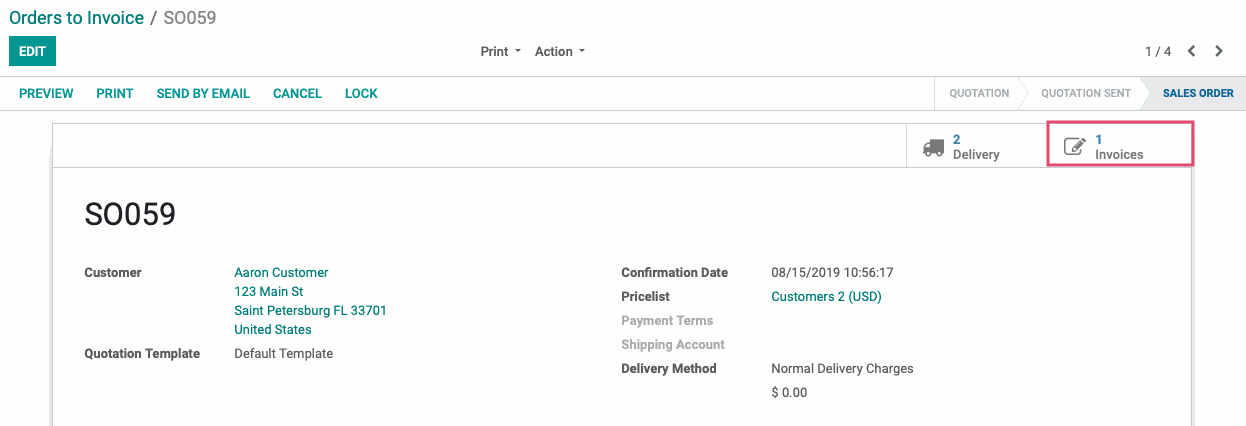
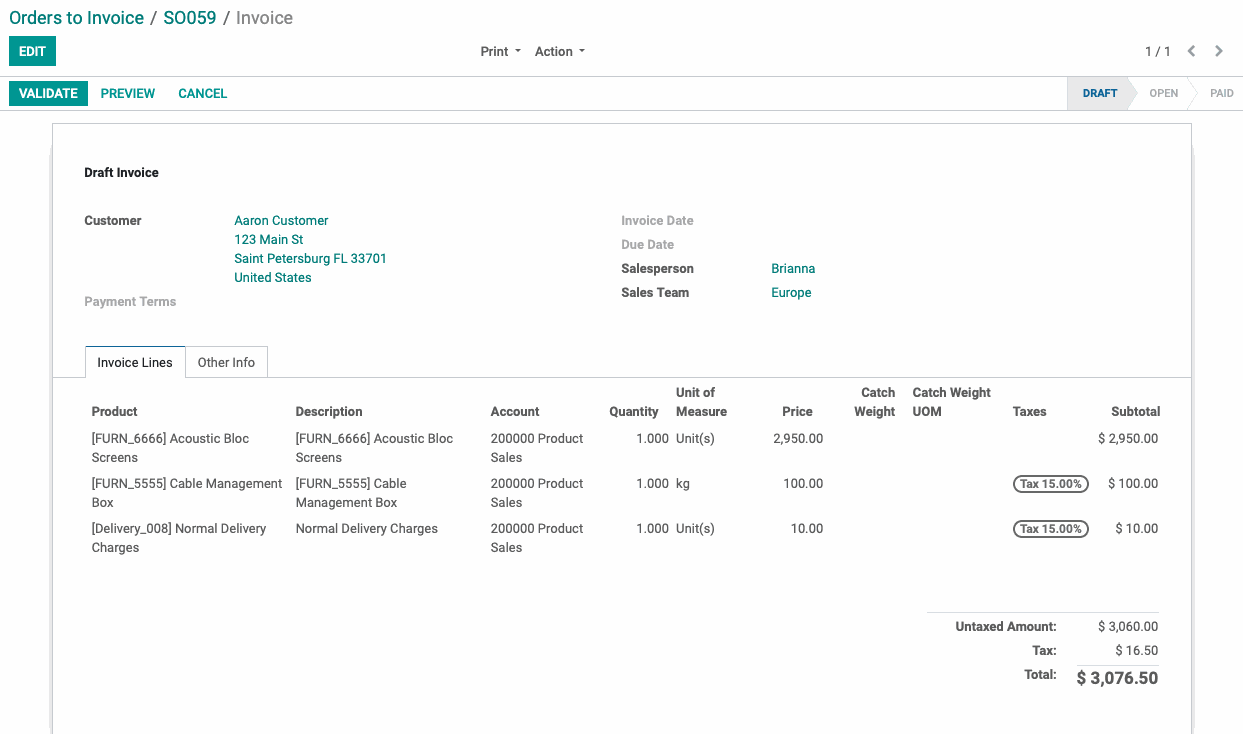
Once created, your Invoice will be in a draft state and must be VALIDATED.
While the Invoice is in Draft, you should take the time to edit it and make sure it's correct before Validating it.
Good to Know!
If you would like to see how the Invoice will look to customers who view it on the online portal, you can use the Preview button to do just that.
Here is a sample of the Invoice template in the customer web portal. Templates are highly customizable using the template editor found in CONFIGURATION > SETTINGS within the Sales application.

When you're ready, hit the Validate button.
Once validated, you can now send the Invoice to your customer.
You can do so by using the Send & Print button. When selected, you will be presented with a Modal that will allow you to choose if you want to Print, Send by Post, or Email the PDF to the customer.
You can choose which options you want to be selected by default in your Accounting app's Configuration > Settings. On this database, we have it configured to select Print and Email by default.
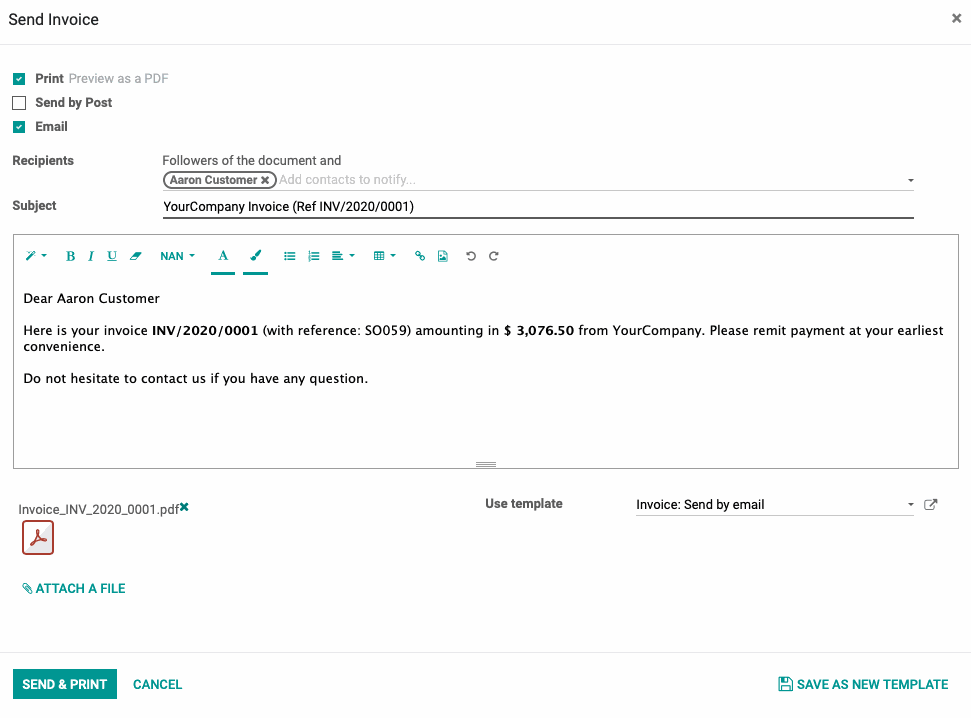
When you're ready to send the Invoice, hit the Send & Print button on the modal.
Creating Invoices Manually
To get started, navigate to the Accounting application.
Once there, go to Customer > Invoices.
From this screen, you will see all previously created Invoices. To make a new Invoice, hit the Create button.
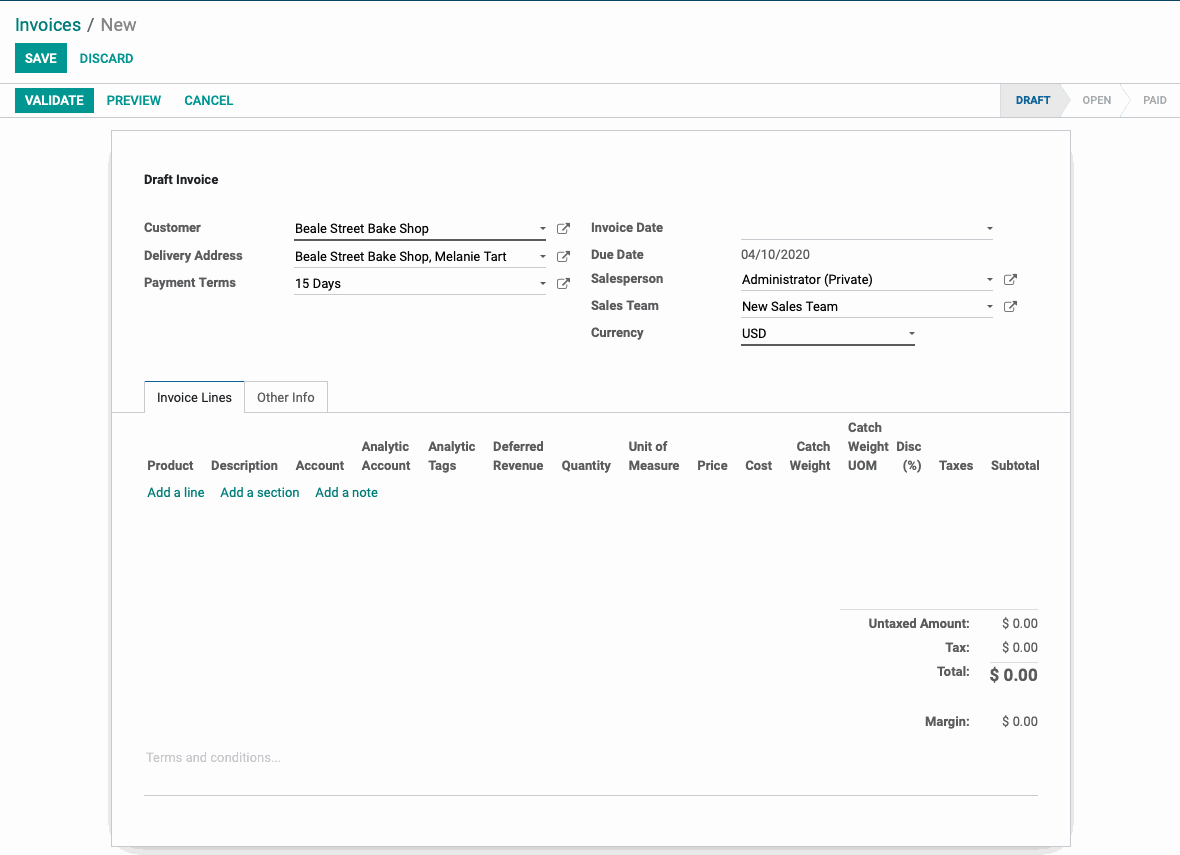
On the next page, you will be presented with a blank Invoice that will need to be filled in. You will see the following fields:
Customer: Select the customer that you want to Invoice.
Delivery Address: If the selected customer has a Delivery Address configured on their contact, it will show up here automatically. Optionally, you can select a Delivery Address for this customer.
Payment Terms: If the selected Customer has payment terms set on their contact, they will automatically appear here. Optionally, you can set the payment terms you would like to apply to this Invoice.
Invoice Date: Once the Draft Invoice is validated, the Invoice Date will automatically fill in with the date it was validated.
Due Date: The Due Date will be automatically computed using the Invoice Date and the Payment Terms that were selected. If no payment terms were selected, this field will allow you to set any date you would like either in the future or in the past.
Salesperson: If the customer has a Salesperson assigned to their contact, this field will be automatically filled in. Optionally, you can select a salesperson to be associated with this Invoice or modify the salesperson that was automatically assigned.
Sales Team: If the salesperson that was selected is assigned to a Sales Team, this field will be automatically filled in. Optionally, you can select a Sales Team to be associated with this Invoice or modify the Sales Team that was automatically assigned.
Currency: Select the currency that you would like this Invoice to be represented in.
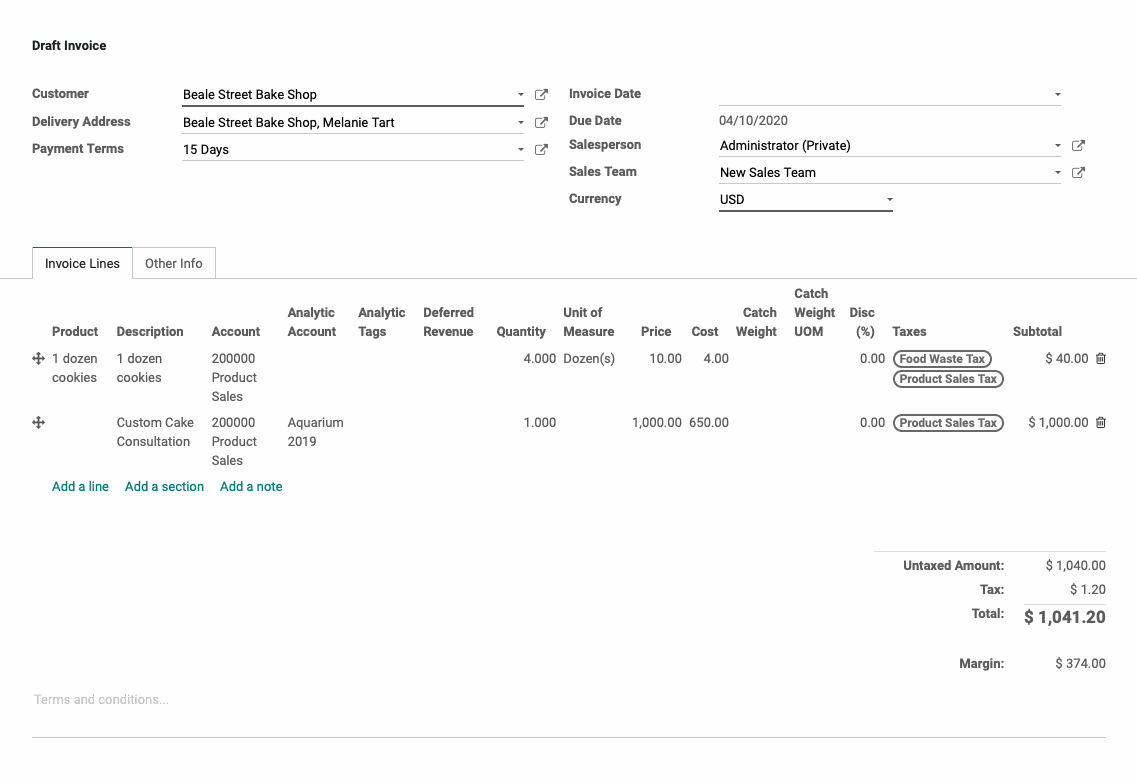
Once you have the customer information filled in on the Invoice, you can now add the product lines that you want to charge the customer for.
Select the Add a line button under the Product column.
You can either select a pre-configured product on the Invoice line or you can bypass product selection and simply enter a description for the line that you are charging the customer for.
If you enter in a description, you will need to manually enter in the accounting information, quantity, price, cost, and other information for the line as needed.
If you select a pre-configured product for the line, these fields will be filled in automatically, but you can always modify them as needed.
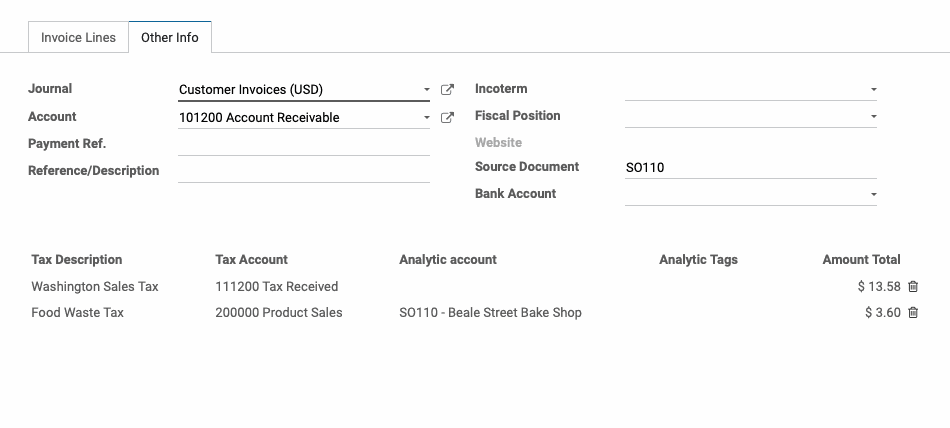
Once you have all of your product lines added and your total is correct, we can configure the options on the Other Info tab:
Journal: The Journal where the entries for this Invoice will be recorded.
Account: The receivable account set on the Customer that this Invoice is for.
Payment Ref: This field will auto-populate a reference that you can provide to your customer so that if they make their payment outside of the online portal, they can reference what the payment is for.
Reference/Description: If the Invoice is not created directly from a sales order, this is where the description of the transaction should be placed.
Incoterm: Pre-defined commercial terms used in international transactions. Not applicable for most Invoices. If you have questions about Incoterms and how to use them for your business, please contact the Hibou team.
Fiscal Position: If a Fiscal Position is set on the Customer record, it will populate here automatically. Optionally, you can apply the fiscal position that will map the appropriate taxes onto the Invoice for this customer.
Journal Entry: Once the Invoice is validated, a link to the associated journal entry will appear here.
Source Document: This is a record within Odoo that this Invoice should be associated with. Typically, this would be a Sale Order. Because we are not creating this from a Sale Order, you can fill this in with any other document or reference you would like.
Bank Account: The bank account number that you would like your customer to send payment to.
Tax Description: Assign tax rules here to determine which tax account will be debited when taxes are collected during a transaction. Use fiscal positions to simplify these tax rules per customer.
Once you've filled in the Invoice with the necessary details, hit Validate.
Registering Payment on a Single Invoice
Now that your Invoice is created, you can apply a payment to it. Navigate to the Invoice and select Register Payment. You will see a payment modal appear where you can define the parameters of the payment:
Payment Amount: This will automatically apply the full amount due on the Invoice. You can modify this field to change the amount if needed.
Payment Journal: Select the journal that you would like the entry for this payment to be posted in.
Payment Method Type: Select how this payment is being made.
Manual: Choose this payment method if you are receiving funds from the customer outside of Odoo (Cash, Check, Wire Transfer, etc).
Batch Deposit: Select this payment method if you want to include this payment into a batch for reconciliation purposes.
Payment Date: The date of payment will always default to today's date. You can modify this to a date in the past or future as needed.
Memo: This will automatically display the associated Invoice number that you are paying. You can modify this field as needed.
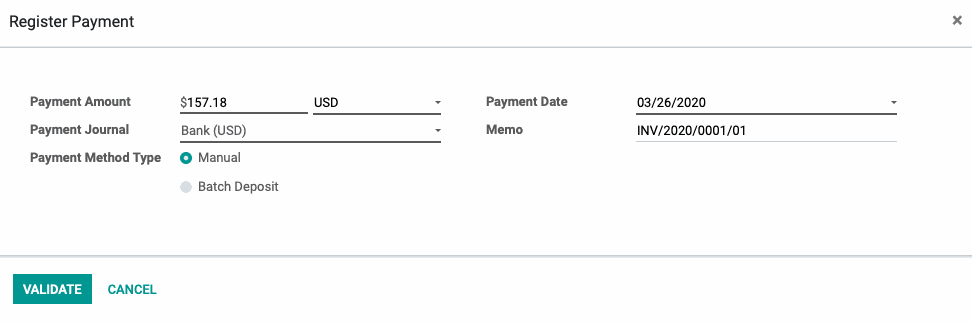
Once your payment details are correct, hit VALIDATE.
Your payment will now be recorded on the Invoice. You can see additional information about the payment by selecting the icon on the Invoice.
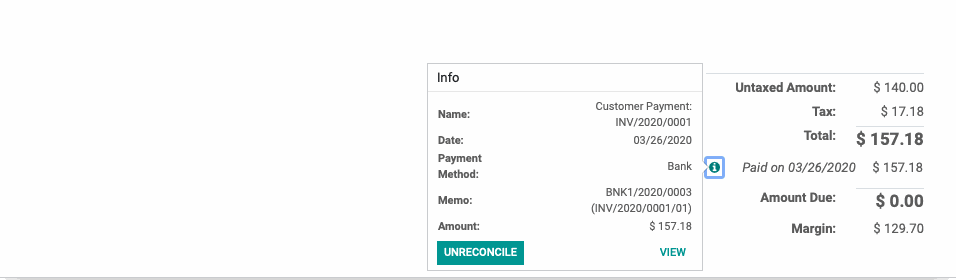
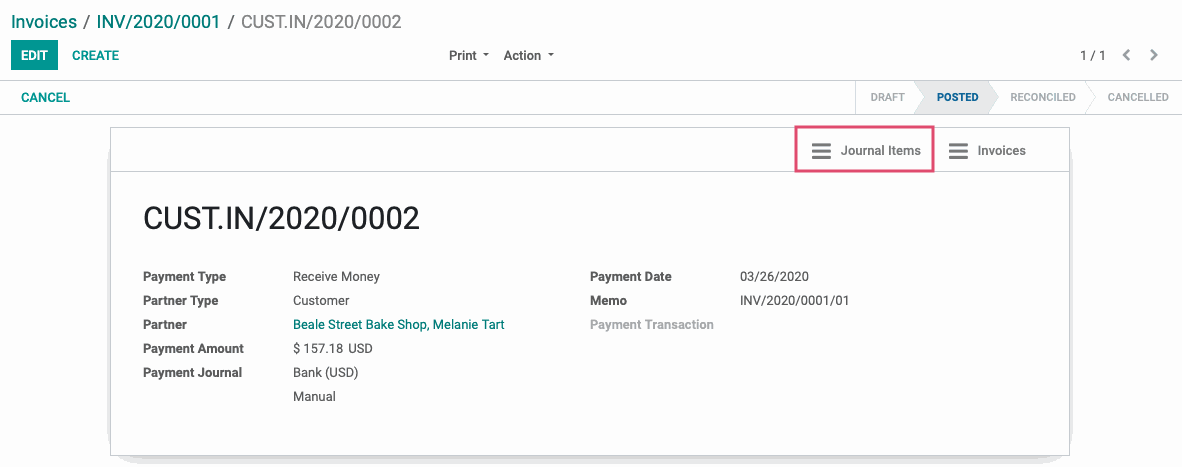
If we select View from the additional information window on the payment, we will be routed to the payment details page.
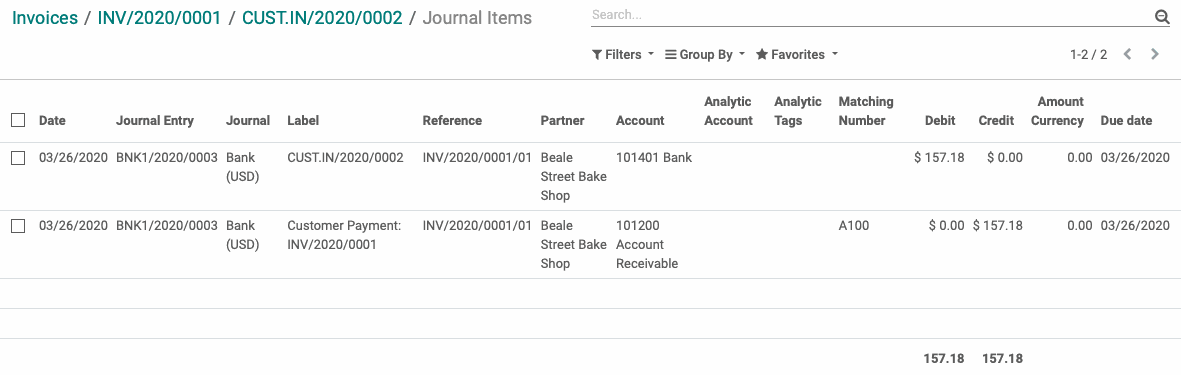
From this screen, we can select the Journal Items Smart Button and review the journal entry that was created for this payment.
Good to Know!
Because we applied the payment directly on the Invoice, the two records (payment and Invoice) are automatically reconciled in the database.
However, if you applied a payment to the wrong Invoice, you can always hit UNreconcile and that will separate the payment from the Invoice it was applied to.
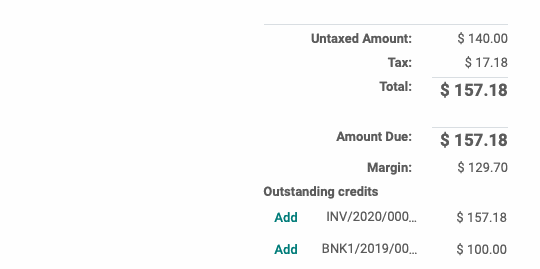
You can then use that same customer payment on any other open Invoices that customer has.
From the Invoice you would like to apply the credit on, select Add next to the outstanding credit and it will be applied to the Invoice.
Registering Payment on Multiple Invoices
If you would like to apply payments on multiple Invoices simultaneously, you can do so easily within Odoo.
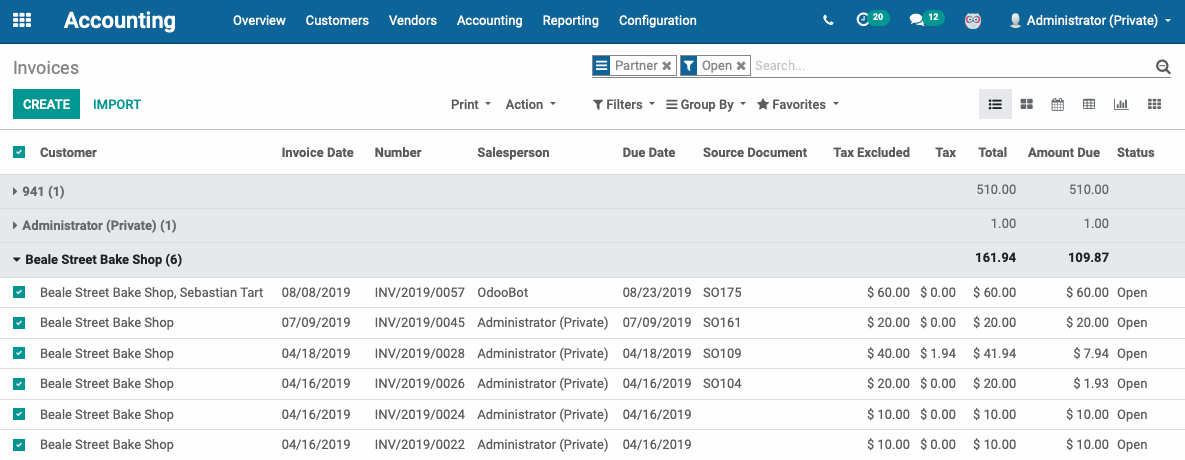
Navigate to Customers > Invoices. From this screen we are going to use our Group By options and Group By > Partner and then we will use our Filters to Filter > Open.
Now, we can see all Open Invoices grouped by Customer.
We will select the customer that we want to pay the Invoices for and then choose the Invoices we want to include on this payment.
If you want to include all Invoices for the customer that you have open, select the checkbox at the top of the column next to Customer.
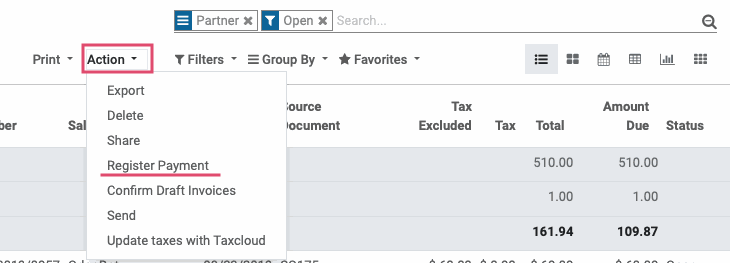
From the Action dropdown select Register Payment.
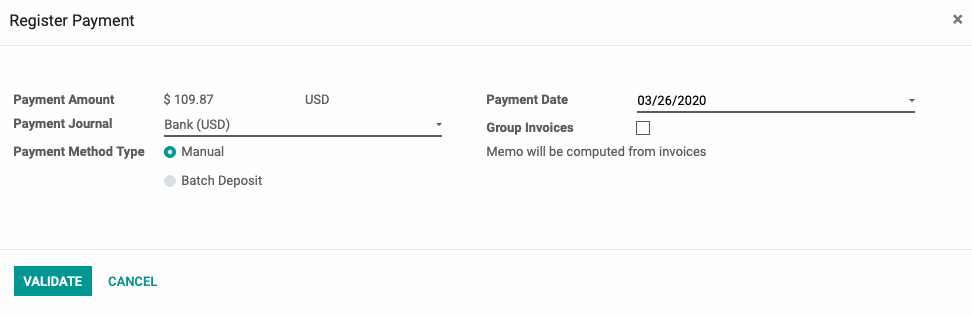
You will see a payment modal appear that will allow you to set the parameters of your payment.
Payment Amount: The payment amount will automatically be for the total amount of all combined Invoices selected. You can manually adjust this as needed.
Payment Journal: Select the journal that you would like the entry for this payment to be posted in.
Payment Method Type: Select how this payment is being made.
Manual: Choose this payment method if you are receiving funds from the customer outside of Odoo (Cash, Check, Wire Transfer, etc).
Batch Deposit: Select this payment method if you want to include this payment into a batch for reconciliation purposes.
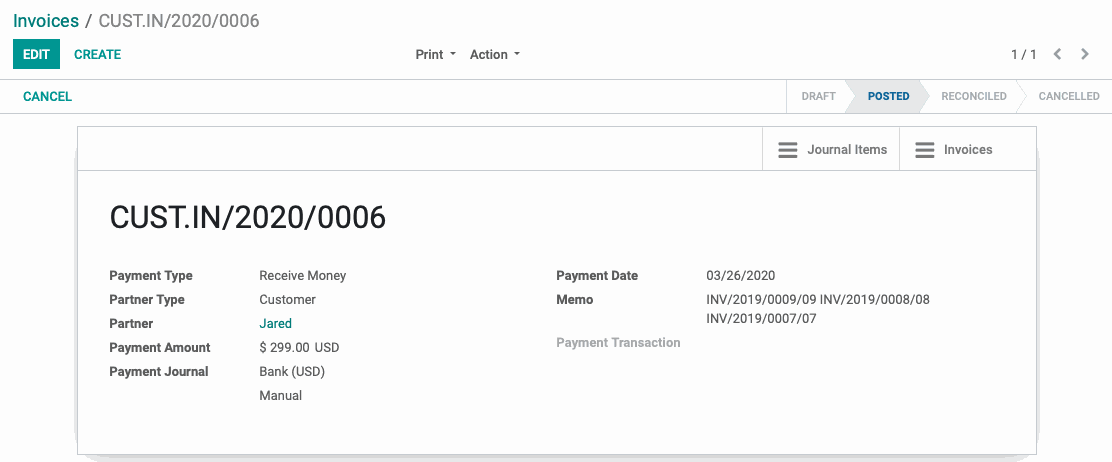
Group Invoices: If this is checked, then there will be one payment that is registered in Odoo for all Invoices. If this is unchecked, then each Invoice will have a separate payment applied to it.
Once your payment parameters have been set, hit Validate.
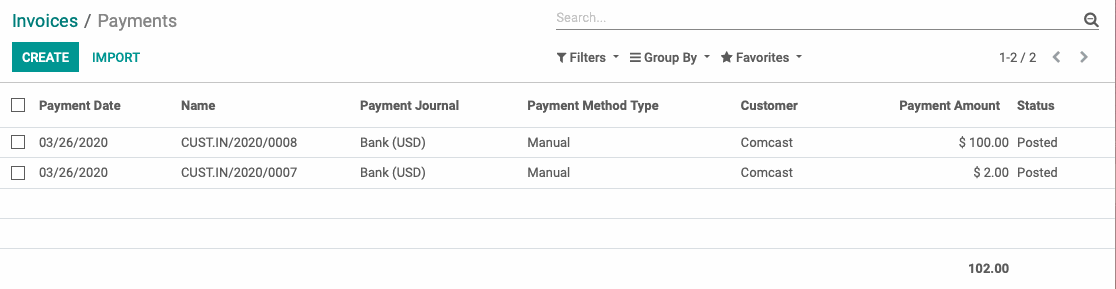
If you selected to have your Invoices Grouped, you will be taken to the single payment that was applied to all Invoices.
If you did not select for your Invoices to be Grouped, you will be taken to a page that displays all payments that were applied to the Invoices selected.