Accounting: Accounting: Management: Assets
Purpose
The purpose of this documentation is to outline the use case and processes associated with Fixed Assets.
Fixed Assets are items that a company purchases for long-term use and are not likely to be quickly liquidated into cash. Fixed Assets can include:
Computer/Office Equipment
Vehicles
Furniture
Fixed Assets then undergo depreciation, at a determined schedule, to reflect within financial reporting the decreasing value of the asset.
Items that are held in inventory are not typically fixed assets, as they are purchased with the sole intent of reselling it and, thus, earning revenue off of it.
Example
If your company purchases a computer for employee use, this is a Fixed Asset because it was paid for by the company and will be utilized over a relatively long period of time with no plans for resell.
Processes
To get started, navigate to the Accounting application.
Configuring Fixed Assets
Once there, click on Configuration > Settings.
Search for 'asset' and check the box for Assets Management.

Once selected, click Save.
Creating Asset Types
Within the Accounting application, click on Configuration > Asset Types.
You will see a list view of all Asset Types. Click the Create button to create a new Asset Type.
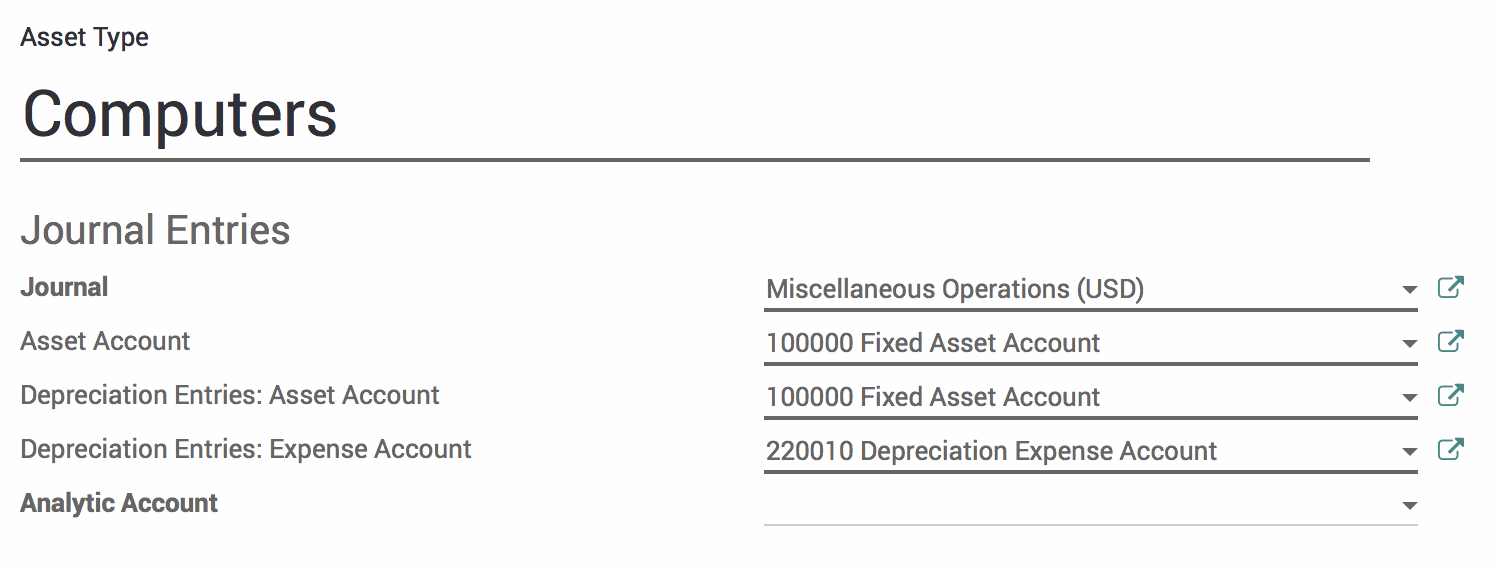
Give the Asset Type a name and then configure the Journal Entries.
Journal: The Journal that will hold the asset entries, usually the 'Miscellaneous Operations' journal.
Asset Account: The account that will hold the value of the asset, such as the '100000 Fixed Asset Account' but a company may also have multiple accounts for different categories of fixed assets. This should be the same account that is set on the Depreciation Entries: Asset Account.
Depreciation Entries: Asset Account: The account that will be credited the depreciation value of the asset with each entry. This should be the same account that is set on the Asset Account.
Depreciation Entries: Expense Account: The account that will be debited the depreciation value of the asset with each entry. This could be a 'Depreciation Expense Account' but companies may choose to use the general 'Expense Account'.
Analytic Account: An optional field, applying an Analytic Account provides additional reporting.
Good to Know!
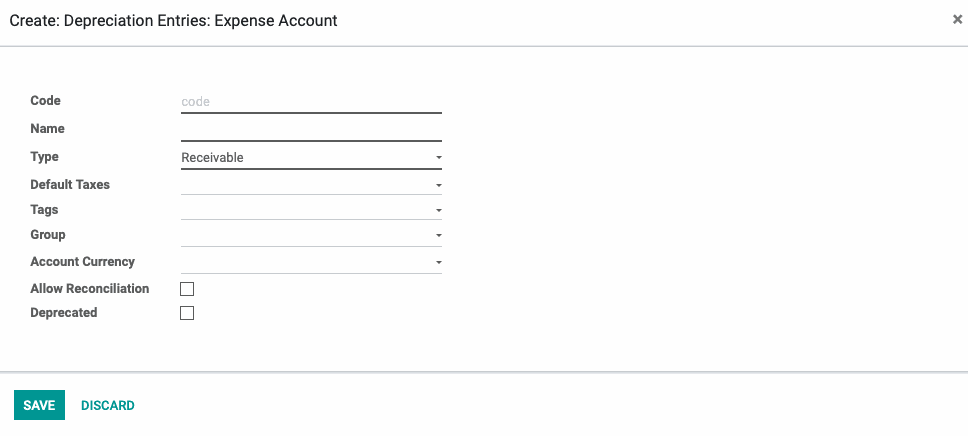
If you would like to setup an expense account specifically for depreciation, it's fast and easy! When editing the Depreciation Entries: Expense Account, choose to "Create and Edit", then fill in the appropriate fields.
Code: Expense accounts in Odoo are typically in the 220000 sequence, so start the code with 2200 and then add an incremented value to avoid a code collision.
Name: Name it something descriptive which, in this case, would be 'Depreciation Expense Account'.
Type: Depreciation
Tags: Operating Activities
Hit Save and you'll be brought back to editing your Asset Type.
Continue on to Periodicity, which is where we will specify the schedule on which the asset will be depreciated over time.
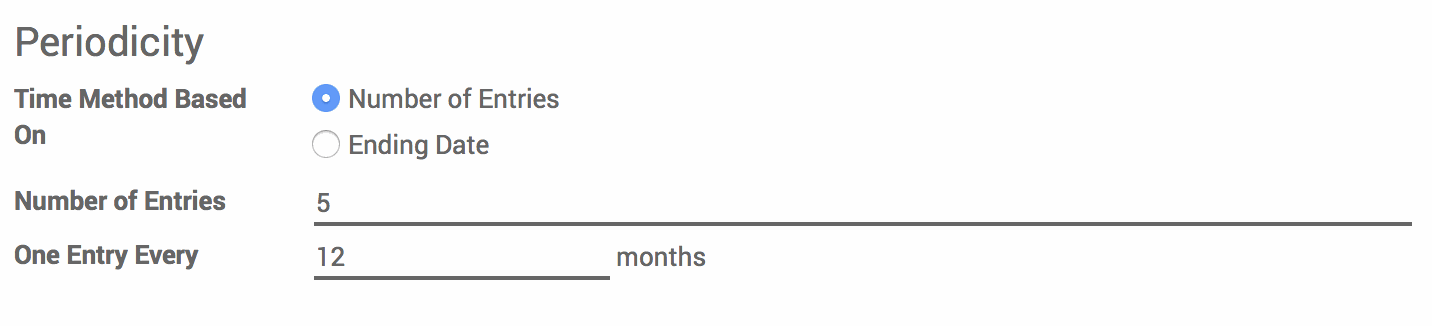
You'll see a selectable field beside Time Method Based On, select either Number of Entries or Ending Date.
Number of Entries, which is the most common scenario, requires the following information:
Number of Entries: How many times the depreciation entry must be made before the entire value of the asset has been depreciated/consumed.
One Entry Every: How often the depreciation entry will be created; this must be a number of months.
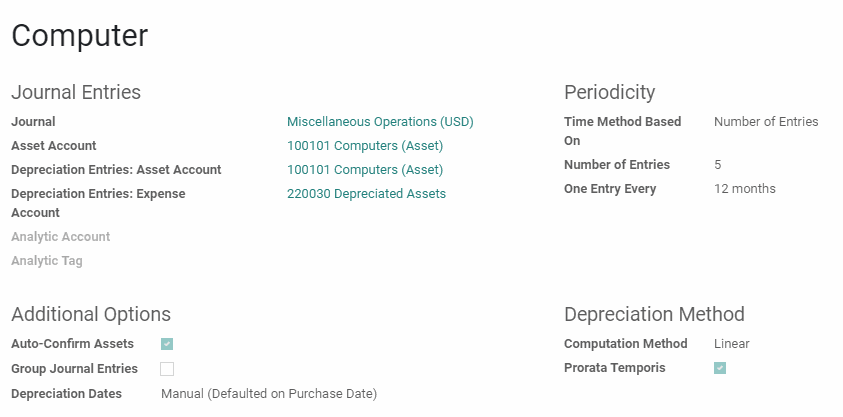
In the example below, we will make a journal entry every 12 months and we will do this five times. So, the value of the asset will be depreciated over five years. Making a journal entry on a yearly basis is a common schedule for depreciating assets.
Ending Date is very similar, but you set a date on which the depreciation will end instead of number of entries.
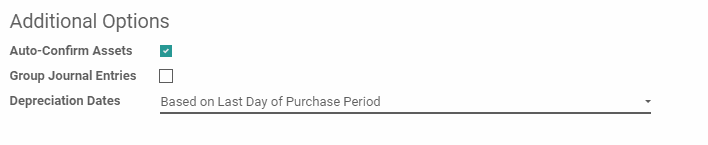
In Additional Options, you have three options:
Auto-Confirm Assets: When you create an invoice that uses this Asset Type, assets will be created. You can either manually confirm these assets or auto-confirm the assets. (Auto-Confirm Assets wouldn't work well if you needed to input a Salvage Value, as they will be confirmed before you could enter one.)
Group Journal Entries: This will create a single journal entry for the depreciation of all items in this Asset Type. When working with thousands of assets, this is a good option for preventing an overwhelming number of journal entries
Depreciation Dates: This can either be set to Manual (Defaulted on Purchase Date), or based on Last day or Purchase Period
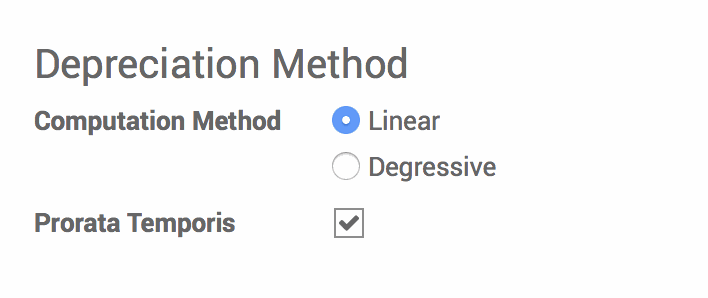
Under Depreciation Method, choose if the asset depreciation should be computed as:
Linear: The asset reduces in value at the same rate for every entry. This is the most common and simple computation method. An example of when to use Linear is for computers or furniture.
Degressive: The asset reduces in value at an increasing rate over the entries; you will enter the degressive factor (the percentage it decreases by each time in decimal format). An example of when to use Degressive is for vehicles, which more steeply decrease in value their first few years. With a 5 year depreciation, 0.5 or 0.6 work well.
Prorata Temporis allows you to choose if you would like the first depreciation entry to be made when the purchase of the asset is made (otherwise it will be made on the first of January), and pro-rate it for the current year.
When done, hit the Save button.
Example
Based on this Asset Type configuration, we can expect the following to happen each time we purchase a Computer Asset Type:
An asset for the item will be created and automatically confirmed.The value of the item will be made in the Asset Account.
A debit entry in the Depreciation Expense Account will be made every 12 months, starting on the day the purchase is made, for five years.
Each entry will be for the same amount (with small variations, to account for numbers that are not evenly divisible by the number of entries).
Creating an Asset
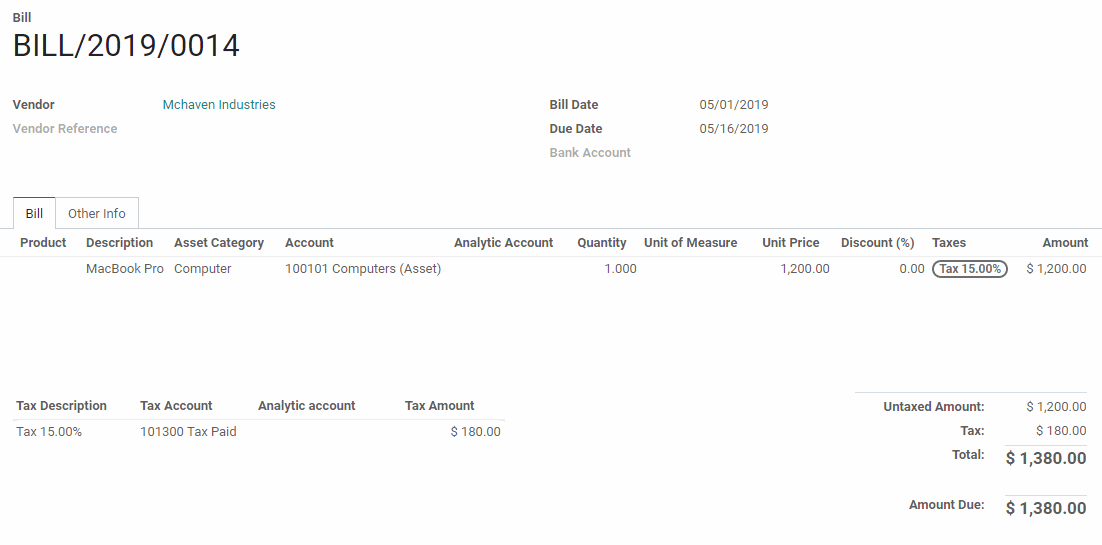
You will see a list view of all Vendor Bills. Click the CREATE button to create a new vendor bill for the asset that was purchased.
As with all Vendor Bills, select or create the vendor. Then click the Add an Line link under the Bill tab.
If you want the fixed assets to be created manually because each one will be very unique or is infrequent, you can do so. Simply skip choosing a product; enter a Description and choose the Asset Category, which will automatically select the appropriate Account based on your Asset Type configuration. Don't forget to give the line item a Unit Price, which will be what you paid when purchasing the item.

We often recommend creating products for assets, which serve as templates through which you can quickly create the assets with little variation. If you create products, choose the Product and the Description, Asset Category, and Account will be automatically selected based on the product and Asset Type configuration.
Creating an Asset Product
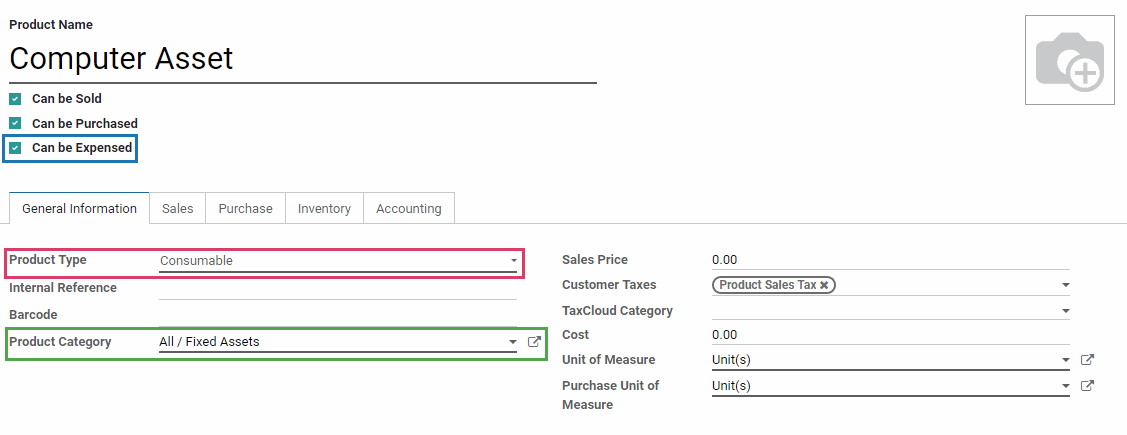
When creating the asset product, first give it a name that conveys what the item is.
If you would like it to also be a product that can be used in Expenses, check the Can be Expensed checkbox.
Under the General Information tab:
Set the Product Type to Consumable
Assign an appropriate Category, such as Fixed Assets. Note that this can be a very simple category that uses its parent (All) defaults, as this is for reporting and grouping/filtering purposes only.
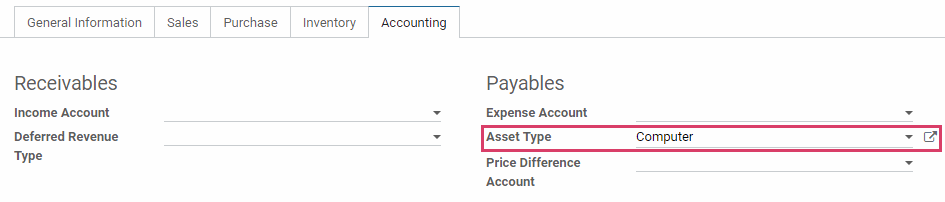
Under the Accounting tab:
Select the Asset Type, which will inform how the asset is created and depreciated.
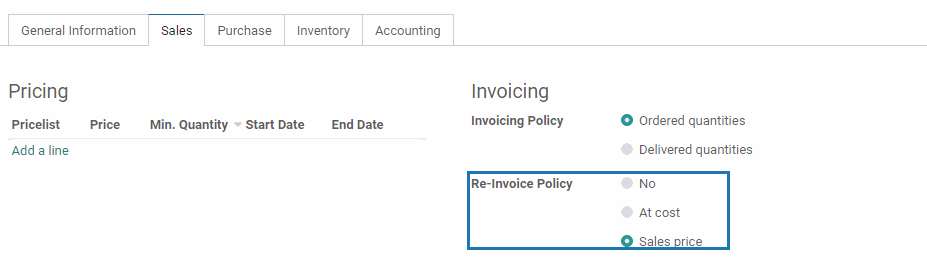
Under the Sales tab:
If you made this a product that can be expensed, select how you would like to Re-Invoice Expenses for this item.
When ready, hit the Save button.
When our vendor bill is complete and you are ready, hit the Validate button.
Managing Assets
Click on Accounting > Assets.
You will see a list of all Assets. If you set the Asset Type to Auto-Confirm Assets, your new asset that was created through the vendor bill will be in the Running state. If not, the asset will be in the Draft sate and you will need to Confirm the asset before depreciation entries can be made.
After confirming the asset you will see:
Depreciation Date: The scheduled date for the depreciation entries.
Cumulative Depreciation: How much the item will have been depreciated after each journal entry posts.
Depreciation: The amount of each depreciation entry.
Residual: The value that the item will still have after each journal entry posts.
Status: (Located besides the numerical value) Green indicates the depreciation entry has been posted and red indicates the entry has not yet been posted.
If you chose Prorata Temporis for the Asset Type, you will note that there will be an additional entry and your Depreciation will be split between the first and last entry to equal the value of the other depreciation entries.

The entries are made based on a scheduled action that occurs once a month and no manual interaction is required. If desired, the manual action can be modified to run more frequently.