Accounting: Customers + Vendors: Vendors: Vendor Bills
Purpose
This document covers how to create Vendor Bills in the Accounting application of Odoo 15. A Vendor Bill is the document generated by Odoo that shows the payment we need to make to one of our Vendors.
Process
To get started, navigate to the Purchase app.

Creating a Vendor Bill from a Purchase Order
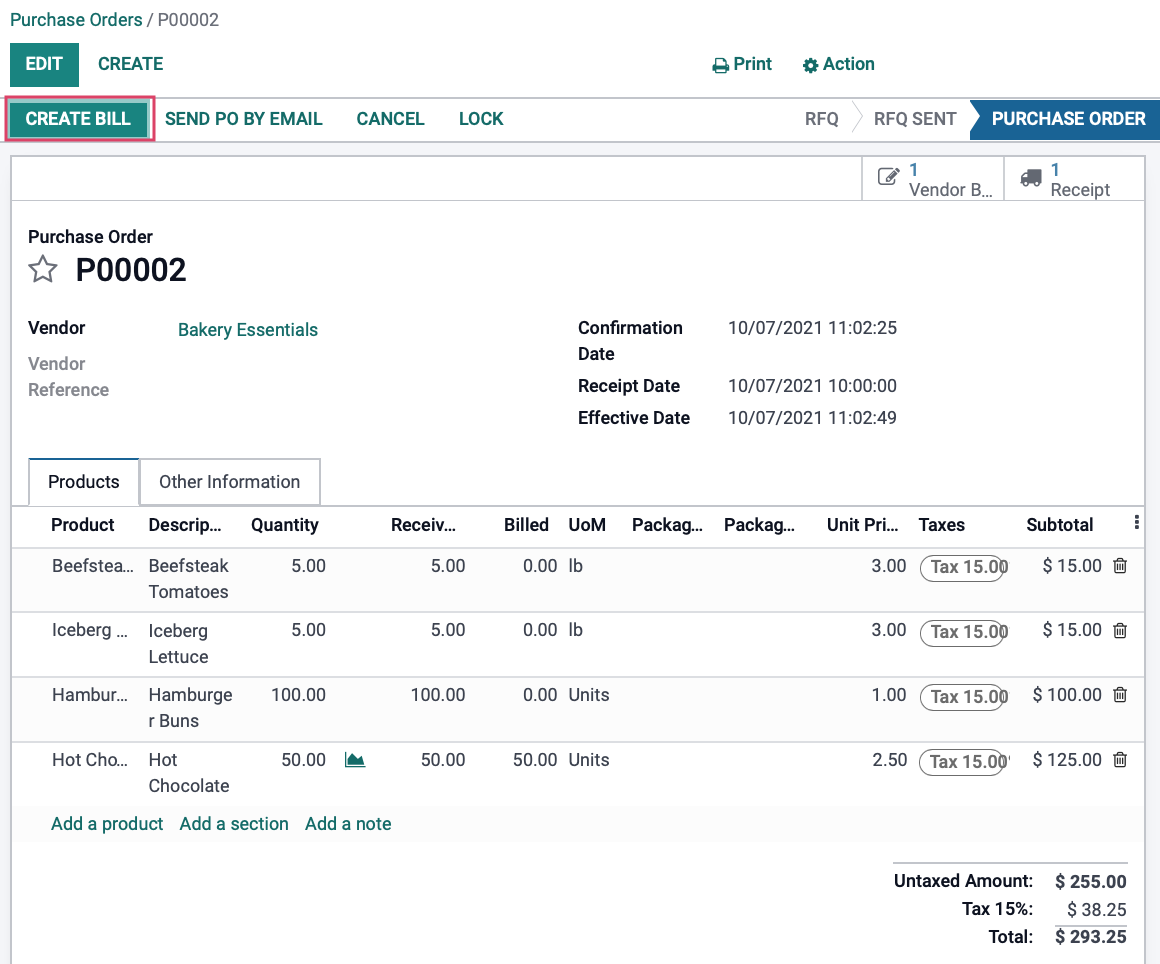
Once there, go to Orders > Purchase Orders and filter for Waiting Bills. Select a Purchase Order from the list.

From within the Purchase Order, click Create Bill.
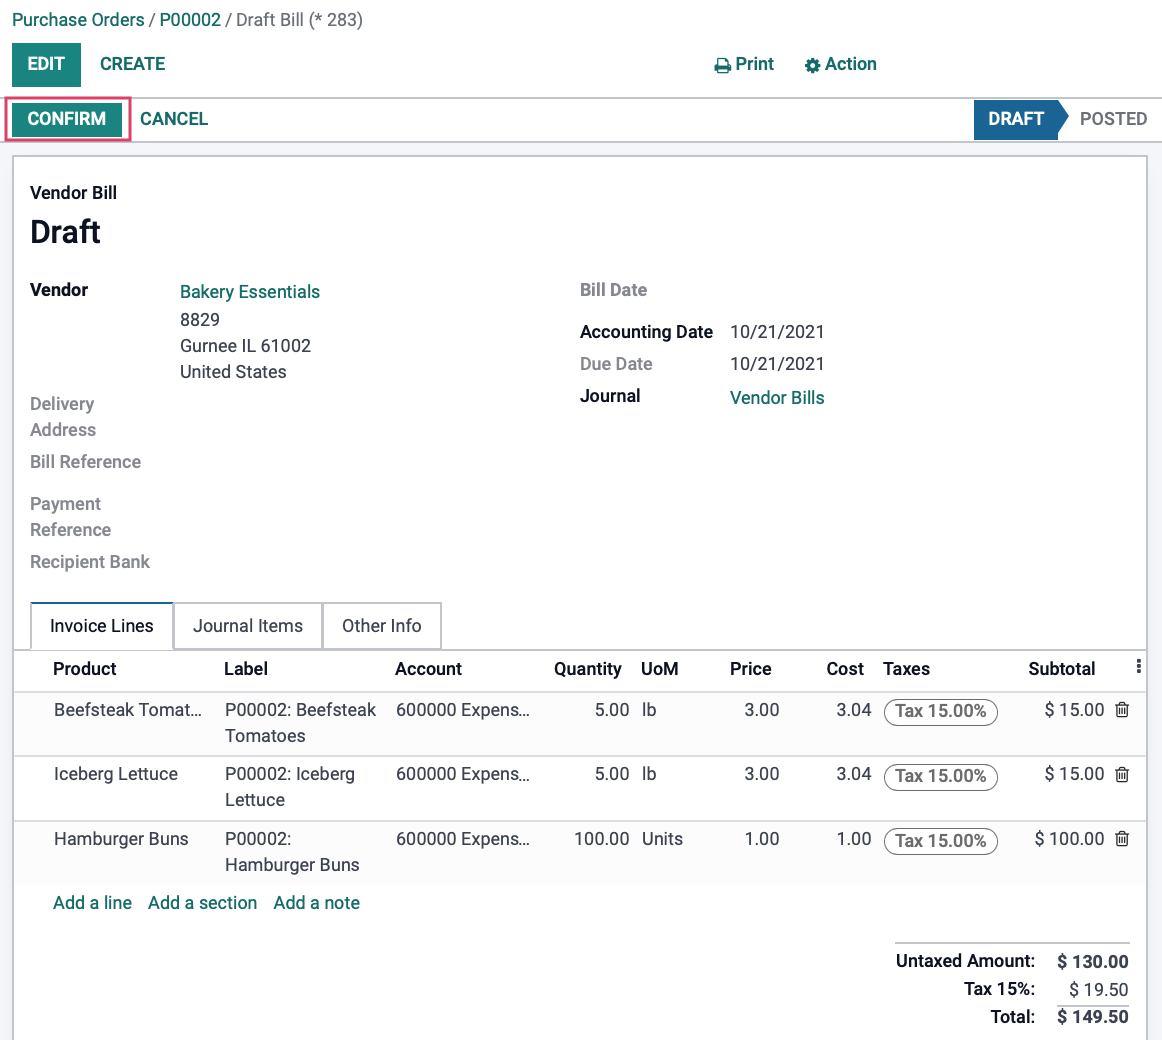
Odoo then takes you to the newly created bill for your review. When you're ready, click Confirm.
You can now Register Vendor Payments on this bill.
Manually Creating a Vendor Bill
Because Odoo uses a checks and balances method of accounting, creating a bill independent of a Purchase Order is uncommon because it will eventually need to be balanced against a Purchase Order; however, this method also allows you to select the Purchase Order while you're creating the bill.
Navigate to the Accounting app.
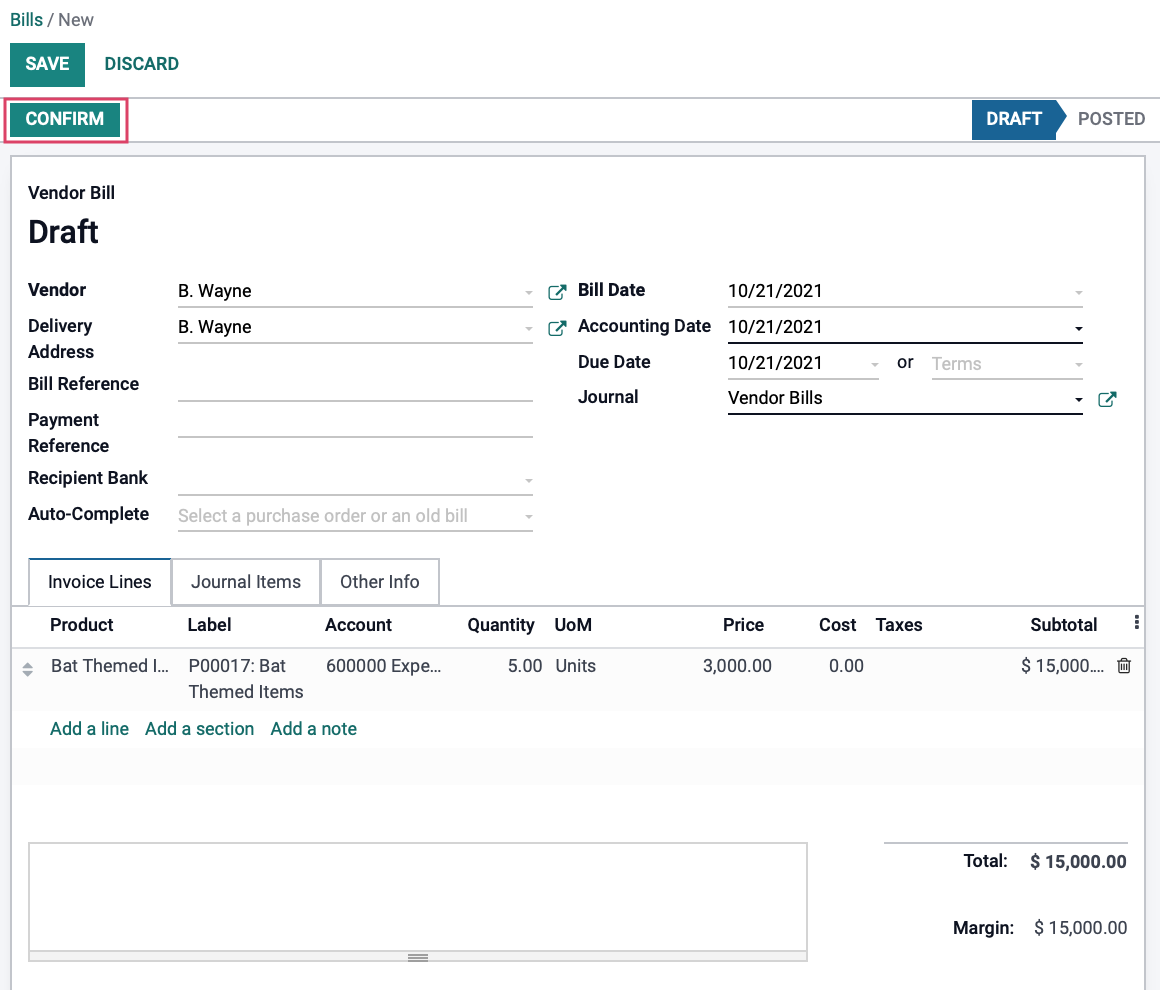
Once there, go to Vendors > Bills, then click Create. This opens a new Bills window where you'll complete the following fields:
Vendor: Select the vendor you're paying.
Vendor Address: Will auto-populate when you select the vendor (as long as it was added when you created the vendor).
Bill Reference: This field can be used to add an invoice number or other ID to help match it when reconciling.
Payment Reference: This field can be used to add a message to the payee about your payment
Recipient Bank: Select the bank to which funds will be sent or deposited.
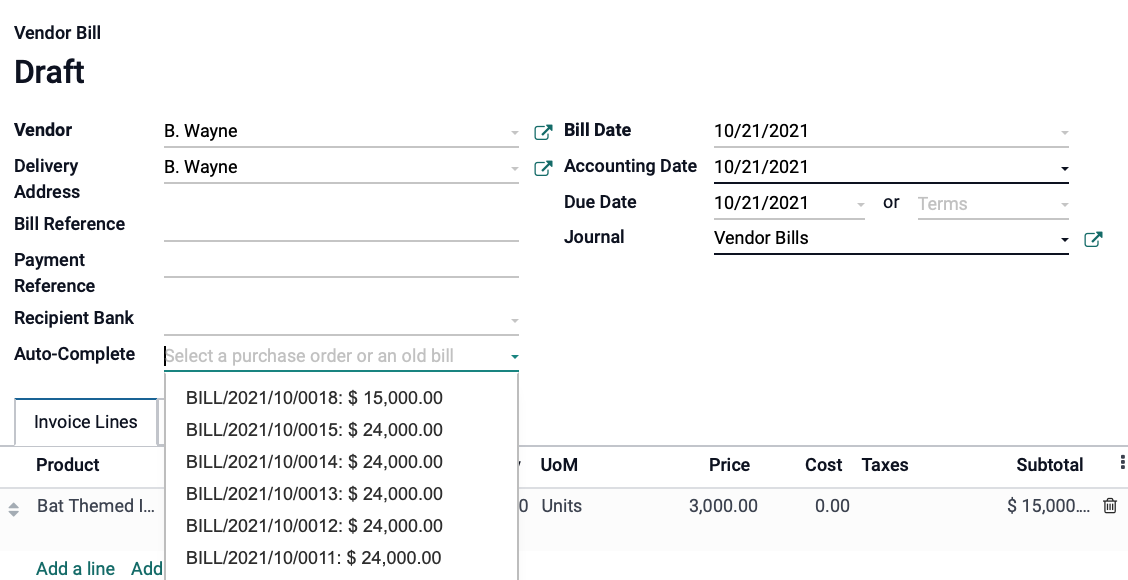
Auto-Complete: If this bill is related to a Purchase Order, select it from this drop-down. In doing so, the form will populate with data from the selected record. This list is filtered by Vendor. You can also select one PO after another to stack items into the Invoice Lines section if needed. See image below.
Bill Date: This will default to today's date, but can be changed as needed.
Accounting Date: This date is set to match the Bill Date, but can be changed, as needed. Note that any time you change the Bill Date, this field will also update.
Due Date or Terms: Enter either the date this bill is due, or select the payment terms you have with this vendor.
Journal: This field, and the Currency field, will auto-populate with the Vendor Bills journal because we're creating the record from the Vendors menu; however, these values can be changed as needed.
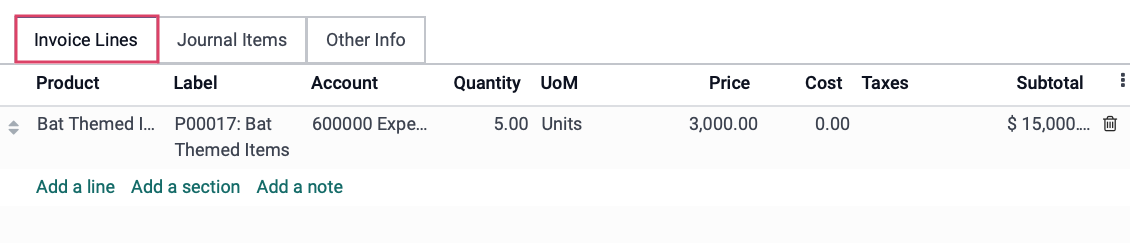
Under the Invoice Lines tab, click Add a Line and select the Product(s) being paid for. Note that you're not required to select a product, but must enter a Label at the very least to describe the product(s).
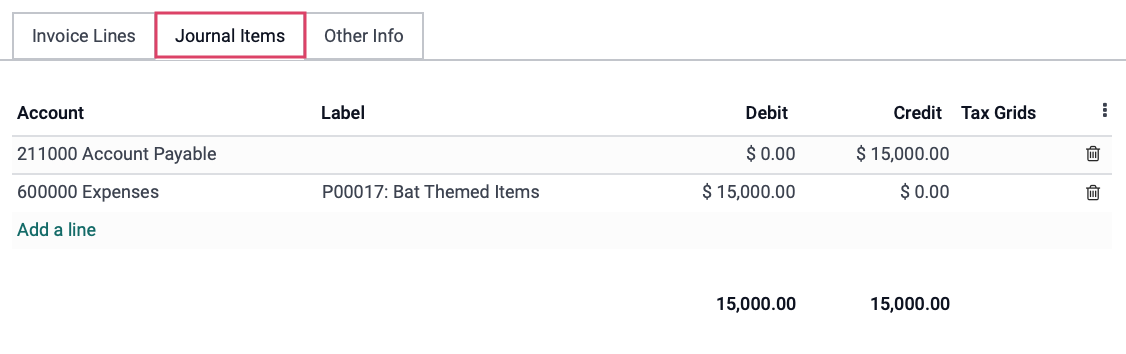
Under the Journal Items tab, you can preview the account moves that will be generated from this bill.
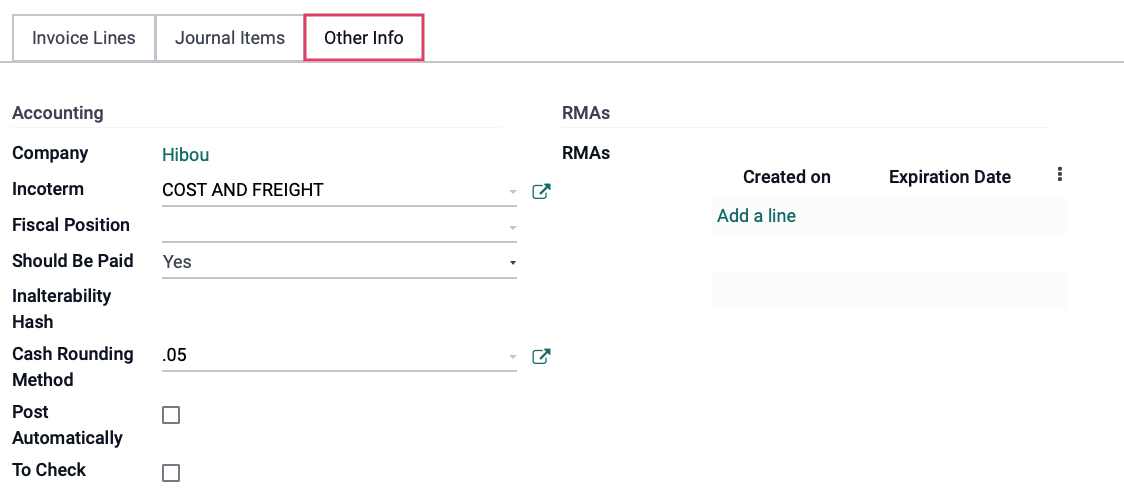
And finally, under the Other Info tab, you can add any other details required for this vendor bill.
Incoterm: If this is an international transaction, you can select applicable Incoterms here.
Fiscal Position: This field pulls from the Vendor's contact record, but can be adjusted here if needed. Changing it here will not change it on the contact record.
Should Be Paid: This field displays when 3-Way Matching is enabled. It is defined automatically, but if you choose to change it, you'll have the option to Force Status.
Yes: Indicates the bill should be paid because the products have been received.
No: Indicates the bill should not be paid because the products have not yet been received.
Exception: Indicates a difference bewteen received and billed quantities.
Cash Rounding Method: This defines the smallest coinage that will be accepted to pay this bill.
Post Automatically: If checked, this bill will be automatically posted at its date.
To Check: If checked, this bill will be marked for review before any further action can be taken.
When you're ready, click Confirm.
You can now Register Vendor Payments on this bill.
Combining Vendor Bills
If you owe a vendor for multiple purchase orders, you can easily combine these into one bill. To do this, first navigate to the Purchase app.
 .
.
Once there, go to ORDERS > PURCHASE ORDERS and filter for Waiting Bills. You can Group by > Vendor if you have a lot of records to sort through.
Select all Purchase Orders you wish to combine, then click Create Bills.

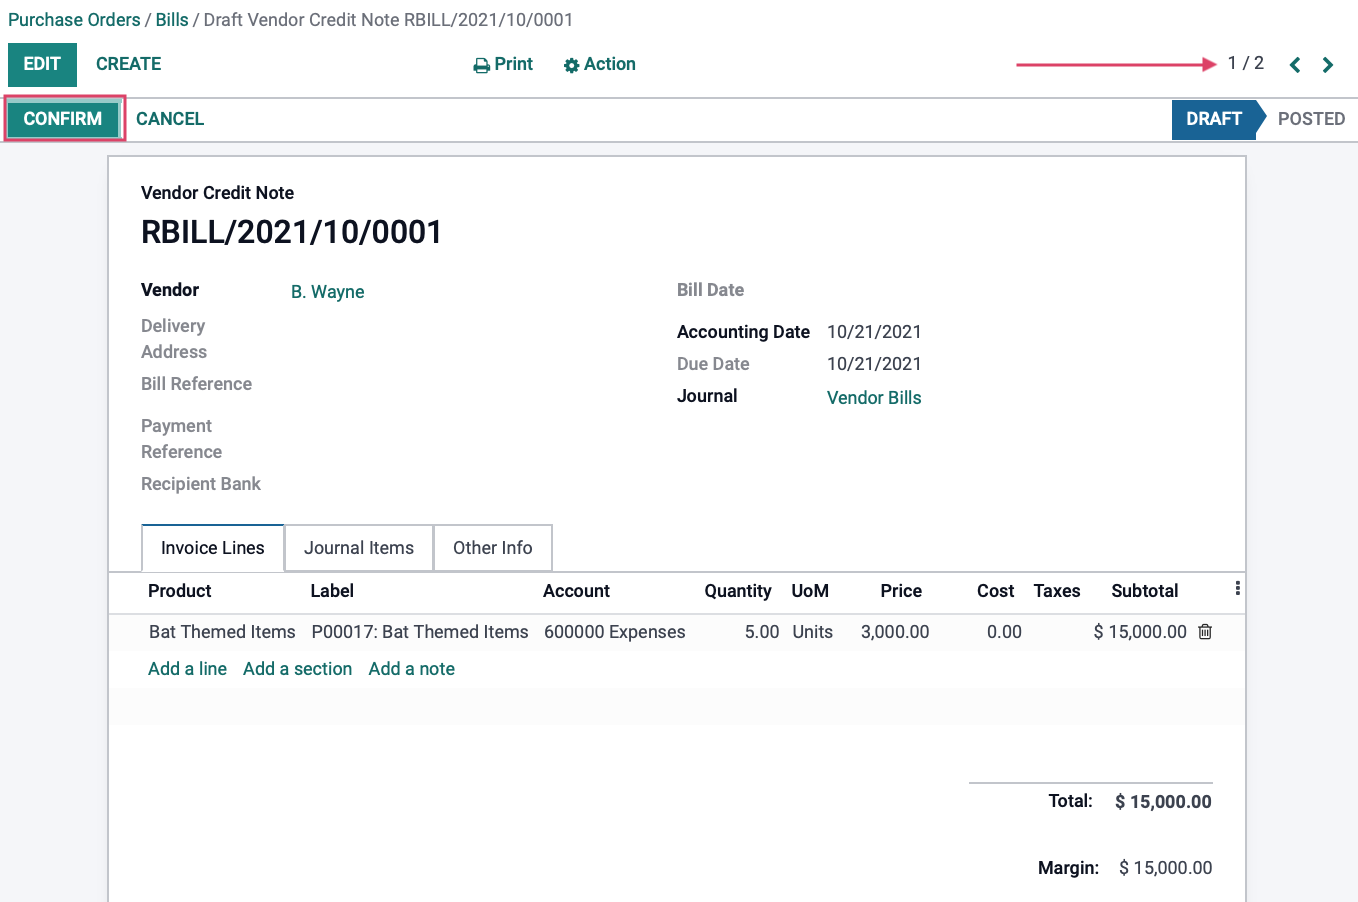
This will move the bills into a draft state:

Click into the first one to see the bill in it's draft state. Note that you can cycle between the bills you selected when creating the bills by using the arrows at the top-right of your screen.
Click Confirm when ready.
You can now Register Vendor Payments on this bill.