Accounting: Configuration: Payment Acquirers
Purpose
This document covers Payment Acquirers within the Accounting app in Odoo 14. The integrated payment acquirers already within Odoo allow customers the ability to pay on the customer portal, or an eCommerce website. Customers may pay Sales Orders, Invoices, or Subscriptions with recurring payments using their preferred method, like a credit card.
Good to Know!
PCI Compliance
Odoo applications do not handle the sensitive information, meaning the certified payment acquirers take care of that so you do not have to concern yourself with PCI (Payment Card Industry) compliance. In short, all credit card numbers and/or credentials are not stored on Odoo servers or databases. Alternatively, Odoo uses a unique reference number to handle that sensitive data, which is safely stored in the payment acquirers system.
From an accounting perspective, there are two types of payment acquirers: payments that directly go to a bank account and follow normal reconciliation workflows, and then those that are a third-party service that requires you to follow a different accounting workflow.
Bank Payments
Wire Transfer: When selected, Odoo shows payment information with a payment reference. You must approve payments manually once they are received to your bank account.
SEPA Direct Debit: This is only used in the European Union. Your customers are able to sign a SEPA (Single Euros Payment Area) Direct Debit mandate online to have their bank be directly debited.
Process
To get started, navigate to the Accounting app.

Once there, click CONFIGURATION > Payments > PAYMENT ACQUIRERS. Find your Payment Acquirer and click ACTIVATE.

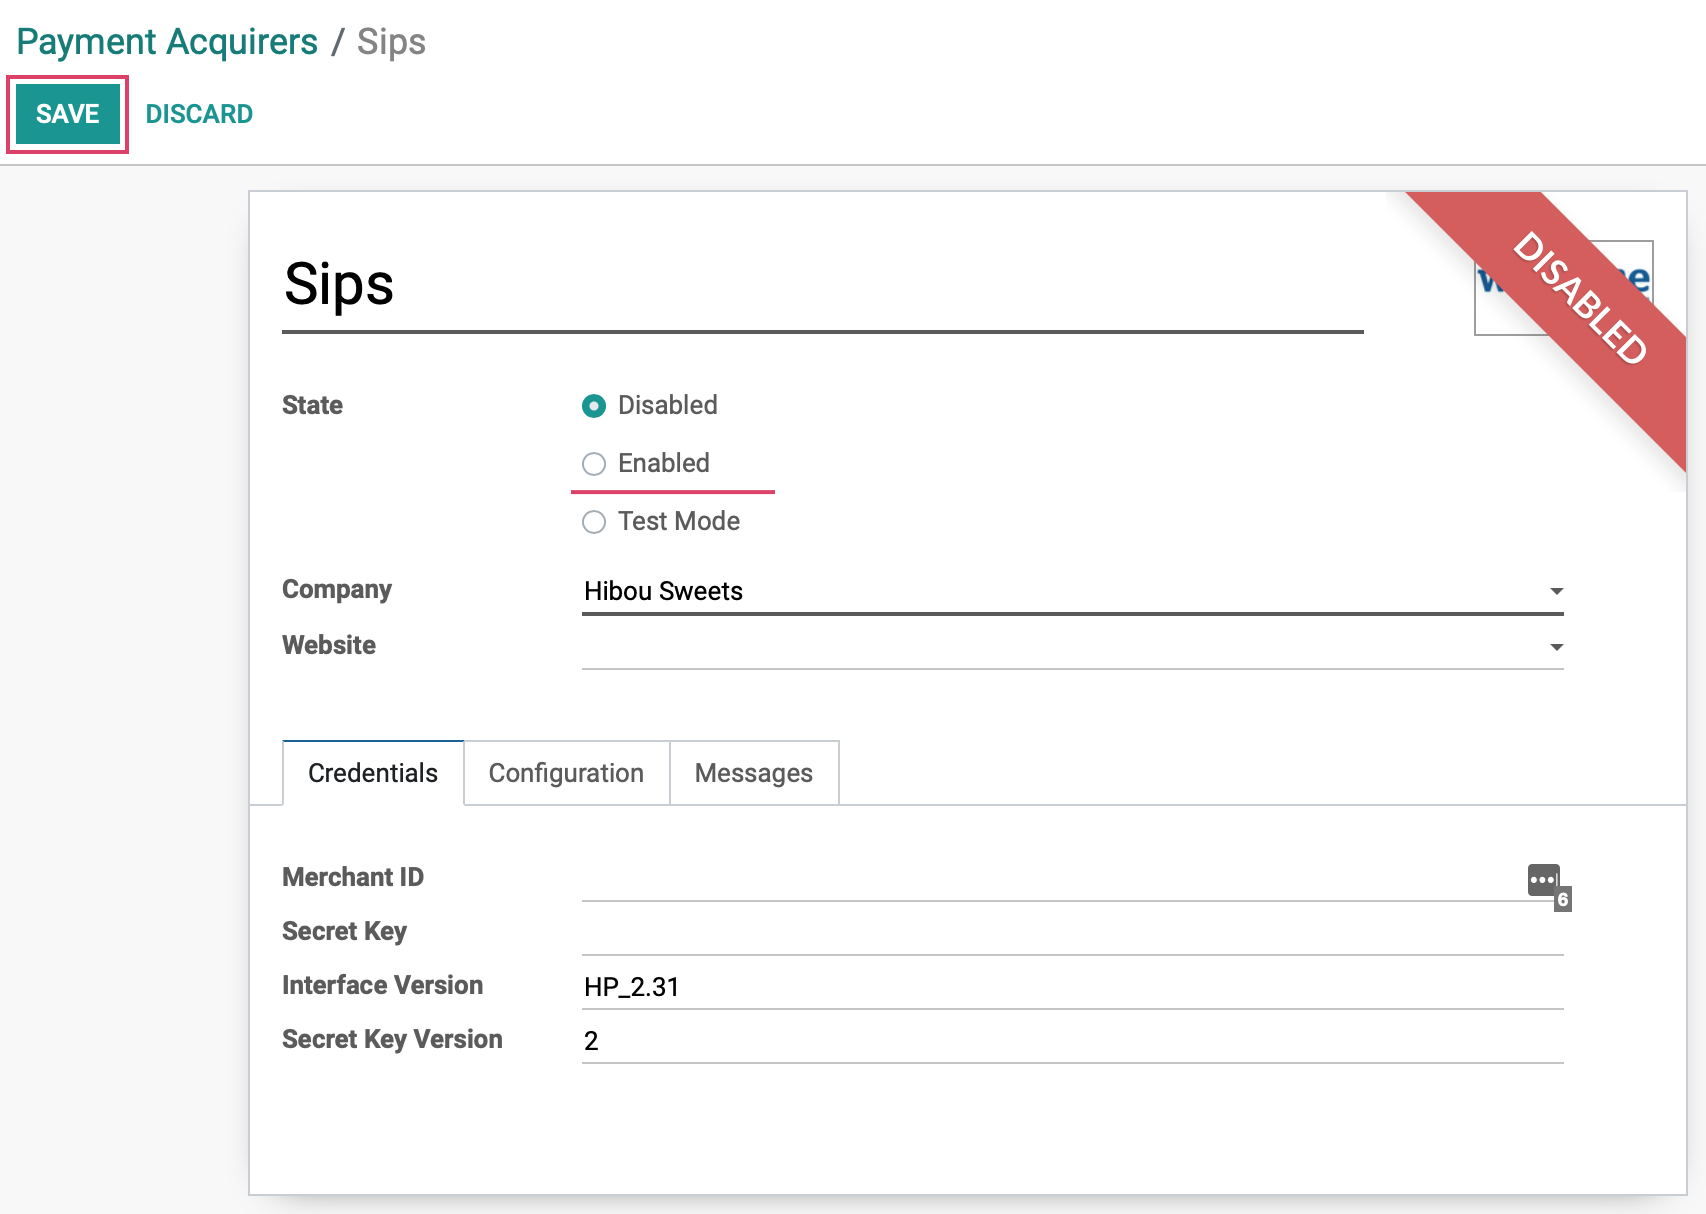
After clicking ACTIVATE, you are automatically in EDIT mode.
State
Disabled: The payment method will not be available for use in Odoo.
Enabled: The payment will be available throughout Odoo and will process live transactions. This is intended for a production database.
Test Mode: It is recommended using the Test Mode on a staging database if you're still in the testing phase. Test Mode is intended to be used with sandbox/test credentials, though Odoo will still generate Sales Orders and Invoices as usual. It is not always possible to cancel invoices which could create issues with invoice numbering if you were to test payment acquirers on your production/main database.
Company: In a multi-company environment, you'll be required to select which company this payment method is configured for. This will default to the company you're working in. You can only select one company.
Website: In a multi-website configuration, you'll have the option to designate this payment method to one website, only. Leaving this field empty will permit all websites to use this payment method.
Good to Know!
Configurations will Differ
The tabs you see on each Payment Acquirer integration will vary slightly. The tabs we outline below are some of the more common ones. If you need assistance configuring payment acquirerers, send us an email!
Under the Credentials tab:
These fields will change based by payment provider. Visit the Online Payment Provider's website to create an account and receive credentials required by Odoo to communicate with the payment acquirer and receive confirmation of payment authentication.
Under the Configuration tab:
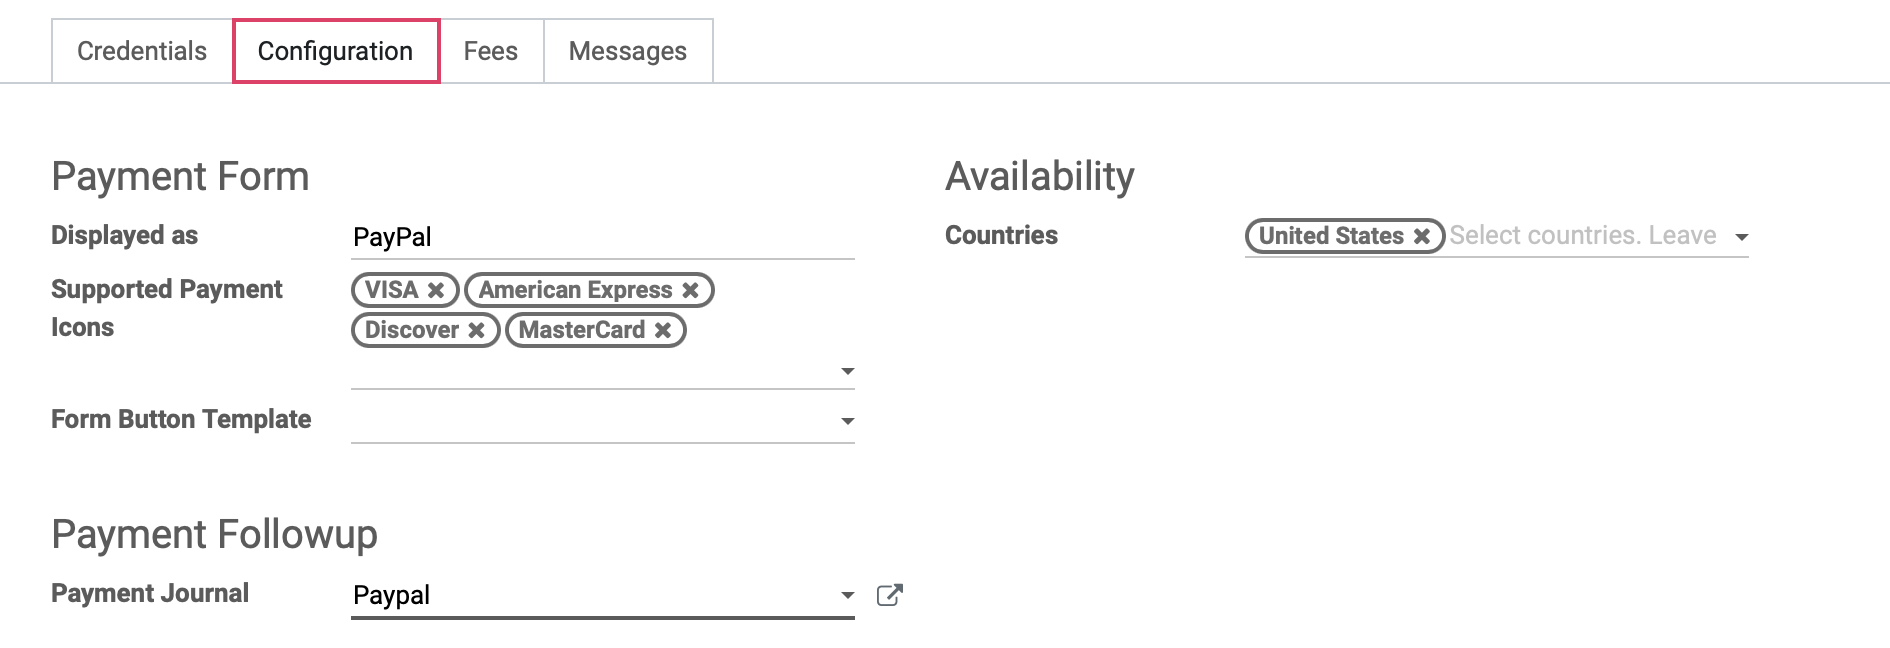
Payment Form
Displayed as: Here you can change the display name for customers, if desired.
Supported Payment Icons: Choose which payment card icons to appear on your website.
Form Button Template: This template is associated to a particular acquirer and will automatically fill in all necessary information if selected. If this field is left empty, information will be input manually. Note that it is only visible in debug mode.
Availability
Countries: Select which countries this acquirer is applicable to. If this field is left empty, the acquirer is usable by all countries.
Payment Followup
Payment Journal: Select a Journal for successful entries to be posted to. Be aware that Odoo will automatically create a new Journal and Account when activating a new acquirer. Both are set by default out of the box, and it is heavily recommended that you ensure the fields are set correctly according to your accounting needs and preferences, configuring them if necessary.
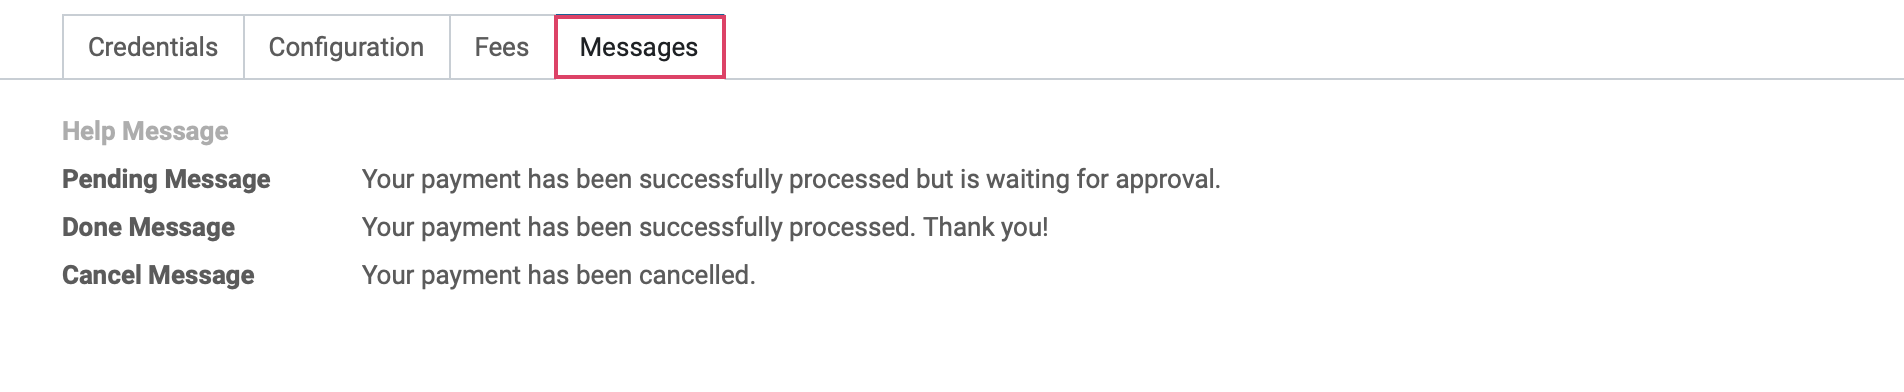
Under the MEssages tab, you can configure and personalize the shown messages to appear in their corresponding circumstances.