Accounting: Customers + Vendors: Vendors: Register a Vendor Payment
Purpose
This document covers how to register payments to Vendor Bills in the Accounting application of Odoo 13. We'll cover full payments, partial payments, and bulk payments. See our Vendor Bills documentation for information on creating bills.
Process
To get started, navigate to the Accounting app.
Paying a Vendor Bill in Full
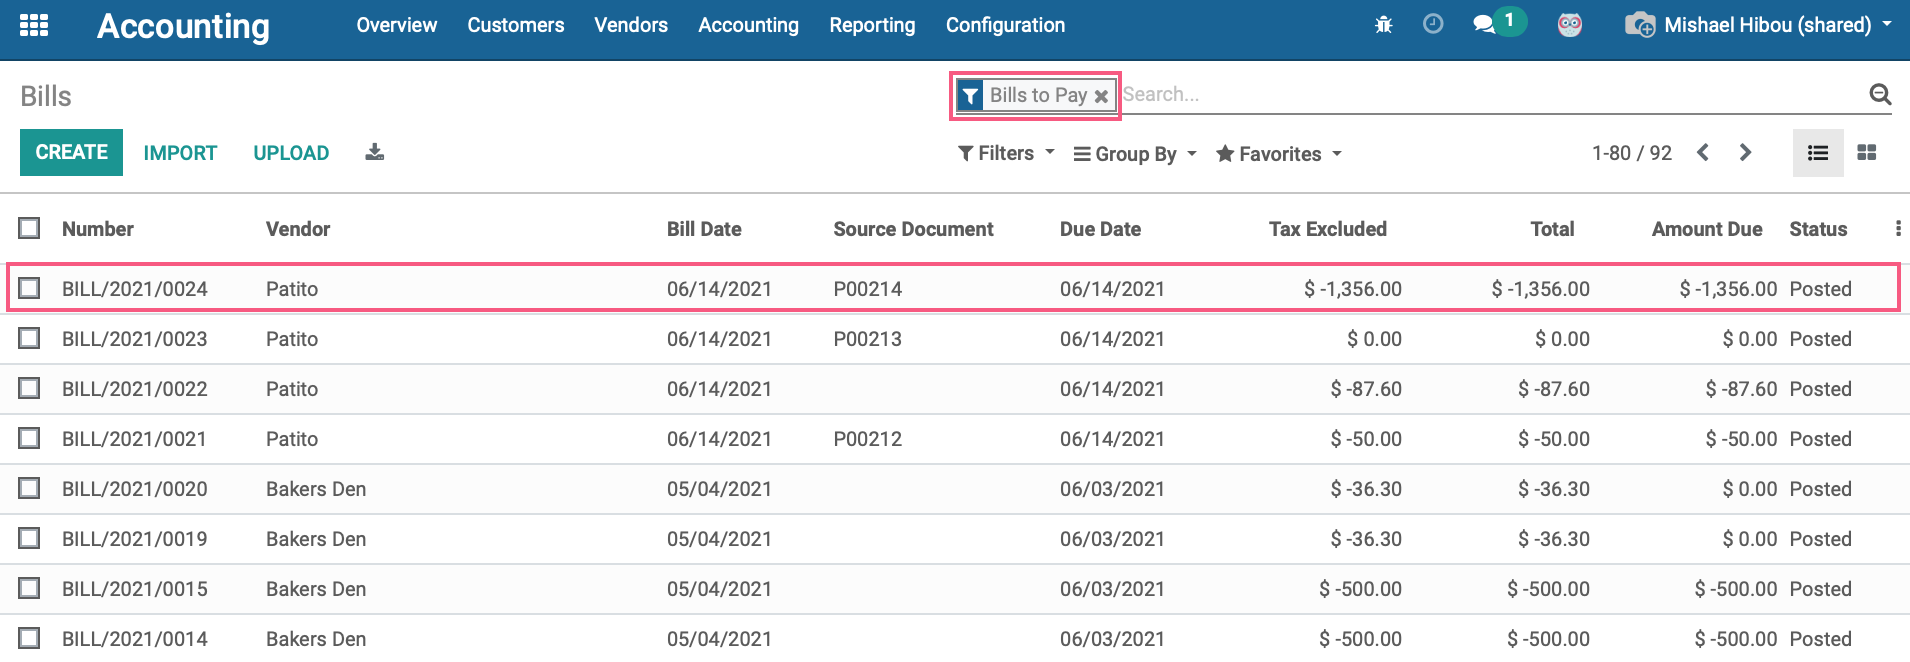
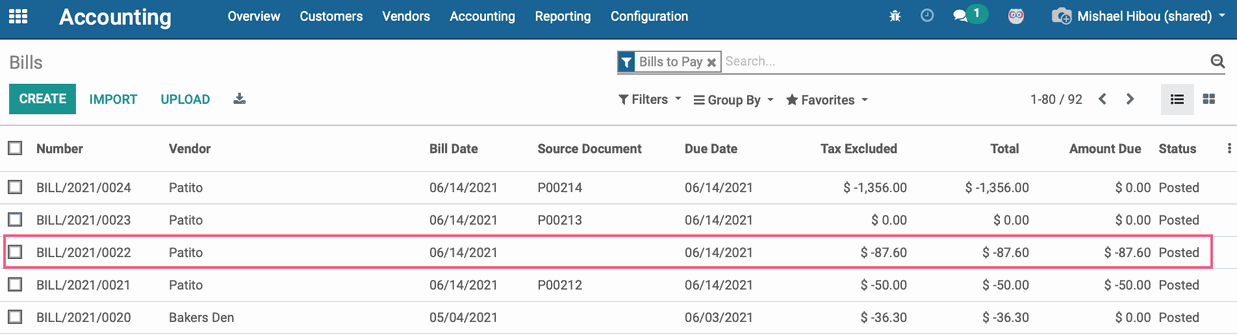
Once there, go to Vendors > Bills. Filter > Bills to Pay, then select a bill from the list.
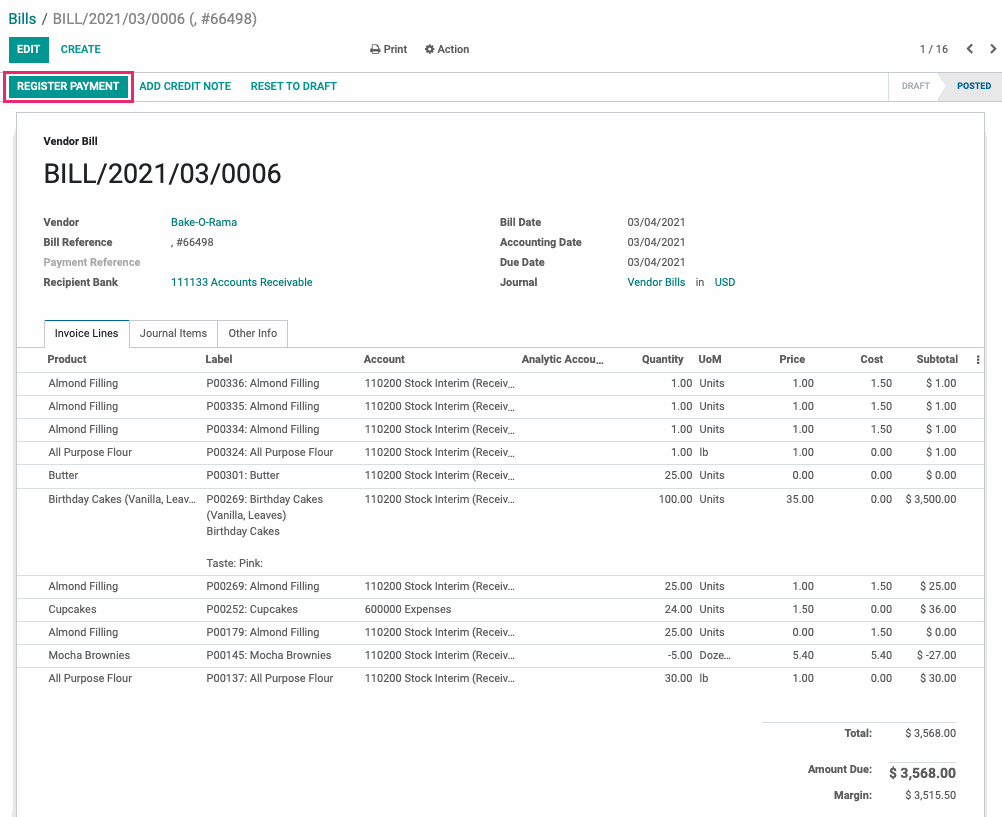
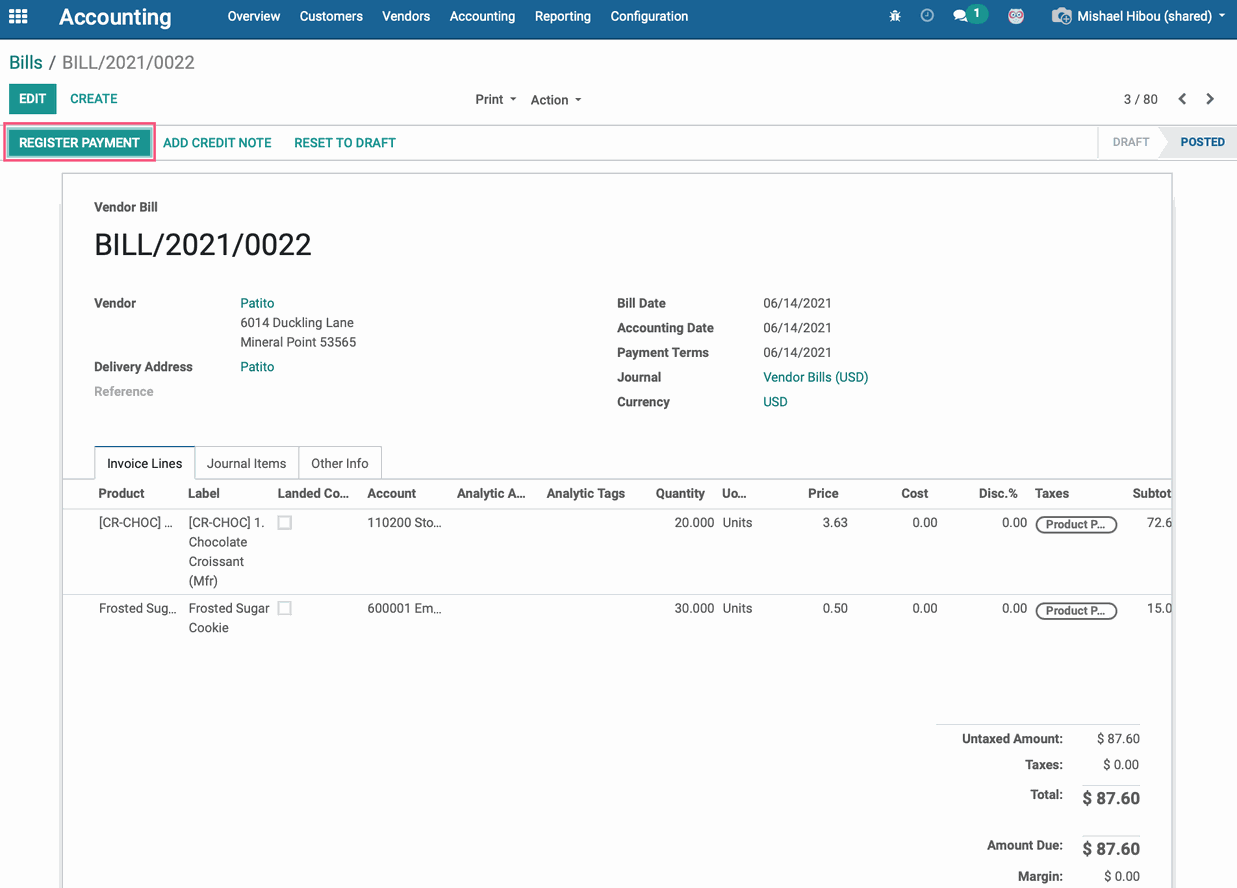
When you're ready to add a payment for this vendor bill, click Register Payment.
A pop-up modal to register payment will appear. Enter the following information:
Journal: The journal to which the payment should be registered.
Payment Method
Manual: Select this to pay be cash, check, or any other method outside of Odoo.
Checks: Select this to print a check in Odoo.
Recipient Bank Account: This label is misleading; this field represents the account you're paying the vendor from.
Amount: The payment amount, this is set to the full amount by default.
Date: The date on which the payment was made.
Memo: This is for reference only; however, a common use case for this field is the invoice ID or reference number issued from the vendor. The memo field will auto fill to the Vendor Bill reference number by default.
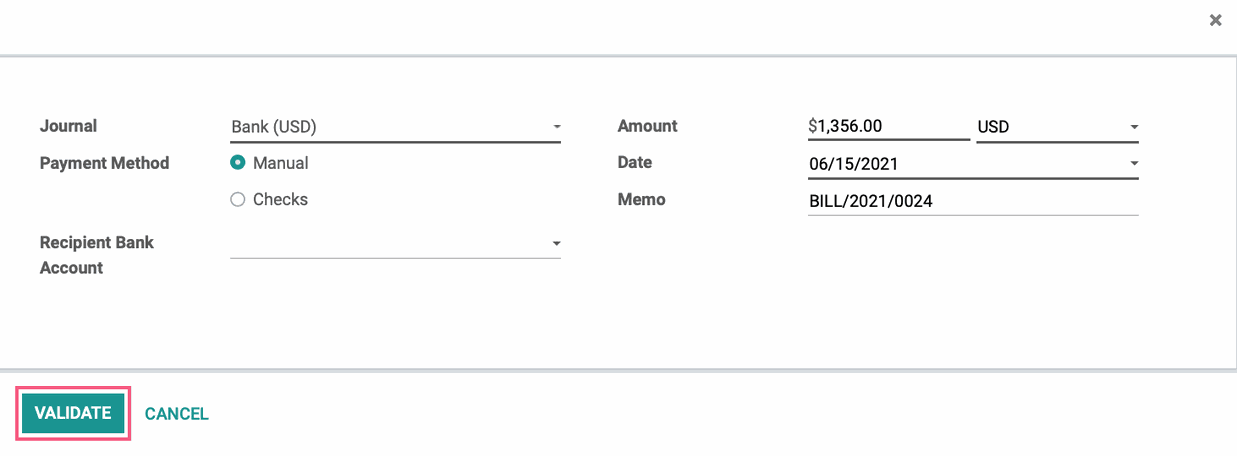
When you're ready, click validate. The bill will be marked Paid.
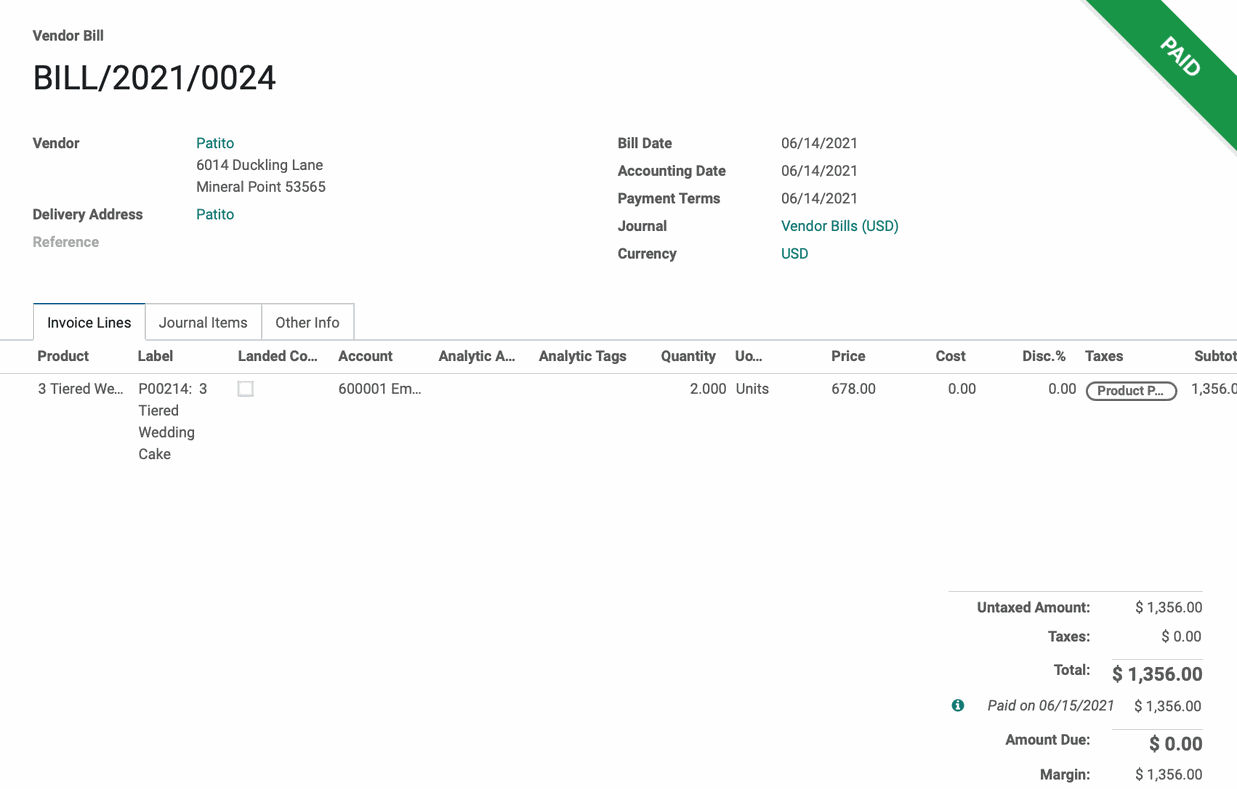
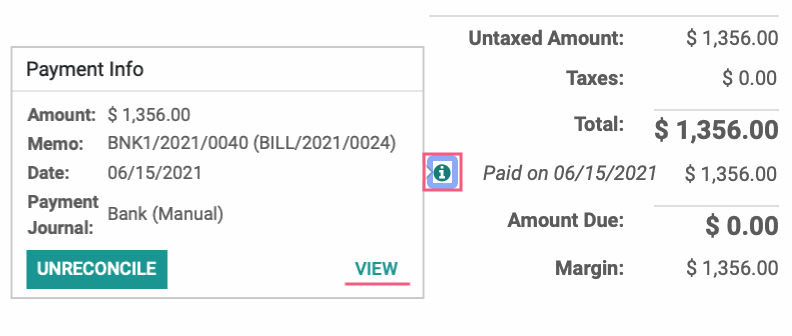
The totals section will reflect the full payment and date. You can click the small info button to the left of the payment line to see the payment details. To view more details, click VIEW. To remove this payment from the bill, click UNRECONCILE.
Partial Payment on a Vendor Bill
To make a partial payment on a vendor bill, go to Vendors > Bills. Click Filter > Bills to Pay and select a bill from the list.
When you're ready to add a payment, click register payment.
A pop-up modal to register payment will appear. Enter the following information:
Journal: The journal to which the payment should be registered.
Manual: Select this to pay be cash, check, or any other method outside of Odoo.
Checks: Select this to print a check in Odoo.
Recipient Bank Account: This label is misleading; this field represents the account you're paying the vendor from.
Amount: Enter the partial payment amount that you're making to the vendor.
Date: The date on which the payment was made.
Memo: This is for reference only; however, a common use case for this field is the invoice ID or reference number issued from the vendor. The memo field will auto fill to the Vendor Bill reference number by default.
Once you enter an amount different from the amount due, you'll see a Payment Difference section. Select the appropriate option:
Keep open: Select this option if you intend to pay the balance in the future.
Mark as fully paid: Select this option if you do not intend to pay the balance. In doing so, you'll need to also indicate which account to report the difference, as well as a reason for it.
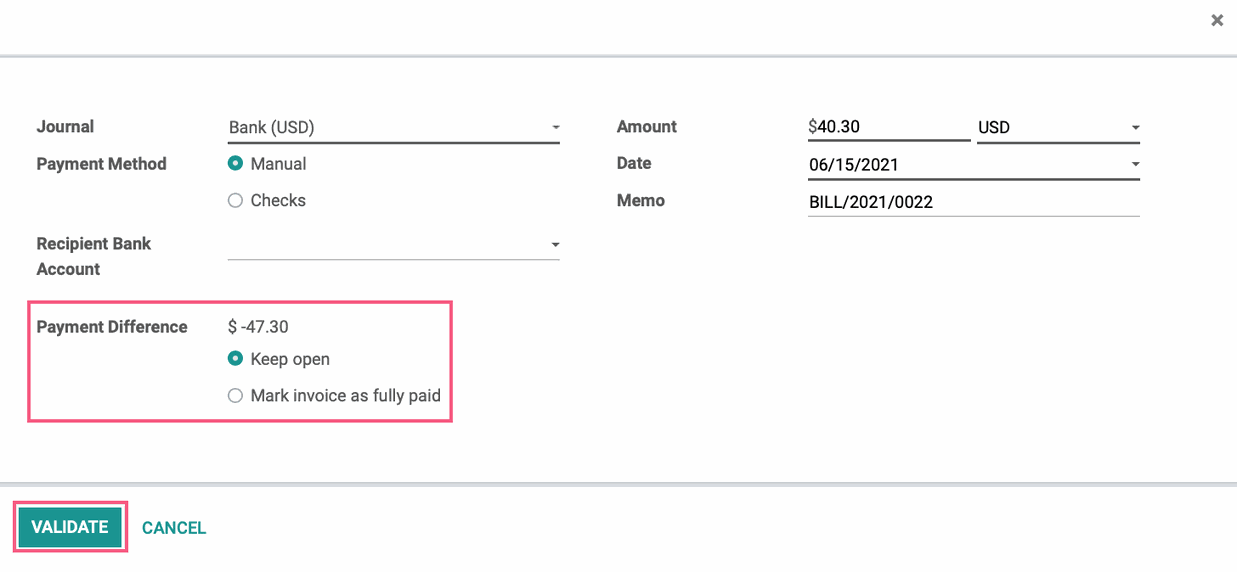
When you're ready, click validate. The payment and remaining balance will be reflected in the totals section.
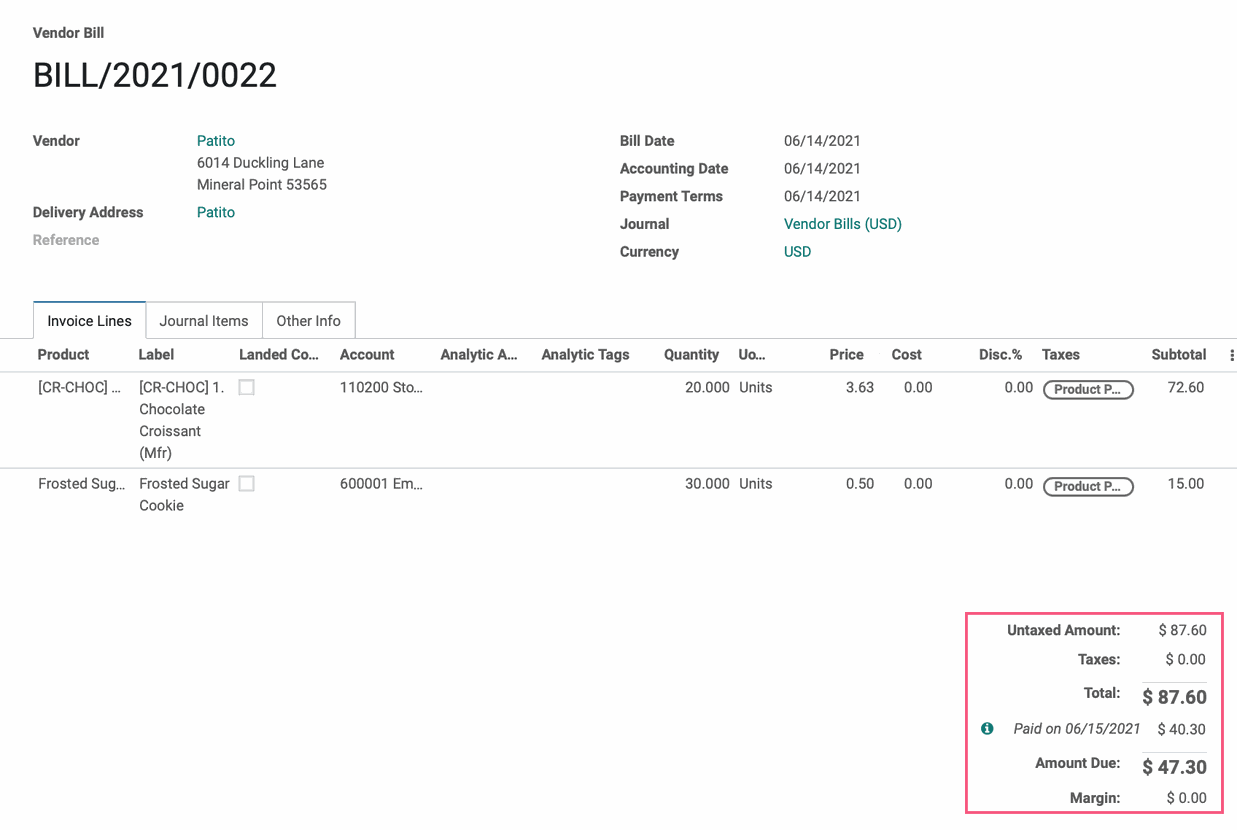
You can click the info button to the left of the payment line to see the payment details. To view more details, click VIEW. To remove this payment from the bill, click UNRECONCILE.

Paying Multiple Vendor Bills (Batch Payments)
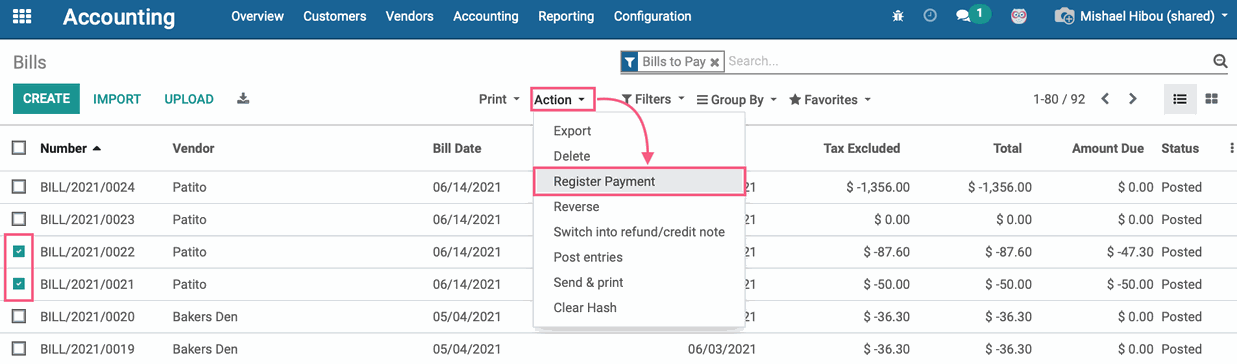
To pay multiple vendor bills, go to Vendors > Bills. Click Filter > Bills to Pay. From the list, select all bills you wish to register payment for in bulk, then click Action > Register Payment. In our example, we've selected bills from the same vendor.
A pop-up modal form will appear with a pared-down version of the Register Payment form. Enter the following information:
Manual: Select this to pay be cash, check, or any other method outside of Odoo.
Checks: Select this to print a check in Odoo.
Group Payments: Select this option if you'll be making these payments together for one partner(bank)/currency. Leave it unchecked if you'll be issuing individual payments (e.g. individual checks) for each vendor bill selected.
Journal: The journal to which the payment should be registered.
Payment Date: The date on which the payment was made.
Disperse Manually: Pay multiple invoices with one Payment, and manually disperse the amount per invoice.
Amount: Enter in the total amount to be paid.
Notice there isn't a field to add the payment amount. This is because it's pulling directly from the selected vendor bills and there's no need to change the amount(s).
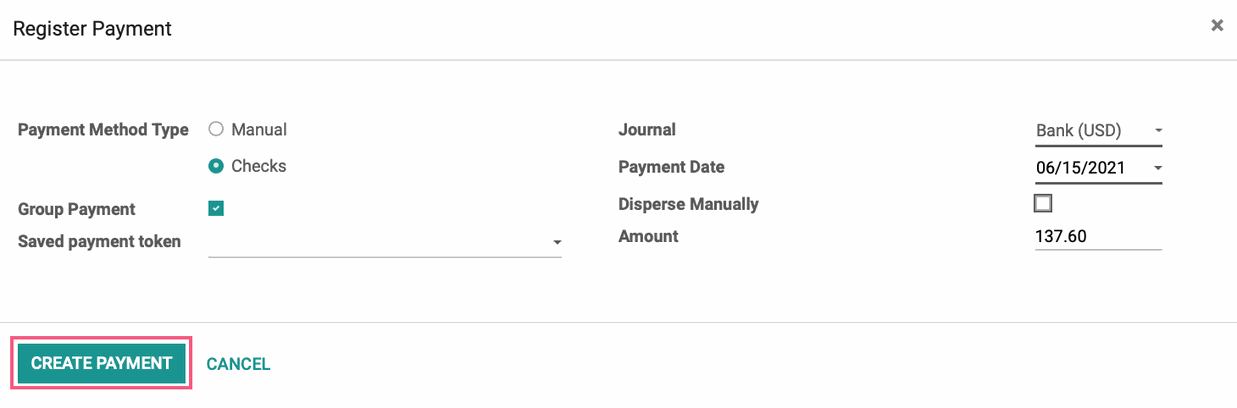
When you're ready, click Create Payment. This brings you to a list of payments made. You can click into each payment and print checks, or process them as a group.