Accounting: Accounting: Journals: Journals: Debug Options
Purpose
The purpose of this documentation is to outline the additional configuration options available in debug mode in the Odoo Accounting Application for Journals.
Processes
To get started, navigate to the Accounting application.
Additional Journal Configuration Options
To access additional configuration options, you must enter Debug mode. To do so, go to the Settings app and click ACTIVATE THE DEVELOPER MODE. Once activated, go back into the Accounting app and hit CONFIGURATION then JOURNALS.
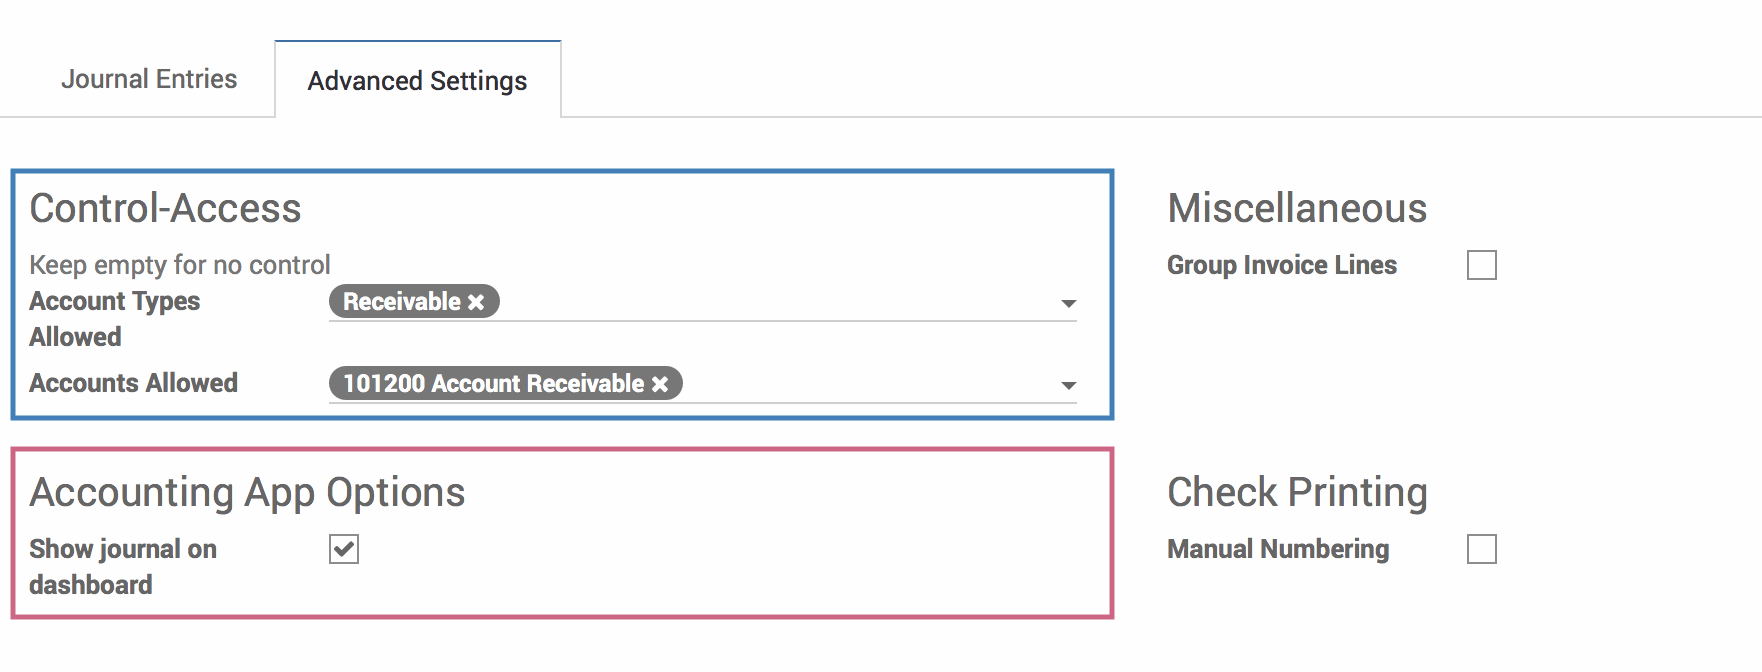
On a journal, you will now see two fields in the Control-Access section:
Account Types Allowed: Choose which account types can access this journal.
Accounts Allowed. Choose which accounts can access this journal.
In the Accounting App Options section, there will also be a checkbox for Show Journal on Dashboard. When this box is checked, this journal will be displayed on the Accounting application's dashboard. This makes it easier to quickly create invoices and perform other tasks within this journal.
Important!
When tagging accounts or account types for access to your journal, be sure to give access to all of the accounts that need it. If you create a new account and subsequently forget to tag it in the journal, you will be unable post to that account in the journal!
Changing the Entry Sequence of a Journal
If you wish to change the way your invoices are numbered, you will need to change the entry sequence of the invoices journal.
To access the settings to change the entry sequence on a specific journal, we need to enter Debug mode. To do so, go to Settings and click Activate the developer mode. Once activated, go back into the Accounting app and hit configuration then JOURNALS.
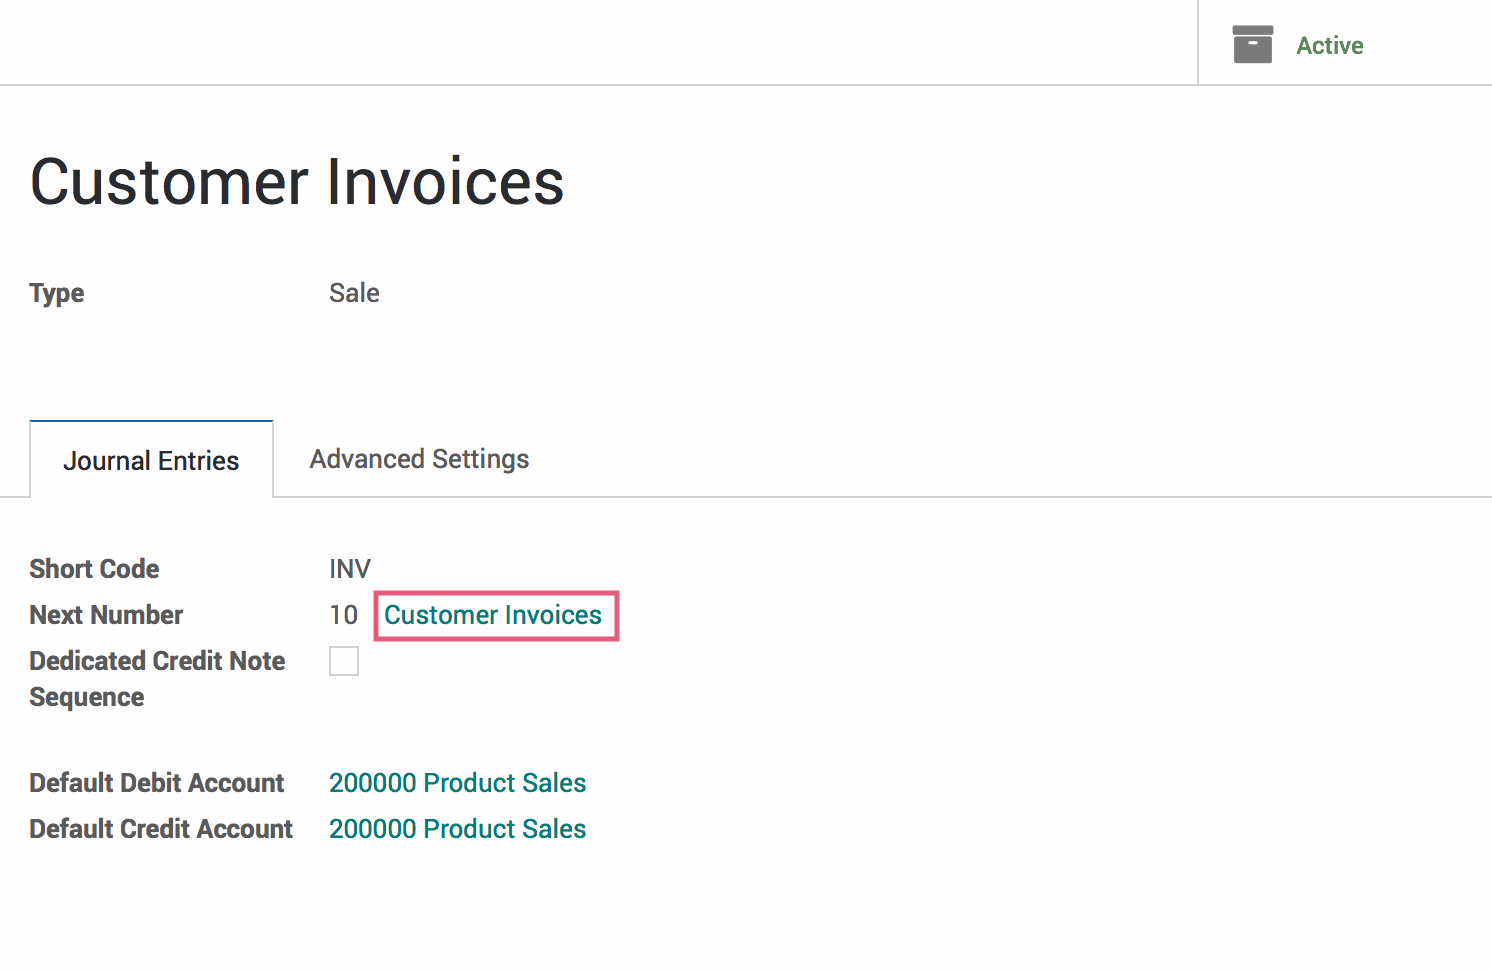
Select the journal you would like to change the entry sequence on. In the Journal Entires tab, you will see that the Next Number field has a new link next to the number, which shares the name of the Journal (in our case, "Customer Invoices"). Click this link to go to the form in which you can edit the entry sequence.
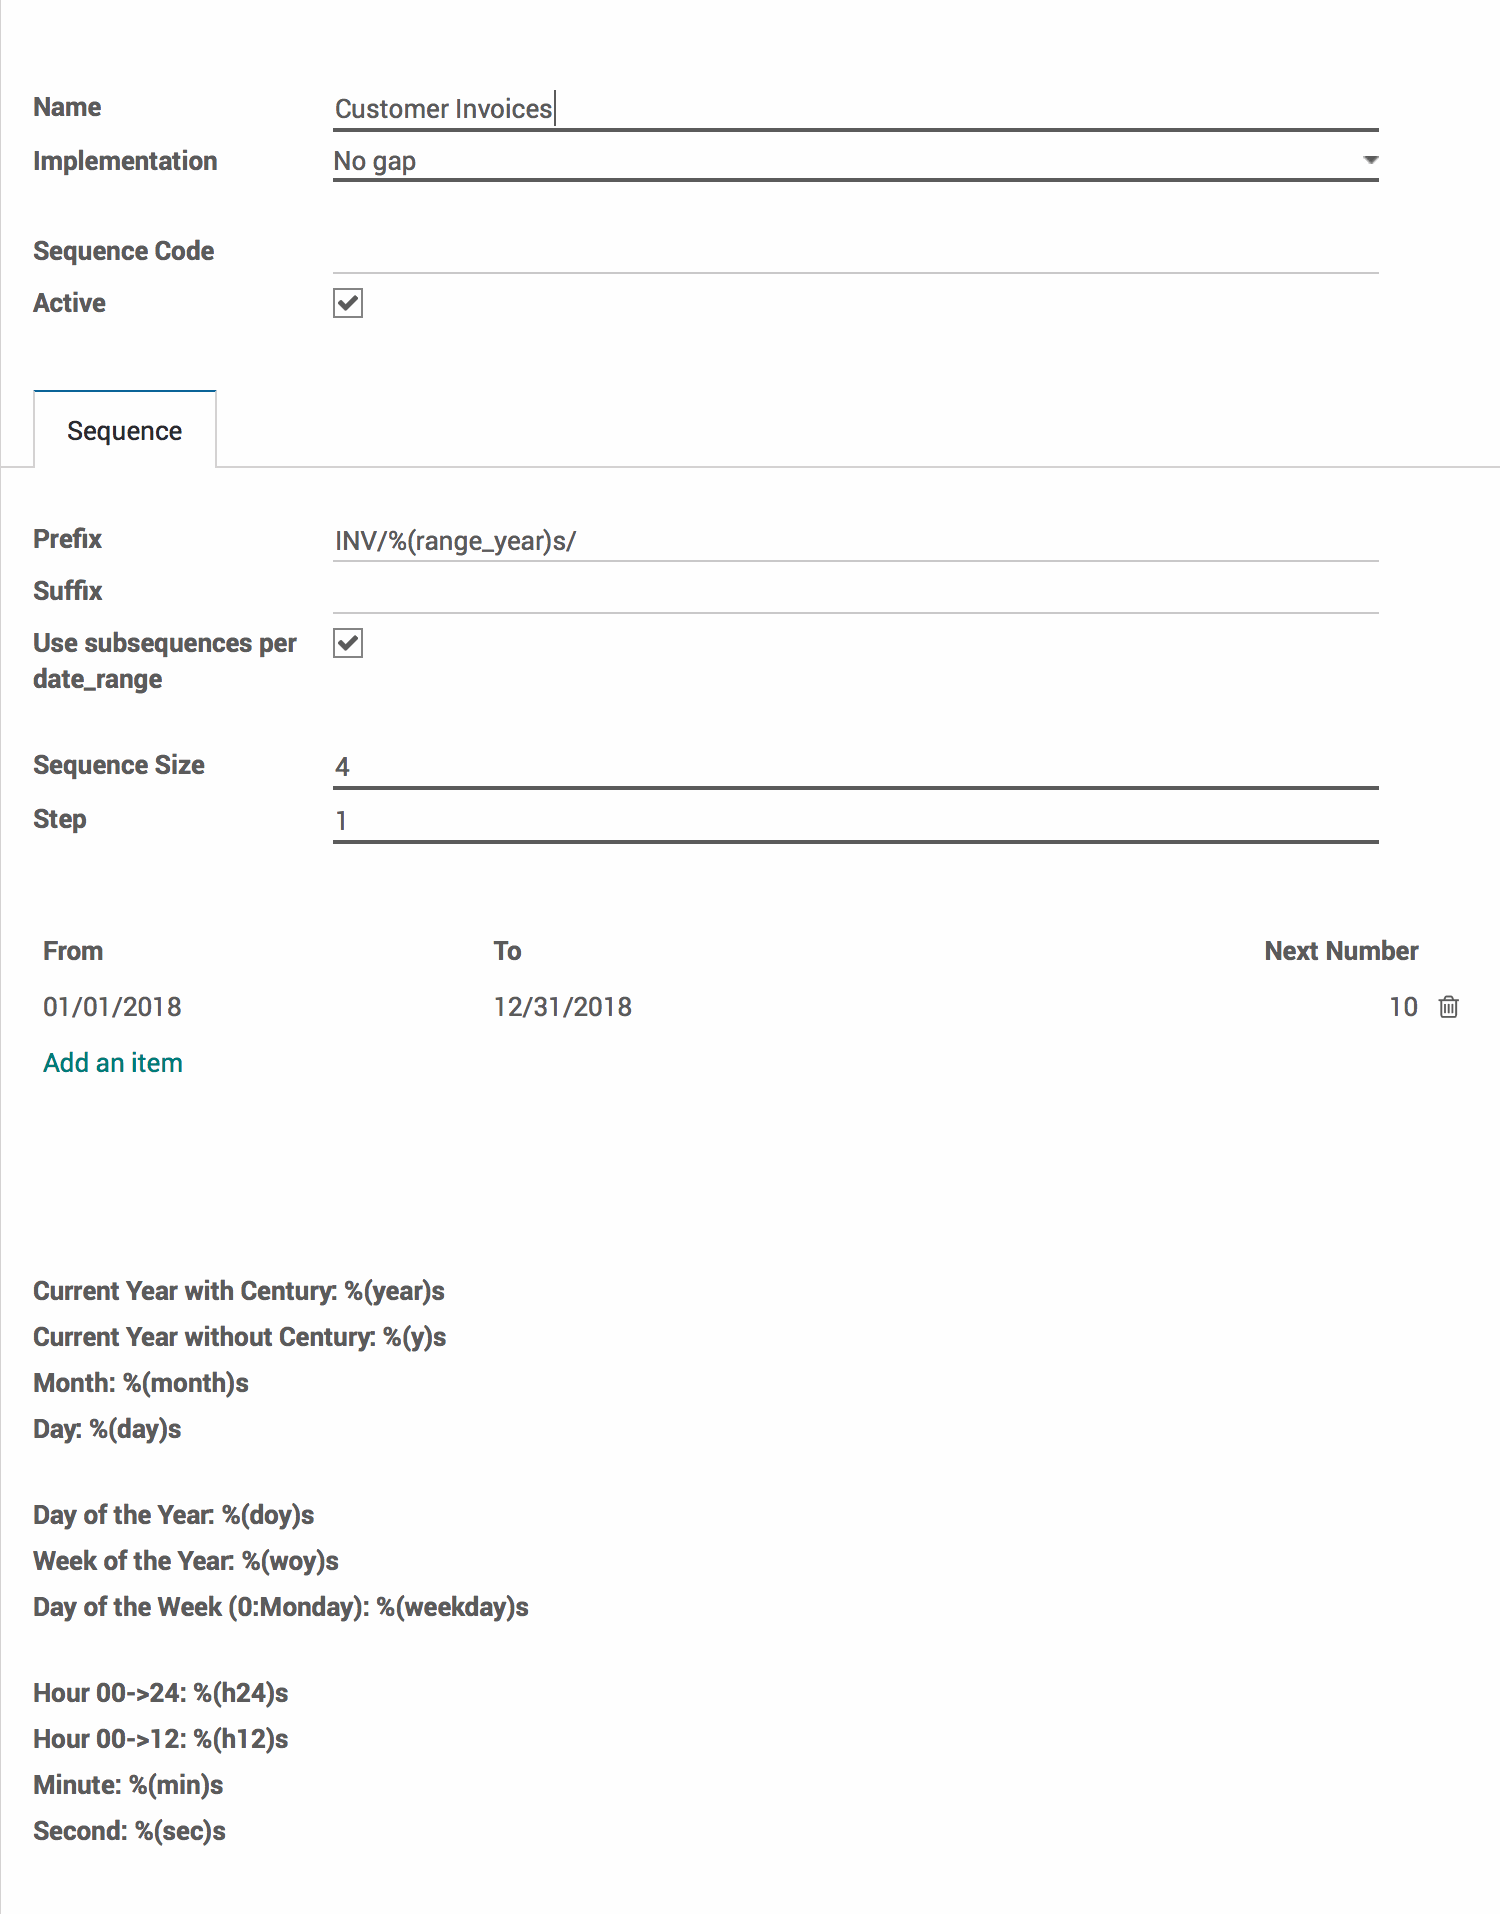
When changing the sequence, you will have access to the following fields:
Name: The name of the entry sequence; is a required field.
Implementation: No Gap forbids any gaps in the sequence while Standard allows gaps; is a required field.
Sequence Code: Optional
Active: Selected if the Entry Sequence is currently in use.
Prefix: The prefix value of the record for the sequence (before the sequence number).
Suffix: The suffix value of the record for the sequence (after the sequence number).
Use subsequences per date_range: If selected, prefix variables with 'range_' to use the beginning of the range instead of the current date. (Example: 'range_year' instead of 'year').
Sequence Size: The length of the number (Example: If set to 4, the number will have 4 digits).
Step: How much the sequence number will increase with each new invoice (Example: With a step of 1 and the first being 0001, the next would be 0002).
Good to Know!
At the bottom of the page, there are snippets of dynamic time and date values that you can use in the prefix and suffix fields in cases where you'd like to change them from the default! Simple copy the value you want and paste into the field you desire.
Date Range lines: When 'Use subsequences per date_range' is selected, this is where the invoice number that resets at the beginning of each new date range is defined. You can define the range you like here as long as there are no gaps between them. In the right column, the next number of the next invoice in each range is defined. In the case that a new entry is created outside of the date ranges defined, a new range will be created automatically based upon the previous existing date ranges.
When finished, hit save.