Accounting: Accounting: Management: Deferred Revenues
Purpose
This document covers how Odoo 14 manages deferred revenues via custom models in the Accounting application.
Process
To get started, navigate to the Accounting app.
Configuring a Deferred Revenue Account
Important!
Automating Deferred Revenues?
In the sections below, we'll go over Deferred Revenue Models, which provision for the automation of deferred revenue journal entries. If you plan to use the automated method, you'll need to create a separate account for each Deferred Revenue Model due to the unique configuration of each.
Go to Configuration > Accounting > Chart of Accounts. Click create to open a new line. Enter the Code, Account Name, and Account Type (Current Liabilities). When you're done, click save.

Once saved, click Setup on the new account line.

From within the record, click Edit.
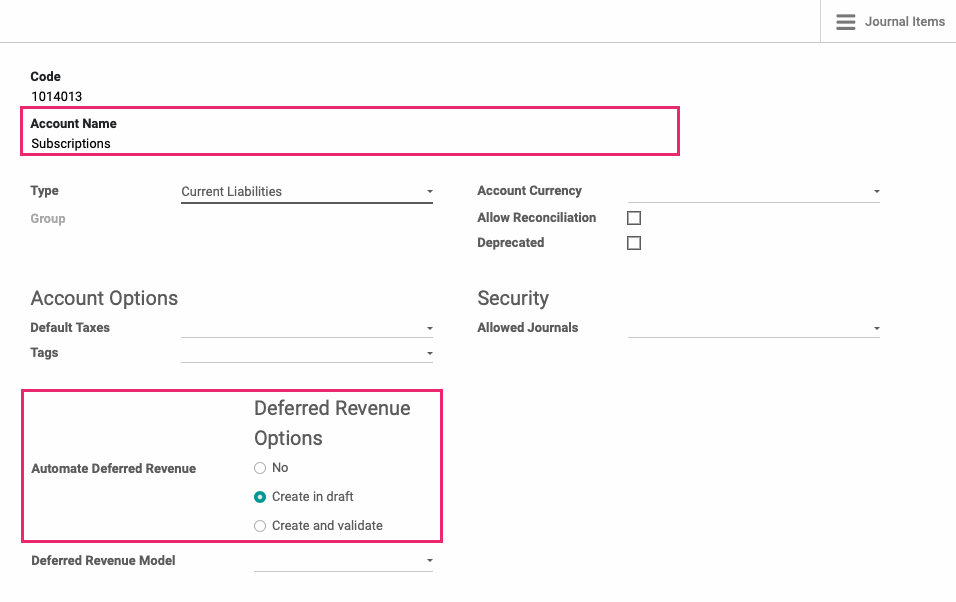
There are two sections to focus on in this account.
Type: Because this is deferred revenue, the account should be set to Current Liabilities.
Automate Deferred Revenue: This is what will automate the process for us. If you'd like to review the entries before the post, select 'Create in draft'. If you'd like Odoo to do this for you, select 'Create and validate'.
Deferred Revenue Model: In order to automate this process, we need to give the account a model to use. If you haven't created that model yet, no worries, we'll come back to this!
When you're ready, click Save.
Creating a Deferred Revenue Model
These configurations are the means by which Odoo automates deferred revenues.
To create a Deferred Revenue, go to CONFIGURATION > MANAGEMENT > DEFERRED REVENUE MODELS. Once there, click CREATE. This brings up the following form.
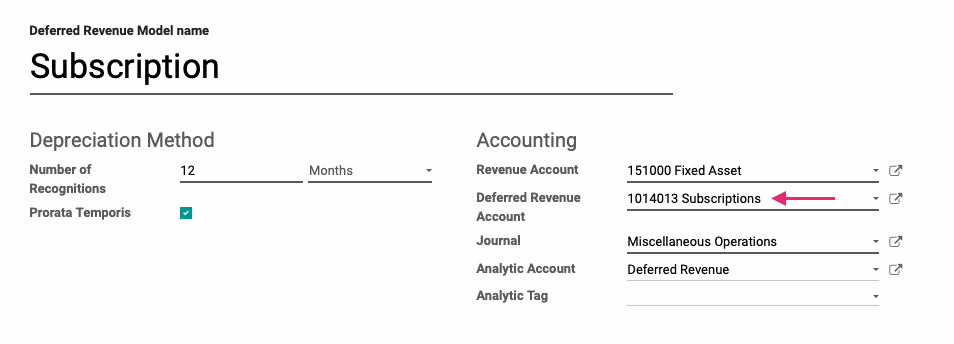
Deferred Revenue Model name: Enter a name for this configuration.
Depreciation Method
Number of Recognitions: Select the unit and number of units (e.g. months, years)
Prorata Temporis: Indicates that the first depreciation entry for this asset must be done from the asset date (purchase date) instead of the first January / Start date of fiscal year.
Accounting
Revenue Account: Select the Revenue Account to which this income will be recorded.
Deferred Revenue Account: Select the Deferred Revenue Account to which this income will be recorded. For our example, we'll select the account we just created.
Journal: Select the journal to which these transactions will be recorded.
Analytic Account: If applicable, select the Analytic Account wo which these transactions will be recorded.
Analytic Tag: If applicable, indicate the tag(s) to be added to transactions that use this model.
When you're ready, click Save.
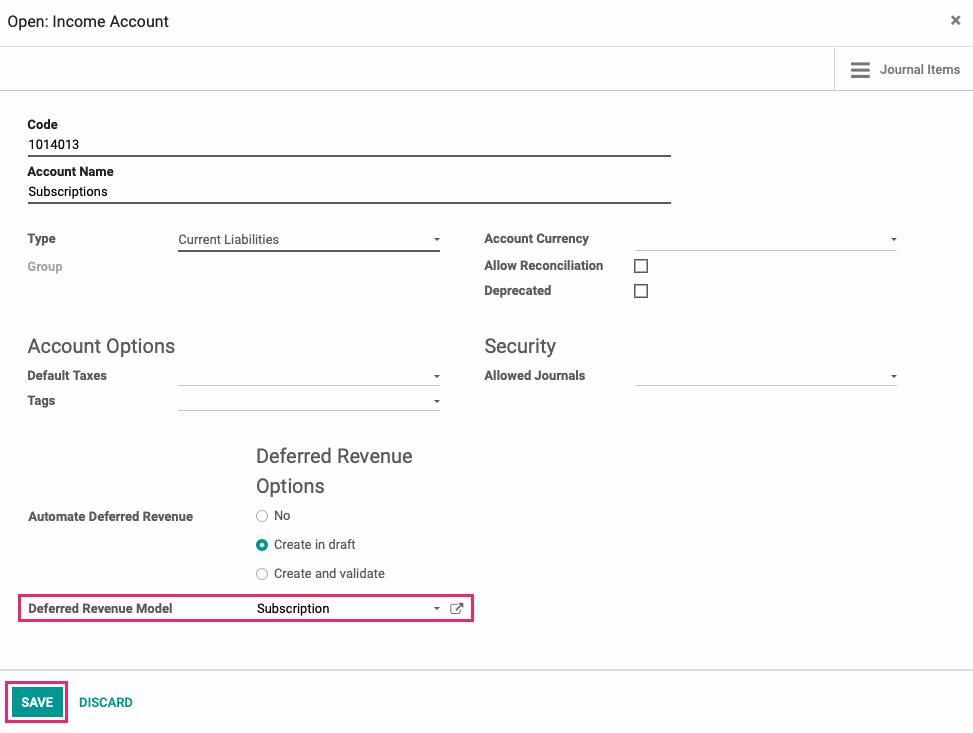
Now that we've created that model, let's go back to CONFIGURATION > ACCOUNTING > CHART OF ACCOUNTS and click Setup on the account we created in the first step.
Under the Deferred Revenue Options section, set the Deferred Revenue Model to the model we just created, then click Save.
Configuring a Product for Deferred Revenue
Next, go to Customers > Products and either create or select a product to configure using the following example as a guideline.
We have a product called "1 Year of Cakes" where we send the buyer one cake every month for one year. We want to disperse the revenue over the course of 12 months to properly reflect what we're sending out each month.
This product looks like any other saleable product, with one important distinction. We're going to edit this product, then head over to the Accounting tab. Under the Receivables section, set the Income Account to the one you set to be deferred revenue.
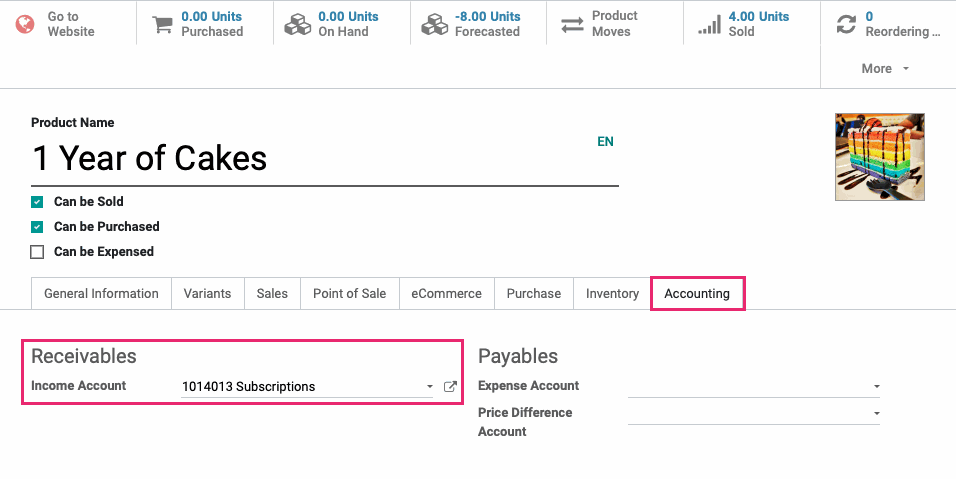
When you're ready, click Save.
Good to Know!
Multiple Deferred Revenue Products?
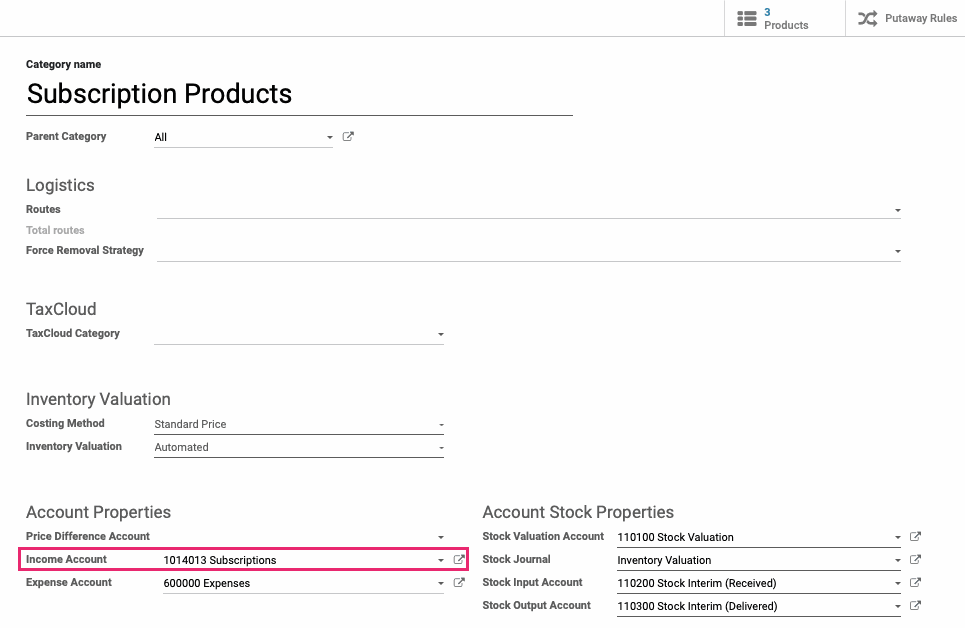
If you have several products that should create deferred revenue, consider creating a dedicated category for those products. Doing so allows you to set the category itself to deferred revenue, so all products within it will inherit that setting.
Watch it Work!
Let's sell this product and watch how it works based on the configuration, above.
Navigate to the Sales app.

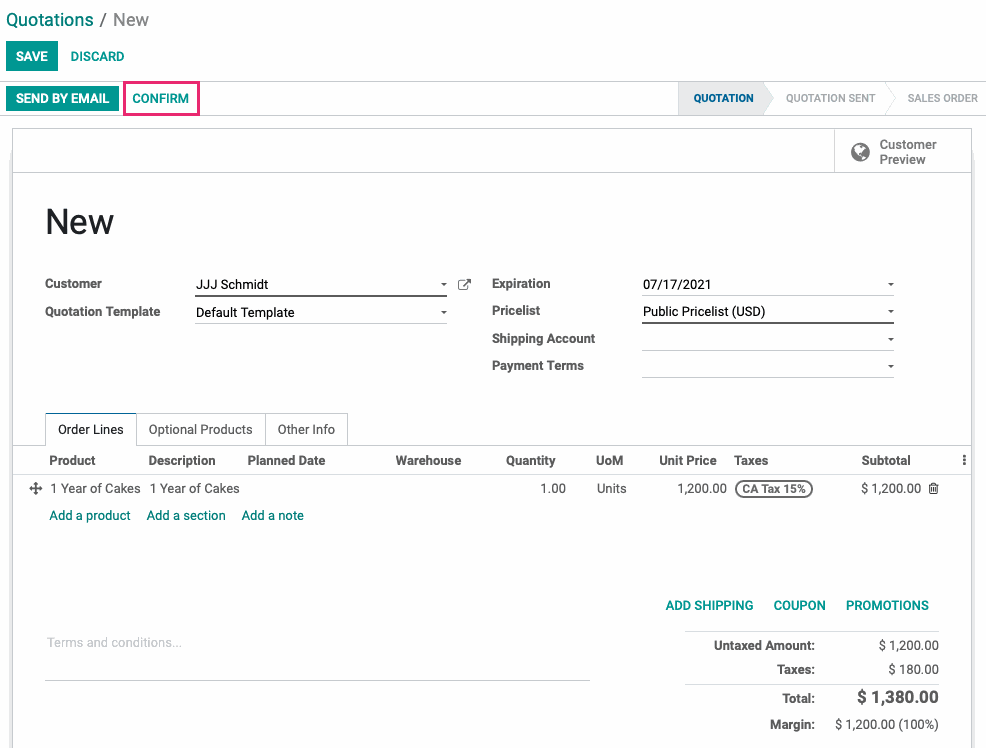
Once there, we'll go to ORDERS > ORDERS and click CREATE. We'll select a customer and add the '1 Year of Cakes' product under the ORDER LINES tab. We'll then confirm the order.
On the confirmed invoice, click Create Invoice, then create and view invoice.
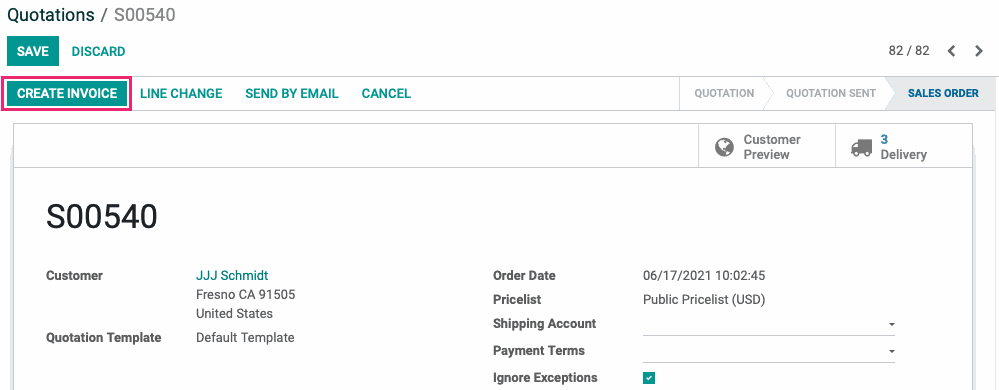

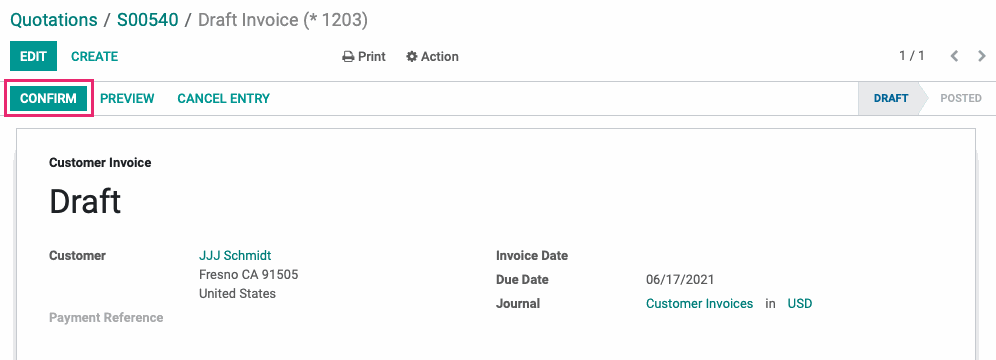
Confirm the invoice.
Now, let's jump back to the Accounting app.
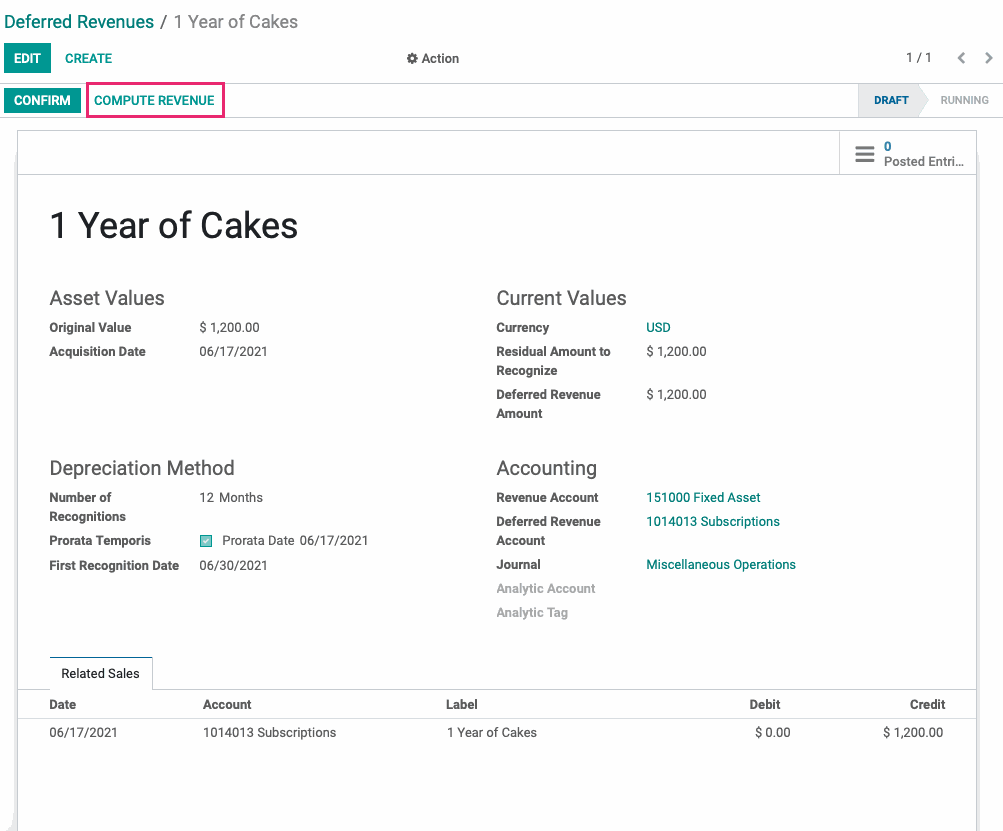
Once there, we'll go to Accounting > Management > Deferred Revenues. Here we'll see our brand new entry in draft status, based on the configuration above. Let's open it up!

From within this record, we can see the configuration of the deferred revenue model has been applied. To see the planned journal entries, we'll click Compute Revenue.
You'll now see a new Revenue Board tab with all of those planned entries.

If everything looks good, you can go ahead and click confirm. Odoo will now start posting journal entries according to the Revenue Board.

Create a Manual Deferred Revenue
If you're not at the point of needing to automate Deferred Revenues, that's no problem! You can easily create an entry manually.
Our customer, Sandra, has ordered 12 leather jackets but she doesn't want them all at once. She wants one at a time. We've already created the sale order and she's paid the invoice. So, let's create a Deferred Revenue!
To do so, start in the Accounting app.

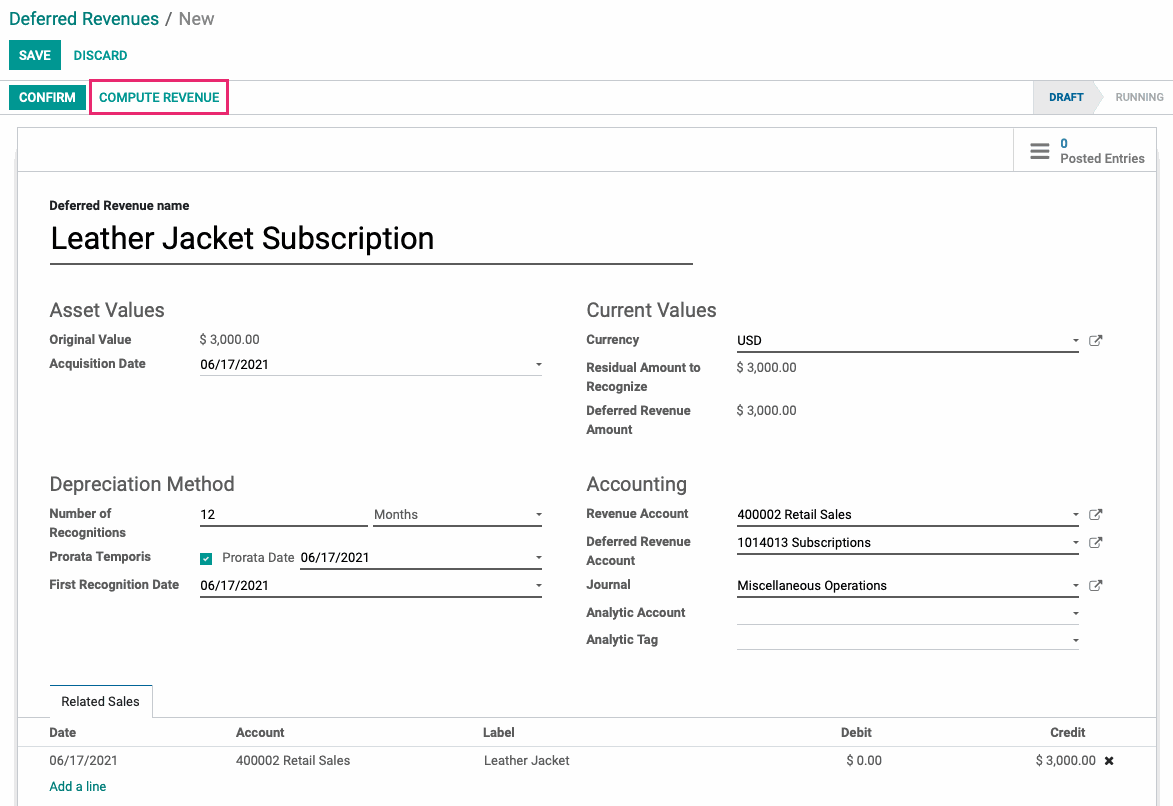
Once there, we'll go to ACCOUNTING > MANAGEMENT > DEFERRED REVENUES and click Create to bring up the empty form.
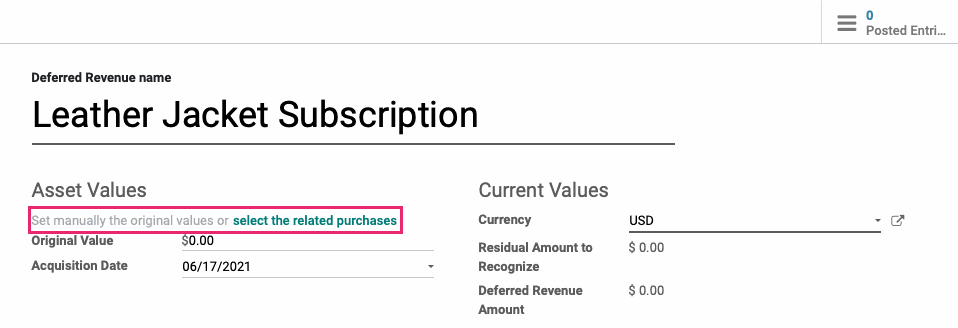
Deferred Revenue name: Enter a name for this record.
Asset Values: Click select the related purchases.
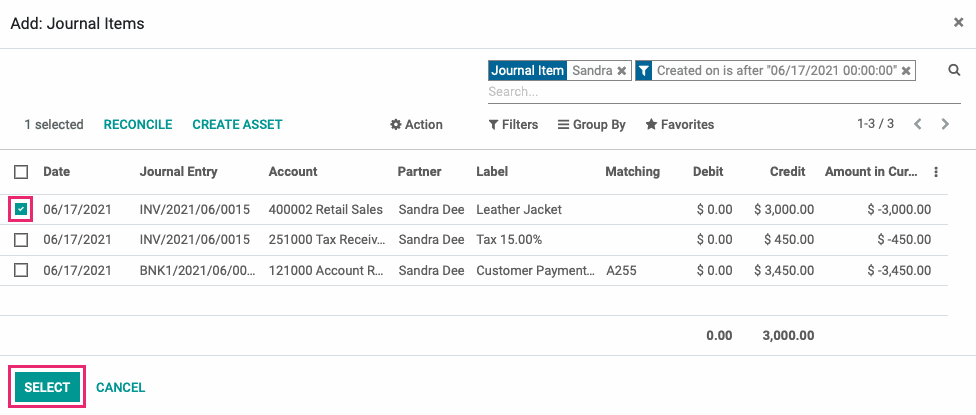
This brings up a list of journal items. Here, locate and select the entry for the sale, and click Select. In doing so, several fields on the page will populate for you.
Original Value: This is a calculated field that pulls directly from the record(s) you selected in the previous step.
Acquisition Date: The date of revenue acquisition.
Depreciation Method
Number of Recognitions: Select the unit and number of units (e.g. months, years).
Prorata Temporis: Indicates that the first depreciation entry for this asset must be done from the asset date (purchase date) instead of the first January / Start date of fiscal year.
First Recognition Date: Select the date for the first journal entry to be made.
Current Values
Currency: This will default to the invoice currency.
Residual Amount to Recognize: This is a calculated field that displays the amount left to defer.
Deferred Revenue Amount: This is a calculated field that displays the amount deferred up until the current date.
Accounting
Revenue Account: Select the account to recognize the revenue.
Deferred Revenue Account: Select the account to recognize the deferred revenue.
Journal: Select the journal to record enteries for this deferred revenue entry.
Analytic Account + Analytic Tag: If you're using analytic accounting, selec the account and tag(s) for these journal entries.
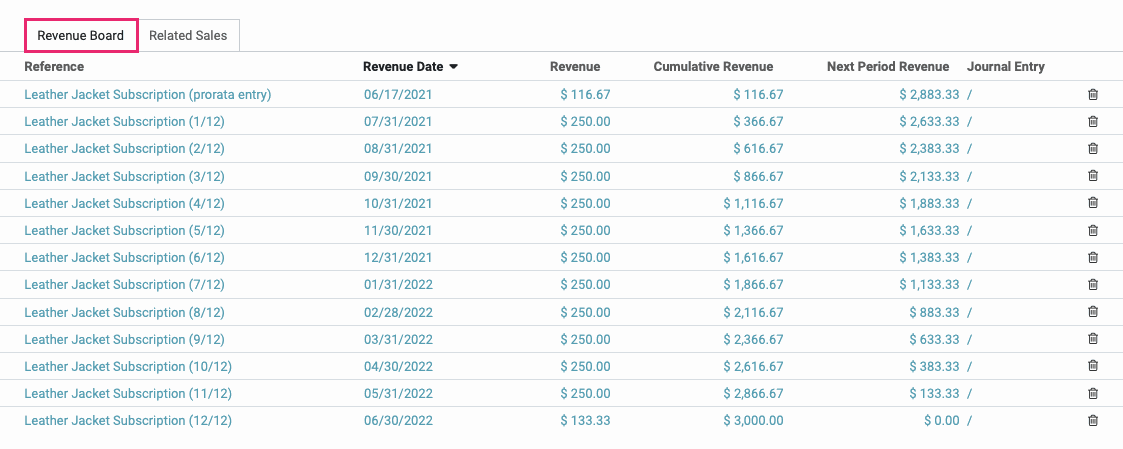
Under the Related Sales tab, you'll see the Sale Order you selected in the first step. When you're ready, click Compute Revenue.
You'll now see a new REVENUE BOARD tab with all of those planned entries.
Good to Know!
Create a Deferred Revenue Model from a Manual Entry
If you've created a manual deferred revenue entry that you think will be useful in the future, go ahead and click Save Model to save this configuration for future use!

At that point you can follow the instructions for Creating a Deferred Revenue Model.