Accounting: Accounting: Journal Entries
Purpose
This documentation outlines the processes associated with Journal Entries in Odoo 14.
A Journal Entry, also referred to as an accounting entry, is a formal record that documents a transaction in a Journal. In Odoo, journal entries are made by utilizing the double-entry bookkeeping system.
Double-Entry Bookkeeping Systems require you to make both a debit line and a credit line for each entry. In addition, the credit side and the debit side of all entries must be equal to each other.
In Odoo, these credit and debit lines that makeup Journal Entries are called Journal Entries.
Processes
To get started, navigate to the Accounting app.
Creating a Journal Entry
In Odoo, there are many operations that can lead to the creation of a journal entry, such as customer invoices, payments, vendor bills, bank statements, stock moves, and payslips. However, sometimes it is necessary to create a custom journal entry, like setting up your initial account balances.
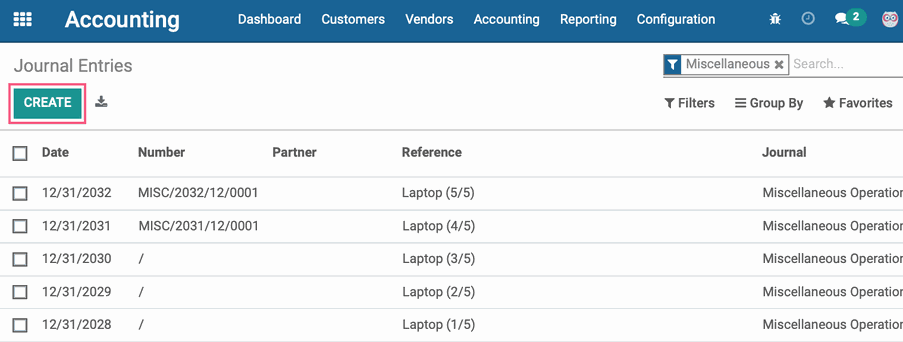
To get to your Journal Entries, click Accounting > Miscellaneous > Journal Entries. You will see a list view of all journal entries.
Click Create to make a new entry.
This will bring you to a form where you'll enter the details of the new entry.
Reference: Enter a description of the journal entry's purpose; this will appear in the journal entry itself. This field is optional.
Accounting Date: This is the date that you want the entry to be shown as being done on. It is automatically set to the current date, but it can be changed if needed.
Journal: Select the journal you'd like to add this entry into. All journal entries require a journal to be selected.
Under the Journal Items tab, you will add Journal Item lines. You will always need at least two lines, one for a debit amount and one for a credit amount.
Click the Add a line button to add a journal item line, and fill in the new line that opens.
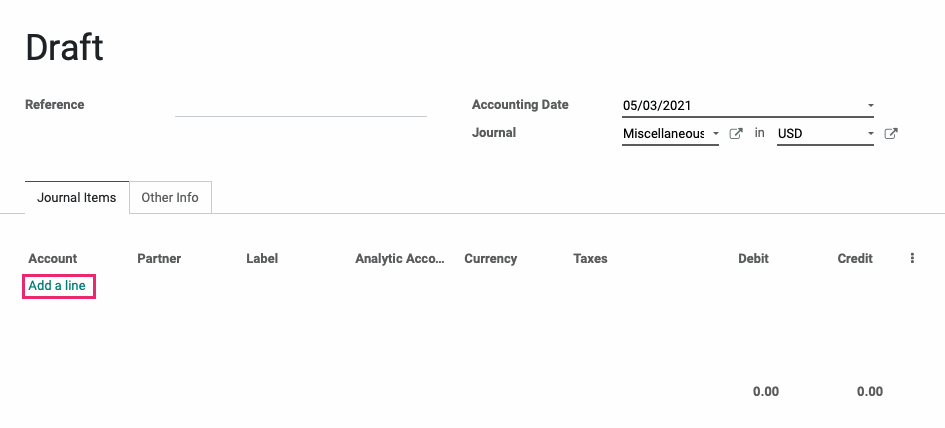
Account: Select the account from which you will be making the debit/credit from the drop-down menu. This is required for all Journal Items.
Partner: Select any associated partners for this Journal Line, if applicable.
Label: Input a description of the debit/credit line for internal reference.
Analytic Account: Choose a relevant Analytic Account, if desired.
Analytic Tags: Choose a relevant Analytic Tag, if desired.
Credit: The value of the credit.
Debit: The value of the debit.
Continue adding as many journal items as needed. When finished, make sure that the totals of the Debit and Credit amounts are equal.
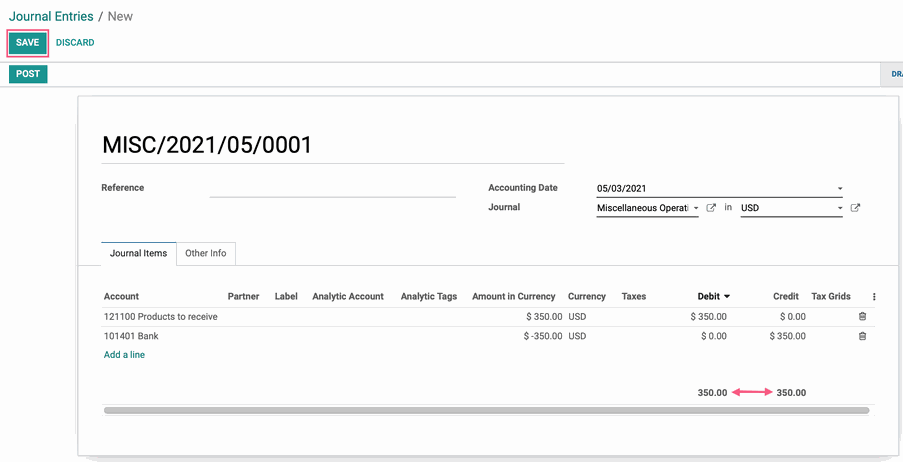
When ready, click Save.
You will notice that the entry has not yet been posted, and is in the Draft state. This adds another step of validation before actually posting the entry to your journal and gives you time to ensure that everything has been entered correctly.

When you're ready to save this entry to your journal, click the POST button.

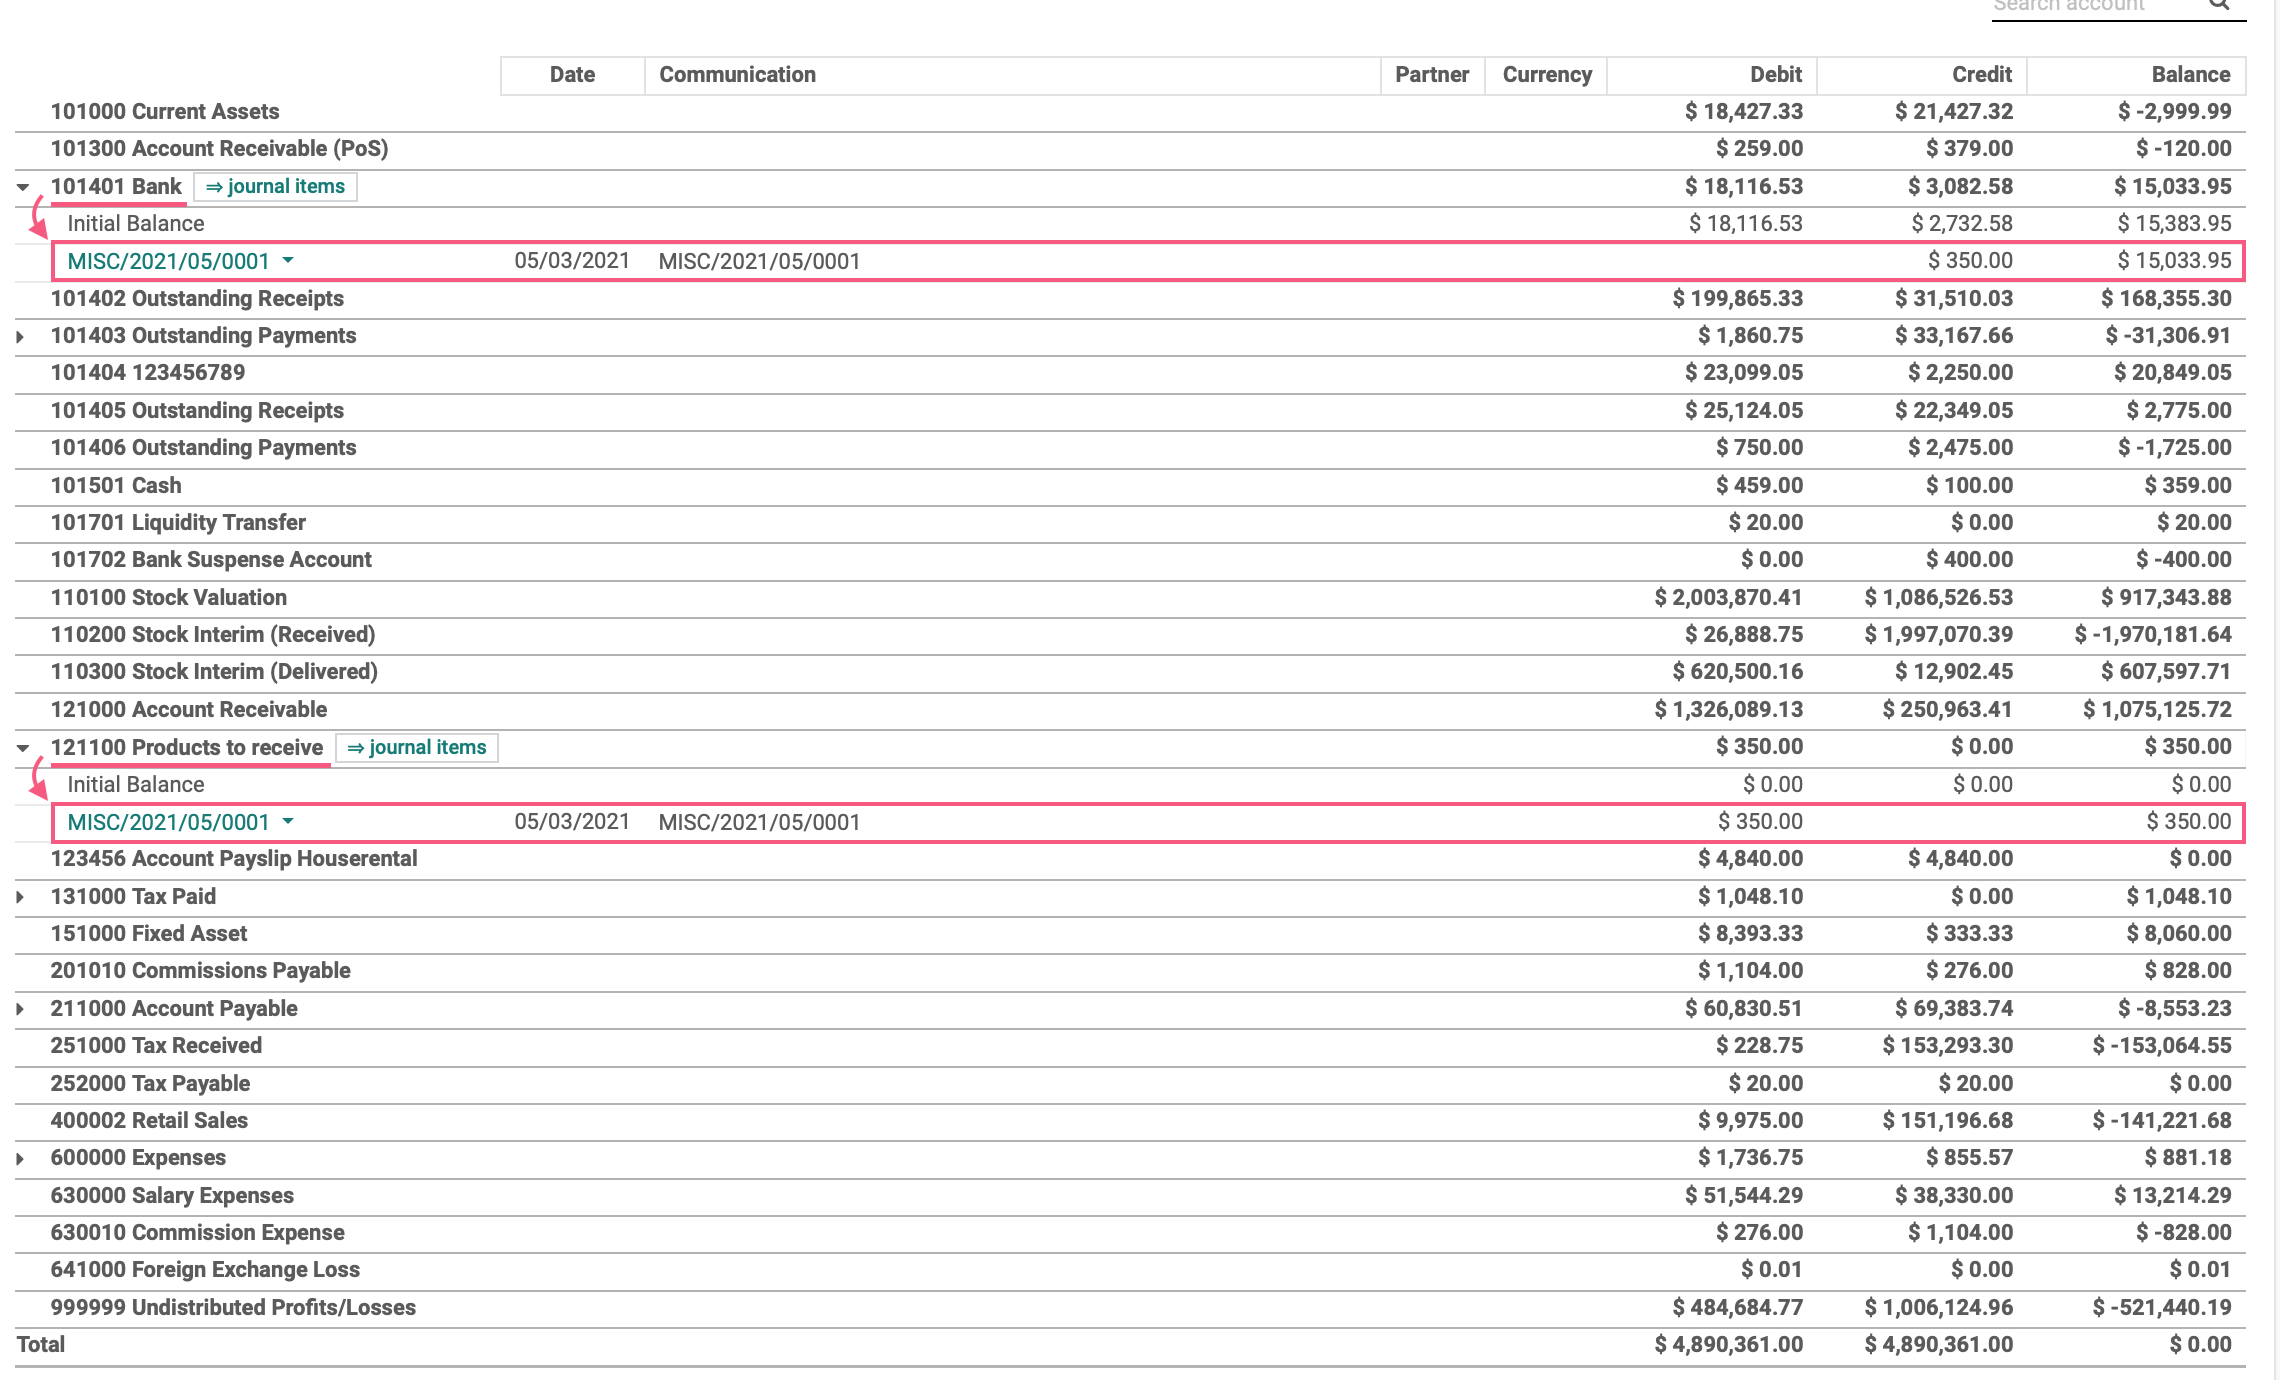
Once your Journal Entry has been posted you can look at a report, such Reporting > Audit Reports > General Ledger, and you'll see the journal items from the posted journal entry.
Reversing a Journal Entry
Click ACCOUNTING > Miscellaneous > JOURNAL ENTRIES and select the posted entry you wish to reverse. By default, the Miscellaneous filter is in place and you may need to remove or adjust your filters to find the correct entry.
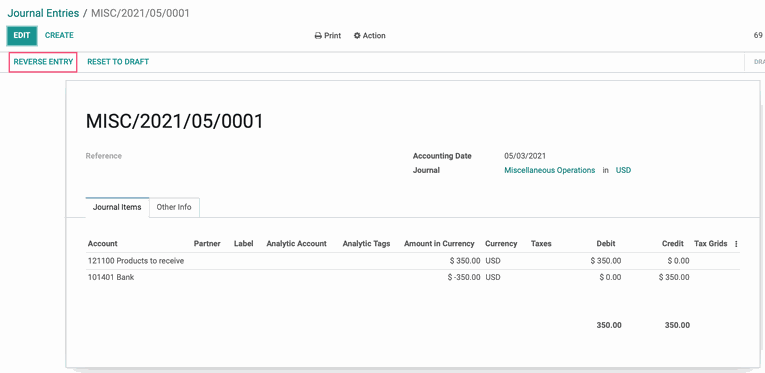
From within the Journal Entry record, click Reverse Entry.
A Reverse modal will appear. Review and modify the fields, as needed.
Reversal Date: Select the date that you want the entry to show as being reversed.
Specific: manually set the reversal date, defaults to the current date.
Journal Entry Date: Use the date on the journal entry as the reversal date.
Use Specific Journal: If you would like to use a specific journal to record the reversal that is different from the Journal this entry was originally posted to, you can select an alternate journal from this dropdown. If this field is left blank, it will use the Journal the entry was originally posted to.
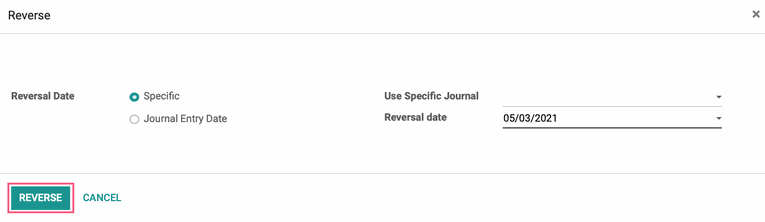
When ready, click REVERSE.
This takes you to the Reversed Journal Entry, indicated by the breadcrumbs.

You will notice that the Journal Items are the same as the original journal entry with the exception that the debit and credit amounts are swapped. The Reference will also indicate that this journal entry is a reversal of the original.
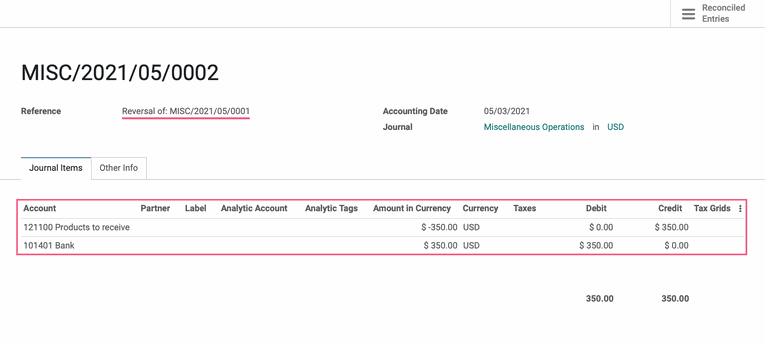
Additionally, the Other Info tab will have a link to the original entry.
