Accounting: Accounting Workflows: Importing Bank Statements
Purpose
This document covers importing your Bank Statements within the Accounting application of Odoo 15. Importing your bank statements allows you to keep track of financial movements that take place on your accounts and allows the reconciliation of them with the transactions recorded within your accounting. For higher efficiency, we recommend using the Bank Synchronization feature; however, if your bank is not a supported institution or you don't want to use synchronization, Odoo still gives you a couple of options.
Process
To get started, navigate to the Accounting app.

Importing Bank Statements
The first option is simply importing the statements supplied to you by your bank. Odoo supports several file formats to import your statements:
SEPA recommended Cash Management format (CAMT .053)
Comma-separated Values (.CSV)
Open Financial Exchange (.OFX)
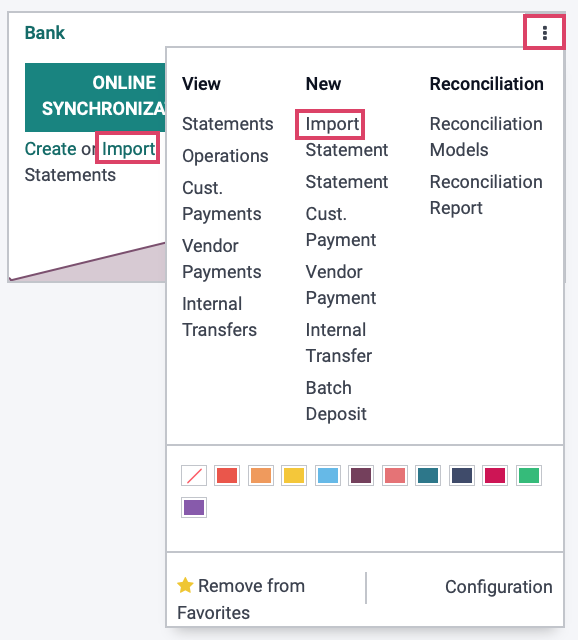
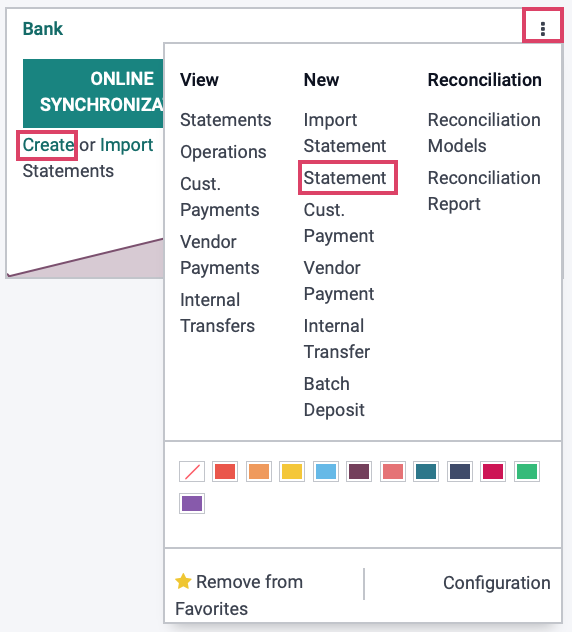
From the Accounting Overview, click either the Import link, or the vertical ellipsis and select New > Import Statement.
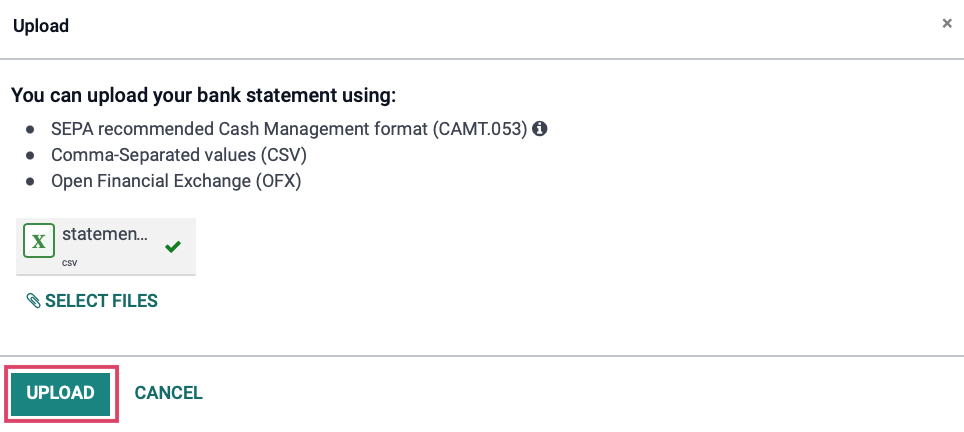
The following modal will open, allowing you to select your file. Use the SELECT FILES and then click UPLOAD when ready.
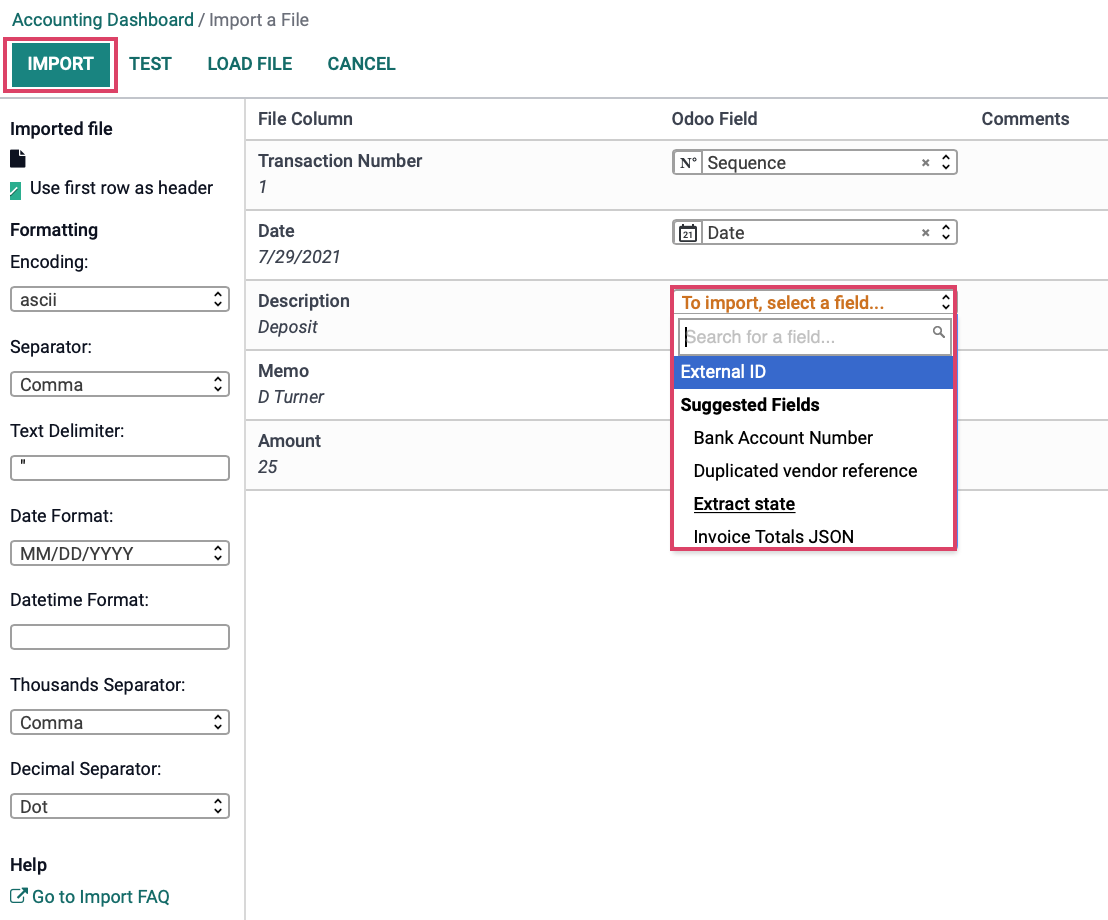
Any line that displays To import, select a field... must have a field selected that corresponds the File Column name from your importing document to a field within Odoo. You can start typing in the search field to find a suitable field, or simply scroll through the options. Once configured to your preference, click IMPORT.
Creating Bank Statements
The second option to get your bank statement information into Odoo is to create them. Like Importing above, click either the CREATE link, or the vertical ellipsis and then New > Statement.
The following fields appear:
Reference: Enter a reference name for your Statement.
Journal: The assigned Journal for this Bank.
Date: Assign a date to the Bank Statement
Company: If in a single company environment, this will be set by default.
Starting Balance: Beginning balance of journal before transactions are input.
Ending Balance: Balance after transactions are calculated. The ending balance and the Computed Balance should be the same.
Use the ADD A LINE to manually enter each entry from the original bank statement.
Tip: To ease the reconciliation process, select an entry in the Partner field, if you have it. It is also recommended to write payment references in the Label field.
Click SAVE when complete. Then click POST. 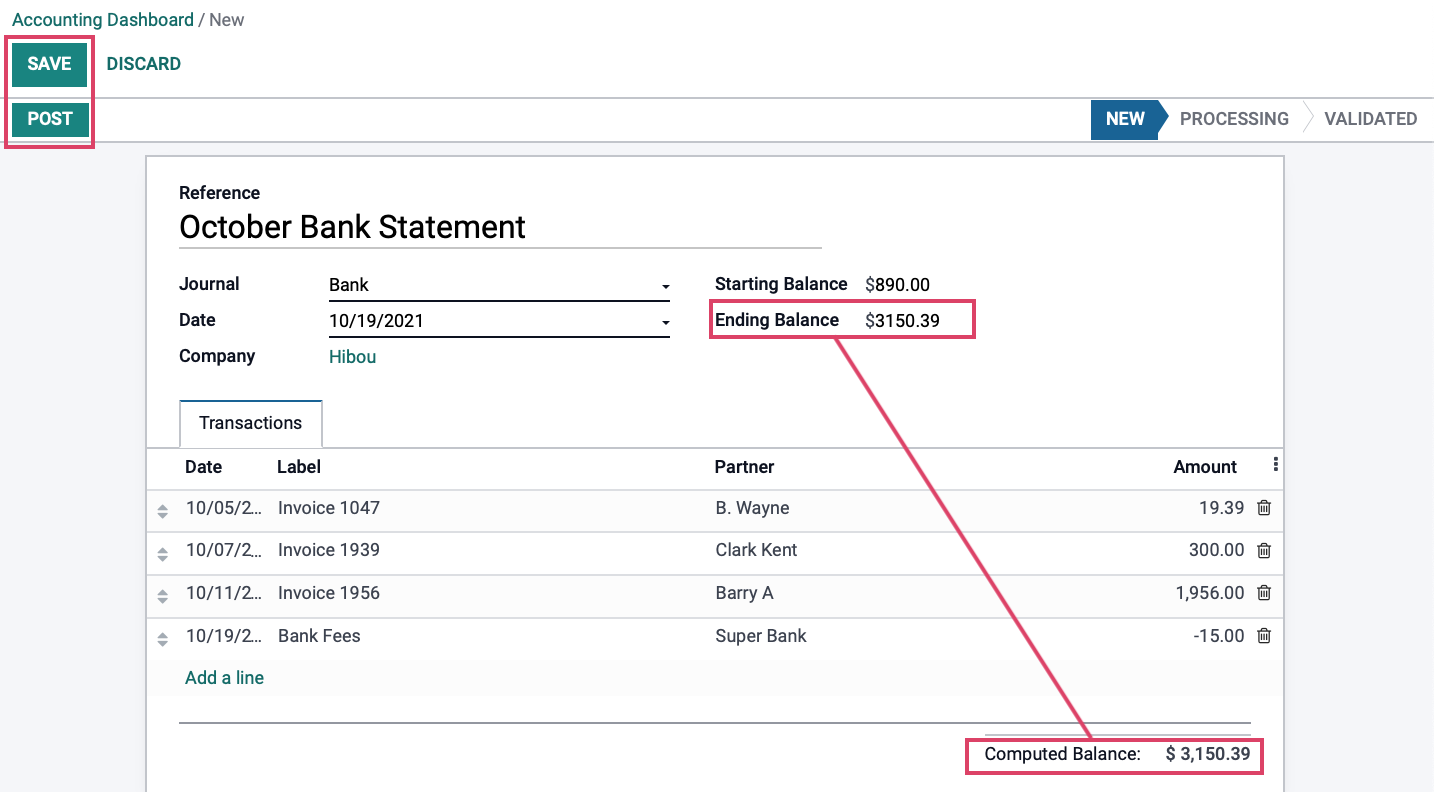
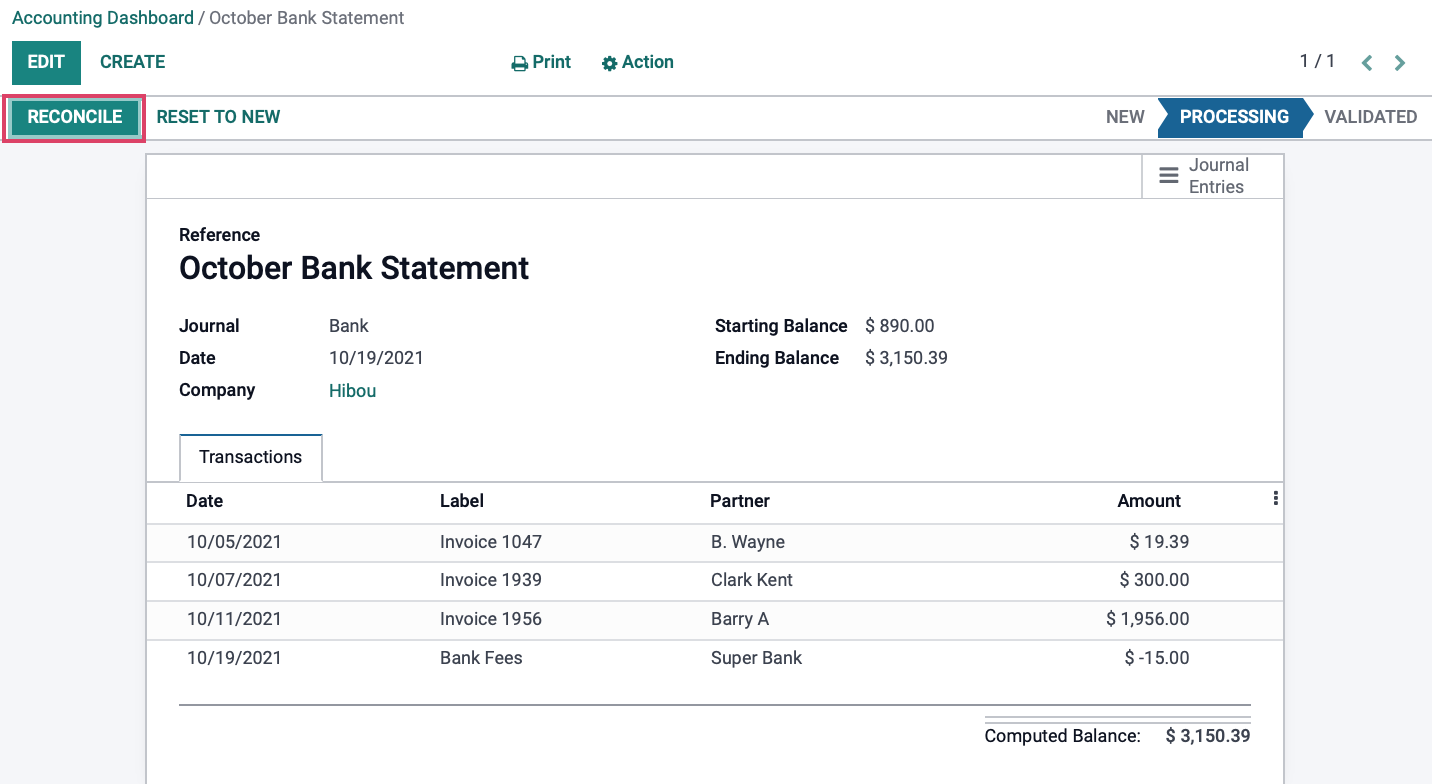
Once you have posted, you will have the opportunity to RECONCILE. For guidance, refer to our Reconciliation documentation.
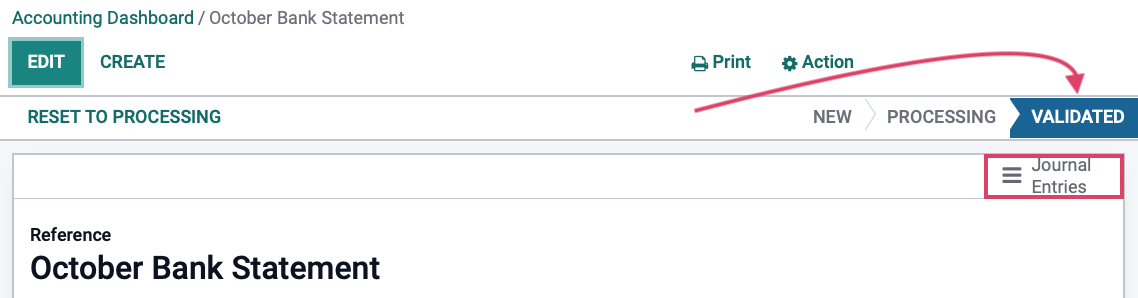
Now you can click validate to finalize the process.
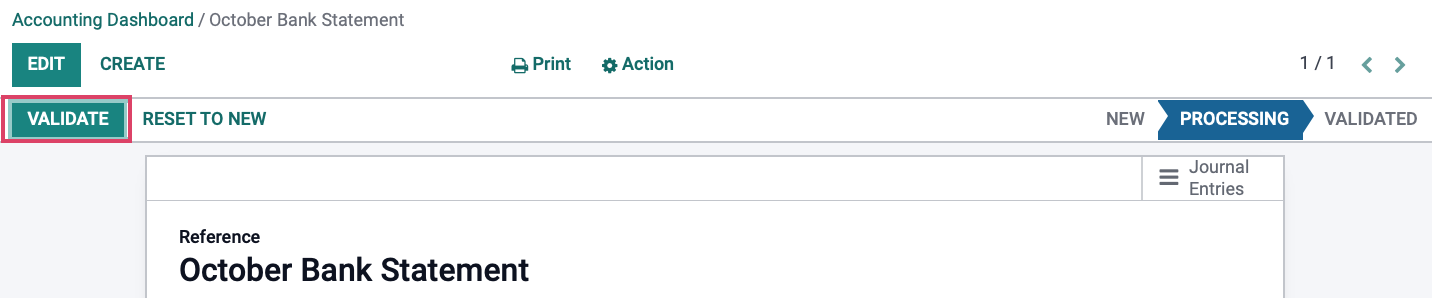
Once the entries have been validated, the PROCESSING status will be replaced by one that reads VALIDATED, and you can now click the Journal Entries smart button to see the entries made on the bank statement.