Accounting: Configuration: Payment Terms
Purpose
The purpose of this documentation is to outline how to set up and use Payment Terms in the Odoo Accounting app.
Payment terms designate the schedule to pay the full balance of an invoice. You can apply payment terms for both your customers and vendors.
Payment terms can be set on a contact, sale order, invoice, purchase order, or vendor bill.
Processes
To get started, navigate to the Accounting application.
Creating a Payment Term
Once there, click on Configuration > Payment Terms.
You will be presented with a list of existing payment terms, which you can view and edit. To create new payment terms, hit the Create button.
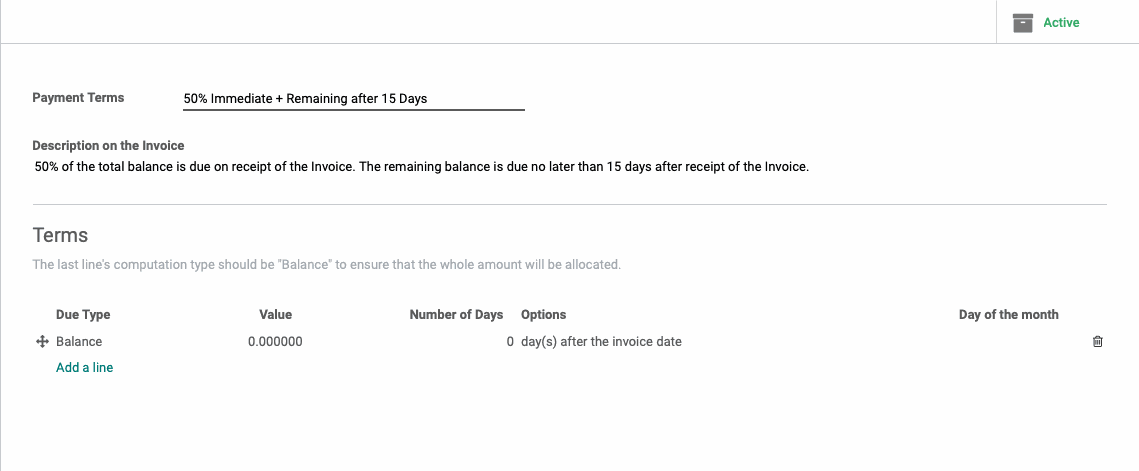
You will be prompted to fill in the below fields:
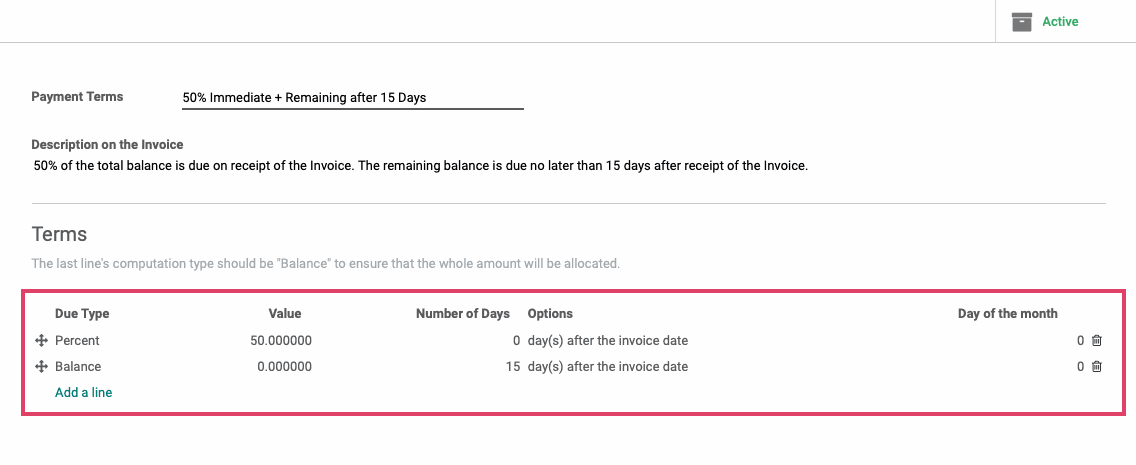
Payment Terms: The name of your payment terms. Typically outlines the payment schedule for that payment term. In the below example, we are creating 50% Immediate + Remaining after 15 days.
Description on the Invoice: You can input a description of the payment terms conditions in more detail in the description so that you customers will understand the conditions to complete payment.
Terms: These lines represent the schedule for a set portion of the invoice's amount.
To set the terms, you will need to add a new line for every condition.
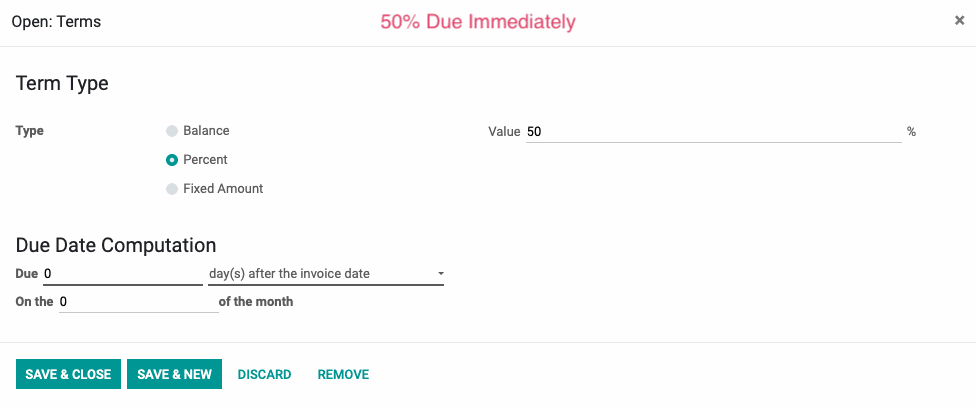
To add a new line, click Add a line and a modal will appear with the below options:
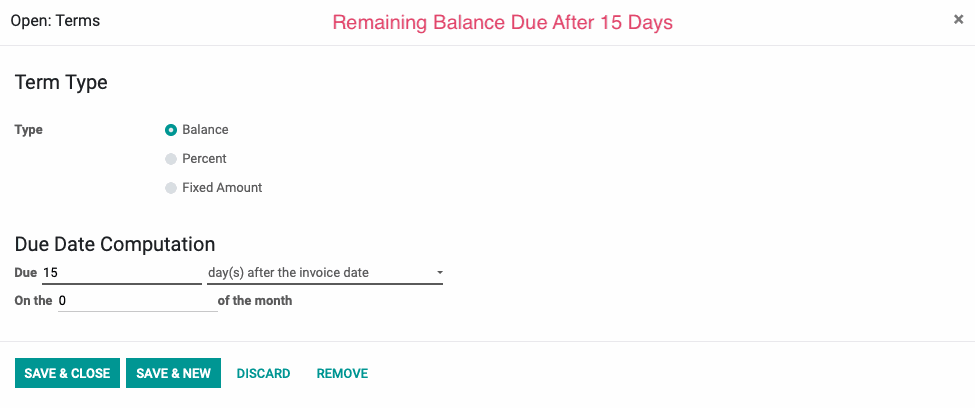
Type: There are three term types that you can use to construct your payment terms. The type is the amount that is due for this line.
Balance: The total remaining balance to be paid. You will enter the value of the balance once you close the modal.
Percent: Input a percentage of the total balance to be paid.
Fixed Amount: Input a fixed dollar amount.
Due Date Computation: This is where you input when the amount you specified above is due.
Once you have these inputted, you can hit Save and close if you only need one line. If you need multiple lines, you can hit save and new to save your existing line and get a new line to appear without leaving the modal.
Important!
When creating a payment term with multiple lines, it is crucial that the last one is for the Balance. This is to ensure the invoice will be paid in full and you won't be left with only a partial payment.
Once you have your payment terms set and ordered, click Save.
Payment Terms and Reporting
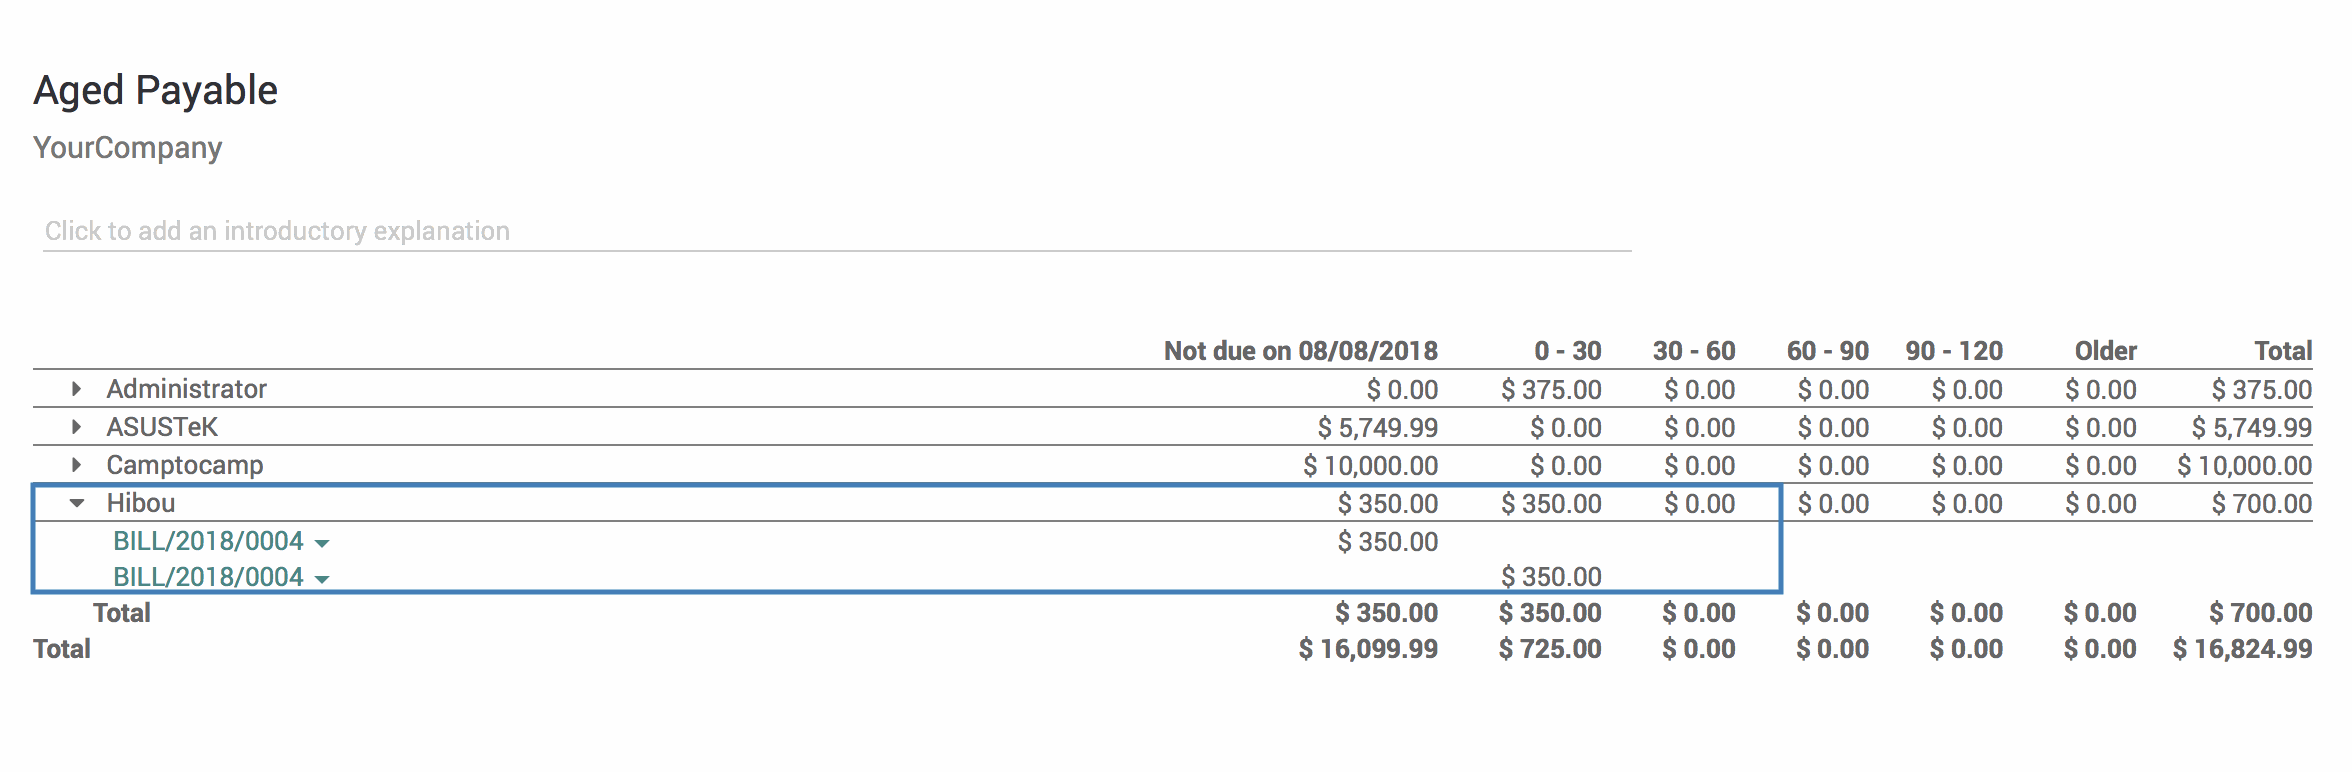
In the Accounting application, your Aged Payables and Aged Receivables reports will reflect the expected incoming or outgoing funds based on the payment terms that you have specified for your customers and vendors.
Applying Payment Terms to Contacts
To apply your payment terms directly to your customers and vendors, navigate to CUSTOMERS > CUSTOMERS.
Select the contact that you want to set the payment terms for. Click Edit on the contact's details page.
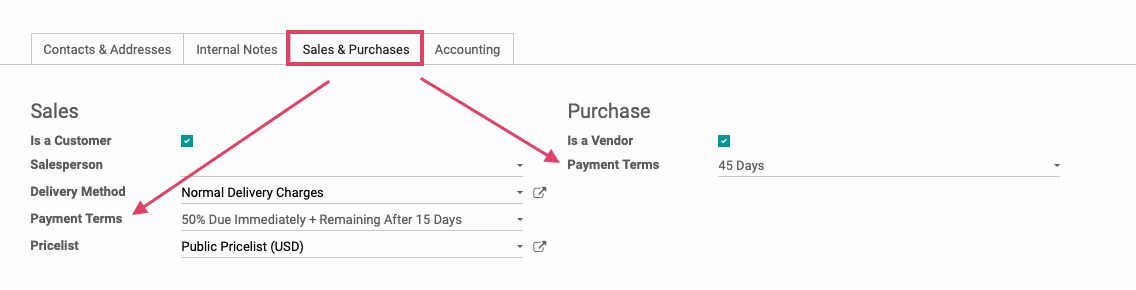
Navigate to the Sales & Purchases tab. On this tab, you'll see if your contact is a customer, vendor, or both and can apply payment terms to the contact as needed.
When ready, hit Save.
Applying Payment Terms on Quotations and Sale Orders
To get started, navigate to the Sales application.

From the main page, click create to make a new Sales Order.
Set the customer you are generating the Sale Order for. If there are any payment terms associated with the customer, they will display automatically in the payment terms field. This can be changed manually if needed.
If the customer does not have payment terms set for them, you can choose the correct payment terms from the drop down menu.

Applying Payment Terms on Invoices
Within the Accounting app, navigate to CUSTOMERS > INVOICES.
Create a new invoice by hitting the CREATE button.
Set the customer you are generating the invoice for. If there are any payment terms associated with the customer, they will display automatically in the payment terms field. This can be changed manually if needed.
If the customer does not have payment terms set for them, you can choose the correct payment terms from the drop down menu.
Proceed with creating the rest of the invoice, then hit SAVE and VALIDATE when ready.

After validating the invoice, the Due Date field on the invoice is the final due date in the payment term (15 days after receipt in our example).

Applying Payment Terms on Purchase Orders
To get started, navigate to the Purchase app.
On the main screen, click create to make a new Purchase Order.
Set the vendor you are creating the Purchase Order for. If there are any payment terms associated with the vendor, they will display automatically in the payment terms field.
If the vendor does not have payment terms set for them, you can choose the correct payment terms manually.
Regardless of whether or not the vendor has payment terms set on their contact, you can change their payment terms by navigating to the Other Information tab and choosing the correct payment terms from the drop down menu.

Fill in the remaining details for the Purchase Order. When ready, hit Save, Confirm order, or Send by Email.
Applying Payment Terms on Vendor Bills
From the Accounting application, navigate to Vendors > Bills.
Click create to make a new vendor bill.
Set the vendor you are creating the vendor bill for. If there are any payment terms associated with the vendor, they will display automatically in the payment terms field.
If the vendor does not have payment terms set for them, you can choose the correct payment terms manually.
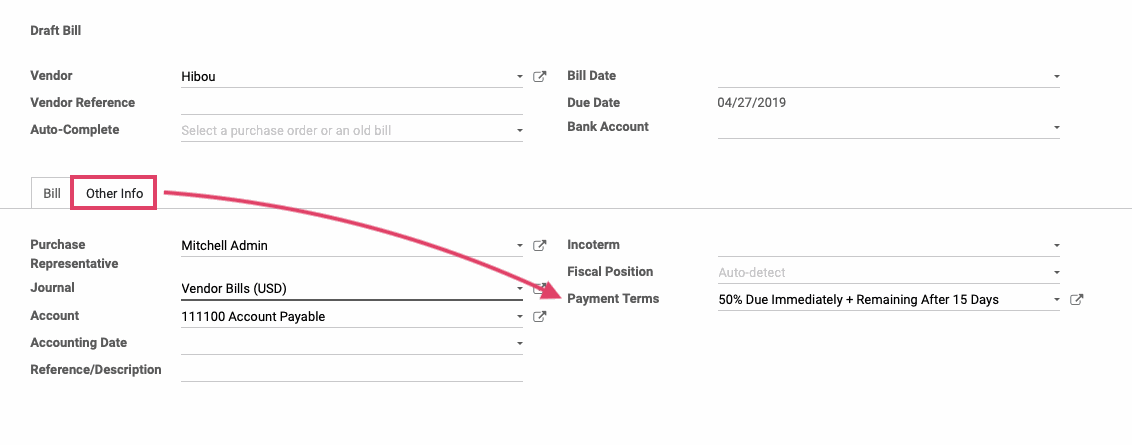
Regardless of whether or not the vendor has payment terms set on their contact, you can change their payment terms by navigating to the Other Info tab and choosing the correct payment terms from the drop down menu.
Proceed with creating the rest of the vendor bill. When ready, hit VALIDATE.
After validating the vendor bill, the Due Date field on the vendor bill will be the final due date in the payment term (15 days after receipt in our example).
