Accounting: Configuration: Expenses
Purpose
The purpose of this documentation is to outline the use cases and processes associated with Odoo's Expenses application.
Processes

Configuring Expenses
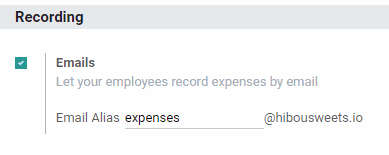
Within the expenses application, click on CONFIGURATION > SETTINGS.
Emails: If selected, you will enter an email address that expenses can be emailed to in order to generate expenses.
Click Save, then on CONFIGURATION > EXPENSE PRODUCTS.
Here you will see a Kanban view of Expense Products. Expense Products are products that have the 'Can be Expensed' checkbox selected.

Important!
Products for Expenses that Will be Invoiced Back to Customers
If you are creating an expense product for an expense that will be invoiced back to the client at cost, don't create your expense product here. Instead, go through the Sales or Inventory applications to create the products, as you will have more control over the product configuration.
For these products, the details below still apply but you'll also want to configure the Income Account and the Expense Account (under the Accounting tab) to use the same expense account, allowing the account to wash out since the cost and the revenue will match.
Hit the Create button.
Fill in the following details:
Product Name: The name of the expense. Here are some sample expense products:
Travel Expenses [Internal]: Used for airfare, car rental, hotels and other similar expenses that are associated with travel that is not being invoiced back to a customer.
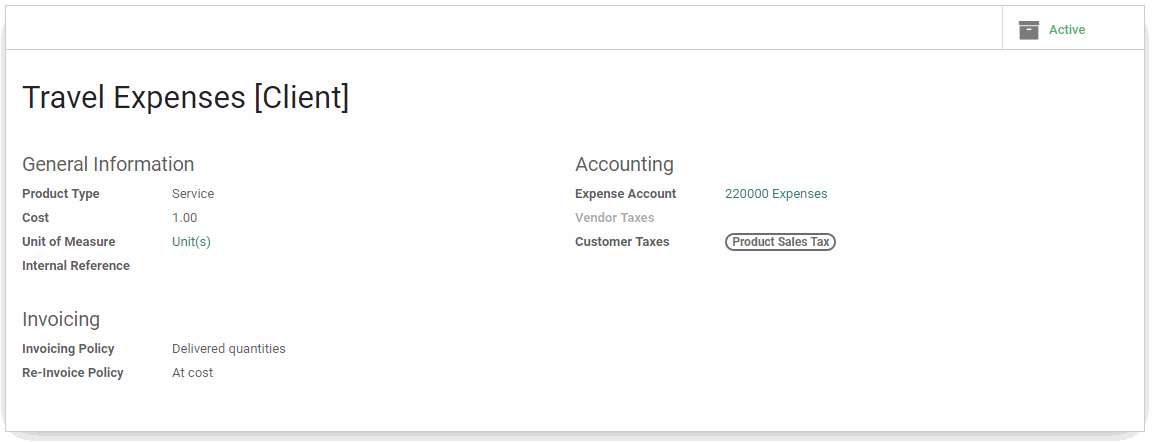
Travel Expenses [Client]: Used for airfare, car rental, hotels and other similar expenses that are associated with client travel and will be invoiced back to a customer.
Meals and Entertainment [Internal]: Used for meals and food purchases that will not be invoiced back to a customer.
Meals and Entertainment [Client]: Used for meals and food purchases that will be invoiced back to a customer.
Other Products: Various broad products for other expenses, such as Office Supplies.
Product Type: Expenses, such as travel and food, should be service products.
Cost: This can be configured to have a set cost, but you may wish to leave this at $0 and set the price appropriately on each expense.
Invoicing Policy: Set to nothing for all expenses that will not be invoiced back to a client. If it will be invoiced back to a client, this should be set to 'Delivered Quantities' or 'Milestones'.
Re-Invoice Policy: This should be set to 'No' for all expenses that will not be invoiced back to a client. If it will be invoiced back to a client, this should be set to 'At cost' or 'Sales price'.
Expense Account: This should be an expense account that makes sense for the type of product. For example, Travel Expenses are assigned a Travel Expenses expense account. Here are some example expense product and account match ups:
Travel Expenses [Internal] : 220107 Travel Expenses
Travel Expenses [Client] : 220107 Travel Expenses
Meals and Entertainment [Internal] : 220150 Meals and Entertainment Expenses (50%)
Meals and Entertainment [Client] : 220108 Meals and Entertainment Expenses (Client)
Other Products: An existing expense account that makes sense given the nature of the product (Supplies Expenses for office supplies, for example
Vendor Taxes: Taxes that are automatically applied when this expense is bought
Customer Taxes: Taxes that are automatically applied when this expense is sold
When ready, hit the Save button.
Creating Expenses
Click on My Expenses > My Expenses.
Here you will see a list of all of your expenses. Click the Create button.
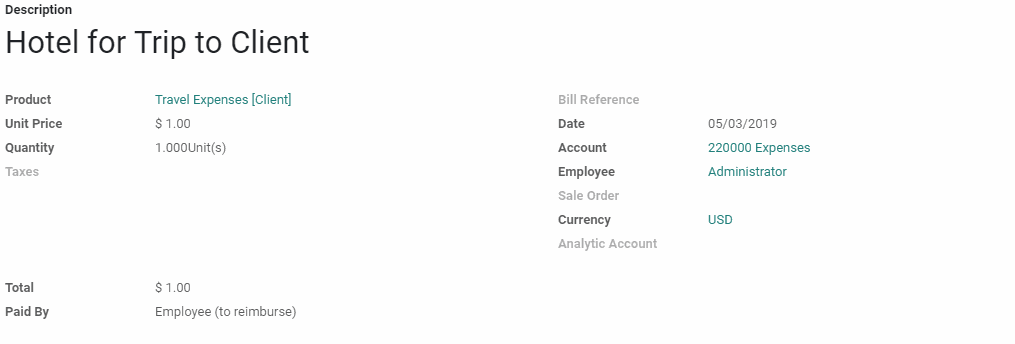
Description: Describe the expense including enough details to make it easily identifiable ('Hotel for Trip to X Client', for example)
Product: Choose the appropriate expense product
Unit Price: Set the price based on the receipt total.
Quantity: Will typically be a quantity of one, unless multiple of the product were purchased on the same day at the same price.
Taxes: Typically none
Bill Reference: Something like a receipt or order number.
Date: The date the purchase was made.
Account: An appropriate expense account, as described above (usually filled by the product)
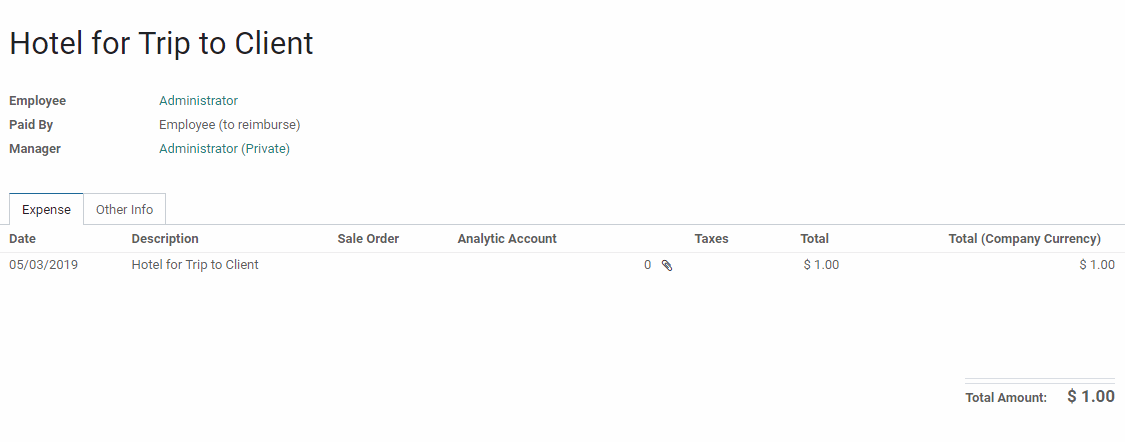
Employee: Select the employee responsible for the expense (usually yourself).
Sale Order: If being invoiced back to a client, select the customer's sale order. If not being invoiced back to a client, leave empty.
Currency: The currency used for this expense
Analytic Account: If needed (e.g. to bill to a project like potentially large trips or marketing initiatives), or potentially an Analytic Account that is related to the Sale Order chosen earlier.
Payment By: If an employee made the purchase and needs to be reimbursed, select 'Employee (to reimburse)'. If the company paid for the purchase and no reimbursement is needed, select 'Company'.
Click Save and then Attach Document and name it something simple (X Receipt for Y). A chatter notification will pop up as well as a Documents smart button that will show you a kanban view of all attached documents.

Hit the Save button and then use your breadcrumbs to go back to your expense page.
Double check the totals and your work. When ready, hit the Create Report button. This will take you to creating an Expense Report Summary. most of the information will automatically be filled. To submit the report, you need to choose from the Paid By Manager drop down menu the manager that will reimburse the employee. Then select Submit to Manager. After submitting the expense, you will be directed to a new form (hr.expense.sheet). You must then either approve the expense or hit the Save button before exiting.

Good To Know!
Mistaken Report
If you file a report with incorrect information, simply press the Reset To Draft and press Edit
Submitting Batches of Expenses
When on a list view of expenses, you can select multiple expenses and then choose an Action dropdown Submit Report
Use this to group several expenses that would be related and in the same period.
Approving Expenses
Click on Expense Reports > To Approve.
Here you will see a list of expenses that are awaiting approval. Click on one and review it. If the expense has been created correctly and the appropriate documentation has been attached, click the Approve button.
Posting Expenses
Click on Expense Reports > To Post
This will bring you to a list of expenses that that need to be posted. Click on one of the expenses.
You have one last chance to check your work before hitting the POST JOURNAL ENTRIES button. Once you do this, the following will happen:
If Payment By was Company, there will be no further action until the charge hits a card or bank, at which point it will be reconciled.
If Payment By was Employee (to Reimburse), it will now show up under To Pay and you will be able to register payment.
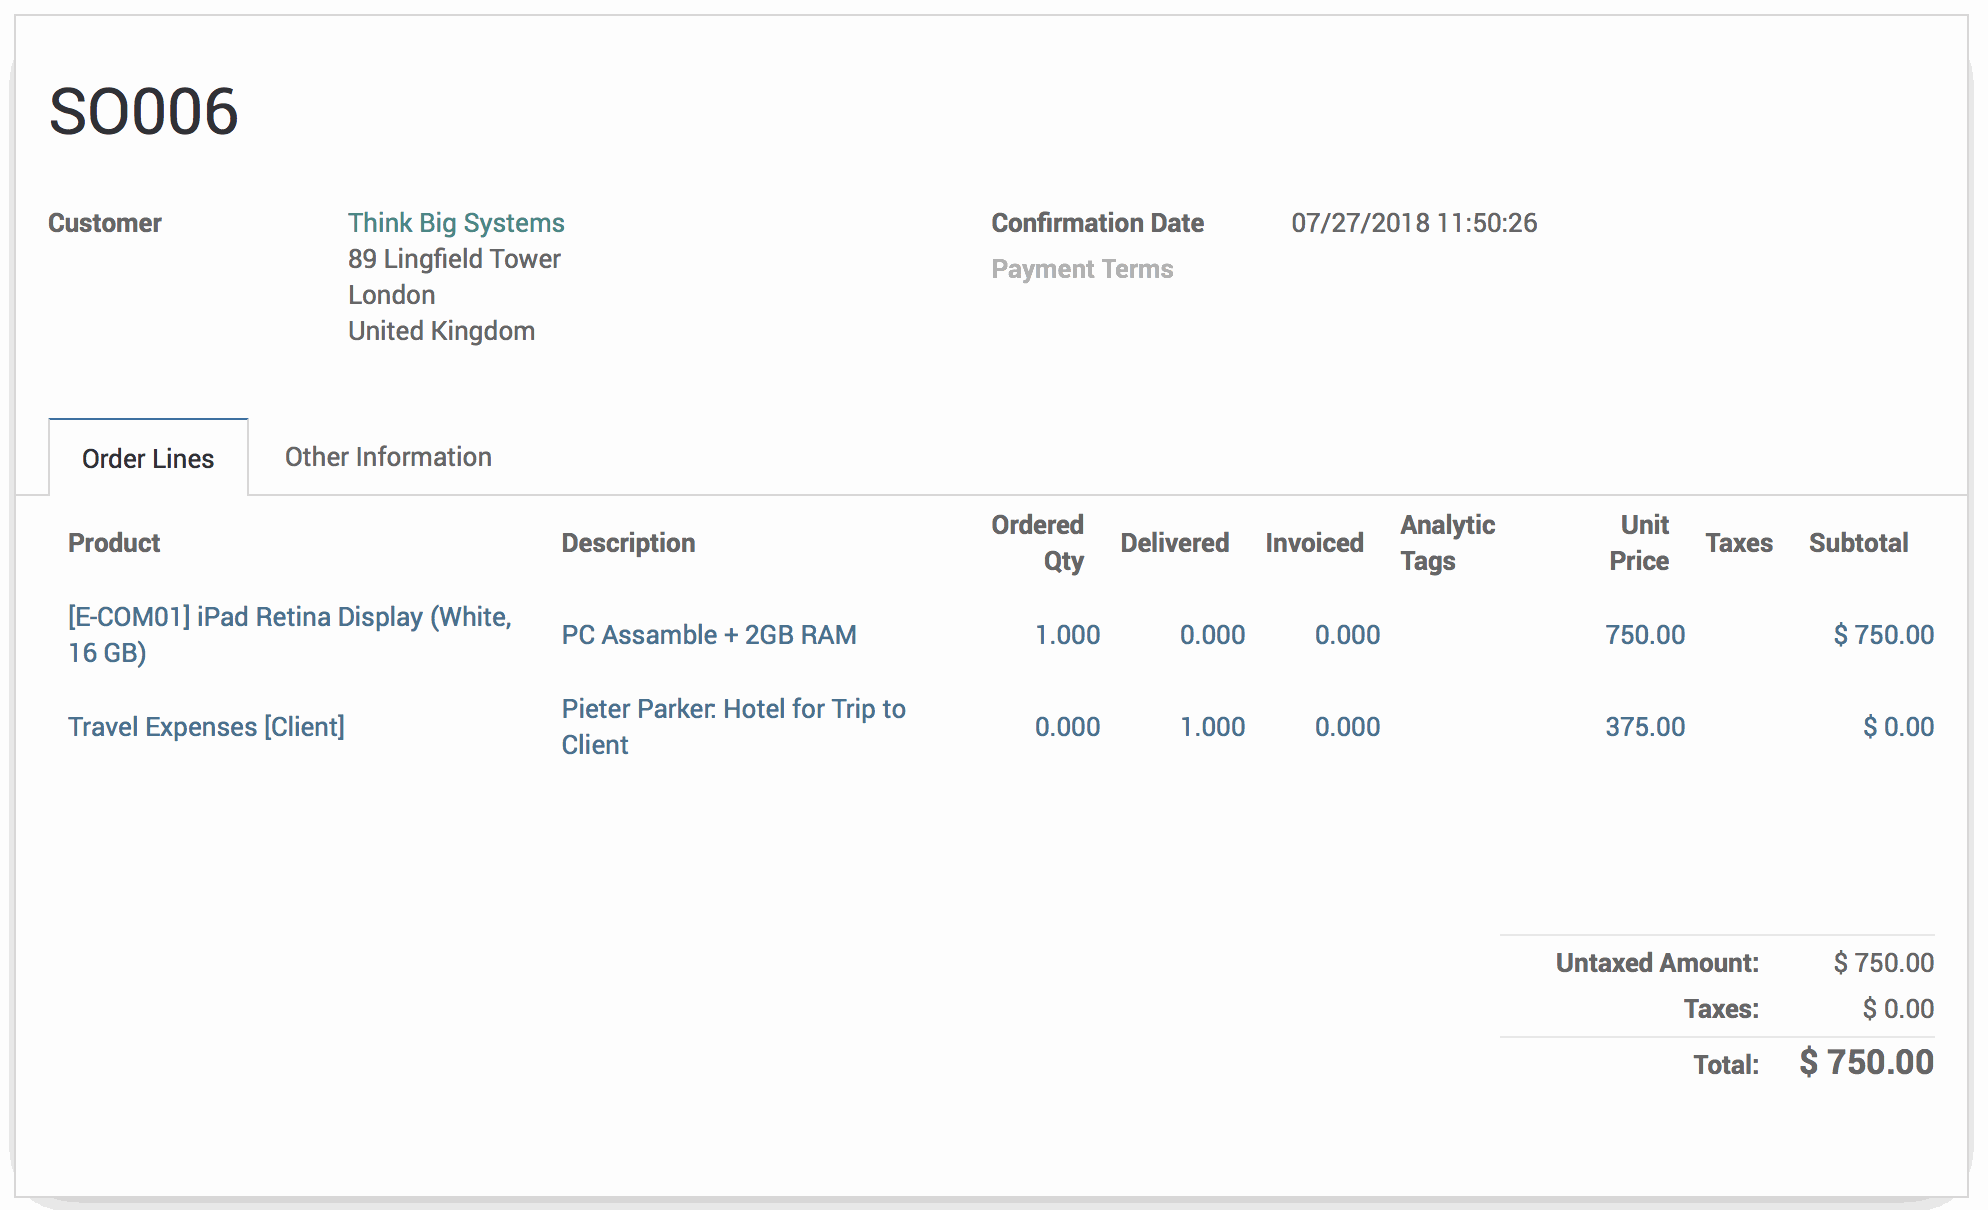
Re-Invoicing to Clients
If the expense and the expense product were setup appropriately, hitting the Post Journal Entries button on an approved expense will add the expense to the client's sale order.
On the expense, you will see that an analytic account is applied once journal entries are posted.

On the sale order itself, you will see the expense as a new line item that is ready to invoice.
When the client is invoiced at the end of each month, these will be included as line items on their invoice.