Accounting: Customers + Vendors: Customers: Register a Customer Payment
Purpose
The purpose of this documentation is to outline different processes to register payments in the Accounting application of Odoo 13.
Processes
To get started, navigate to the Accounting app.
Registering Full Payments on a Customer Invoice
Click customers > invoices. Select an open invoice from the list or create a new one by clicking the CREATE button. Once there, click Filters > Posted to find an invoice in the payable state.
Select an invoice from the list.

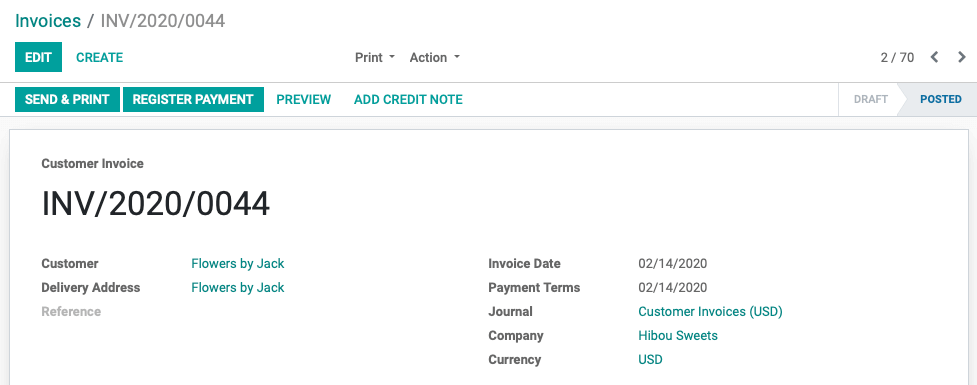
From within the invoice, click Register Payment.

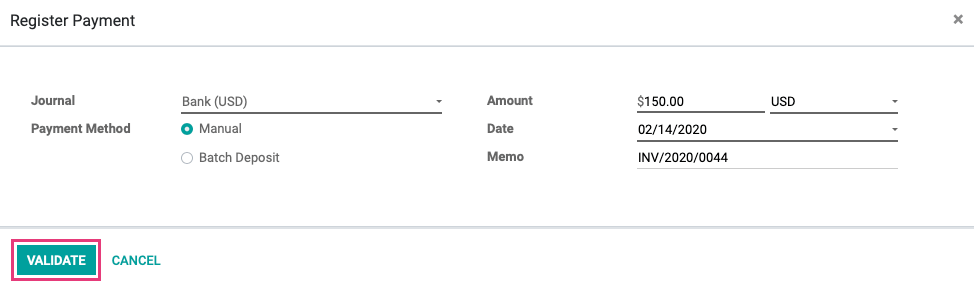
A pop-up modal to register payment will appear. Enter the following information:
Payment Amount: This is set to the full amount by default, but can be changed.
Journal: The journal to which the payment should be registered.
Payment Method
Manual: Select this to get paid by cash, check or any other method outside of Odoo.
Batch Deposit: Select this to encase several customer checks at once by generating a batch deposit to submit to your bank.
Amount: This is set to the full amount by default, so we'll leave it as-is for this example.
Date: The date on which the payment was made.
Memo: This is set to the Invoice number by default, but can be changed. A common use case for this field is the check number for the check by which payment was made.
When finished, click VALIDATE .
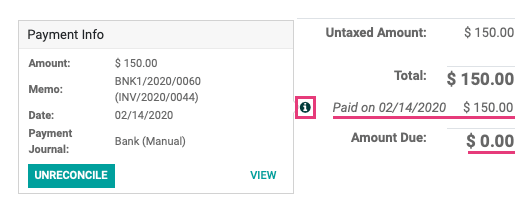
Once the payment is validated, you'll see a Paid banner on the top-right of the invoice.
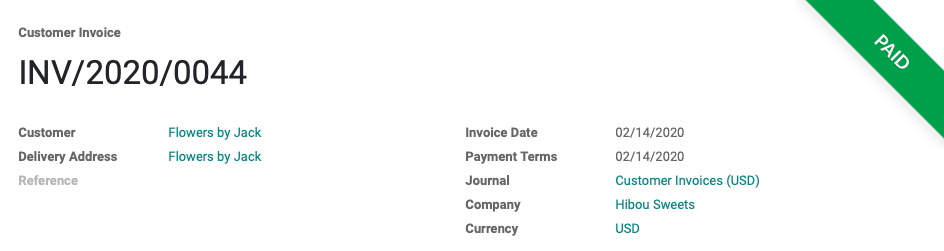
The Amount Due at the bottom of the invoice will also be updated and the payment will be logged with a date. Click the small info button to the left of the payment line to see the payment details.
Once the payment is validated, you'll see a Paid banner on the top-right of the invoice.
The Amount Due at the bottom of the invoice will also be updated and the payment will be logged with a date. Click the small info button to the left of the payment line to see the payment details.
Registering Partial Payments on a Customer Invoice
Click customers > invoices. Select an open invoice from the list or create a new one by clicking the CREATE button. If you create an invoice, be sure to confirm it so you'll be able to accept payment.
For this example, we'll open an existing invoice.
From within the invoice, click Register Payment.
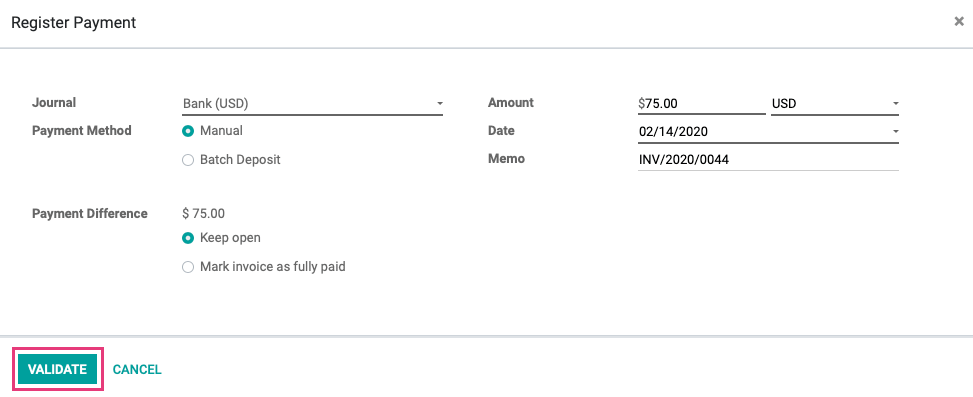
A pop-up modal to register payment will appear. Enter the following information:
Payment Amount: This is set to the full amount by default, but can be changed.
Journal: The journal to which the payment should be registered.
Payment Method
Manual: Select this to get paid by cash, check or any other method outside of Odoo.
Batch Deposit: Select this to encase several customer checks at once by generating a batch deposit to submit to your bank.
Amount: This is set to the full amount by default, but we'll change it to partial payment for our example.
Date: The date on which the payment was made.
Memo: This is set to the Invoice number by default, but can be changed. A common use case for this field is the check number for the check by which payment was made.
Payment Difference: When you enter a partial payment, Odoo will ask what you want to do with the remaining balance. You'll have two options:
Keep open: Select this option for this example as we expect to collect the balance due at a later date.
Mark invoice as fully paid: We'd select this option if we want to consider this invoice settled and will write-off the balance.
When finished, click VALIDATE .
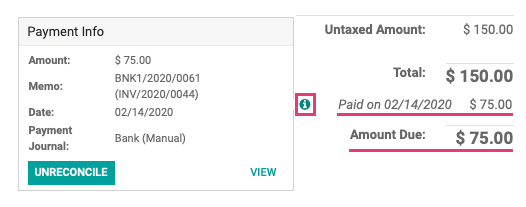
Once the payment is validated, you'll see that you still have the option to register payment on the invoice. You'd use this option to add another full or partial payment.
The Amount Due at the bottom of the invoice will also be updated and the payment will be logged with a date. Click the small info button to the left of the payment line to see the payment details.
Matching Database Payments
It is possible to take a lump-sum payment and attribute a portion of it to various invoices.
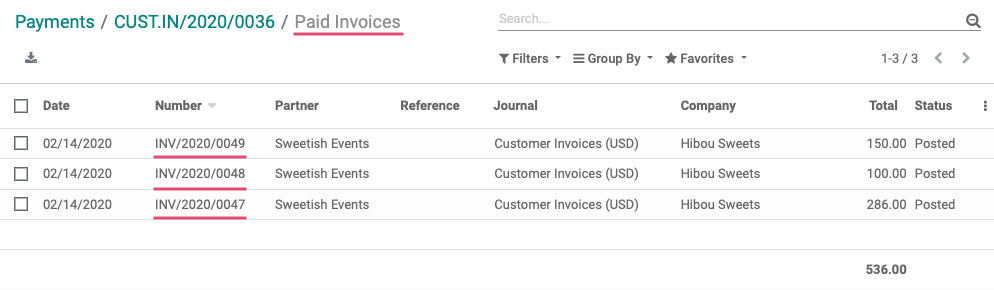
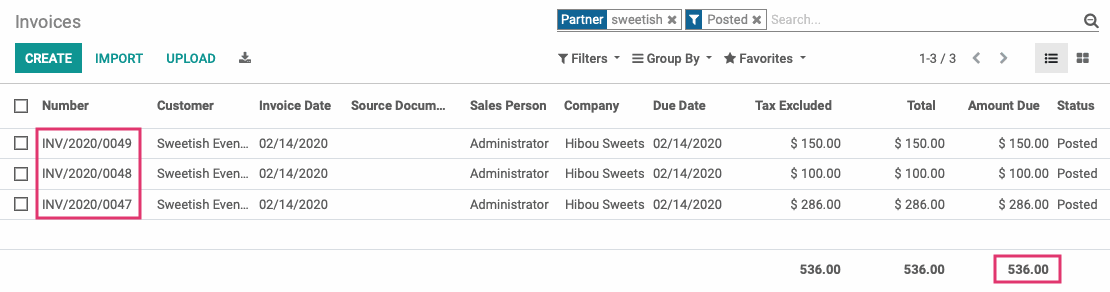
From Customers > Invoices, we'll filter Posted invoices for Sweetish Events. The result shows three open invoices totaling $536. Sweetish Events has decided to write us a check and pay all three invoices in full.
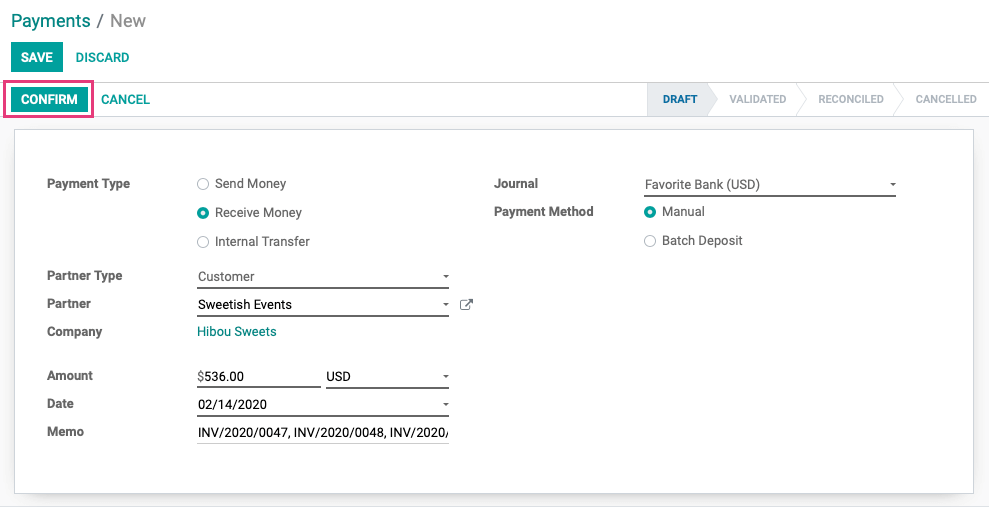
We'll go to Customers > Payments, then click create to register this payment. On the modal window, we'll enter the following details:
Payment Type: Select Receive Money.
Partner Type: Select Customer
Partner: Sweetish Events (the customer we're taking payment from).
Amount: The amount of full payment.
Date: The date we're receiving the payment.
Memo: Enter the invoice numbers so we know what this will apply to. Note that this is for reference purposes, this does not link the payment to these invoices.
Journal: Select the Journal where this transaction will be recorded.
Payment Method: Select Manual.
When ready, click Confirm.
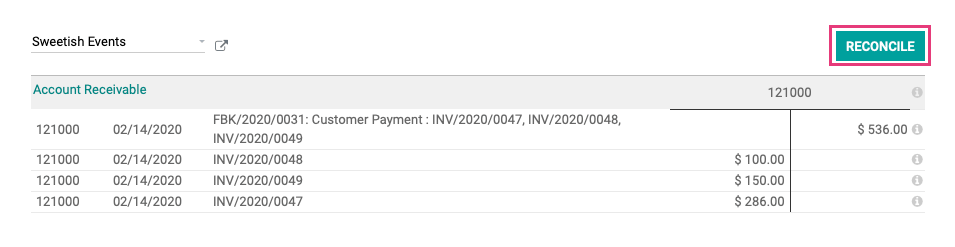
After confirming, you'll be in the validated payment record. Click the Payment Matching smart button.

From here you'll see the customer payment listed with the reference numbers clearly showing which invoices we should apply this to. Click the payment entry, and then click each related invoice to add all entries to the T Sheet. Both columns will then balance, and we'll click Reconcile.
This payment hs now been applied to all three invoices, and we can confirm this by navigating back to the invoice using the breadcrumbs.

Then, click the Invoices smart button to see invoices associated with this payment.
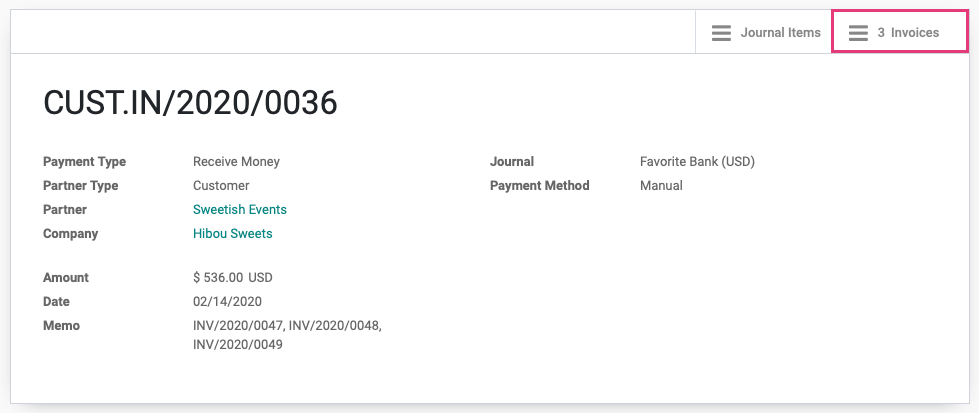
Here we see all of the invoices that this payment applied to.