Accounting: Accounting Workflows: Internal Transfers
Purpose
This documentation demonstrates how to transfer funds between journals in the Accounting application of Odoo v14. Internal transfers allow you to move money between your internal journals with ease.
ProcessesLet's start by navigating to the Accounting app.

Scenario
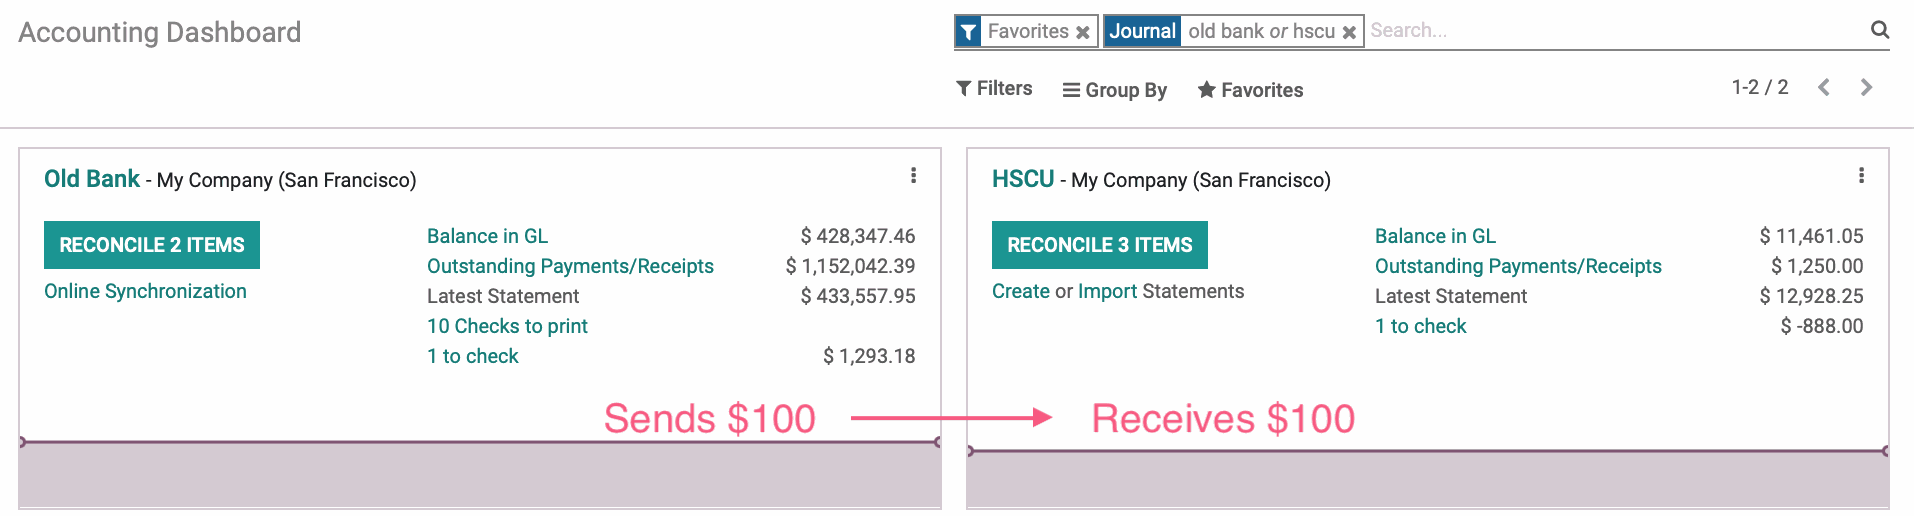
Scenario: A company is going to transfer $100 from their Bank journal to their HSCU journal.
Send a Transfer
From the Dashboard, go to the journal that will sending the funds and click on the menu. Next, select View > Internal Transfers, then click Create.
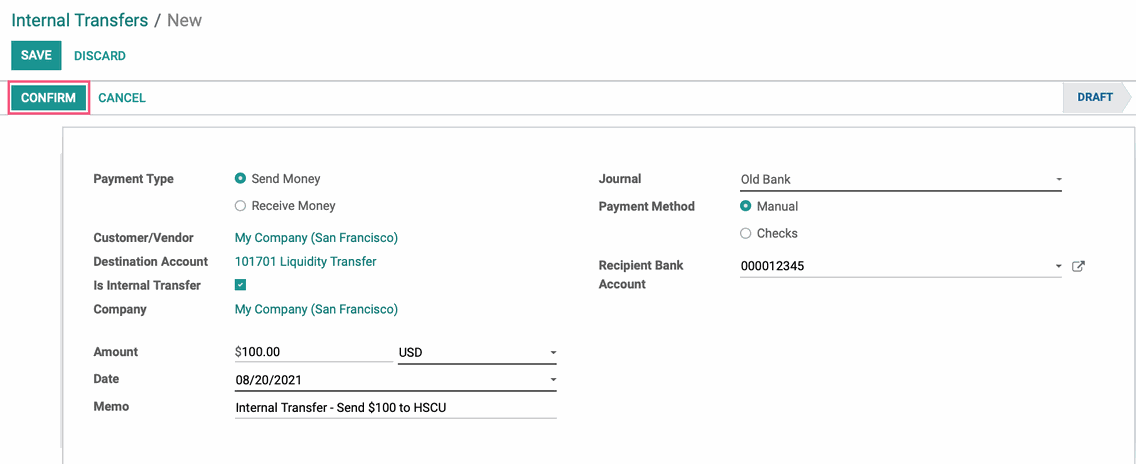
Payment Type: Select "Send Money".
Customer/Vendor: This will automatically pre-fill with the contact card associated with your active company. This will change depending on the company you are in if your database is multi-company.
Destination Account: This will automatically pre-fill with a liquidity transfer account.
Is Internal Transfer: This box will be ticked by default in order to indicate that this is an internal transfer.
Company: This will automatically pre-fill with the company you are in. This will change depending on the company you are in if your database is multi-company.
Amount: Indicate the amount to be sent, in this case $100.00.
Date: This will automatically pre-fill with today's date.
Memo: This is optional, however writing a memo can help you remember why this transfer was done.
Journal: This is the journal in which the funds are coming out of.
Payment Method: Select your payment method.
Recipient Bank Account: This will automatically pre-fill with your recipient bank account.
Once you have configured your internal transfer, click Confirm.
Reconcile the Internal Transfer to the Bank Statement
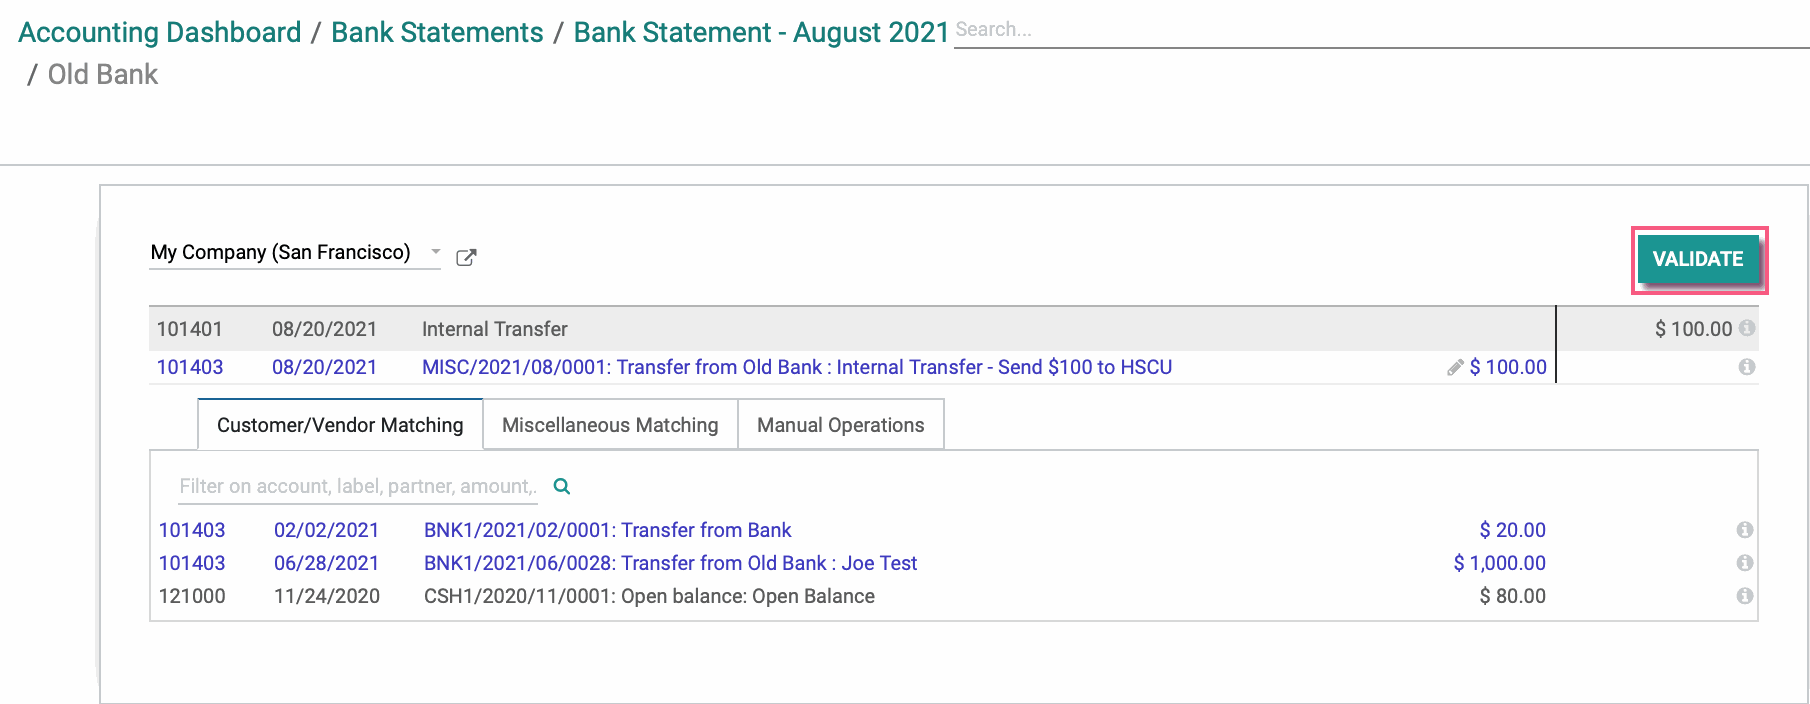
From the DASHBOARD, go to the same journal that is sending the funds and click on the menu. Next, selectVIEW > statements. We have received our bank statement and see that there is a line for the internal transfer that was made. Click Reconcile to match the internal transfer to our bank statement line.
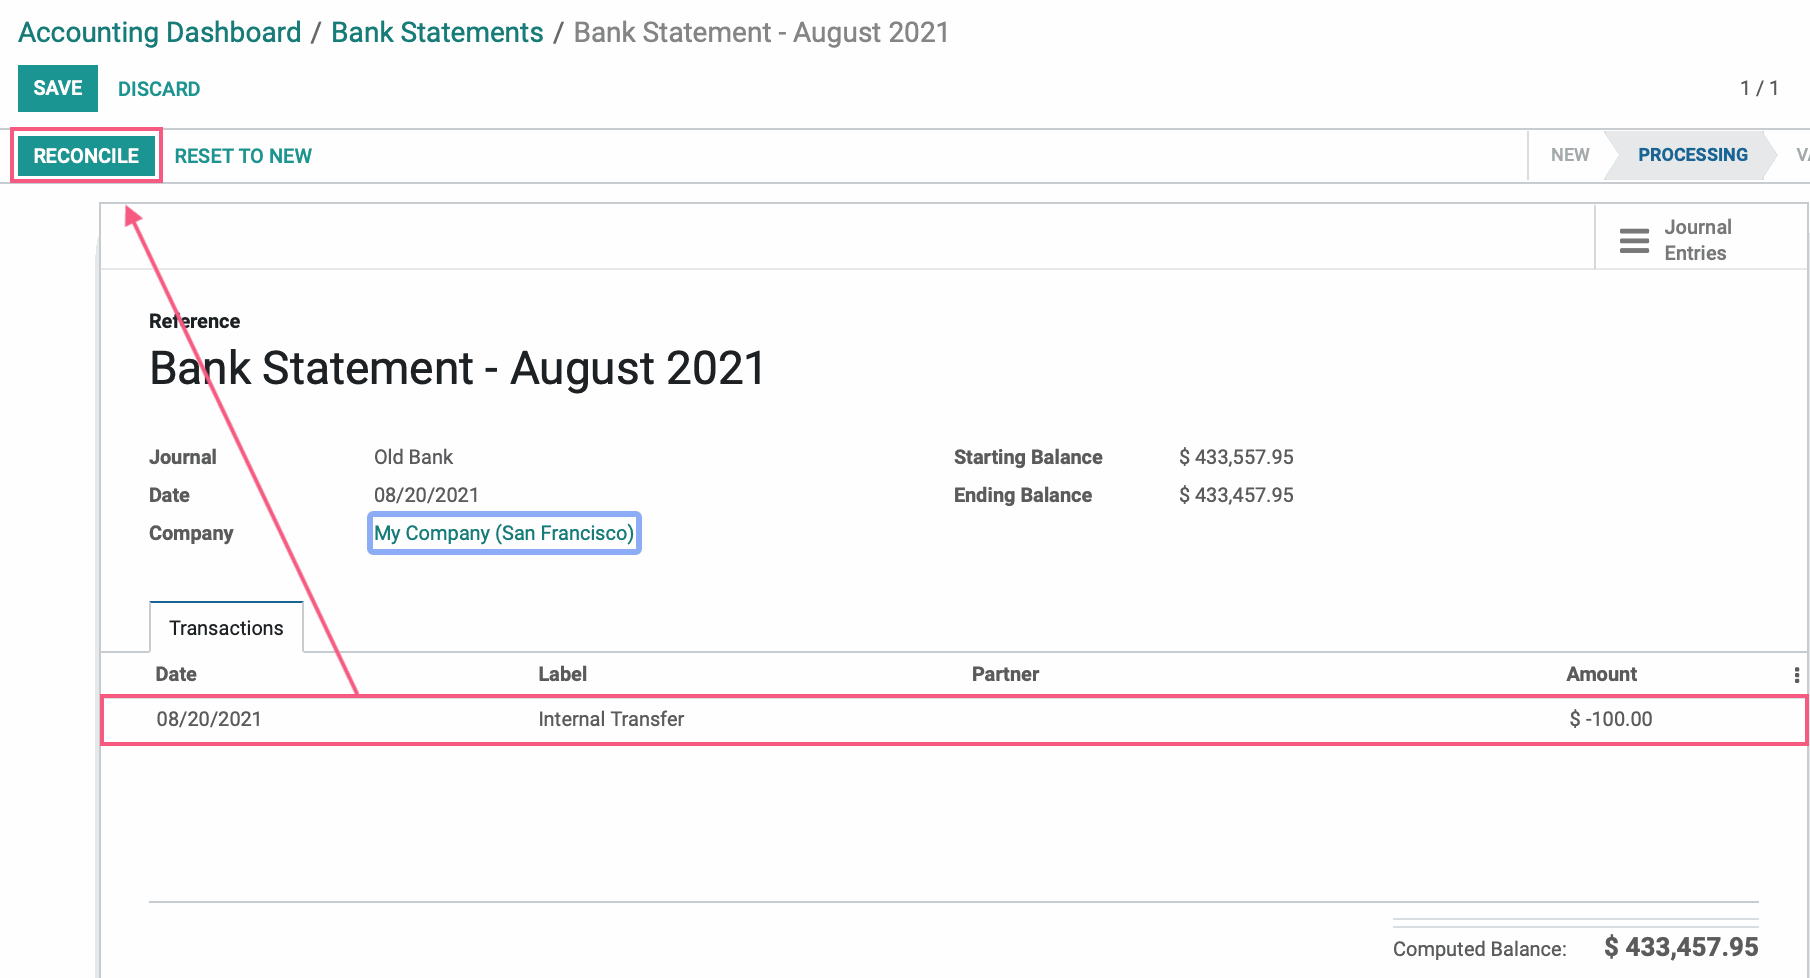
Once the internal transfer line has been matched to the bank statement, click Validate.
Receive a Transfer
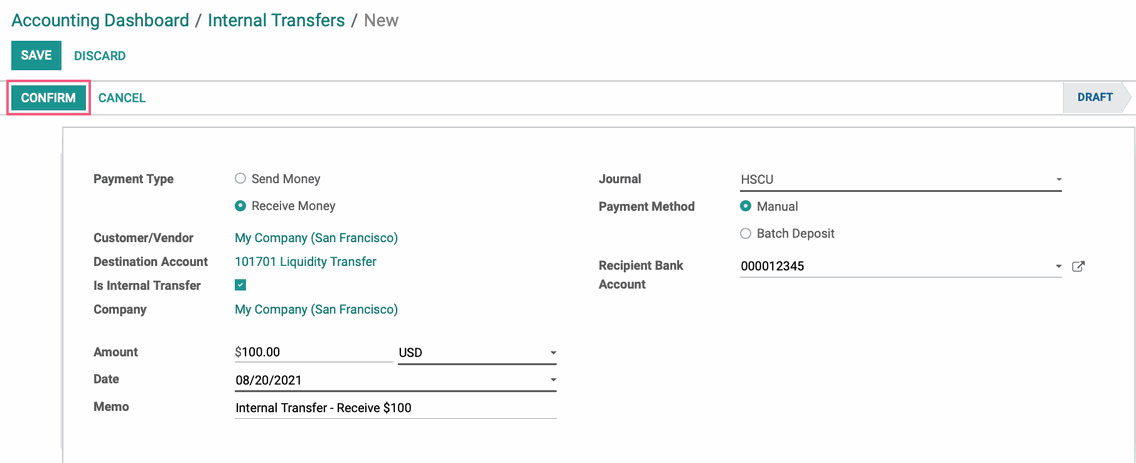
Now, let's learn how to receive a transfer. From the DASHBOARD, go to the journal that will be receiving the funds and click on the menu. Next, select VIEW > INTERNAL TRANSFERS, then click CREATE.
Payment Type: Select "Receive Money".
Customer/Vendor: This will automatically pre-fill with the contact card associated with your active company. This will change depending on the company you are in if your database is multi-company.
Destination Account: This will automatically pre-fill with a liquidity transfer account.
Is Internal Transfer: This box will be ticked by default in order to indicate that this is an internal transfer.
Company: This will automatically pre-fill with the company you are in. This will change depending on the company you are in if your database is multi-company.
Amount: Indicate the amount to be received, in this case $100.00.
Date: This will automatically pre-fill with today's date.
Memo: This is optional, however writing a memo can help you remember why this transfer was done.
Journal: This is the journal in which the funds are being received into.
Payment Method: Select the payment method of the incoming transfer.
Recipient Bank Account: This will automatically pre-fill with your recipient bank account.
Once you have configured your internal transfer, click CONFIRM.
Reconcile the Internal Transfer to the Bank Statement
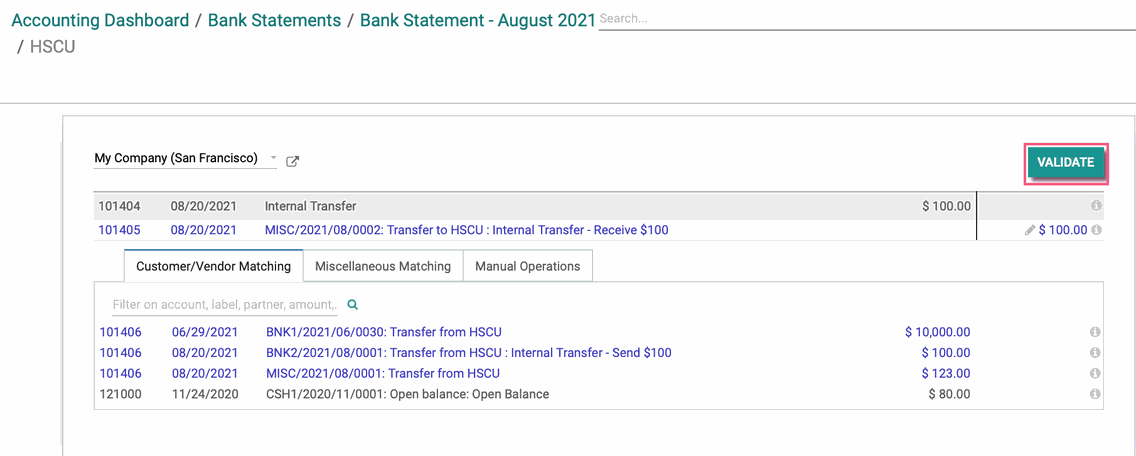
From the DASHBOARD, go to the same journal that is receiving the funds and click on the Ellipsis > VIEW > STATEMENTS. We have received our bank statement and see that there is a line for the internal transfer that was made. Click RECONCILE to match the internal transfer to our bank statement line.
![]()
Once the internal transfer line has been matched to the bank statement, click Validate.