Accounting: Configuration: Expenses
Purpose
The purpose of this documentation is to outline the use cases and processes associated within the Expenses application of Odoo 16. We'll go over the app configuration, as well as Expense Product configuration.
We'll then show you how to enter, submit, post, approve, and charge expenses to the client.
Process
To get started, navigate to the Expenses app.

Configuring Expenses
Within the Expenses application, click on CONFIGURATION > SETTINGS. Here you'll see the following options:
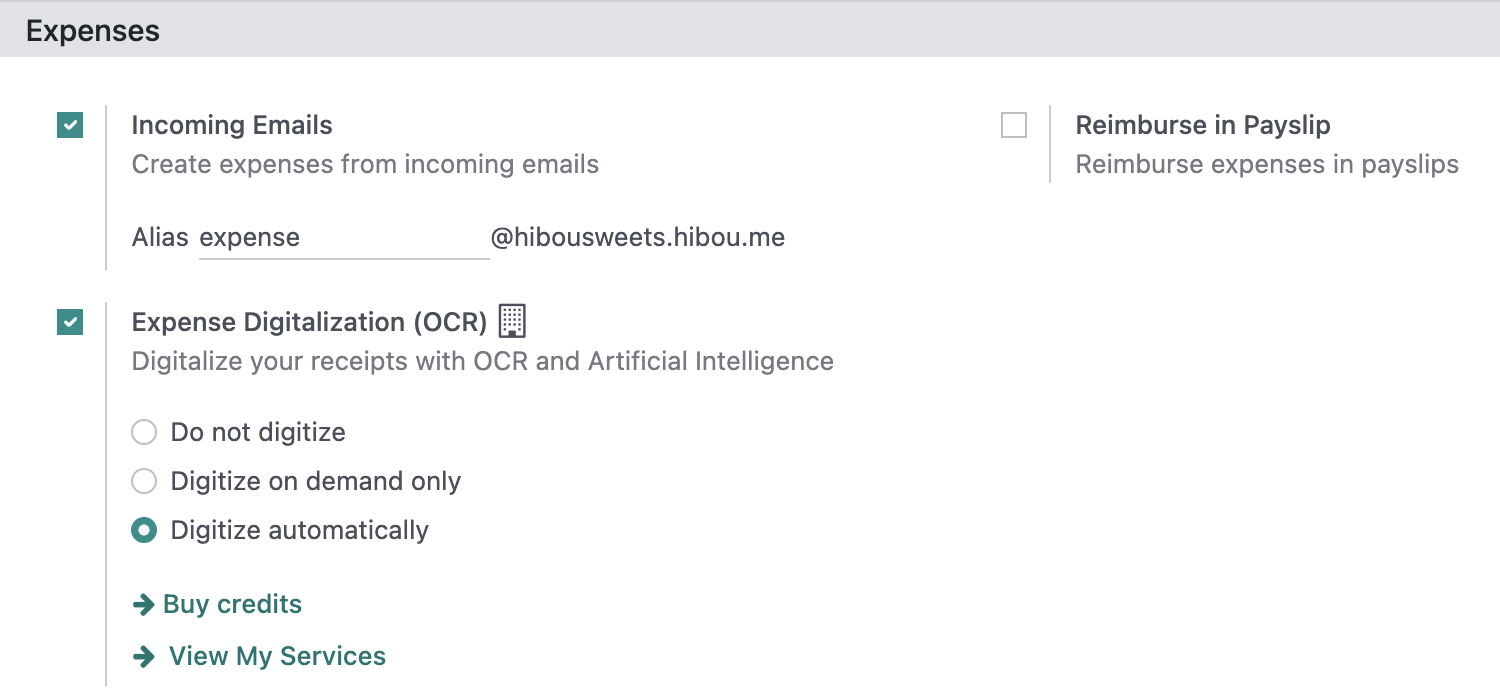
Incoming Emails: If selected and you have configured your Odoo system for Custom Email Servers in your General Settings, you will enter an email alias where expenses can be emailed to in order to generate expenses.
Reimburse in Payslip: Select this option to reimburse via payslip rather than separate payments.
Expense Digitalization (OCR): This is a paid Odoo feature that will digitalize scanned/uploaded receipts for a more automated method of expense entry into the Expenses app. We will not be covering this functionality in our documentation, but if you need help, please contact us.
When you are finished, click Save.
Expense Products
Expense Products are products that have the 'Can be Expensed' checkbox selected. Click CONFIGURATION > EXPENSE PRODUCTS to see a list view of Expense Products, if any exist.
To create a new Expense Product, click NEW. Complete the following form according to these guidelines:
Product Name: The name of the expense. Here are some common expense products to serve as examples:
Travel Expenses [Internal]: Used for airfare, car rental, hotels and other similar expenses that are associated with travel that is not being invoiced back to a customer.
Travel Expenses [Client]: Used for airfare, car rental, hotels and other similar expenses that are associated with client travel and will be invoiced back to a customer.
Meals and Entertainment [Internal]: Used for meals and food purchases that will not be invoiced back to a customer.
Meals and Entertainment [Client]: Used for meals and food purchases that will be invoiced back to a customer.
Other Products: Various products for other expenses, such as office supplies, cell phones, postage, subscriptions, etc.
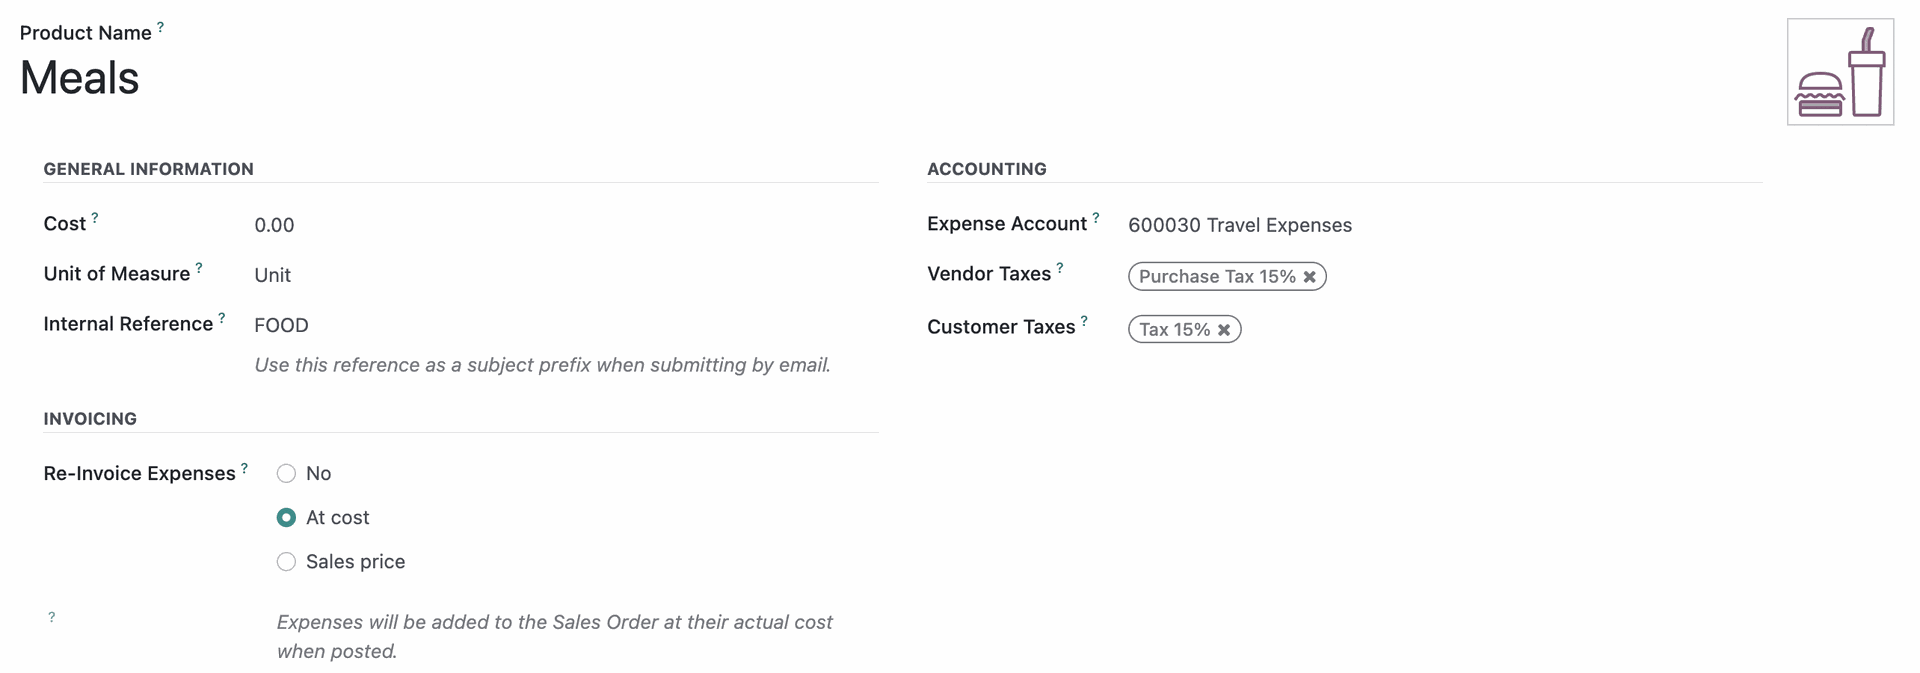
General Information
Cost: This can be configured with a default cost for things like regular monthly expenses (e.g. Cell Phone), but you may wish to leave this at $0 and set the price appropriately on each expense.
Unit of Measure: Enter the unit of measure for this product (e.g. each, per unit).
Internal Reference: When emailing expenses, this code will serve as a subject prefix when submitting expenses via email.Be creation to keep these unique.
Company: If you're in a multi-company environment, leave this blank to apply to all companies. Otherwise, select the individual company to which this applies.
Accounting
Expense Account: This should be an expense account that makes sense for the type of product. For example, Travel Expenses are assigned a Travel Expenses expense account. Here are some example expense product and account matchups:
Vendor Taxes: Taxes that are automatically applied when this expense is purchased.
Customer Taxes: Taxes that are automatically applied when this expense is sold/charged to a client.
Re-Invoice Expenses
This should be set to 'No' for all expenses that will not be invoiced back to a client. If it will be invoiced back to a client, this should be set to 'At cost' or 'Sales price'.
Important!
Configuring Products for Expenses that Will be Invoiced Back to Clients
If you are creating an expense product for an expense that will be invoiced back to the client at cost, create your those products here, but you will need to edit them in either the Sales or Inventory applications to configure the Income Account and the Expense Account (under the Accounting tab) to use the same expense account, allowing the account to wash out since the cost and the revenue will match.
Entering Expenses
Employees can enter their own expenses, and those with proper permissions can enter expenses on behalf of employees.
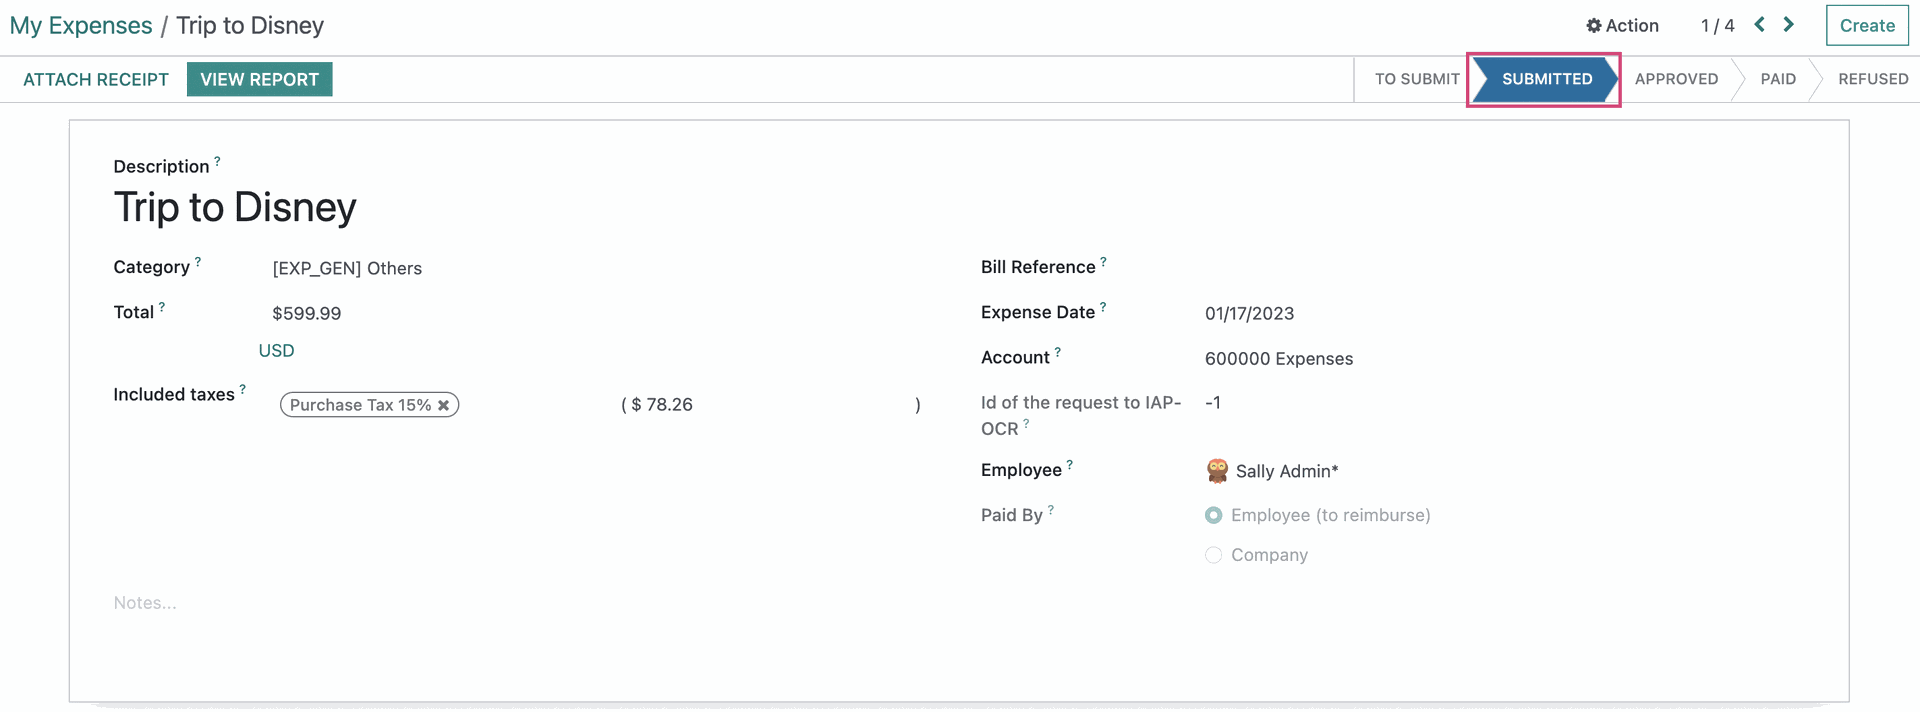
To submit an expense, click MY EXPENSES > MY EXPENSES to report or MY EXPENSES > ALL MY EXPENSES. Once there, click NEW and enter details in the following form.
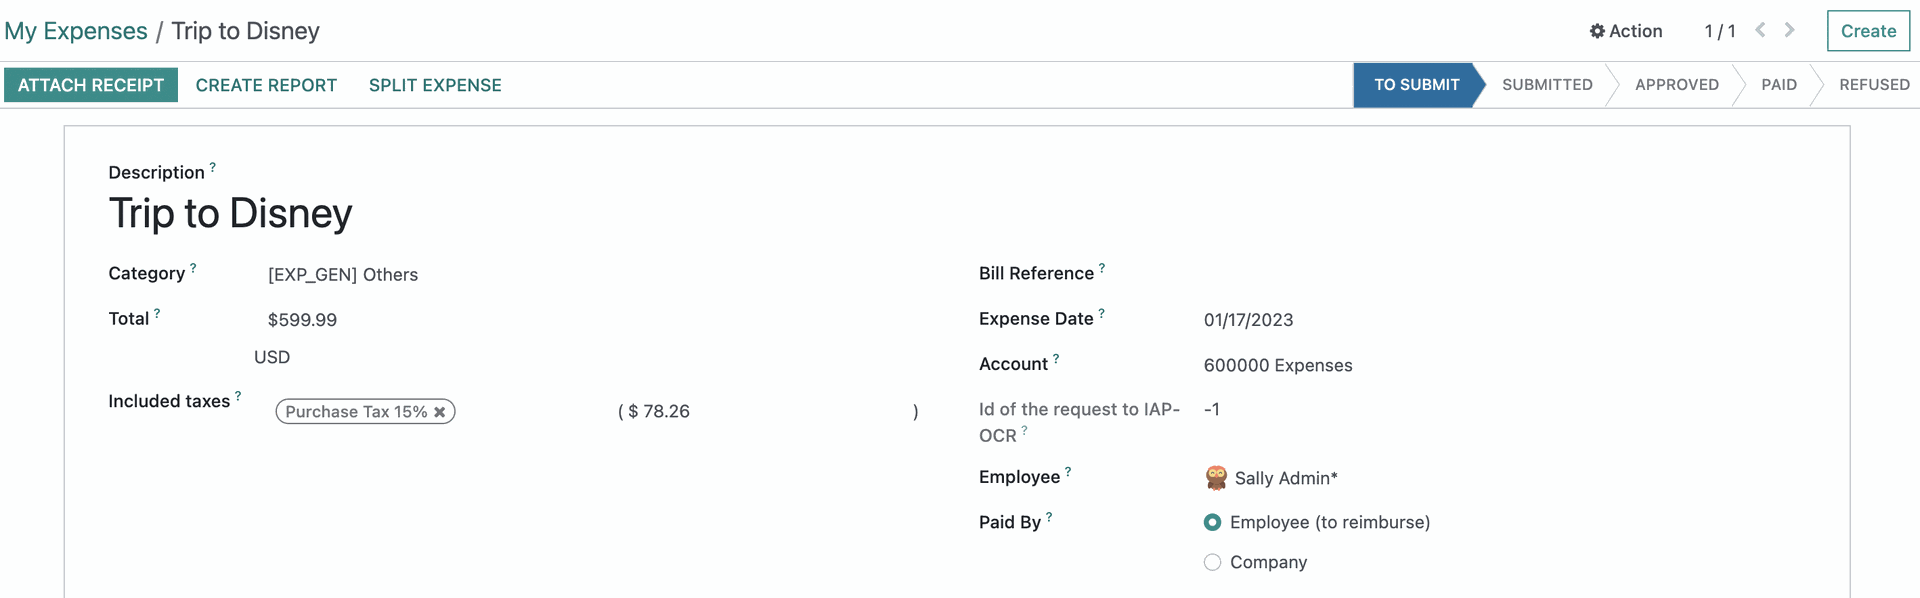
Description: Describe the expense including enough details to make it easily identifiable ('Hotel for Trip to X Client', for example).
Category: Choose the appropriate expense product.
Total: Set the price based on the receipt total.
Include Taxes: Typically none, but if you have taxes configured, you may choose one or more as needed.
Bill Reference: This is a free text field commonly used for something like a receipt or order number.
Expense Date: The date the purchase was made.
Account: An appropriate expense account, as described above (usually filled by the product).
Employee: Select the employee responsible for the expense (usually yourself).
Paid By: Indicate who paid this initial expense.
Employee (to reimburse): Select this option if an employee made the purchase and needs to be reimbursed.
Company: Select this option if the company paid for the purchase and no reimbursement is needed.
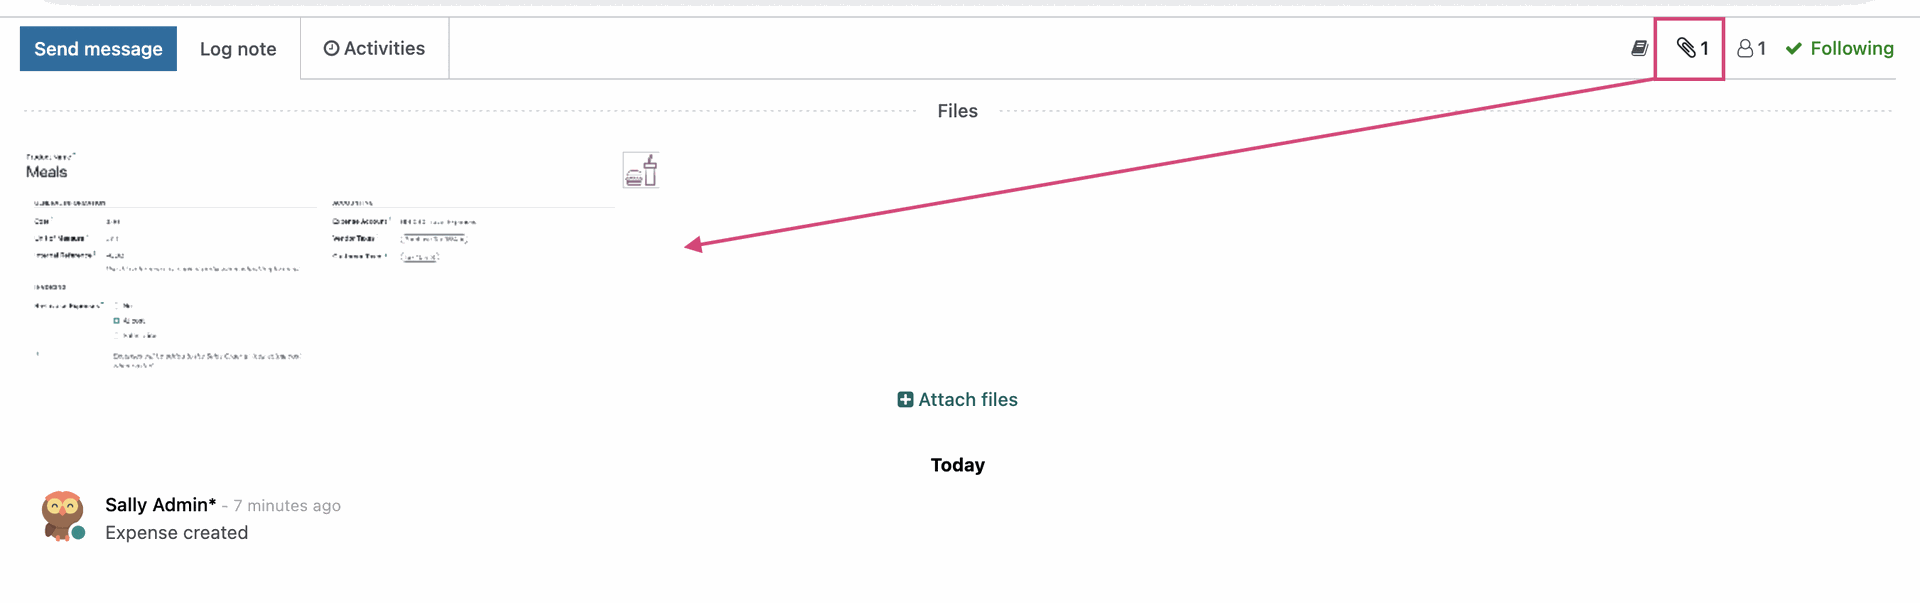
Next, click Attach receipt and upload the receipt for this purchase.
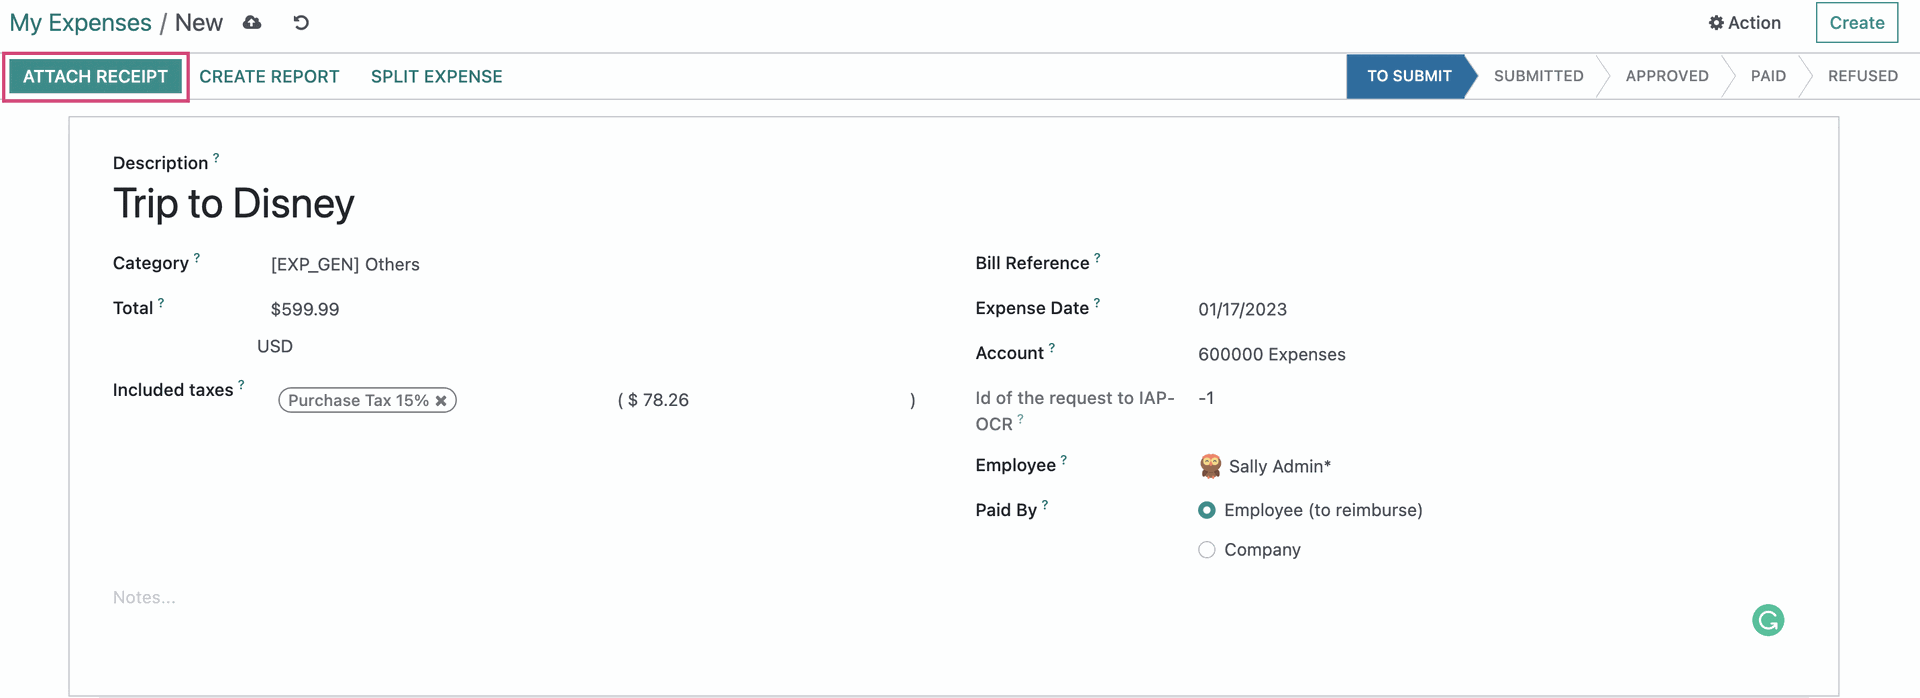
Once you've uploaded your document(s), you'll also see it attached below the task by clicking the icon.
Expense Reports
The next step is submitting your Expenses is to create an Expense Report. You may do so in a couple of different ways.
You can generate an Expense Report directly from within the Expense record by clicking. CREATE REPORT.

This will take you to a draft Expense Report Summary where most of the data you've entered will be populated. It will include information for that particular expense and employee.
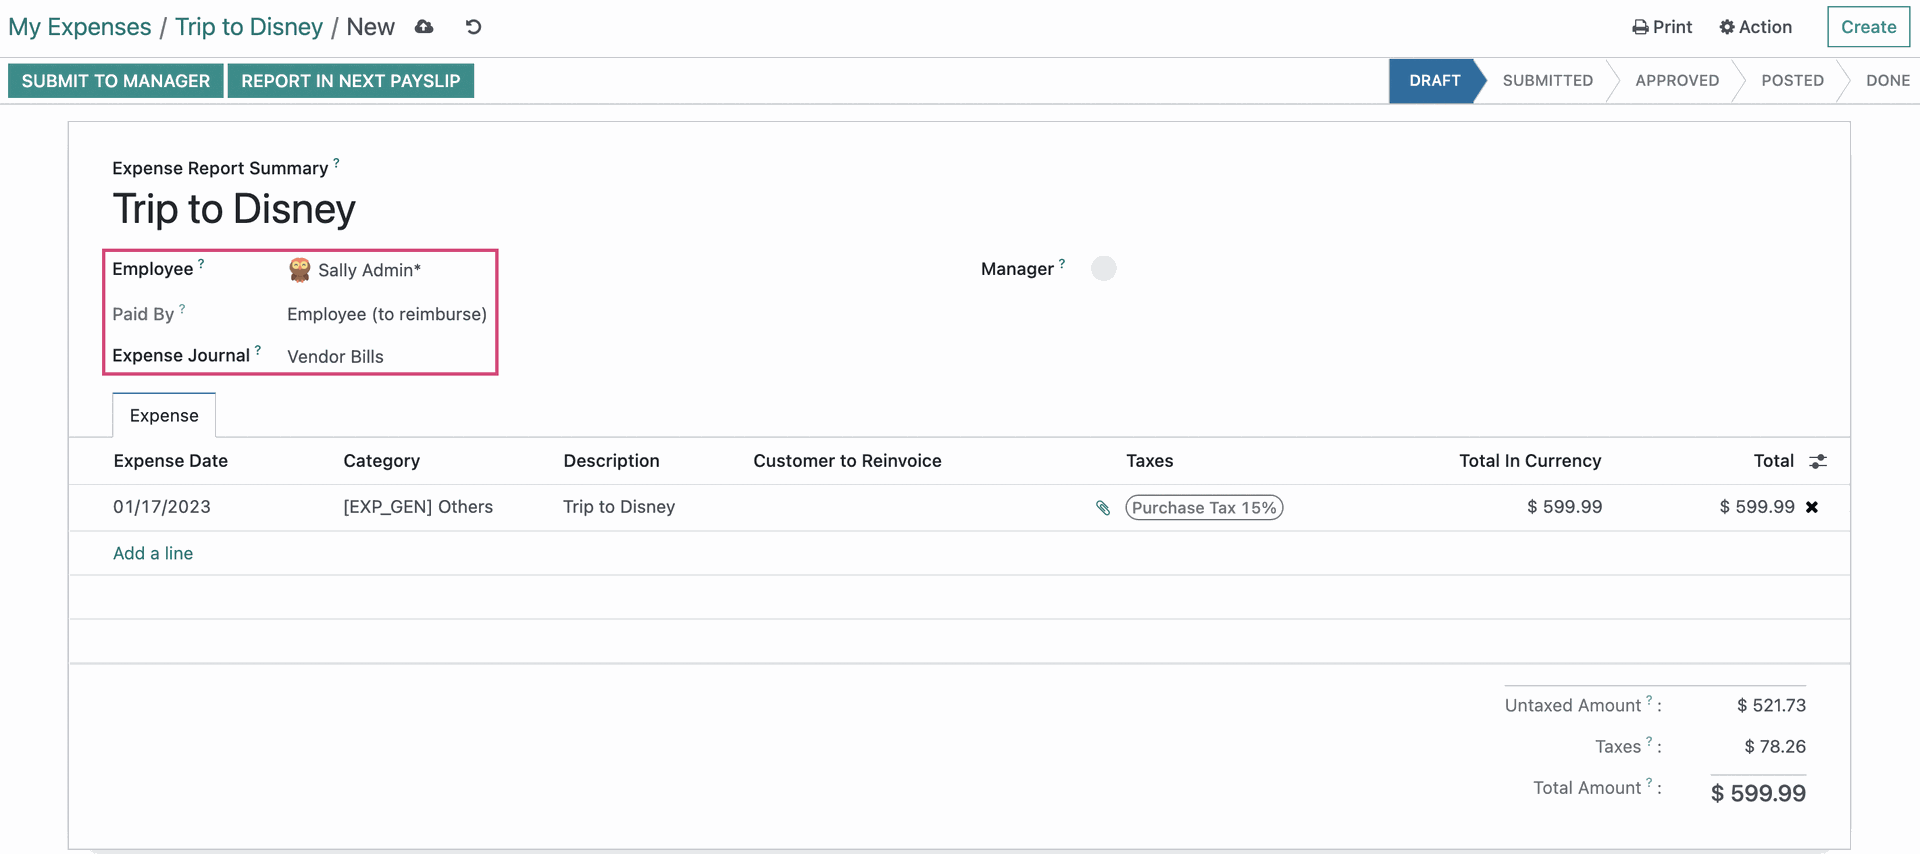
Review the information on the page, and if you are finished.
If you have additional lines to add, look in the Expense tab at the row below your expense and click Add a line. This will open a modal window that will list any unsubmitted expenses for the same employee. You can use the NEW button at the bottom to go to the typical Expense entry screen and add an expense on-the-fly.
Once saved, that new expense will be added to the list. To include that, or any listed expense in the Expense Report currently being created, place a check in the box to the left of those. When ready, click select.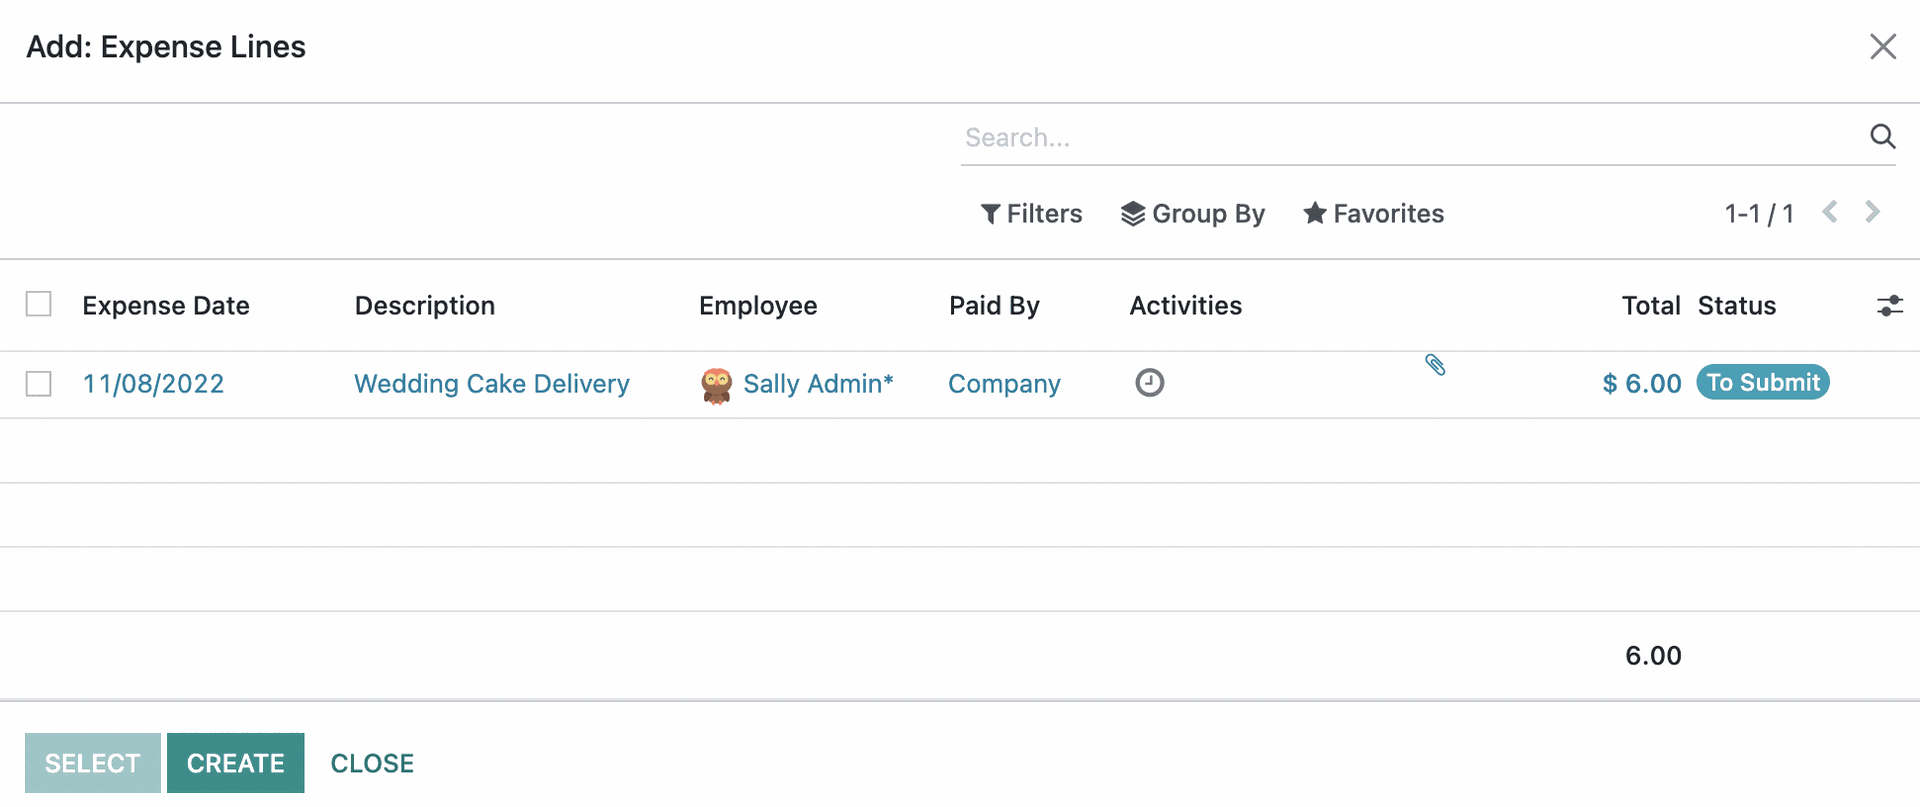
You will be returned to the Expense Report screen to review the information on this page. You can then click SUBMIT TO MANAGER if your expense requires approval. If you are a manager, you can click APPROVE.
Another method for creating a report for one or more expenses is from EXPENSE REPORTS and clicking Create. It will take you to the same screen we covered above, but you will need to give the expense report a name, and click Add a line to include any expenses in the list.
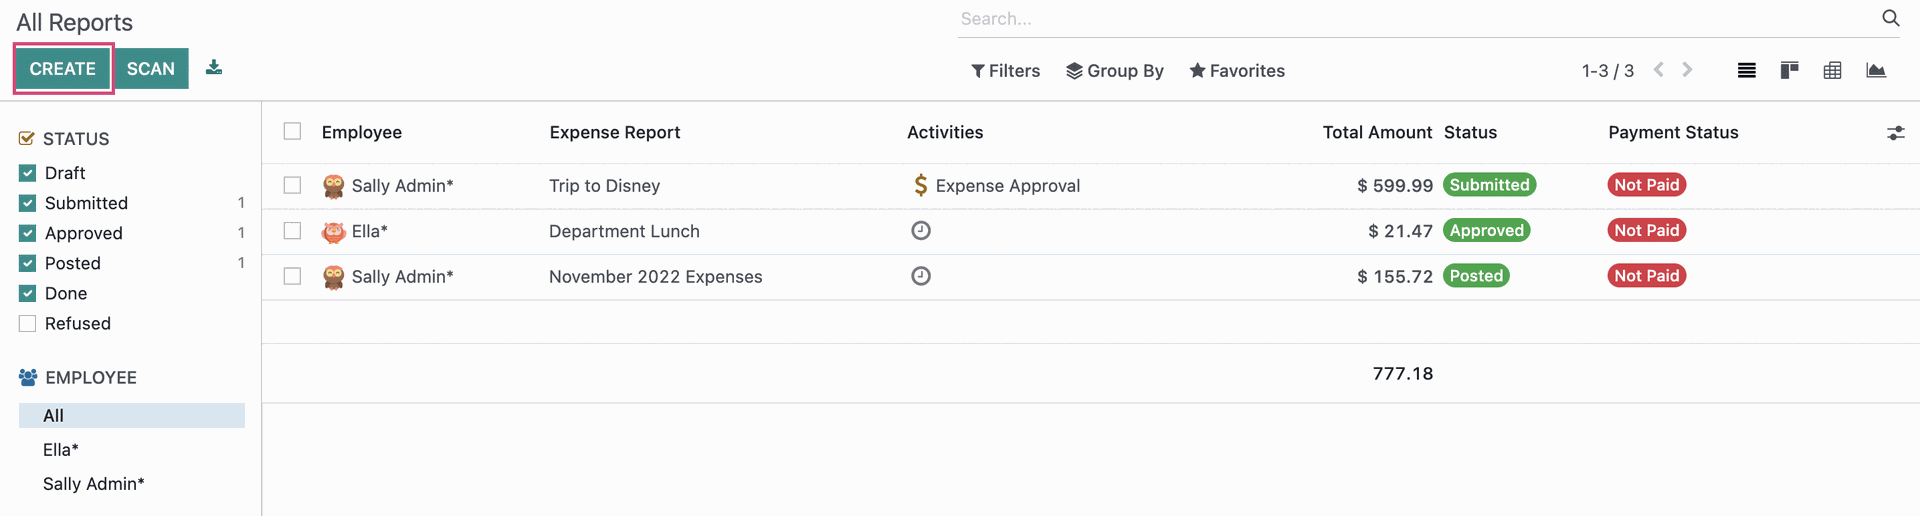
The final method for creating a report for one or more expenses is by going to My Expenses > My Expenses. Simply select all expenses to submit, then click Create Report. This brings you to the draft Expense Summary Report we covered, above. Using this method, Odoo will automatically name your expense report with the date range of included expenses, and as is typical, you may edit that.
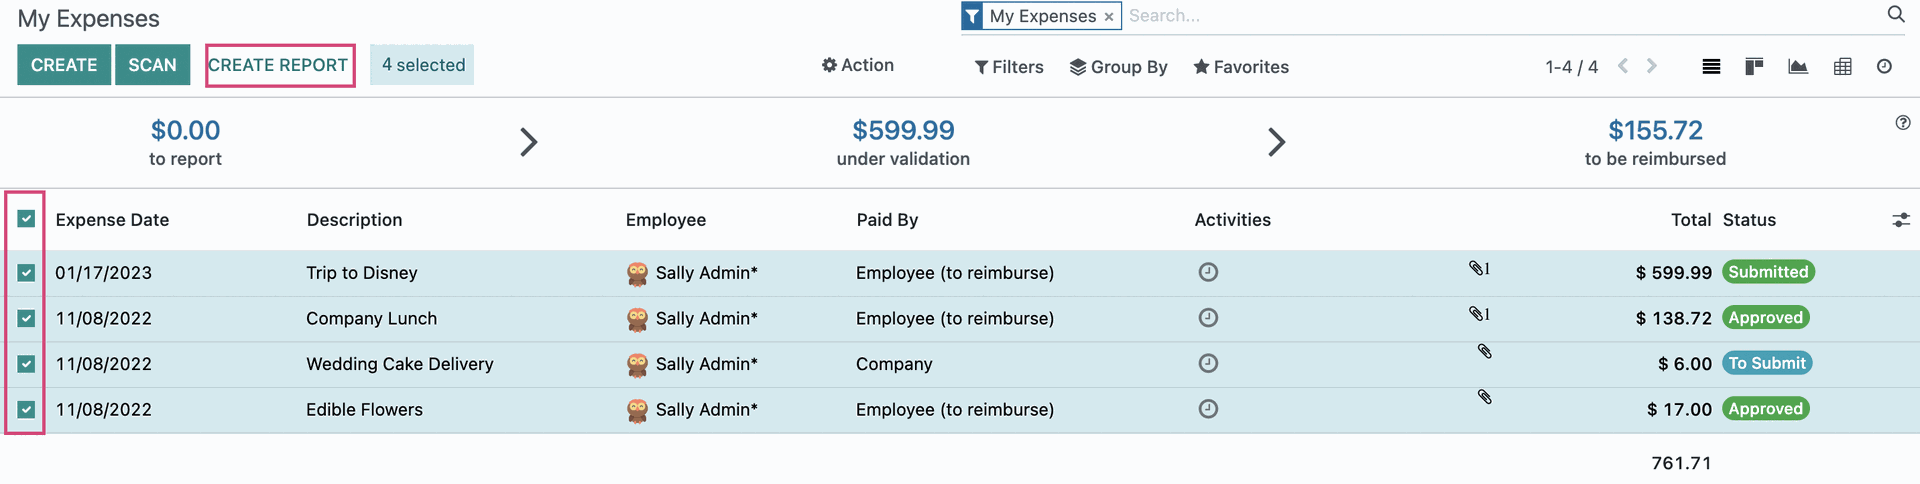
Once saved, the expense report will be ready to be submitted for approval, even if no manager is listed. Click Submit to Manager to move the report to a SUBMITTED status as it awaits approval.
Good to Know!
Sometimes when you transition from an expense to the expense summary, the document count won't update.
Approving Expenses
As an administrator, you can review pending expenses by clicking Expense Reports . Here you will see expense reports that have been submitted and await approval. Click into the individual report.

If the expense has been created correctly and the appropriate documentation has been attached, click APPROVE. This will move it to the APPROVED stage where you'll Post the expenses.

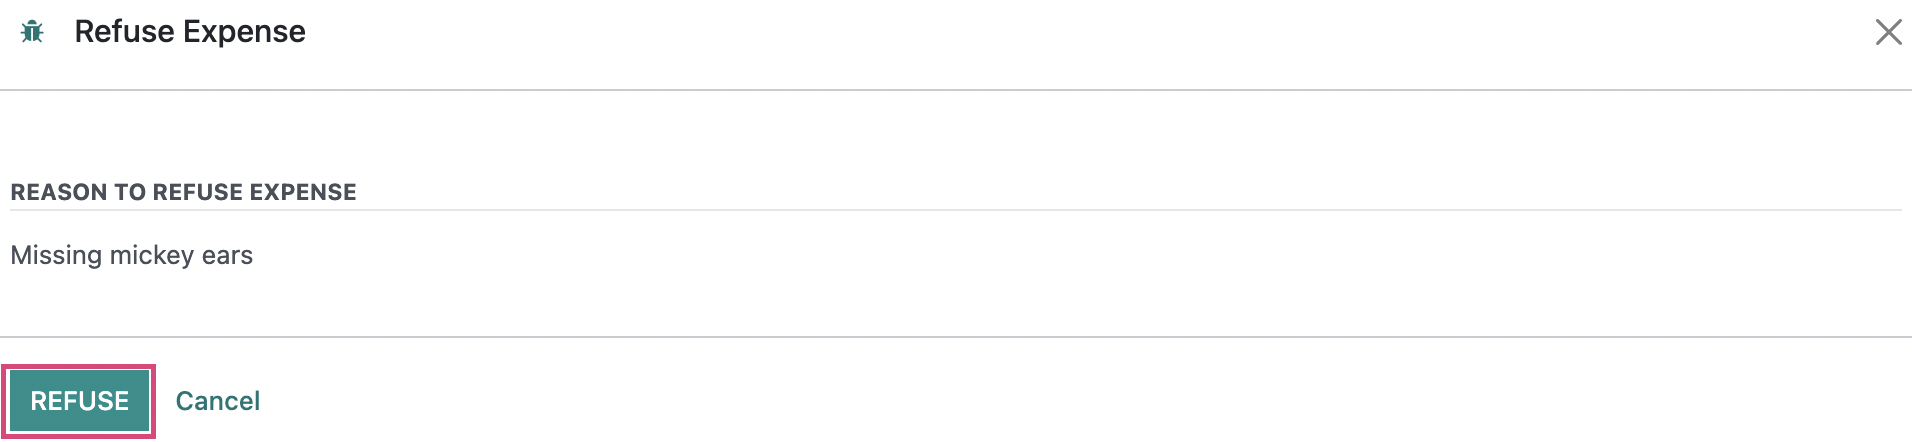
If the expense wasn't submitted correctly, for example if the expense is missing a receipt, you can choose to click Refuse.

Enter a reason for refusal, then click Refuse again.
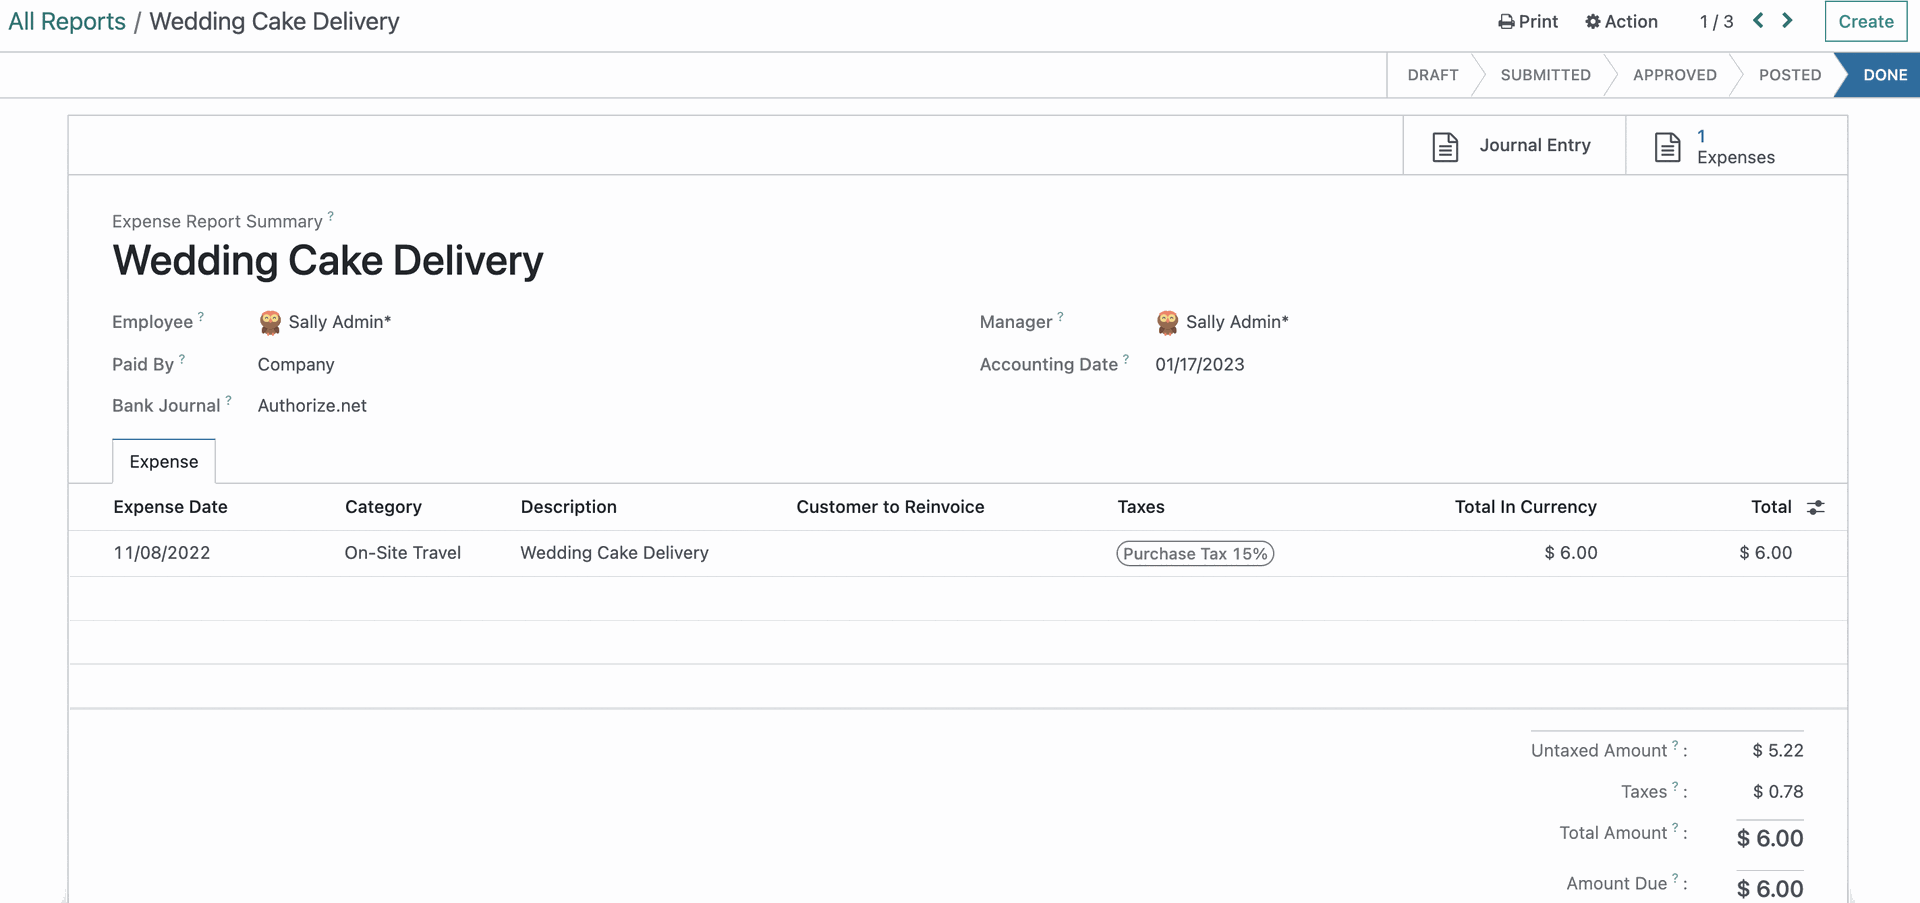
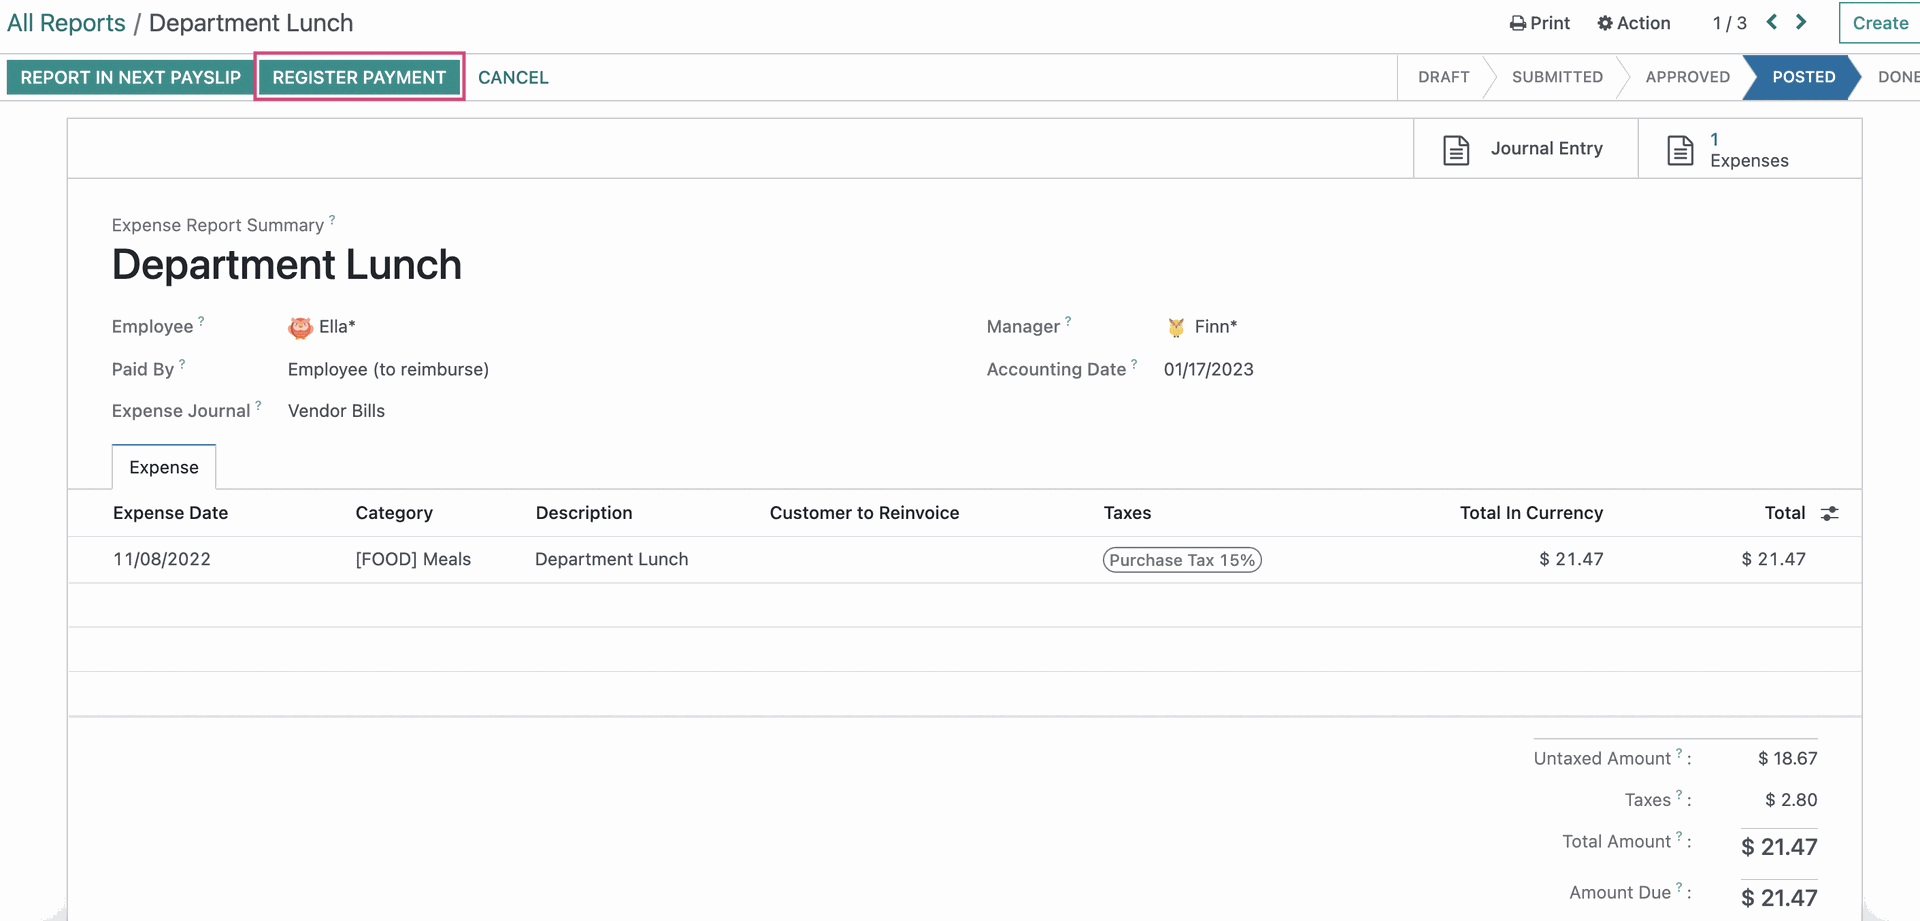
Posting Expenses
If you're not coming directly from within an approved expense report, you can view the reports ready to post by clicking Expense Reports and selecting an expense report to post from the list.
This page is your final review. If everything still looks correct, click POST JOURNAL ENTRIES moving the status to POSTED.

Once entries are posted, one of two things will happen.
If Paid By was set to Company, there will be no further action until the charge hits a card or bank, at which point it will need to be reconciled.
If Paid By was Employee (to Reimburse), the status will change to Posted and you'll have the option to Register Payment directly from the expense. The unpaid expense will also be listed under Expense Reports > REPORTS TO PAY where you'll be able to register payment which will move the status to DONE.
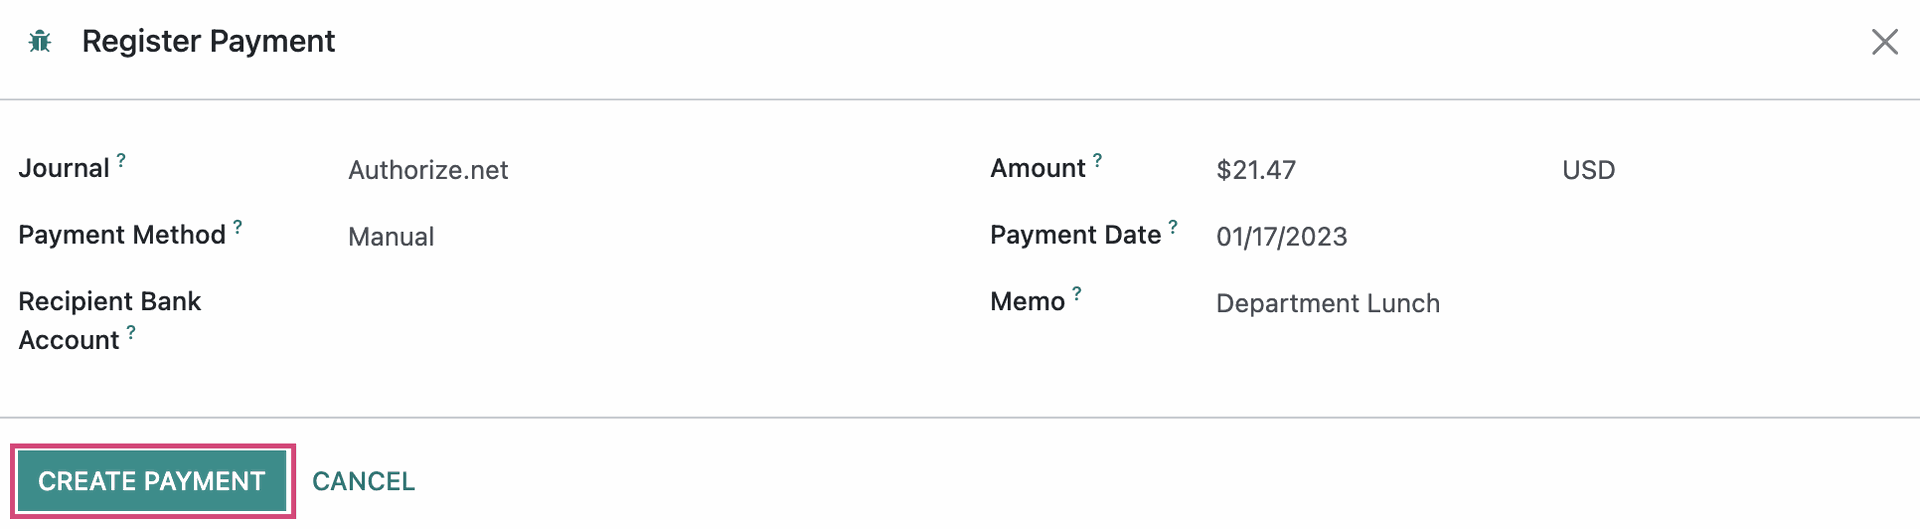
The Register Payment modal window allows the selection of the payment details, and pre-fills the Memo field with the employee's name and descriptions of all the related expenses. Review and edit as needed, then click Create Payment to complete the process.
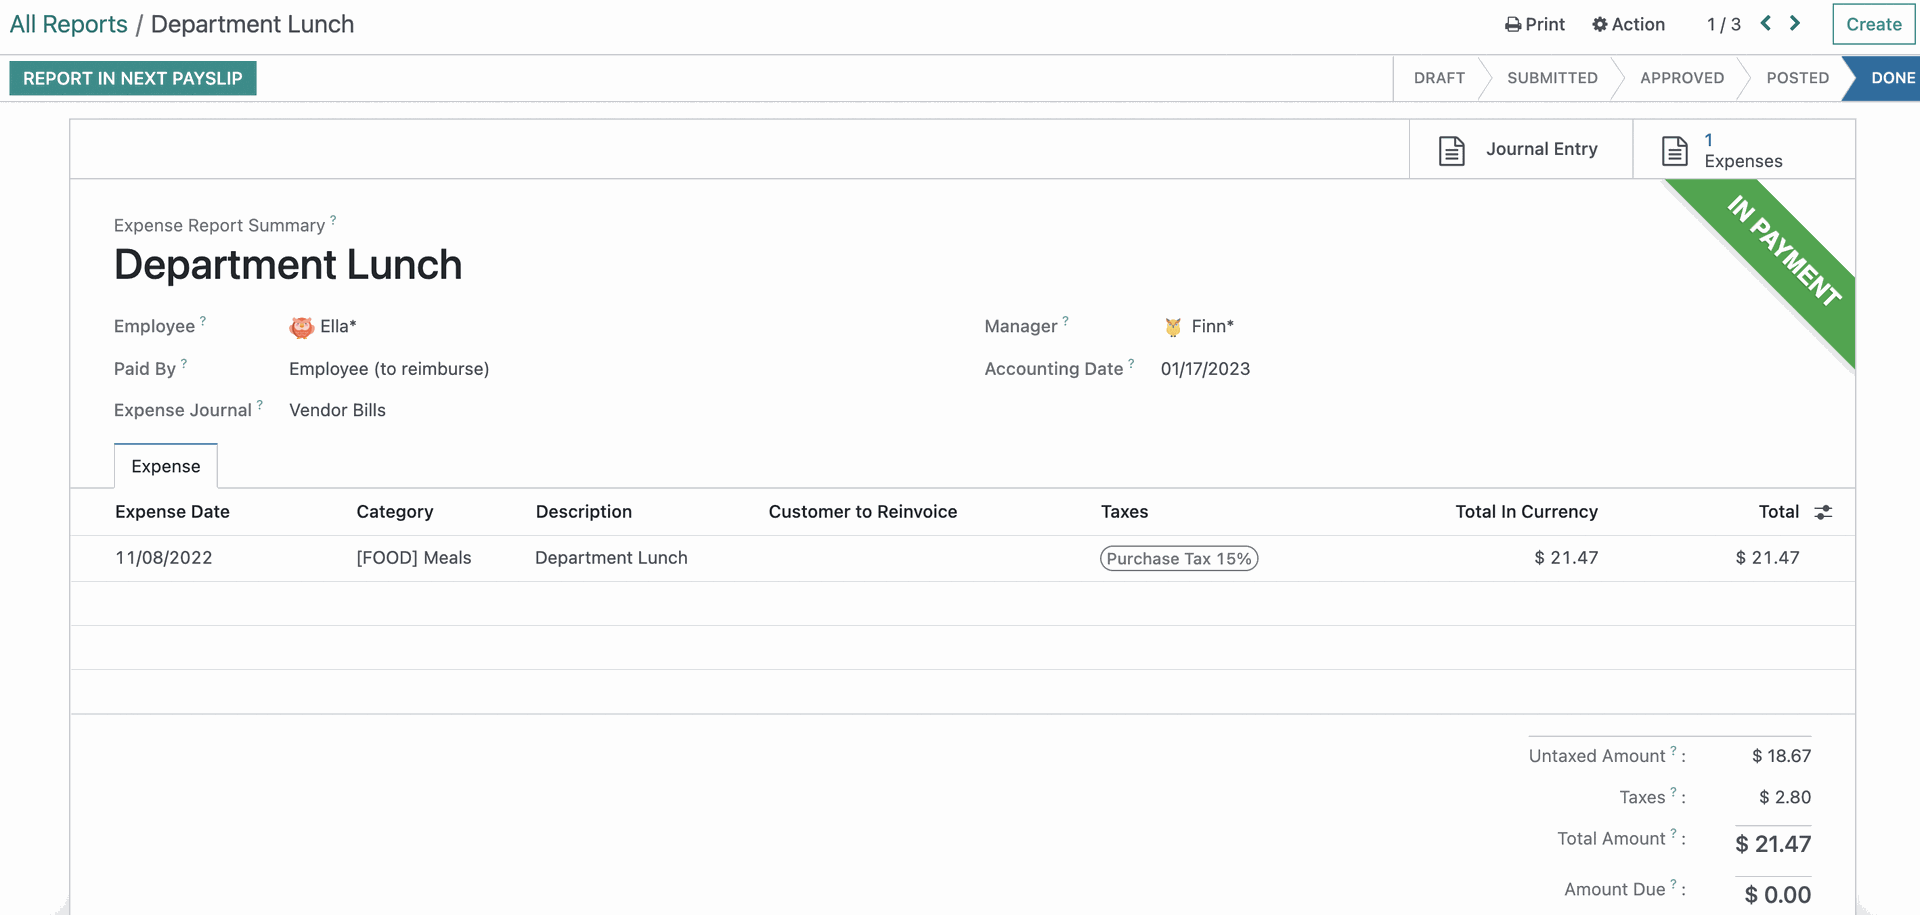
The result is an expense report with a green banner saying IN PAYMENT (or PAID if the payment is reconciled to a bank statement.)
Good to Know!
You may also access expense reports via the Accounting application from Vendors > Employee Expenses

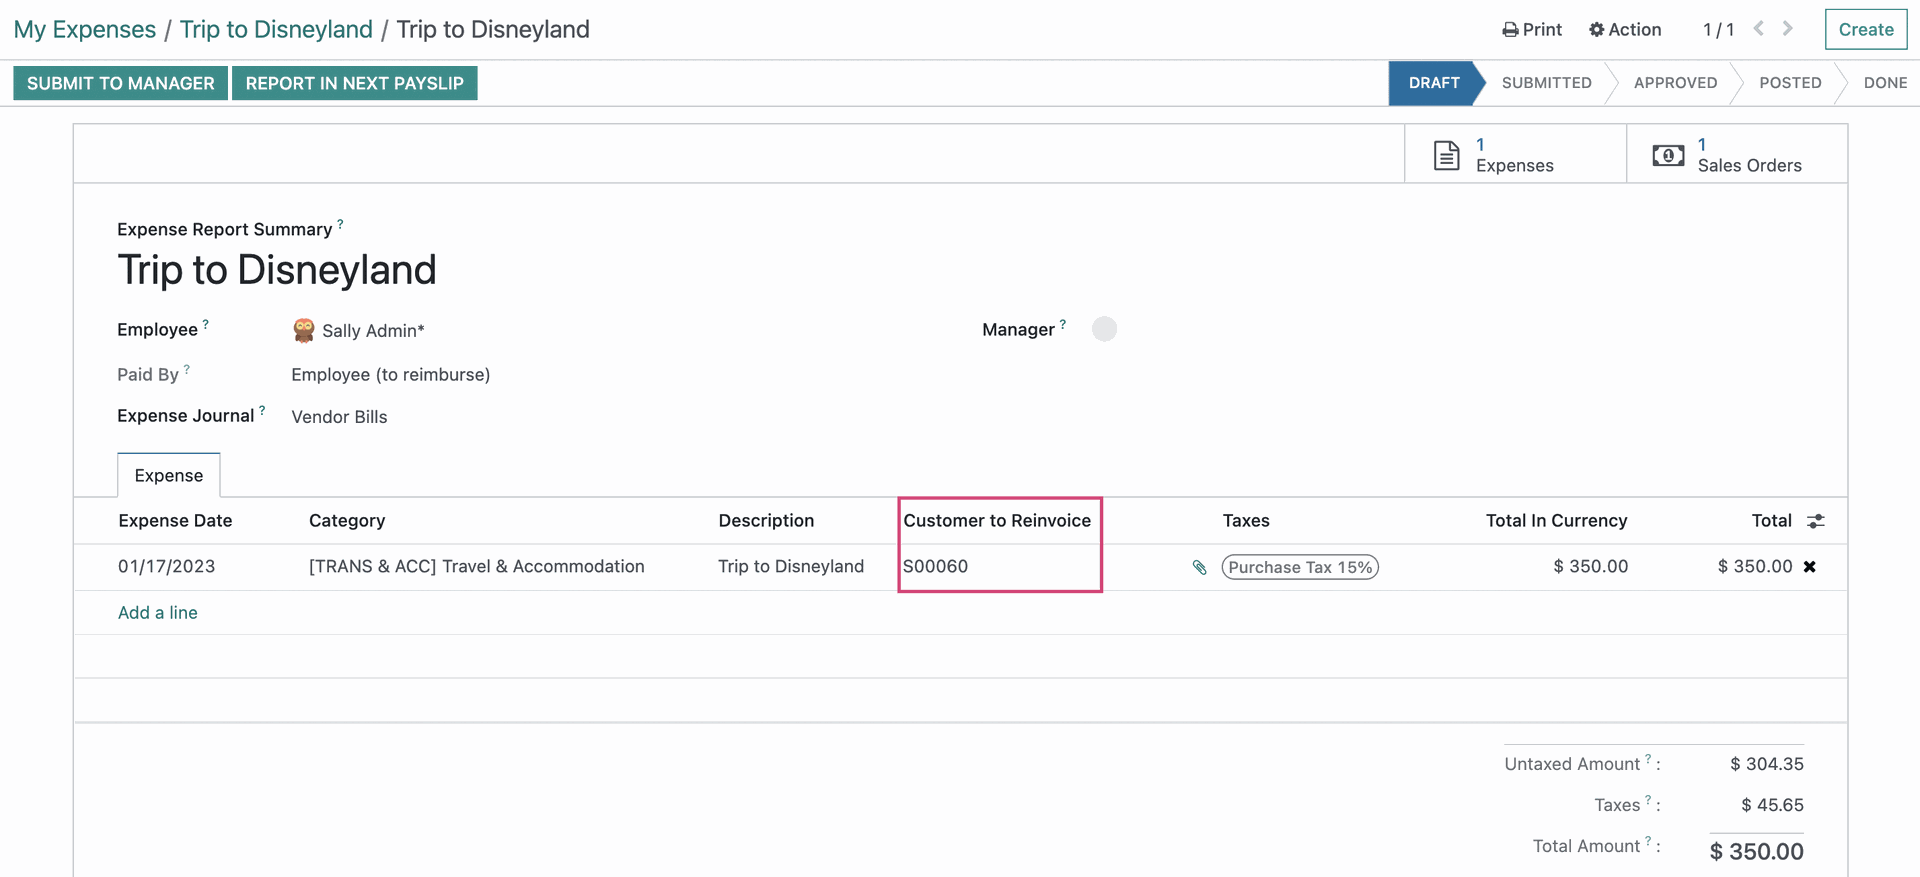
Re-Invoicing to Clients
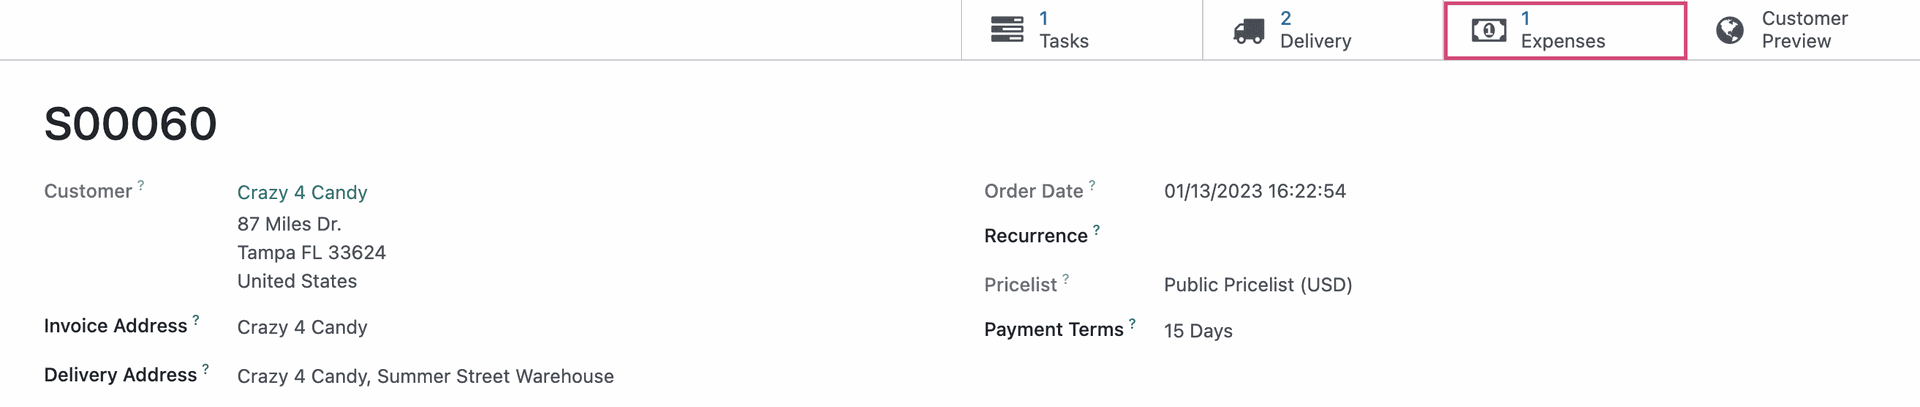
In this example, we'll click Approve on an expense configured to "Customer to Reinvoice". You'll see the related, open Sales Order in the Expense lines.
Navigate to the Sales application to find the Sale Order. You can see the entry was created and there's a smart button that links back to the related Expenses.
Good to Know!
Enter an expense via email:
An employee set up in the system can create an email addressed to the email alias you set up in configuration steps at the beginning of this document (e.g. [email protected]), with a subject line that exactly matches the "Reference" of the expense product (e.g. TRAV-CLIENT) with an attached image of a receipt. The system will receive this, create the expense and send a verification response to the sender.