Accounting: Use Case: Analytic Accounting: Projects + Analytic Accounting
Purpose
This documentation describes the relationship between projects and analytic accounts in the Accounting application of Odoo 15, and how they work together to provide additional reporting when configured correctly.
Getting Started

Odoo can also add analytic account lines to your analytic accounts using employee timesheets. To take advantage of this functionality, you must also install both the Timesheets and Employees applications.


Process
Next, navigate to the Accounting app.

Once there, navigate to Configuration > Settings. Ensure that, under the Analytic Accounting section, the option for Analytic Accounting is checked.
If you've made changes, click Save.

Creating an Analytic Account from a Project
Next, navigate to the Project app.

Once there, click Create and complete the form presented. The options on your form may look different than the example based on your database configuration.
Project Name: Enter a project name.
TImesheets: Select this option to enable employee timesheets on the project.
Billable: Select this option to bill from individual project tasks.
Recurring Tasks: Select this to create a recurring project, or leave unmarked.
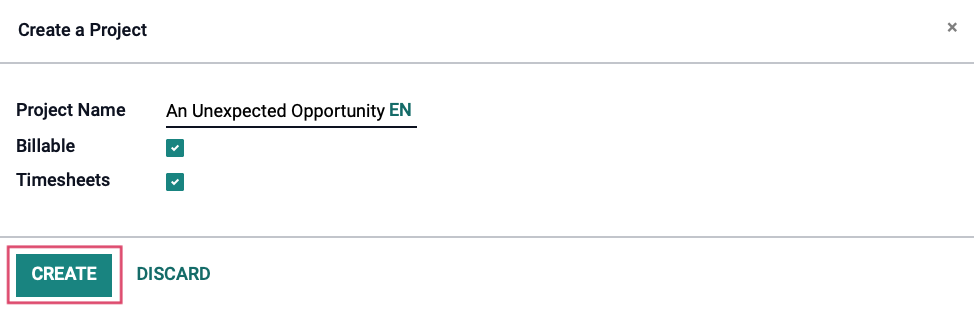
When ready, click Create.
To use this project outside of this walkthrough, you'll need to complete the project creation process according to the guidelines of our Basic Project Workflow documentation. The project we're displaying is only to be used as an example in this document.
Tracking Cost & Revenue
Since Analytic Accounting has been enabled in the configuration for Accounting, every time a project gets created moving forward, a new Analytic Account will be created, allowing you to easily track the Cost and Revenue of any given project.
To view our new Analytic Account, we need to navigate back to the Accounting app.
From there, click Configuration > Analytic Accounting > Analytic Accounts.
Here you will see a list of all of your Analytic Accounts. Click on the entry that was created with your Project name to go to the Analytic Account form view.

Once there, click Edit to see all available options.
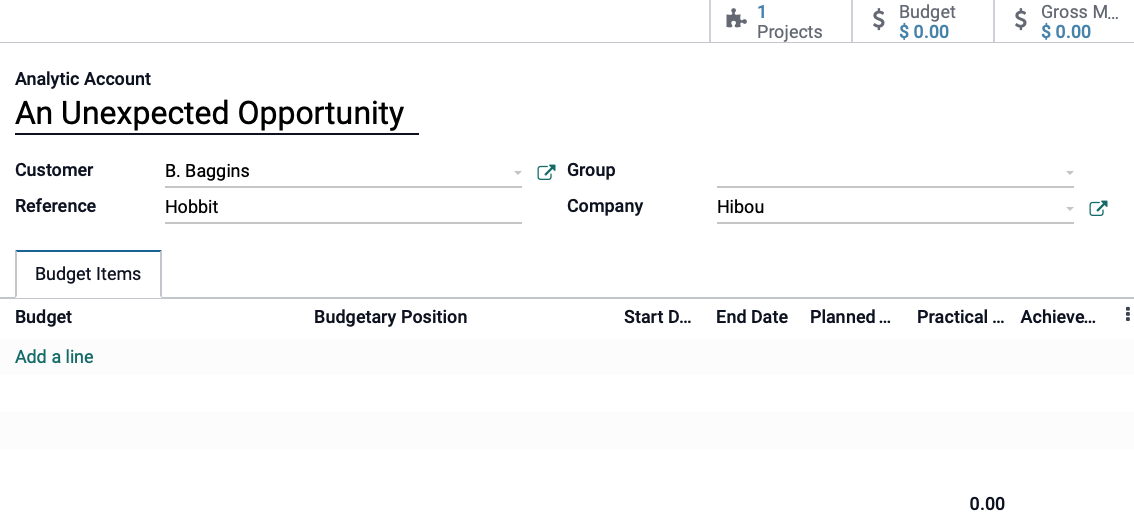
Customer: If this account applies to one customer only, select them here.
Reference: Enter a word or phrase to reference this account quickly.
Group: If this account should be grouped with other analytic accounts, select or create the group here.
Company: If working in a multi-company database, select the appropriate company here.
When you're done, click Save .
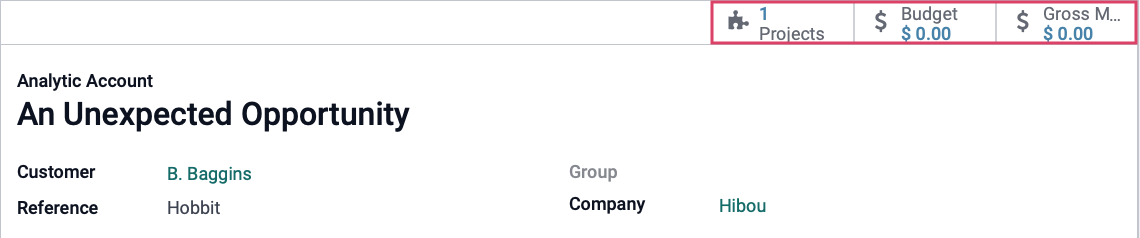
On the top right of the form there are three smart buttons:
Projects: Quickly access the project page from which this account was created
Budget: Quickly jump to the list of Budget Items if applicable.
Gross Margin: Quickly jump to the related Gross Margin report.
Configuring an Employee for Timesheet Usage
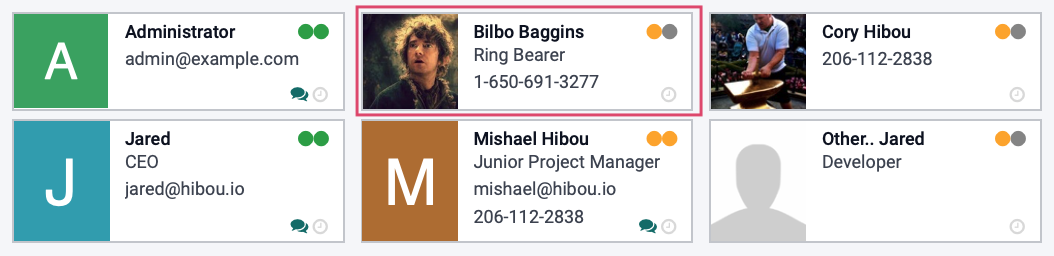
In order to use timesheets on projects for our analytic accounting reports, we must first configure the employee properly. Navigate to the Employees app.

Once there, click on the employee that will be adding timesheets to projects.
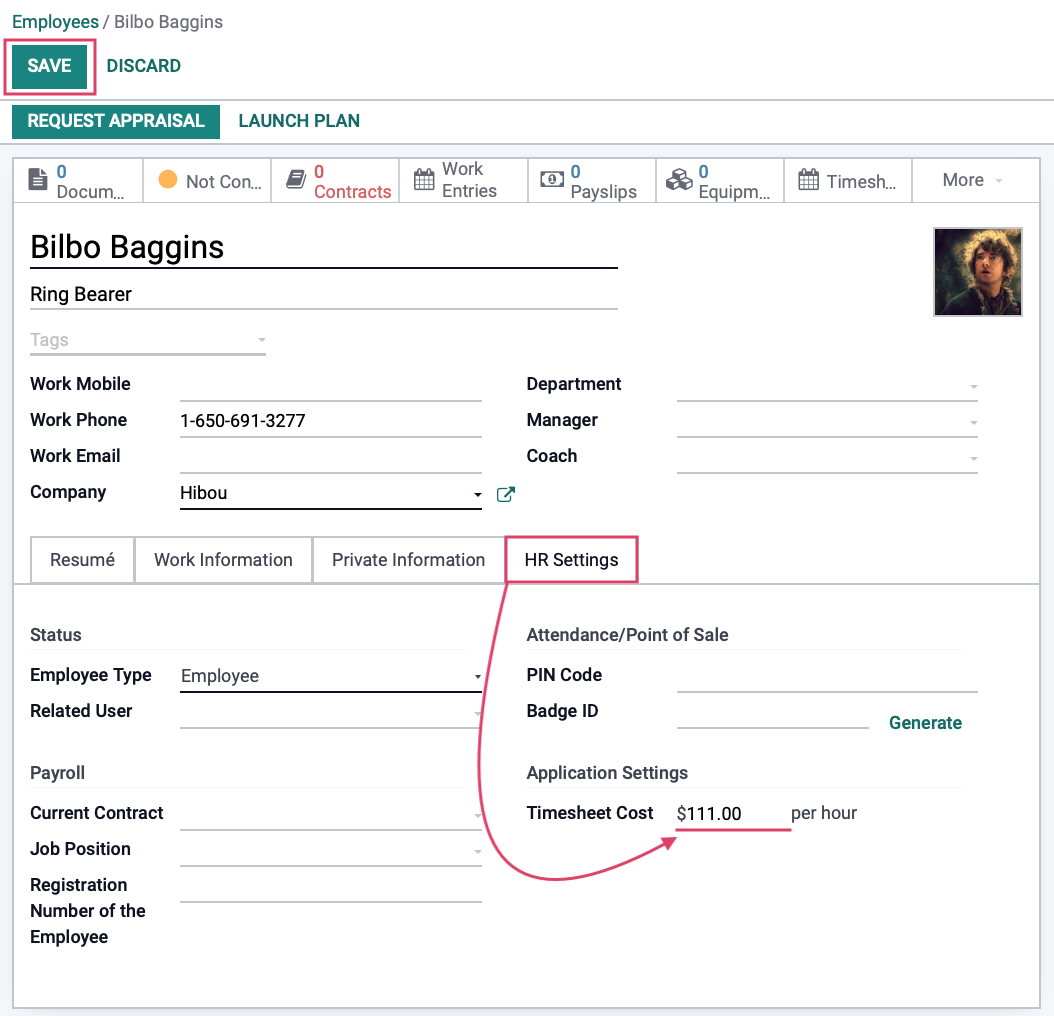
Click Edit to see available options, then under the HR Settings tab you'll see the Timesheet Cost field. Enter the hourly cost of this employee, then click Save.
Good to Know!
If the Timesheet Cost is not entered on an employee record, the Cost for this employee's timesheet entires on an Analytic Accounting entry will be $0.00.
Timesheet Entries on an Analytic Account's Cost & Revenue
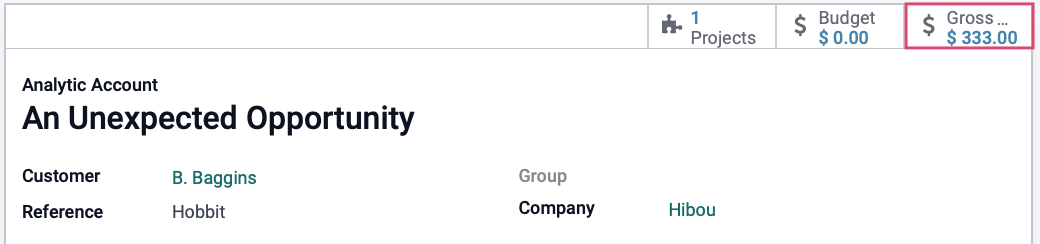
After an employee has added timesheet entries to a project, it's simple to view the effect on the project's analytic account. First, navigate to the Accounting app.
Once there, go to Configuration > Analytic Accounting > Analytic Accounts. Select the Analytic Account for the project, then click on the Gross Margin smart button.
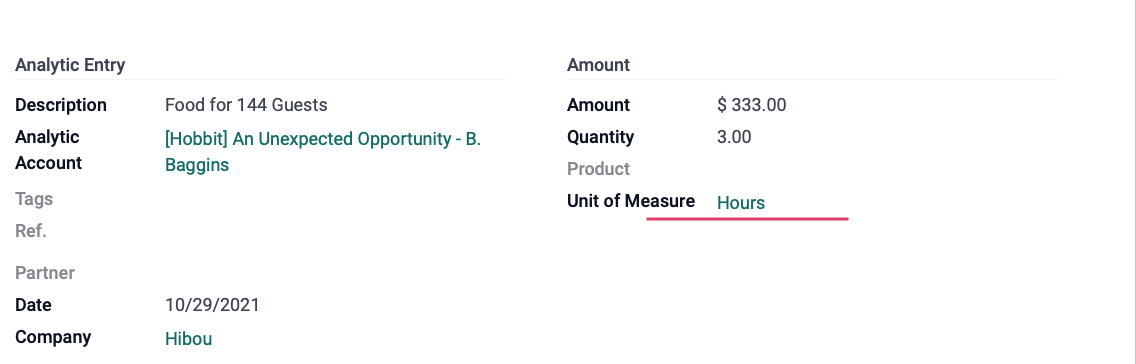
Here you can see all the Credits and Debits associated with this account, including Debits from timesheet entries.
In this example, we can see that the Description of the first entry is "Food for 144 Guests", which is a service that is most likely a timesheet entry. Let's click it to have a closer look.

On the details page, we can see that it was, indeed, a timesheet product because it's UoM is in hours.