Project: Project Workflows: Basic Project Workflow
Purpose
The purpose of this document is to outline the basic workflow for using the Odoo Project app to manage tasks within your company. The Project app provides a Kanban view with customizable stages, email capability, and several options to fine-tune your workflows and track progress and timesheets per employee. Projects can be assigned to a partner and even a specific sale order if required.
Good to Know!
There's a module for that!
For companies with a project-driven sales structure, Hibou has created the Project Stage module that adds stages to manage the flow of their projects, similar to task stages. It also provides color-coding and a tagging structure for projects based on the stage.
See our Project Stage module in the Suite for more information!
Process
To get started, navigate to the Project application.
Creating a New Project
To create a new project, click create. You will presented with the Create a Project modal window. The fields on this window will vary based on the confiuguration of your database and Project app.
Project Name: The title of the Project.
Planning: If selected, this will enable you to use forecasts to create an estimate of the time needed to complete the project and the desired work hours, which can be scheduled per task. To see this checkbox, Planning must be activated in the Project application settings.
Worksheets: If enabled, you will be able to use customized worksheets on tasks. To see this checkbox, Worksheets must be activated in the Field Service application settings.
Timesheets: If selected, this option will allow your employees to create timesheets directly on a task and this data will be rolled into the Project overview for invoicing and reporting purposes. Timesheets will also be logged in the Timesheets app.
Billable: If selected, you will be able to invoice your time and material from your tasks.
Recurring Tasks: If selected, you will be able to configure tasks to be recurring at a customizable frequency. To see this checkbox, Recurring Tasks must be activated in the Project application settings.
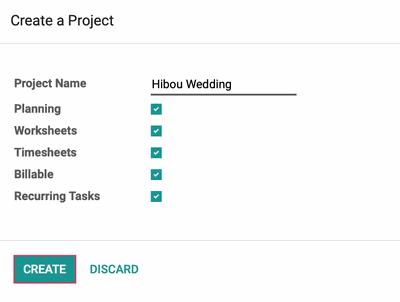
When you're ready, click create.
Good to Know
Note that it is also possible to create a new project, or a task within a project, when selling a service type product. To configure Service products, see our Creating Tasks From Products documentation.
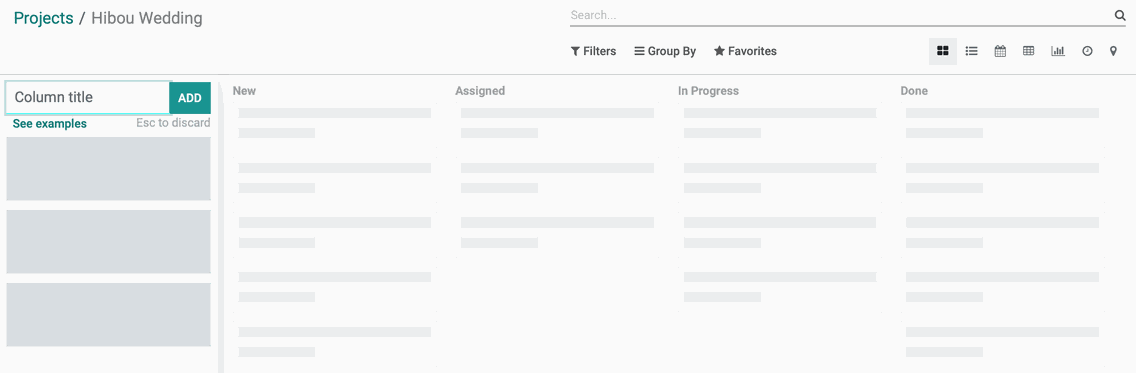
The project will open with the first column blank, waiting for a title. See the below Important! callout before creating any stages, and also refer to our Stages documentation for more information.
Important!
Avoid Duplicate Stages
Adding a stage directly from a project will create a new stage rather than applying a stage that already exists. For common stages like "New" or "Complete", go to configuration > Stages and manually assign your project to the stages you wish to see in it. See our Stages documentation for more information.
Once you've added your stages, you can click and drag the columns to rearrange them as needed, but tasks will typically flow left to right as they progress through the stages.

Tasks
Add a Task
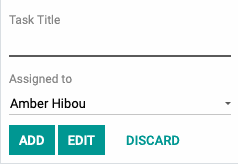
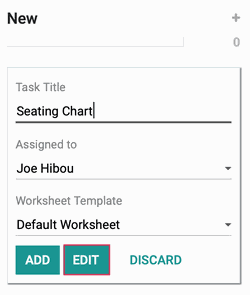
To add a task to the first column, click the symbol in the top right corner. A draft task modal will appear directly in the column that can be used for quick additions to the project. If the task requires more information than displayed below, title the task and click Edit
Good to Know!
Task Title is the only required field.
When creating a task, the only required field is Task Title. Odoo allows a task to be added with only that information, illustrated by the bold line in the Task Title field of the screenshot above.
When you open this edit window, you'll see the following fields:
Title: Give the task a title.
Customer: Assign a customer to this task.
Project: This field will pre-fill with the project you're working in. If creating a task from scratch, assign it to a project here.
Worksheet Template: If worksheets are enabled, you will be able to select a template.
Parent Task: If the task you are editing is a sub-task of another task, you can select the parent task here.
Assigned To: Select the person responsible for completing the task.
Deadline: Set a deadline for the task to be completed.
Tags: For ease of filtering, assign or create any relevant tags in your Odoo Database.
Recurrent: If checked, you'll see a new Recurrence tab where you will be able to configure this task as recurrent with a customizable frequency.
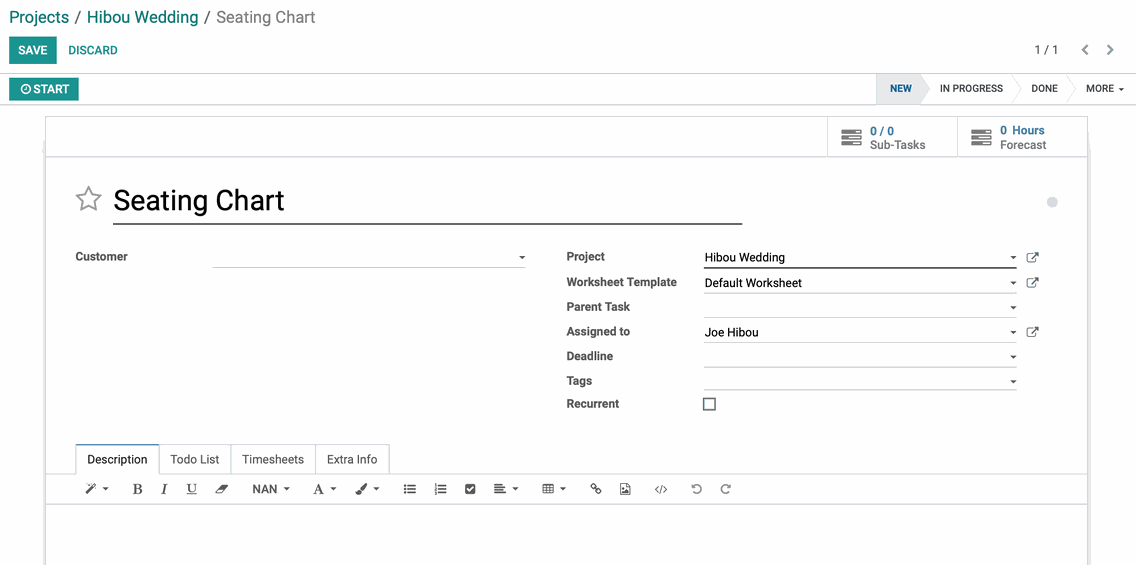
When you're ready, click Save.
Subtasks
Subtasks exist as an individual step or item of sorts within a larger Parent Task. Each task has the capability of being broken down into subtasks, therefore becoming a Parent Task. To create subtasks, be sure they're enabled in the Project app settings as well as in the project itself.
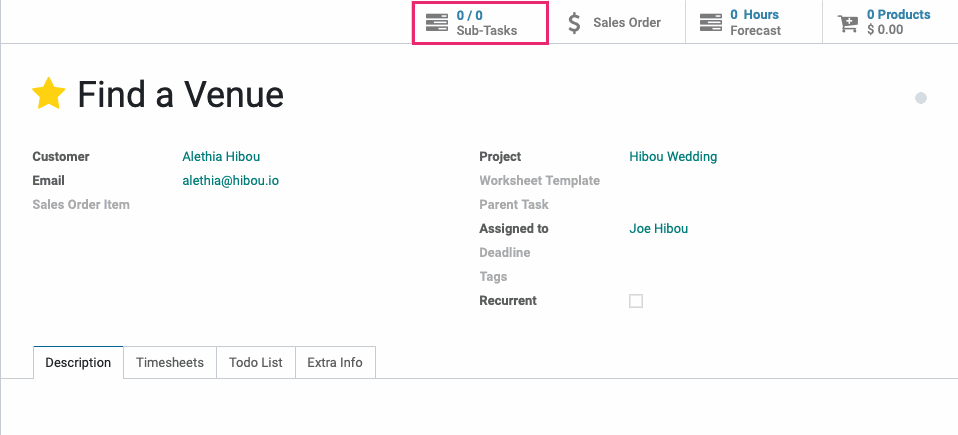
To add subtasks, open a task. On the task, click the Sub-Tasks smart button. This brings you to a list of any subtasks for this task, and you can add a new one by clicking Create.
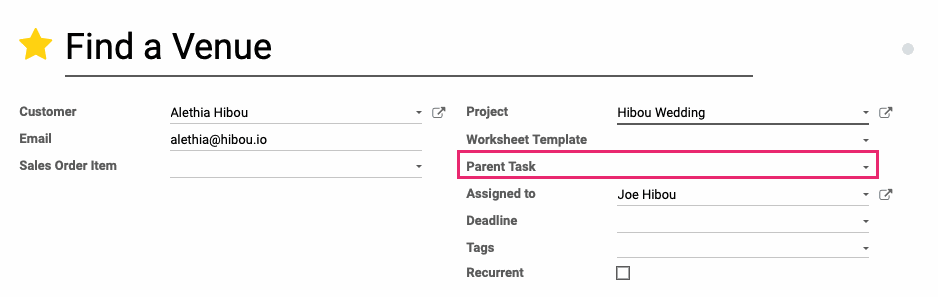
You can also convert a task to a subtask by selecting a task in the Parent Task field. Sub-tasks and their parent tasks do not need to be in the same project, therefore, when you select the Parent Task drop down, you will see tasks from all projects listed.
Good to Know!
Sub-task hierarchy.
There is no limit to the number of layers of subtasks you can have in hierarchy. Every subtask created is capable of parenting its own subtasks.
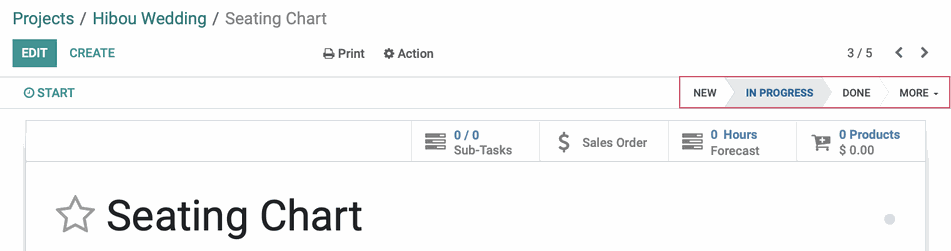
Task Stages
Above the smart buttons, you will see the task's current stage highlighted in blue, and can quickly move it to any of the others by clicking on the stage you want to move it to.
Timesheets
If timesheets are configured, employees can log time under the Timesheets tab of a task.
Initially Planned hours allow you to set the time needed to complete the parent task and any subtasks. Once your planned hours are set, you and your employees can log your time to keep the progress reporting accurate.
After clicking EDIT, users can click ADD A LINE to log their time along with a short description of the work that they’ve done. Once logged, be sure to click SAVE before leaving this tab to retain your work.

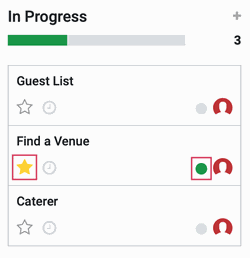
Tasks View
Tasks can be moved manually by dragging them through your kanban stages or editing the stage from within the task record. The Project kanban view may look something like this:
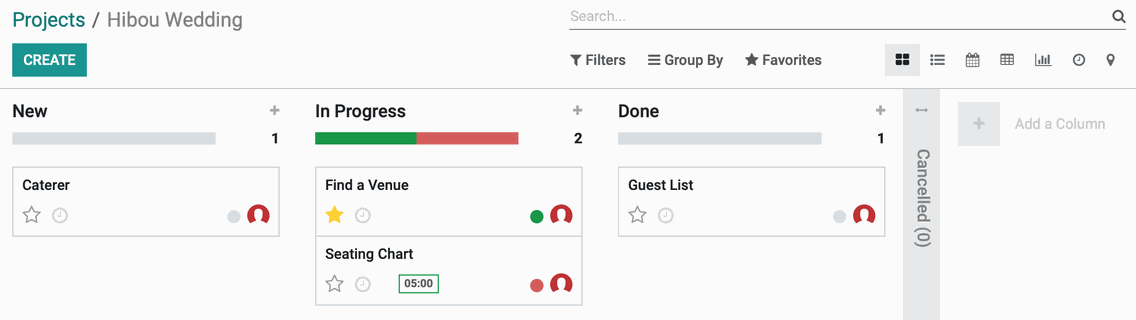
You can prioritize the task by clicking the star next to the title. To the right of the title is a grey status indicator that can be used to signal whether the task is ready for the next stage (green), or blocked and needing attention (red).