Accounting: Accounting: Journals
Purpose
This documentation outlines the configuration and use of journals in the Odoo 15 Accounting application. We will review the different journal types and their different configuration options.
A Journal is where you record all transactions of the same type, in chronological order. For example, a Sale journal would list all of your customer invoices and refunds that occurred in order of creation thanks to a sequence number.
The entry sequence of a journal determines how your journal entries are numbered.
Good to Know!
Accounting Overview + Journals
When you open the Accounting app, you'll see all of your favorite Journals shown on the dashboard page. This is because the default filter is set to Favorites.
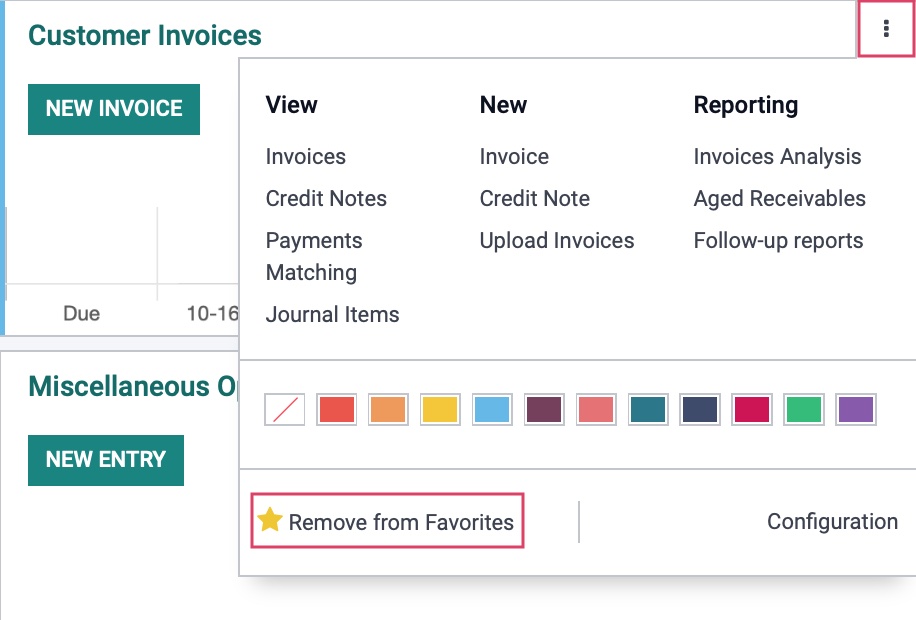
To remove a Journal from this view, click the menu icon and then click Remove from Favorites. When you reload this page, that journal will not display.
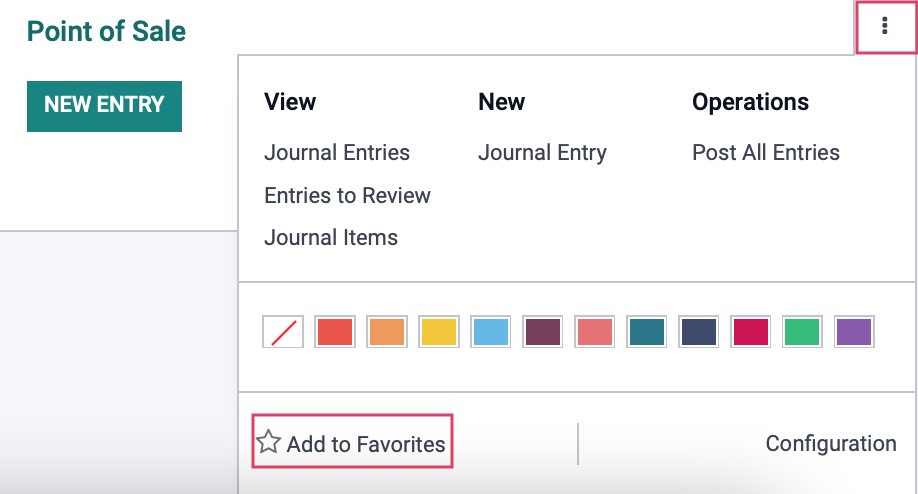
To add a Journal as a favorite to the Overview page, remove the Favorites filter to see all Journals.

From the menu, click Add to Favorites.
Process
To get started, navigate to the Accounting app.
Journal Types
Once there, click on Configuration > Accounting > journals.
With a new Odoo installation, you will see pre-configured Journals that are common for most industries. While you likely won't need to modify many outside of bank journals, you can delete or create journals as needed.
Click CREATE to make a new journal.
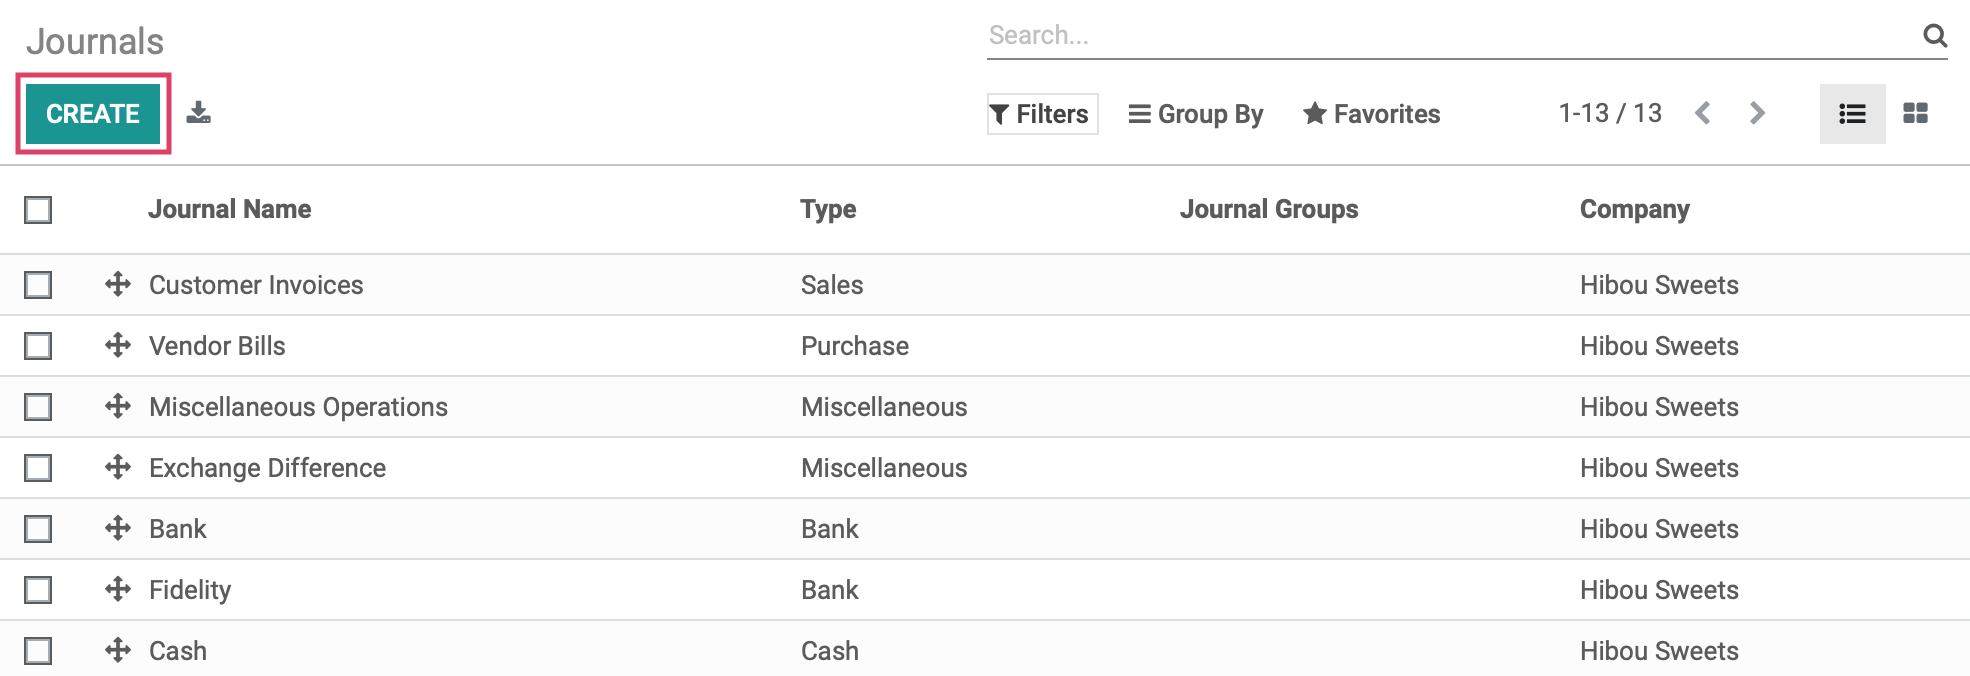
The following template will be shown:
Journal Name: The name of the journal.
Type: There are five journal types in Odoo:
Sales: Post recorded customer invoices.
Purchase: Post received vendor bills.
Cash: Where you keep track of petty cash and daily cash transactions, as well as received customer payments.
Bank: Post your bank statements and track customer payments, vendor payments, and all other transactions recorded by your associated bank account.
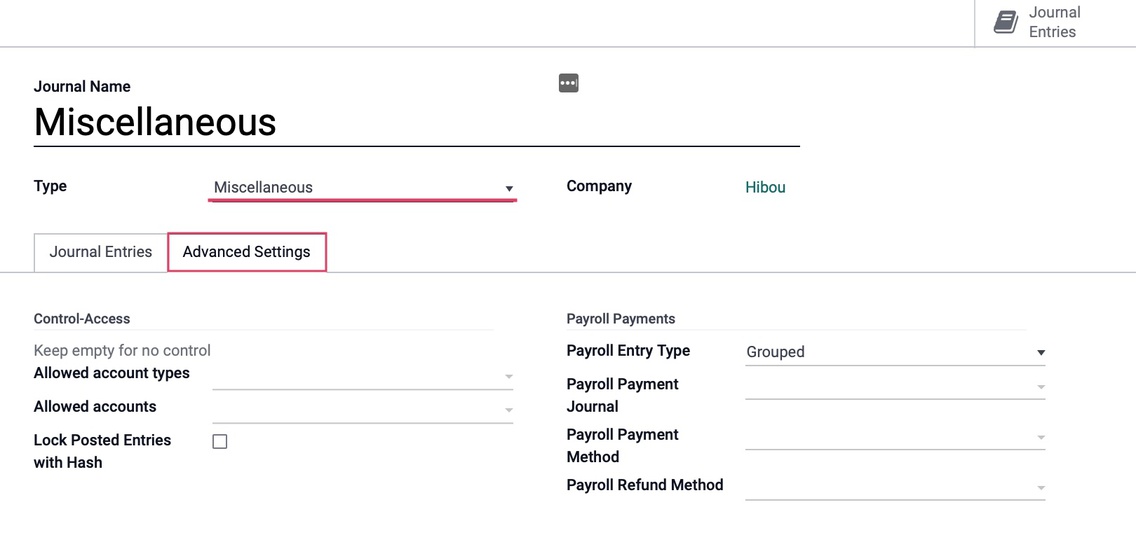
Miscellaneous: Post miscellaneous entries, like payroll or all of your corrections. This journal is used for anything that doesn't fit into the above journal types. Miscellaneous journals do not have any advanced settings.
Company: This field displays on a multi-company database and will populate with the company you are working in.
The tabs at the bottom of the template change to reflect the journal type you have chosen, as you will see in the following sections.
![]()
Configuring Sale Journals
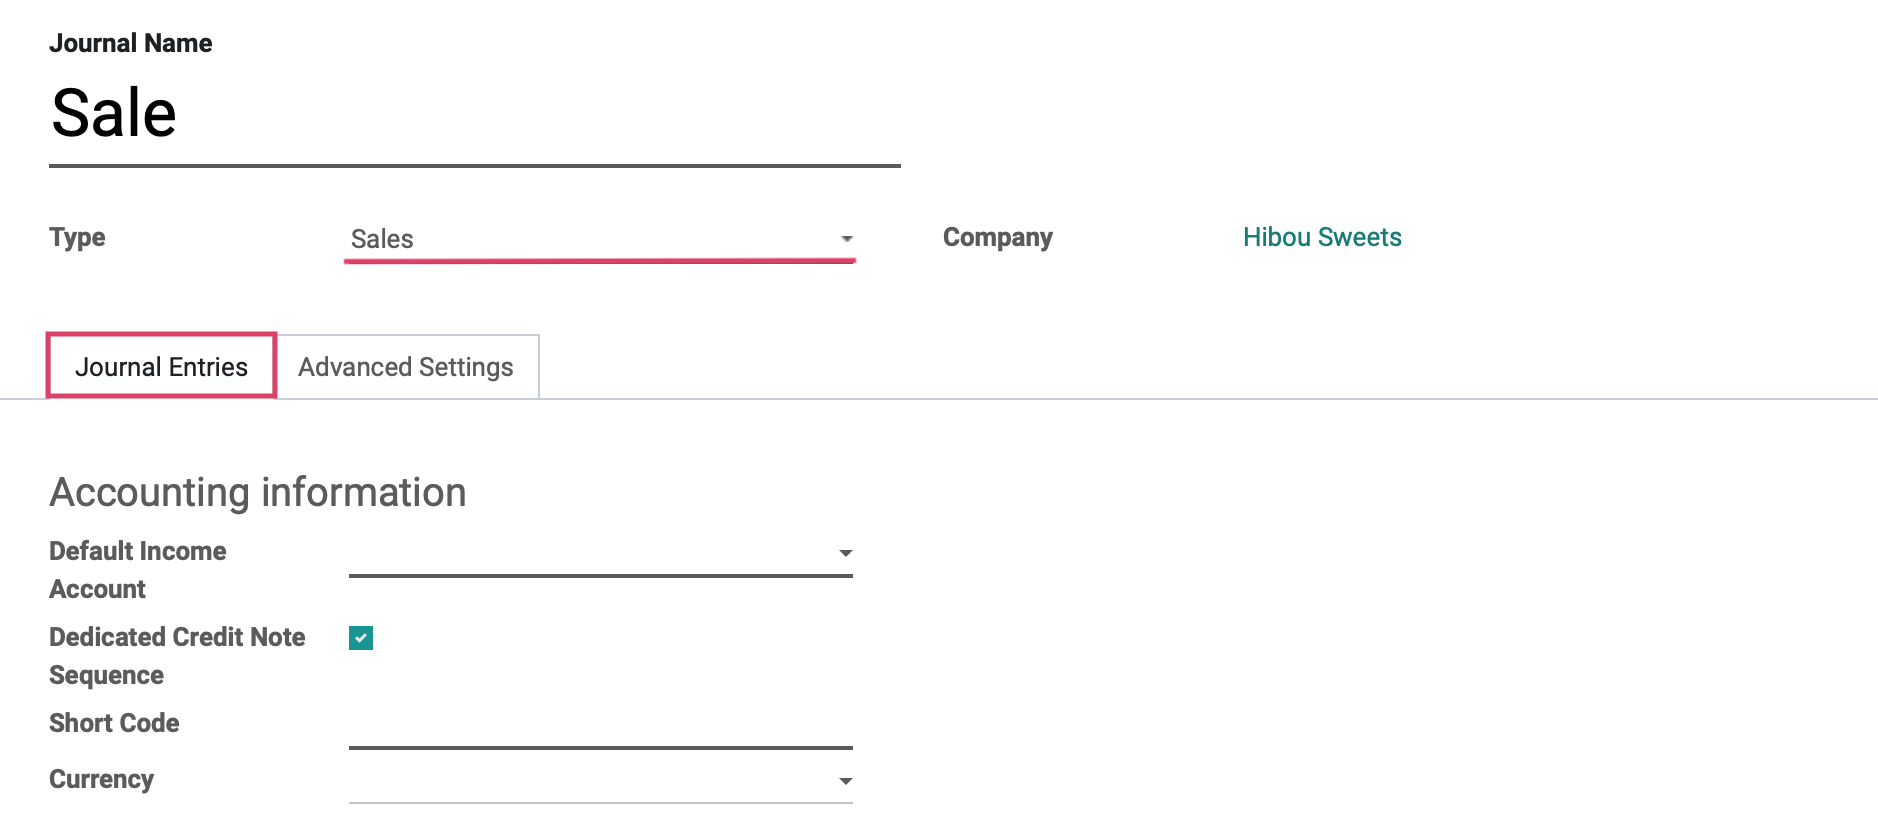
The first listed journal type is Sales, which is used to post recorded customer invoices.
Under the JOURNAL ENTRIES tab we will see the fields shown:
Accounting Information
Default Income Account: The default account, from your Chart of Accounts, that transactions for this bank journal will be recorded.
Dedicated Credit Note Sequence: Check this box if you do not want to share the same sequence for invoices and credits notes made in this journal.
Short Code: A Short Code is used to easily identify a journal and track the journal entries and journal items that are posted to it. Short codes are heavily used throughout Odoo.
Currency: The currency used in this statement.
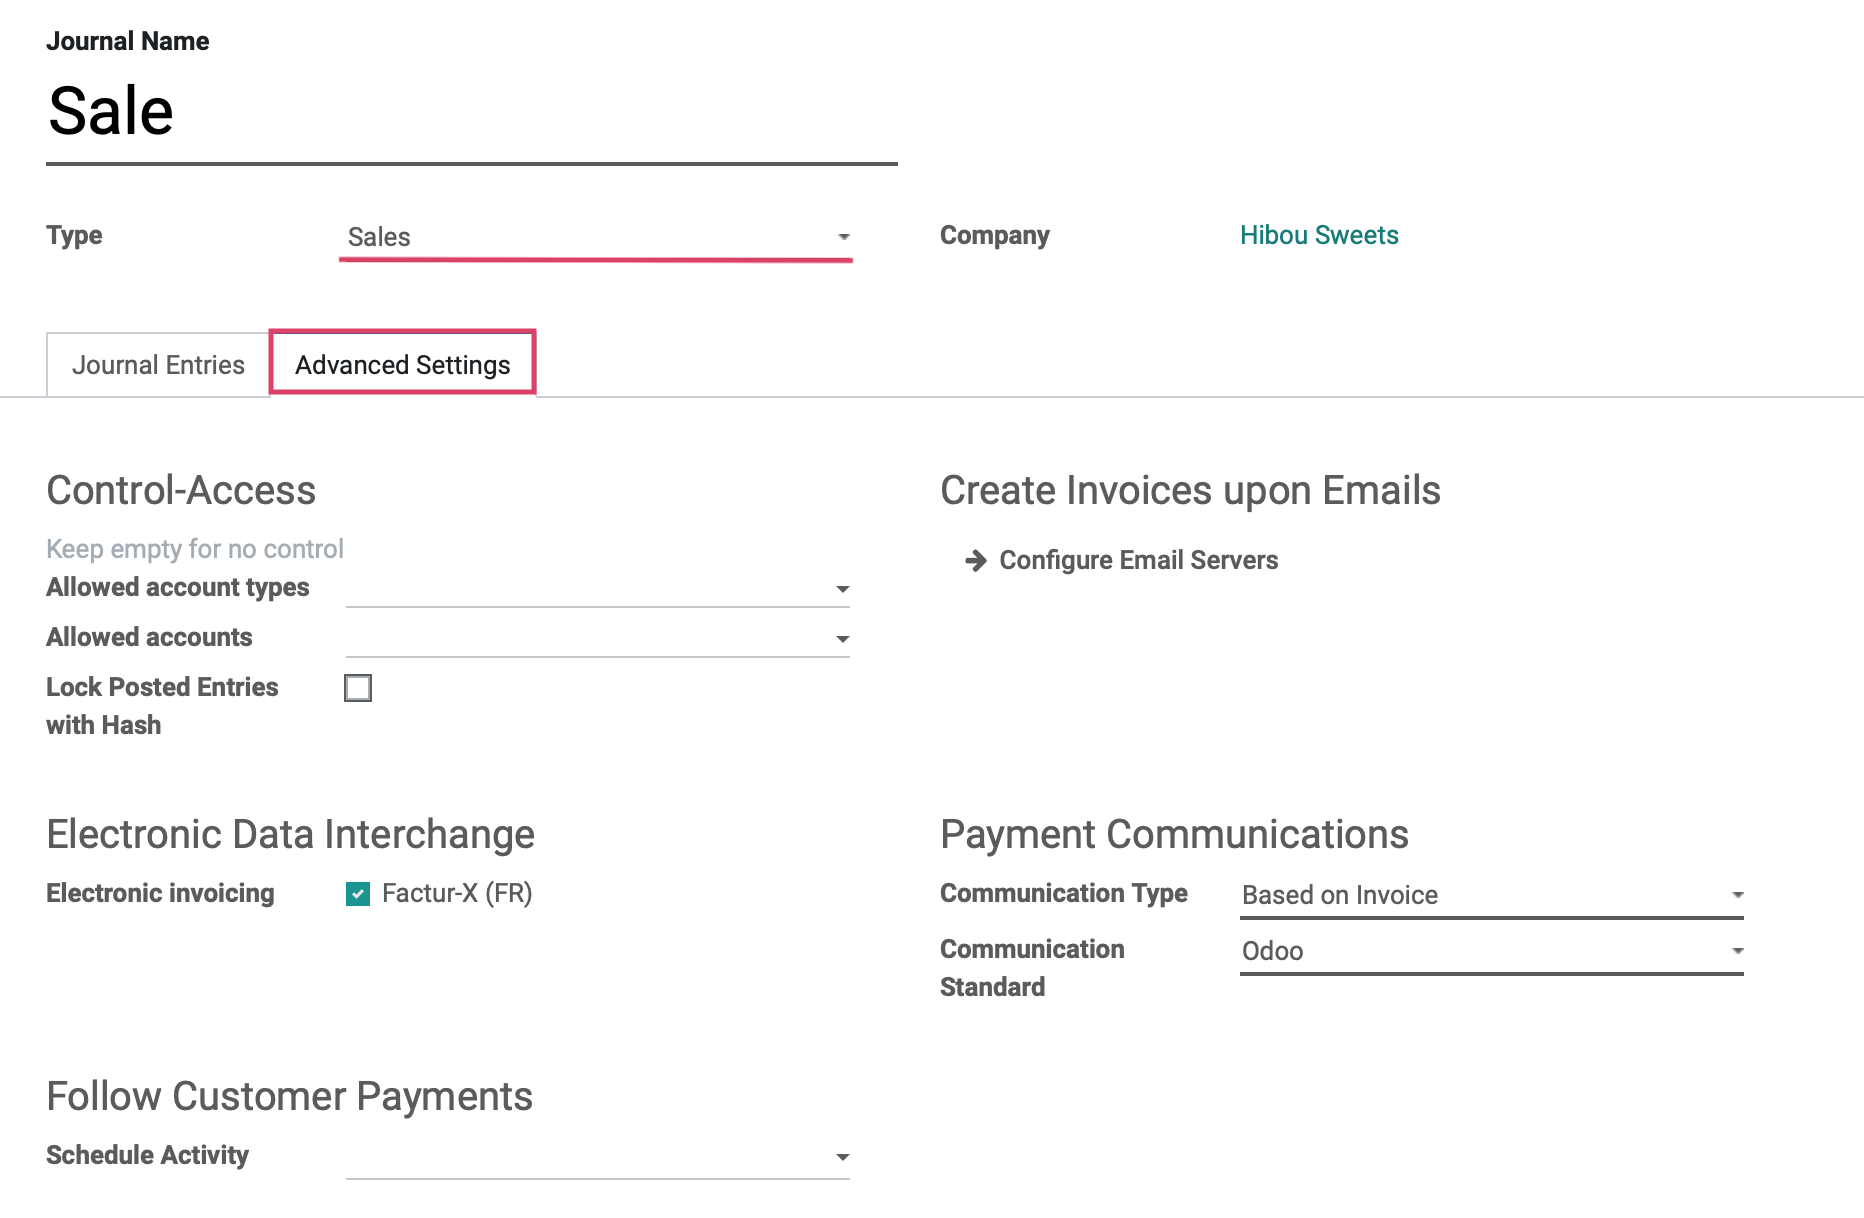
Under the Advanced Settings tab we will see the fields shown :
Control Access: Leave these fields empty for no control.
Allowed Account Types: Select the account types allowed for this journal.
Allowed Accounts: Select the accounts allowed for this journal.
Lock Posted Entries with Hash: Enable this to lock accounting entries or invoices once posted. This means they cannot be further modified.
Electronic Data Interchange
Electronic Invoicing: Check this box to send XML/EDI invoices.
Follow Customer Payments
Schedule Activity: This activity will automatically be scheduled on payment due date, improving the collection process.
Create Invoices upon Emails
Configure Email Servers: If we configure an email alias for the Purchase journal, we can email vendor bills to a unique email alias and they will automatically generate a Vendor Bill entry for the journal.
Payment Communications
Communication Type: Set the communication that will appear on customer invoices, once validated, to help the customer refer to that particular invoice when making the payment.
Communication Standard: Choose different models for each type of reference. The default is the Odoo reference.
Payroll Payments: This section is specific to Hibou Payroll. To learn how to configure this section, please review our Payroll Workflows: How to Run Payroll document.
Configuring Purchase Journals
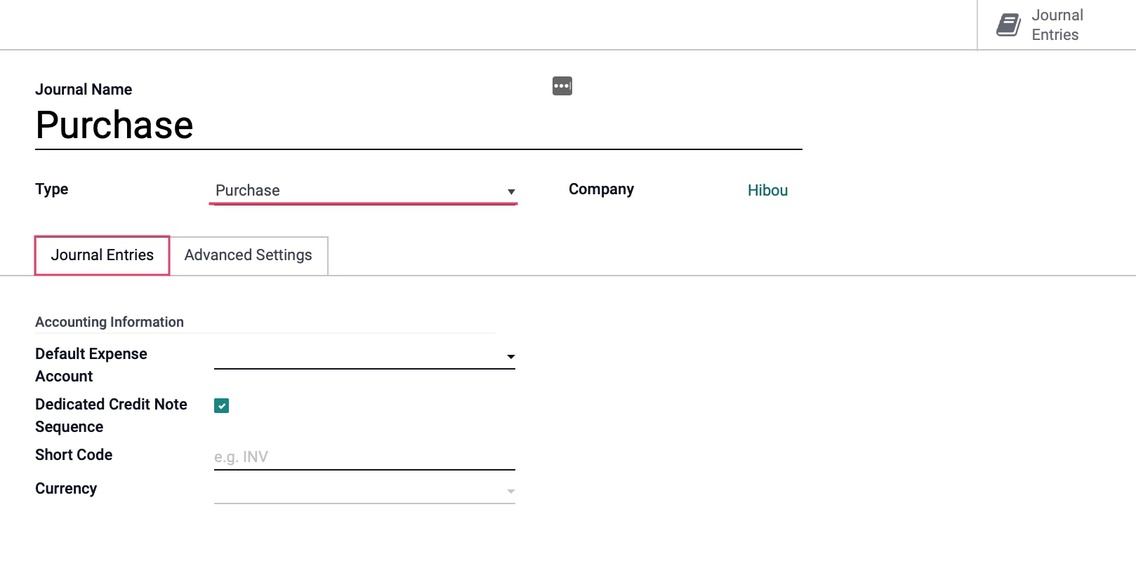
The second listed journal type is Purchase, which is used to post received vendor bills.
Under the JOURNAL ENTRIES tab we will see the fields shown:
Accounting Information
Default Expense Account: The default account, from your Chart of Accounts, that transactions for this bank journal will be recorded.
Dedicated Credit Note Sequence: Check this box if you do not want to share the same sequence for invoices and credits notes made in this journal.
Short Code: A journal's Short Code is used to easily identify a journal and track the journal entries and journal items that are posted to it. Journal short codes are heavily used throughout Odoo.
Currency: The currency used in this statement.
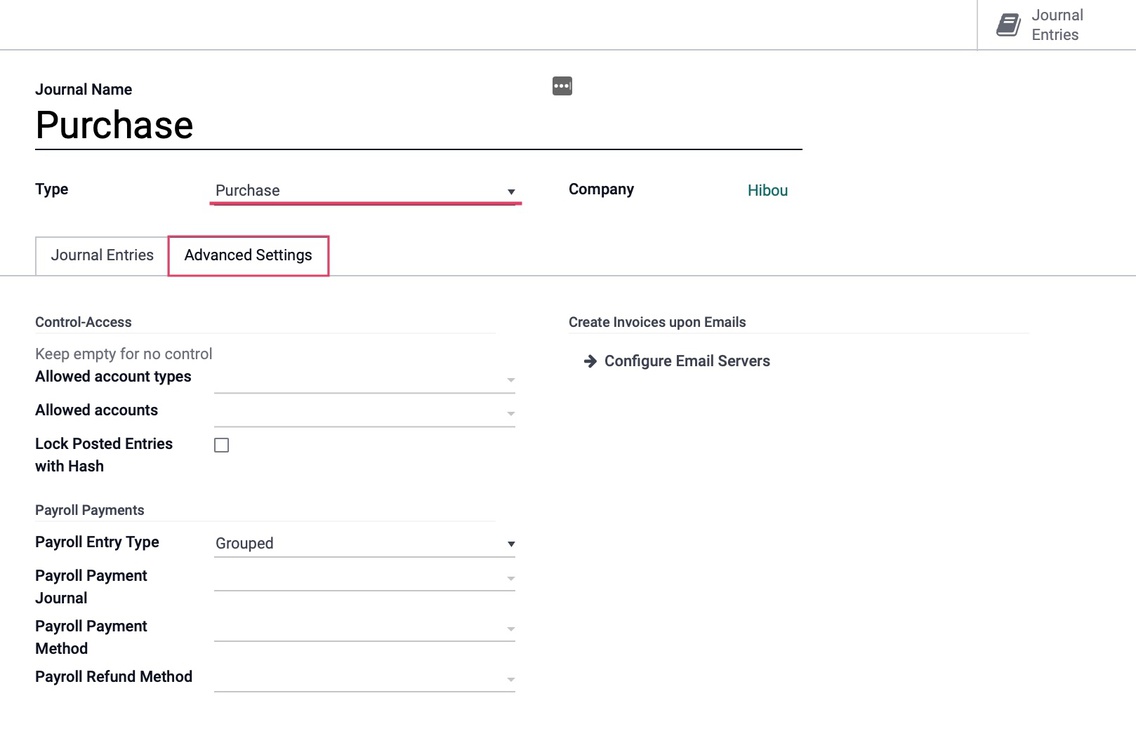
Under the ADVANCED SETTINGS tab we will see the fields shown:
Control Access: Leave these fields empty for no control.
Allowed Account Types: Select the account types allowed for this journal.
Allowed Accounts: Select the accounts allowed for this journal.
Lock Posted Entries with Hash: Enable this to lock accounting entries or invoices once posted. This means they cannot be further modified.
Create Invoices upon Emails
Configure Email Servers: If you configure an email alias for your Purchase journal, you can email yourself vendor bills to a unique email alias and they will automatically generate a Vendor Bill entry for the journal. We will cover email server configuration in a separate document.
Payroll Payments: This section is specific to Hibou Payroll. To learn how to configure this section, please review our Payroll Workflows: How to Run Payroll document.
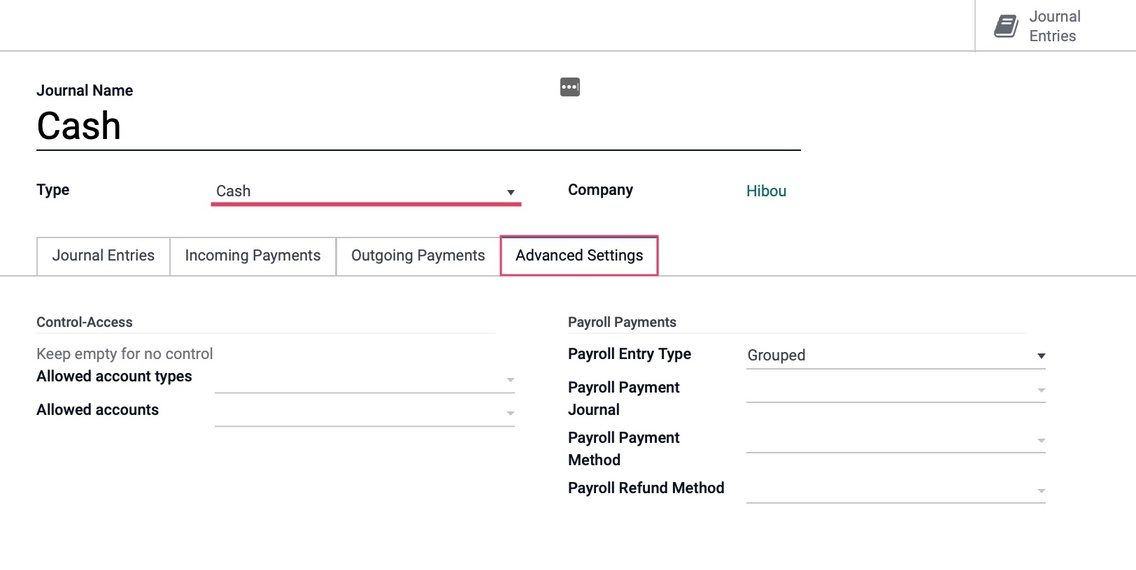
Configuring Cash Journals
The third listed journal type is Cash, which is where petty cash and daily cash transactions, as well as received customer cash payments are recorded.
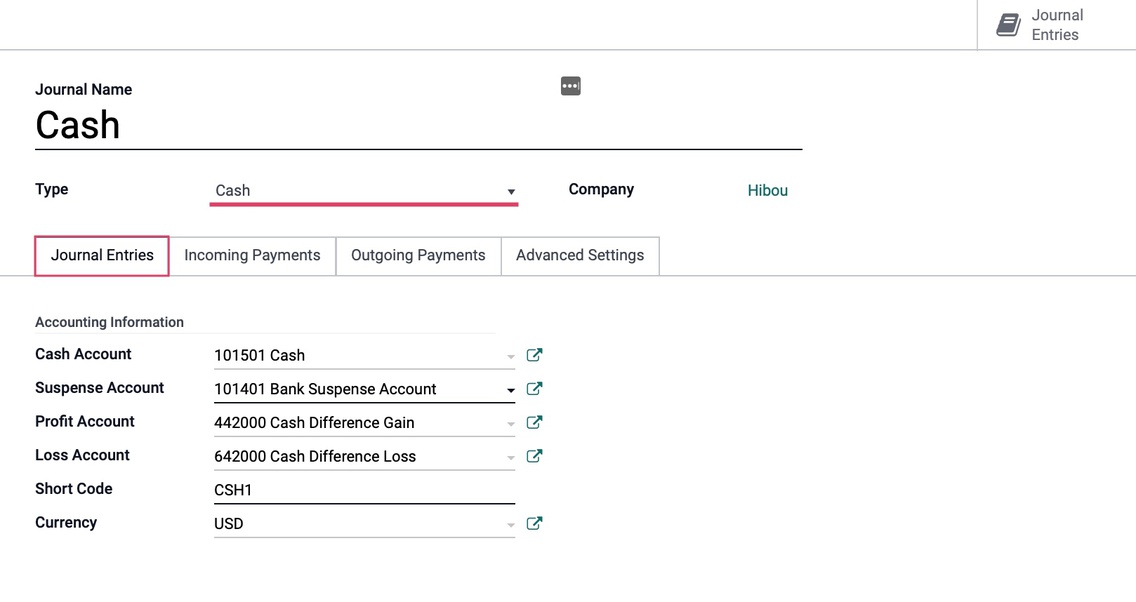
Under the JOURNAL ENTRIES tab for the cash type, you will see the following fields:
Accounting Information
Cash Account: The default account, from your Chart of Accounts, that transactions for this bank journal will be recorded.
Suspense Account: Bank statement transactions are posted to this account until reconciliation to allow the finding of the correct account.
Profit Account: This account is used to register profits when the ending balance of a cash register is different from the system totals.
Loss Account: This account is used to register losses when the ending balance of a cash register is different from the system totals.
Short Code: A short code is used to track journal entries and journal items posted to this journal.
Currency: The currency used in this statement.
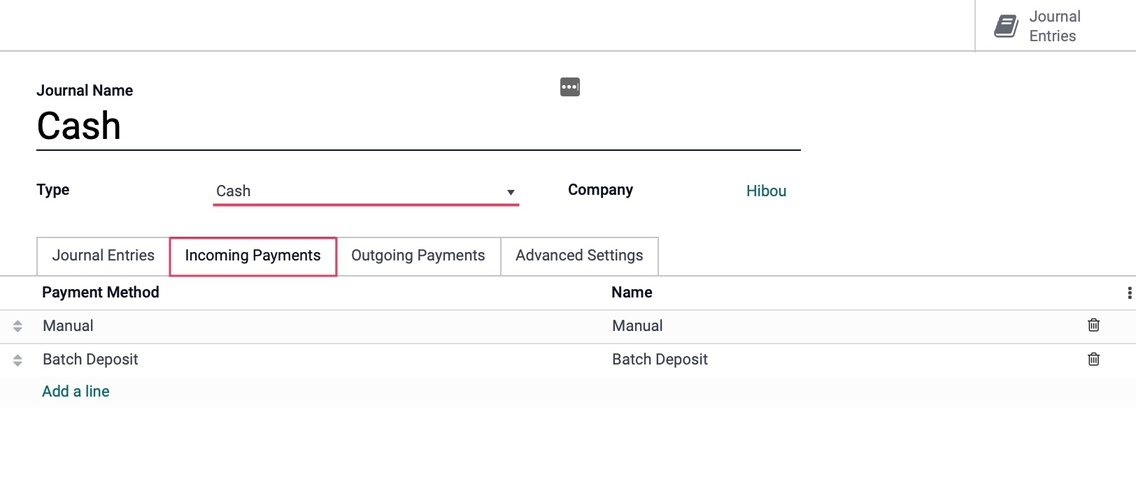
Under the Incoming Payments tab:
Payment Method: The account which incoming payment entries triggered by invoices and refunds will be posted to.
Manual: Should be selected if you get paid by cash, check, or any other method outside of Odoo.
Payment Acquirers: Each payment acquirer has it s own payment method. Request a transaction on/to a card thanks to a payment token saved by the partner when buying or subscribing online.
Batch Deposit: Collect several customers checks at once generating and submitting a batch deposit to your bank.
SEPA Direct debit: Get paid in the SEPA zone thanks to the mandate your partner will have granted to you.
Name: This will fill in automatically with the payment method name. This can be changed if desired.
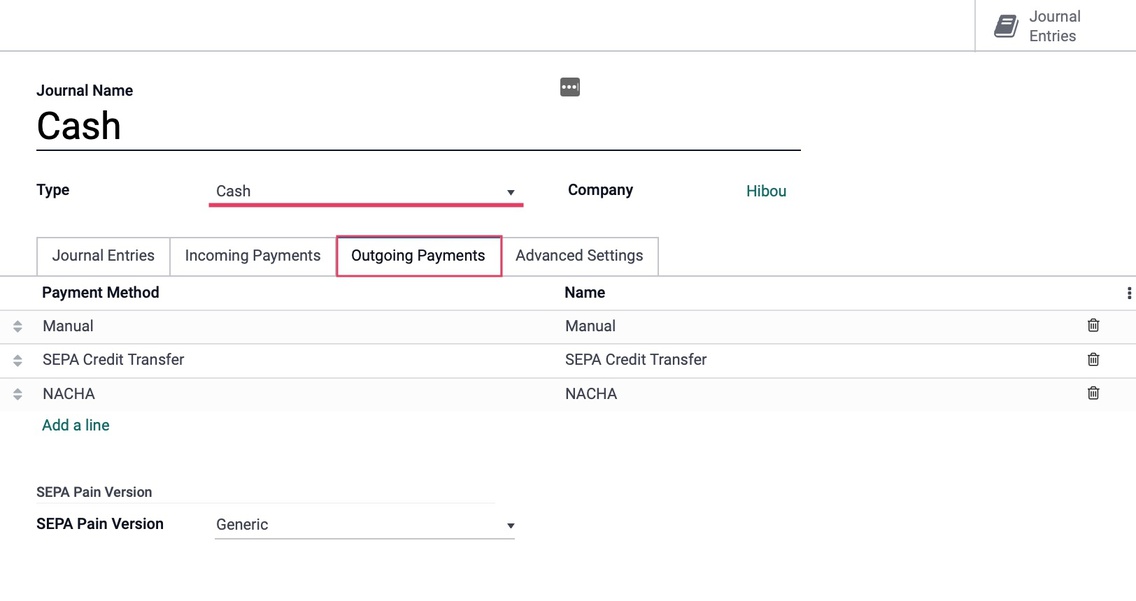
Outgoing Payment tab:
Payment Method
Manual: Pay by any method outside of Odoo.
Check: Pay bills by check and print it from Odoo
SEPA Credit Transfer: Pay in the SEPA zone by submitting a SEPA Credit Transfer file to your bank.
Name: This will fill in automatically with the payment method name. This can be changed if desired.
And under the Advanced Settings tab we will see the fields shown:
Control Access: Leave these fields empty for no control.
Allowed Account Types: Select the account types allowed for this journal.
Allowed Accounts: Select the accounts allowed for this journal.
Payroll Payments: This section is specific to Hibou Payroll. To learn how to configure this section, please review our Payroll Workflows: How to Run Payroll document.
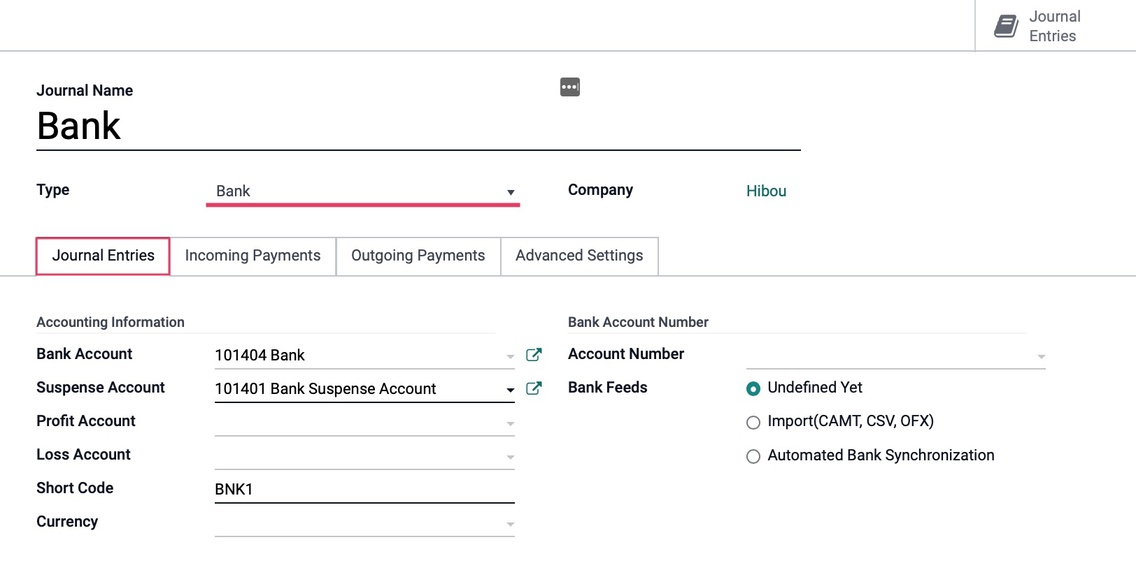
Configuring Bank Journals
The fourth listed journal type is Bank, which is where bank statements, customer and vendor payments, and all other transactions recorded by your associated bank account are recorded. This is also where you will link your bank account to this journal and configure how you want your bank statements to synchronize with Odoo.
Under the Journal entries tab for the bank type you will see the fields shown.
Accounting Information
Bank Account: Select your desired bank account from the drop-down menu.
Suspense Account: Bank statement transactions will be posted on this account until reconciliation.
Short Code: A journal's Short Code is used to easily identify a journal and track the journal entries and journal items that are posted to it.
Currency: The currency used in this statement.
Bank Account Number
Account Number: Buckle up, this is where you will enter your bank account number!
Bank Feeds
Undefined Yet: If this is selected, it means you will be entering your bank statement lines manually.
Automated Bank Synchronization: If this option is selected, you will have the ability to link your bank account to Odoo and schedule synchronizations at various time intervals to create your bank statements.
Import (CAMT, CSV, OFX): If this is selected, then you will need to import your bank statements once issued from your bank in the necessary format.
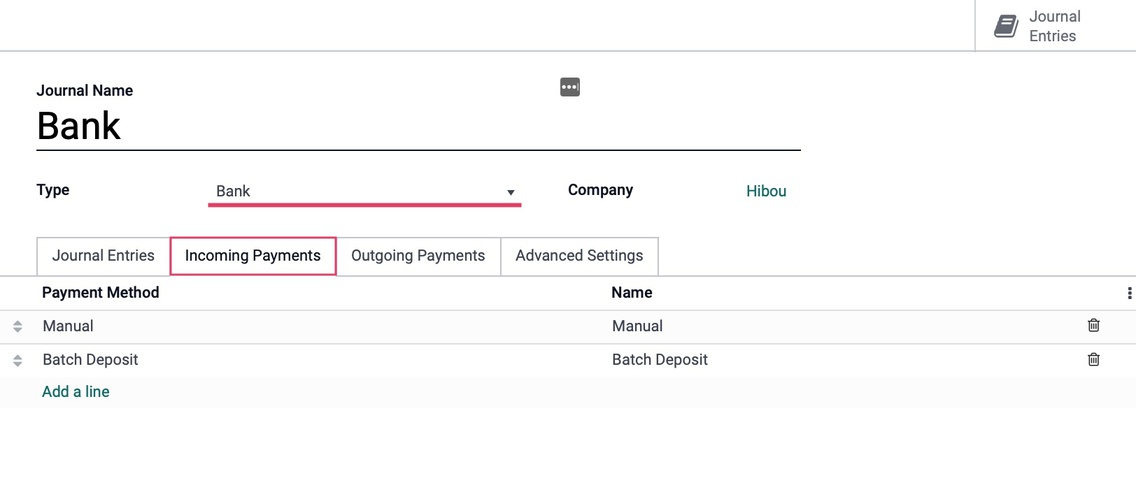
Incoming Payments Tab:
Payment Method: The account which incoming payment entries triggered by invoices and refunds will be posted to.
Manual: Should be selected if you get paid by cash, check, or any other method outside of Odoo.
Payment Acquirers: Each payment acquirer has it s own payment method. Request a transaction on/to a card thanks to a payment token saved by the partner when buying or subscribing online.
Batch Deposit: Collect several customers checks at once generating and submitting a batch deposit to your bank.
SEPA Direct debit: Get paid in the SEPA zone thanks to the mandate your partner will have granted to you.
Name: This will fill in automatically with the payment method name. This can be changed if desired.
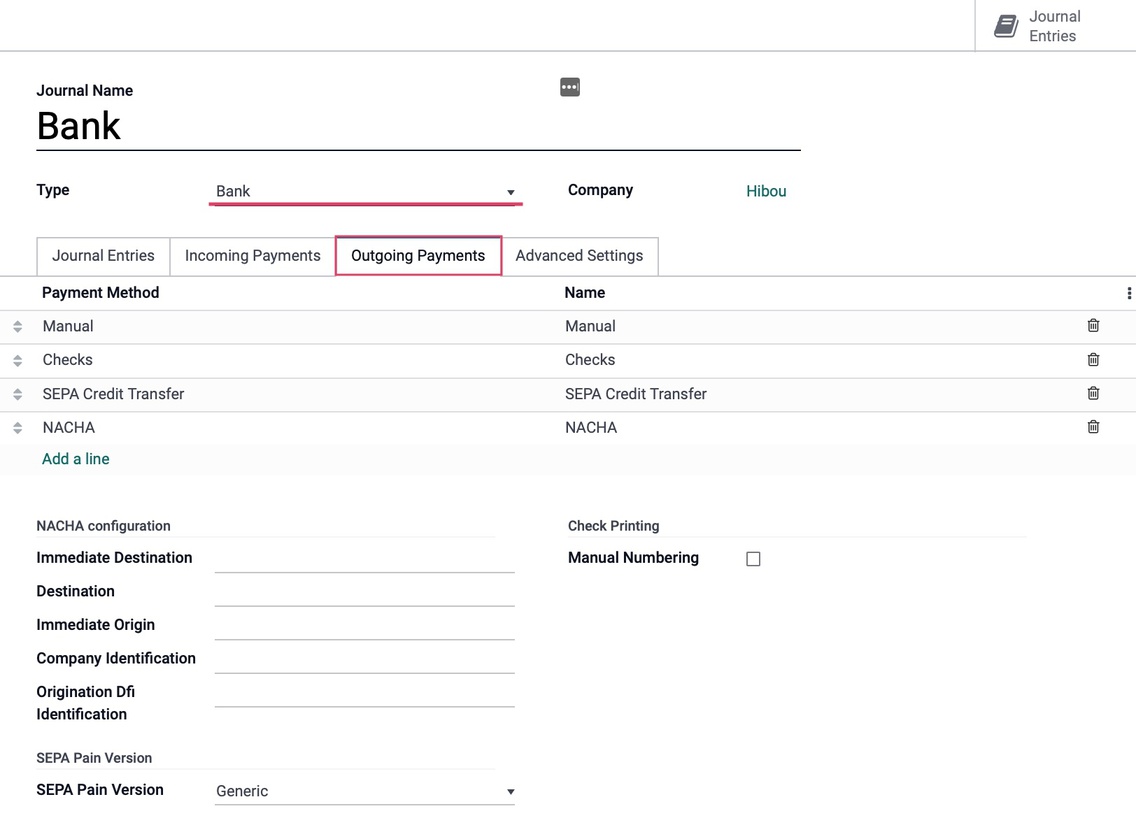
Payment Method
Manual: Pay by any method outside of Odoo.
Check: Pay bills by check and print it from Odoo
SEPA Credit Transfer: Pay in the SEPA zone by submitting a SEPA Credit Transfer file to your bank.
Name: This will fill in automatically with the payment method name. This can be changed if desired.
NACHA Configuration: This configuration information will be provided by your bank
SEPA Pain Version
SEPA Pain Version: SEPA may be a generic format, some countries differ from the SEPA recommendations made by the EPC (European Payment Council) and thus the XML created need some tweaking.
Check Printing
Manual Numbering: Check this option if your pre-printed checks are not numbered.
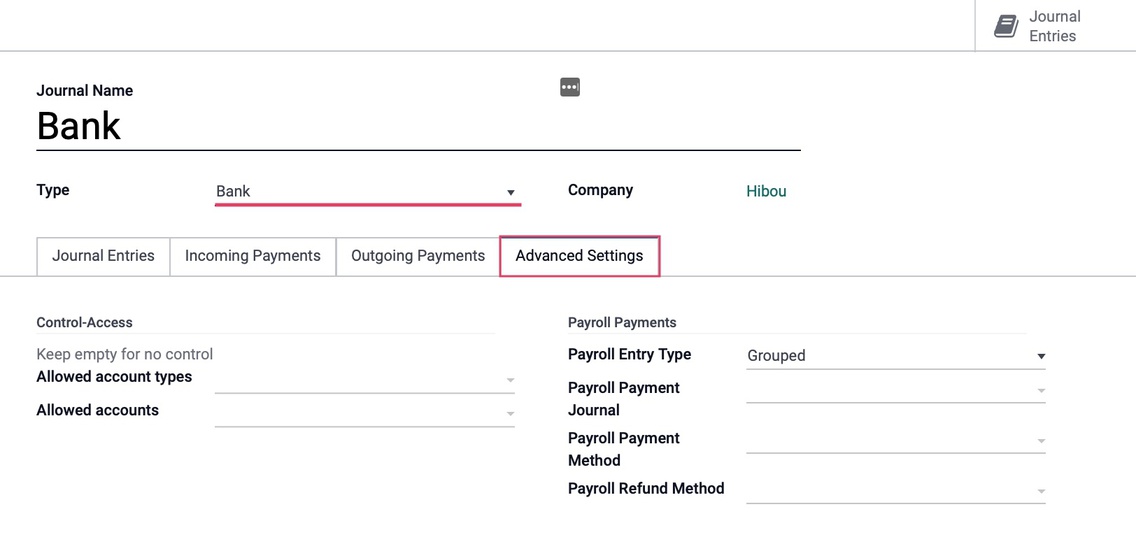
On the last tab, Advanced Settings, we will see the fields shown:
Control Access
Allowed Account Types: Select the account types allowed for this journal.
Allowed Accounts: Select the accounts allowed for this journal.
Payroll Payments: This section is specific to Hibou Payroll. To learn how to configure this section, please review our Payroll Workflows: How to Run Payroll document.
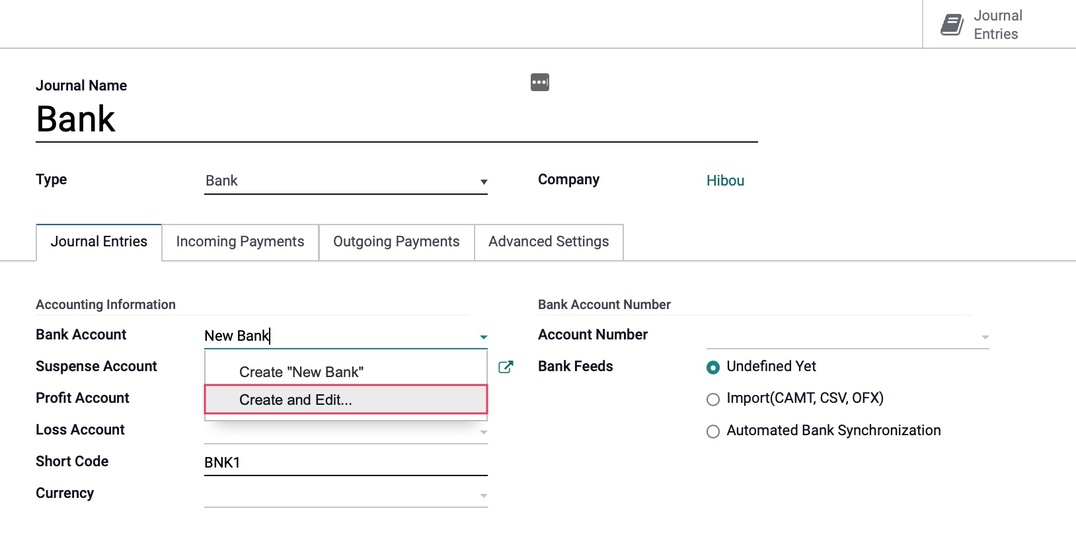
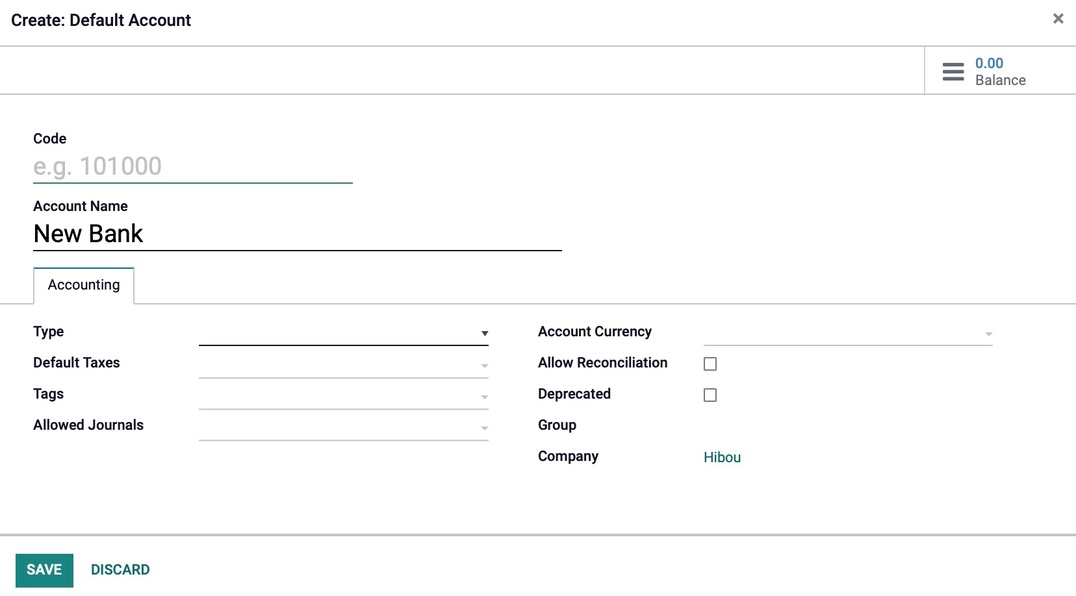
Good to Know!
If you have not added your bank account yet, you can select CREATE AND EDIT from the Bank drop-down and fill in the details on the pop-up window as shown below. Note: This is mostly informational, but these fields may come in handy when doing exports.
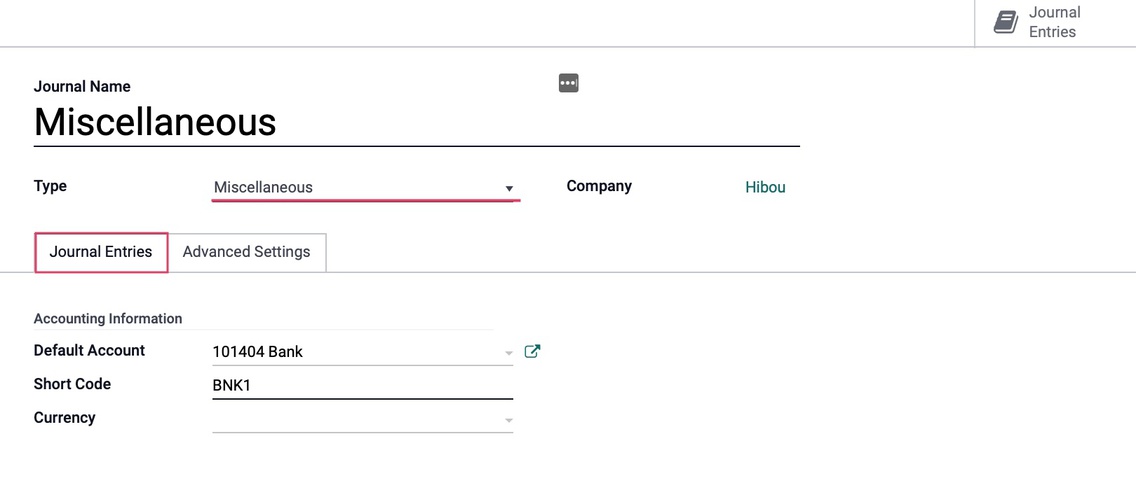
Configuring Miscellaneous Journals
The last listed journal type is Miscellaneous, which is used for anything that does not fit into the other four journal types, like payroll or corrections for example.
Under the journal entries tab we will see the fields shown:
Accounting Information
Default Account: The default account, from your Chart of Accounts, that transactions for this bank journal will be recorded.
Short Code: A journal's Short Code is used to easily identify a journal and track the journal entries and journal items that are posted to it. Journal short codes are heavily used throughout Odoo.
Currency: The currency used in this statement.
Under the Advanced settings tab we will see the fields shown:
Control Access: Leave these fields empty for no control.
Allowed Account Types: Select the account types allowed for this journal.
Allowed Accounts: Select the accounts allowed for this journal.
Lock Posted Entries with Hash: Enable this to lock accounting entries or invoices once posted. This means they cannot be further modified.
Payroll Payments: This section is specific to Hibou Payroll. To learn how to configure this section, please review our Payroll Workflows: How to Run Payroll document.
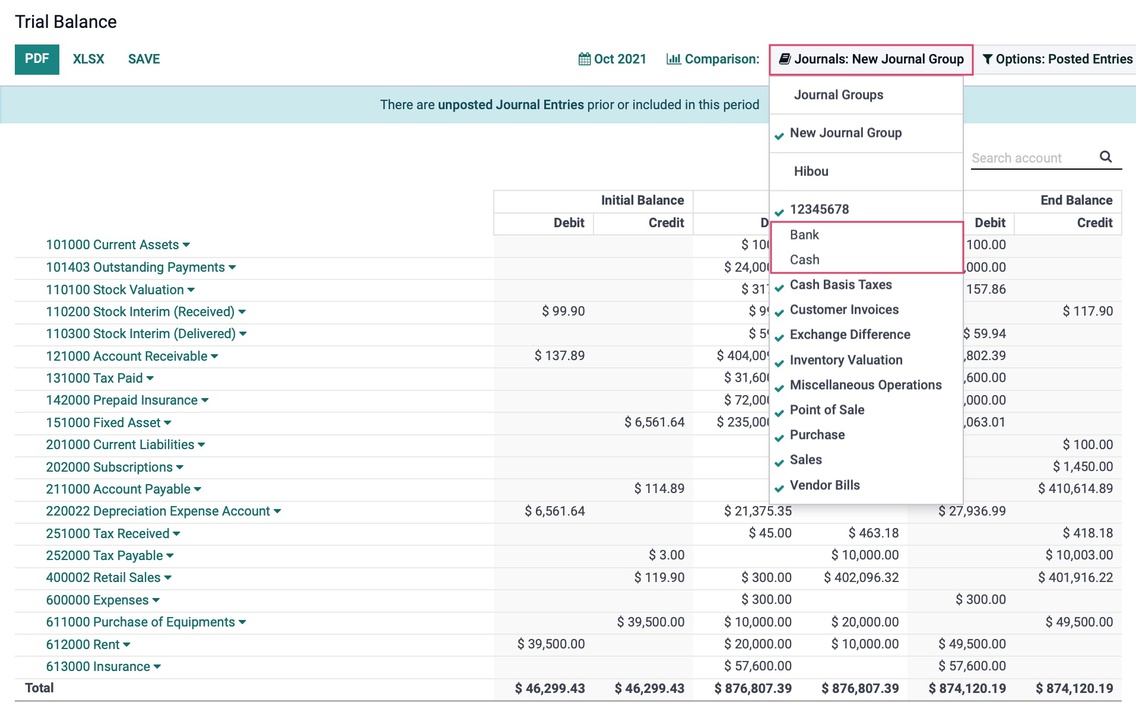
Configuring Journal Groups
For reporting purposes, Odoo allows us to configure Journal Groups which act as a filter to remove selected journals from reports. Clicking on configuration > Accounting > Journal Groups, then click CREATE .

Journal Group: This is the name of the journal group
Excluded Journals: List any journals you would not like to be visible in the reporting for this group
Company: Specify the company that this journal group belongs to, if applicable.
When you have selected the journals to exclude, click SAVE .

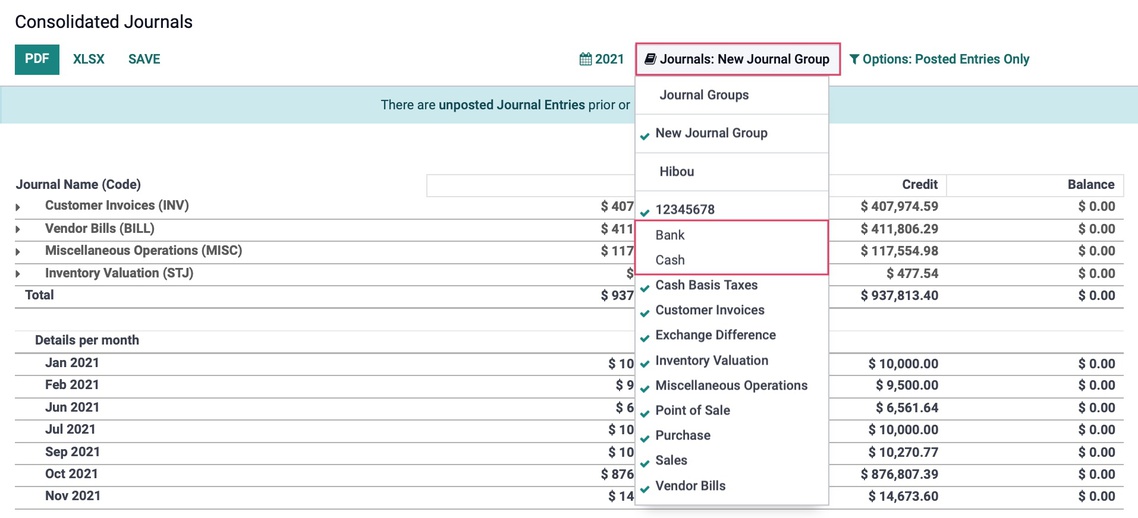
When we now click on REPORTING > AUDIT REPORTS > TRIAL BALANCE to view as an example, we will see the report information does not show the excluded journals, as defined by our journal group, along with all the other journals listed on the left.
To demonstrate one more example, we can click on REPORTING > AUDIT REPORTS > CONSOLIDATED JOURNALS to view the same effect.