Accounting: Customers + Vendors: Customers: Customer Invoices
Purpose
This document will cover the general workflow of creating an Invoice, registering a payment for it, and dividing a lump sum payment across several invoices within the Odoo 16 Accounting application.
Process
To get started, navigate to the Accounting app.
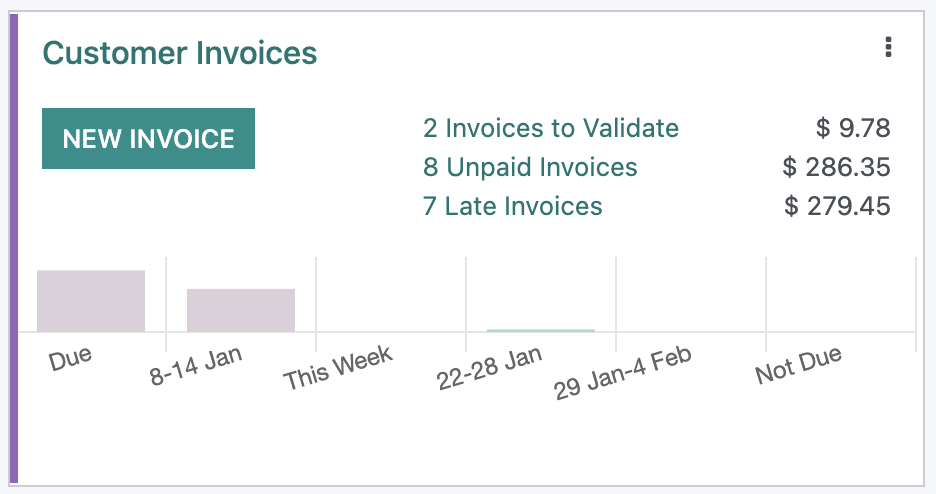
From the Accounting Overview, you will see a kanban view of your journals. Customer Invoices will have smart buttons for Invoices that need to be validated/sent to the customer, unpaid invoices, and quick totals of each. You will also have the option to create a new invoice manually or by import.
Important!
Start with a Sale Order
Odoo has an automated checks-and-balances approach with most applications. For this reason, you should always aim to create invoices and payments from the original sales order. Doing so will keep the records linked so Odoo can apply payments, credits, stock moves, etc. all within the same realm of that original transaction.
Creating manual invoices and payments for existing records can cause more work in the future because those original orders would then need to be updated manually.
Creating Invoices
Creating a Manual Invoice
To create an invoice manually, click Customers > Invoices, then click Create. On the New Invoice form, fill out the fields as follows.
Customer: Select the customer to be invoiced.
Delivery Address: This field should auto-populate with the customer's delivery location.
Reference: Enter the reference number(s) for the sales order(s) being invoiced against.
Invoice Date: Enter the date the invoice was created.
Due Date: Determine the due date for the invoice or select predefined terms (e.g. 15 days, 30 days) from the drop-down menu.
Payment Reference: The payment reference to set on journal items.
Journal: The Journal where entries for this invoice are recorded. The second drop down menu on this line is to define the currency which will auto-populate with the default currency for your company.

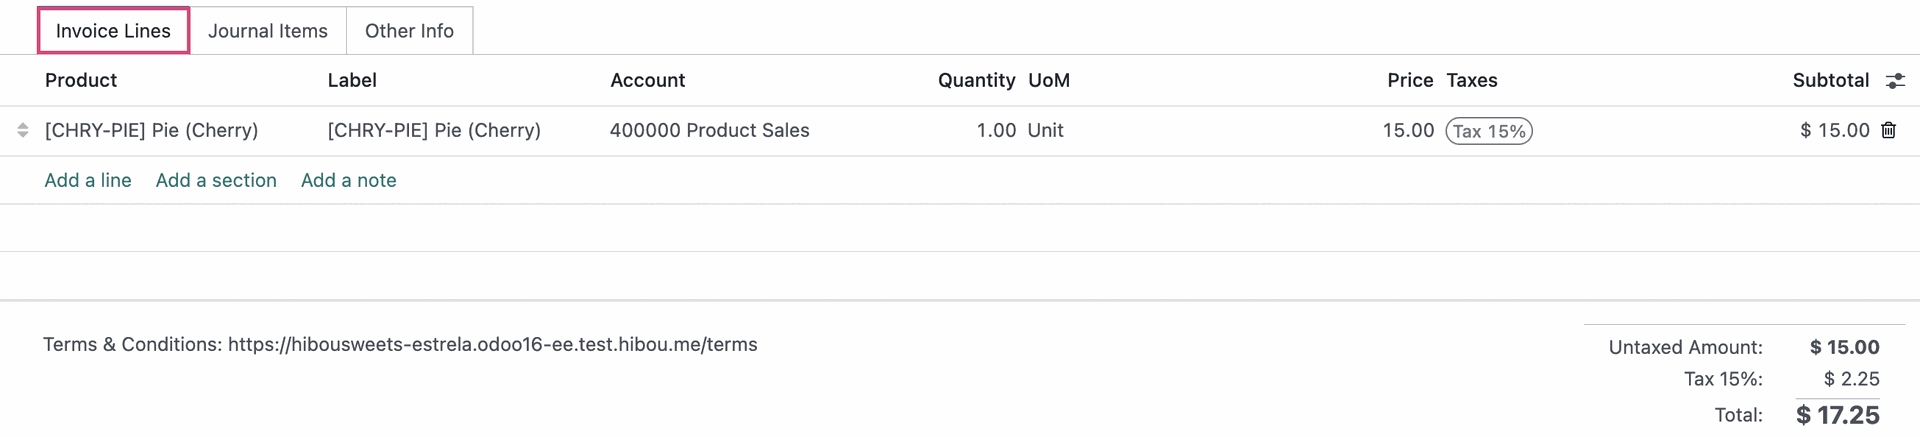
Under the Invoice Lines tab, you can add a specific item by clicking Add a Line, then enter the items or services that you'll be invoicing, as well as the quantity and price for each. Notice that you're not required to select a product, but it does make it easier to match invoices to sale orders if you decide to go this route.
If you don't select a product, you'll need to provide a label for the invoice line, as shown below.
Under the journal items tab, the fields will be pre-populated with the accounts on the product template; however, you can modify or Add a Line if necessary.

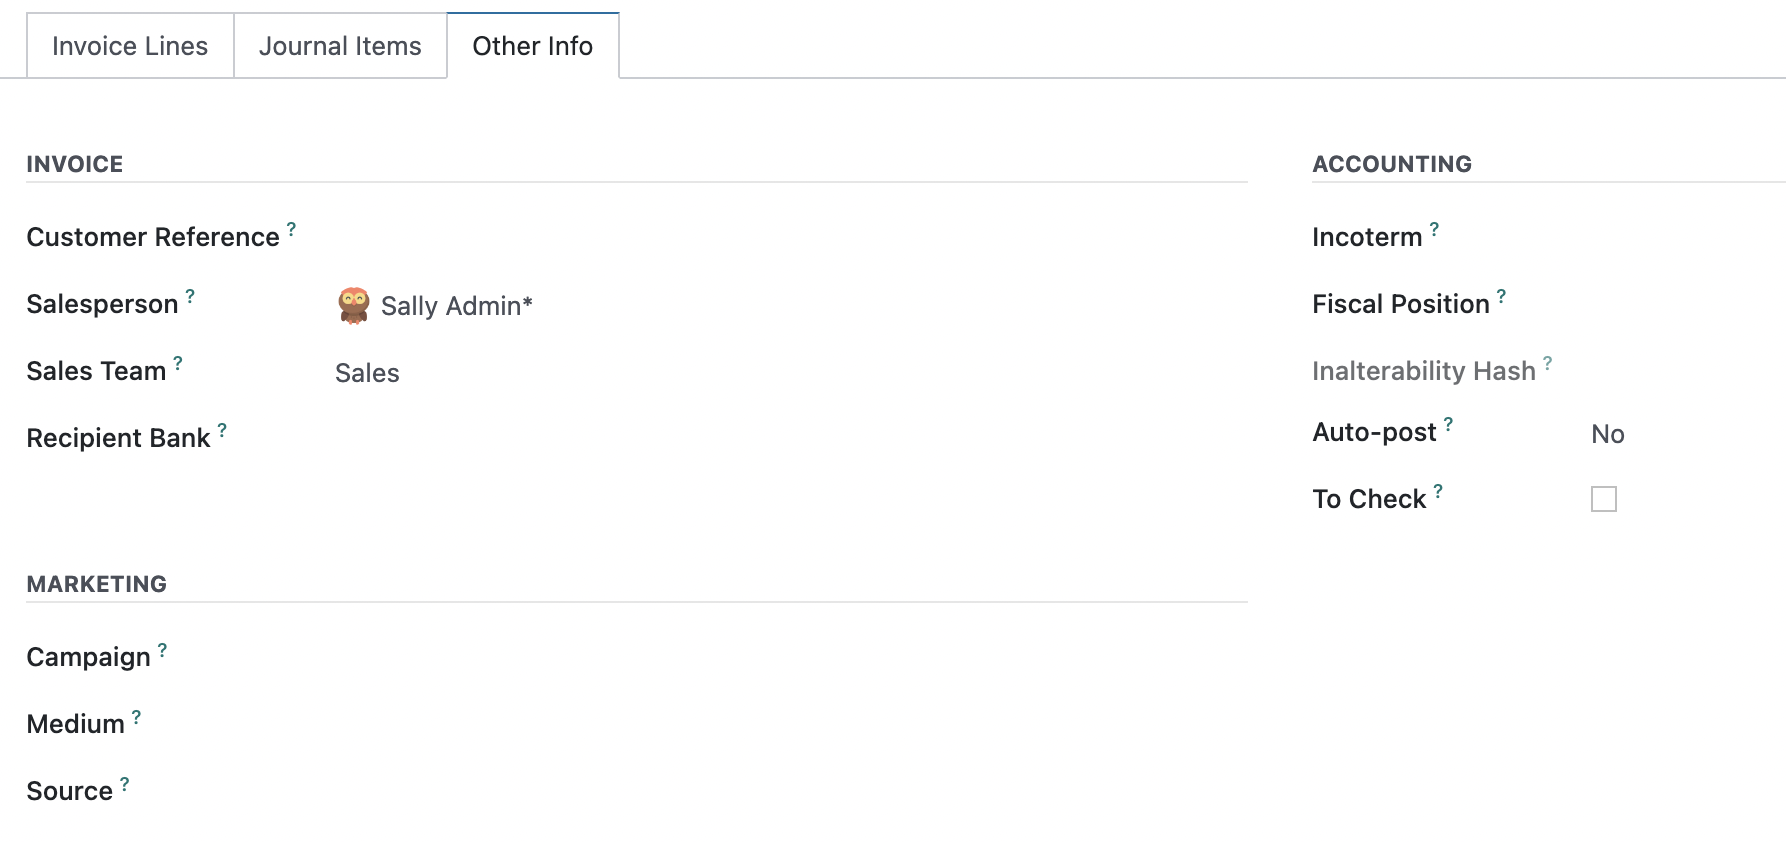
Under the Other Info tab:
Invoice
Customer Reference: This field will auto-populate a reference to be used when registering payments through the invoice record, with the Register payment function
Salesperson: Select the employee responsible for this invoice.
Sales Team: Select the Sales Team this invoice is assigned to.
- Recipient Bank: The bank account number to which the invoice will be paid.
Accounting
Incoterm: Pre-defined commercial terms used in international transactions.
Fiscal Position: Define the taxes that should be applied for this customer, IE state-specific tax rules.
Intrastat Country: System for collecting information and producing statistics on dispatches and arrivals of goods between countries.
Autopost: If checked, this invoice will post on its date.
To Check: If checked, it indicates the user was not sure about the information entered and is requesting an admin to review before confirming.
Click confirm to confirm that it's ready for payment.
You can click SEND & PRINT so your customer will have access to the invoice, and the ability to make payments. Move to the next section to register a payment on an invoice!
Creating an Invoice from a Sales Order
When creating invoices, this is the recommended method because it keeps your documents in sync. To get started, navigate to the Sales app.

Under the To Invoice > ORDERS TO INVOICE. This will take you to an overview of sales orders that need to be validated and billed in order to receive payment.
Click the order you wish to invoice.

Next, click Create Invoice.

Good to Know!
Pro-Forma Invoice
If enabled, you can Send Pro-Forma Invoice instead. A Pro-forma invoice is an estimate provided in advance of the delivery of goods. They are commonly used as quotations and are not a demand for payment.
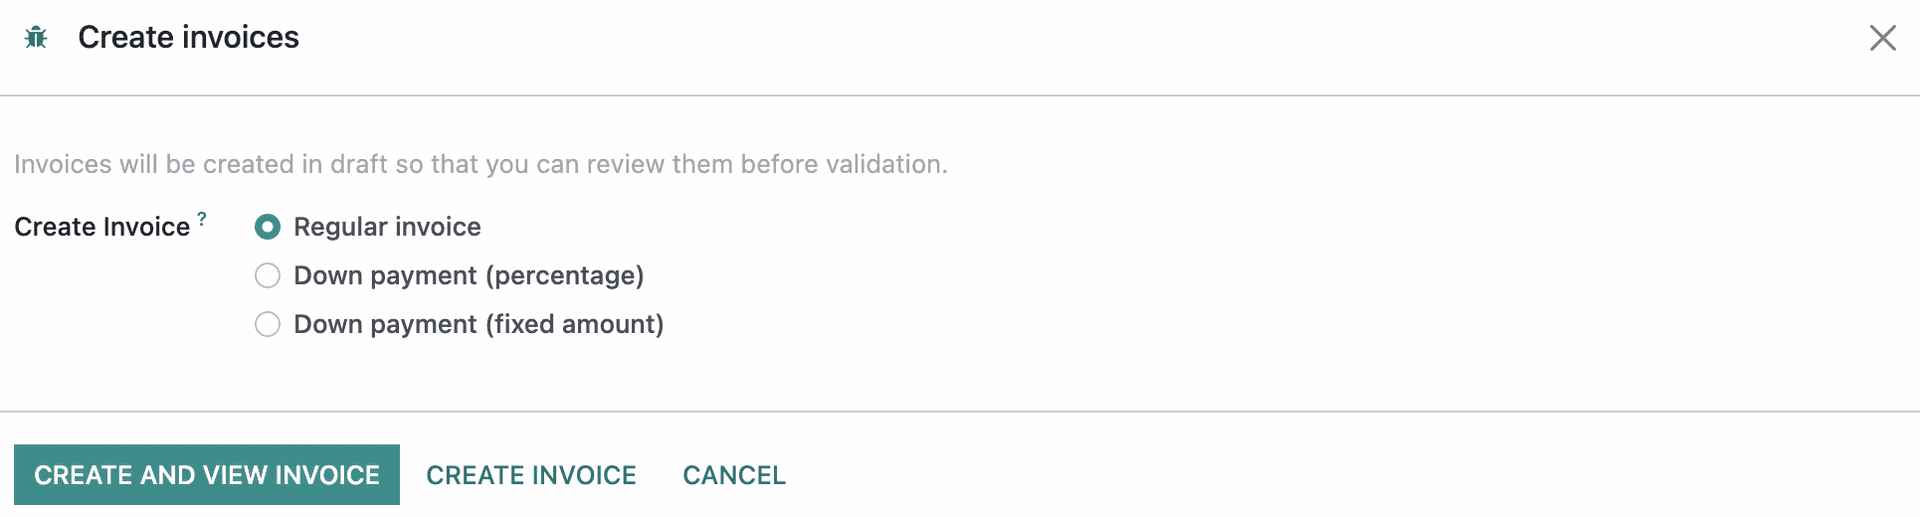
Regular Invoice: This will include all un-invoiced lines on the order.
Down Payment (percentage): Invoices a percentage of the total on order, leaving the remainder to be invoiced at a later date.
Down Payment (fixed amount): Invoices the down payment line alone to take an initial payment.
Click Create and View Invoice to immediately review the invoice.
Good to Know!
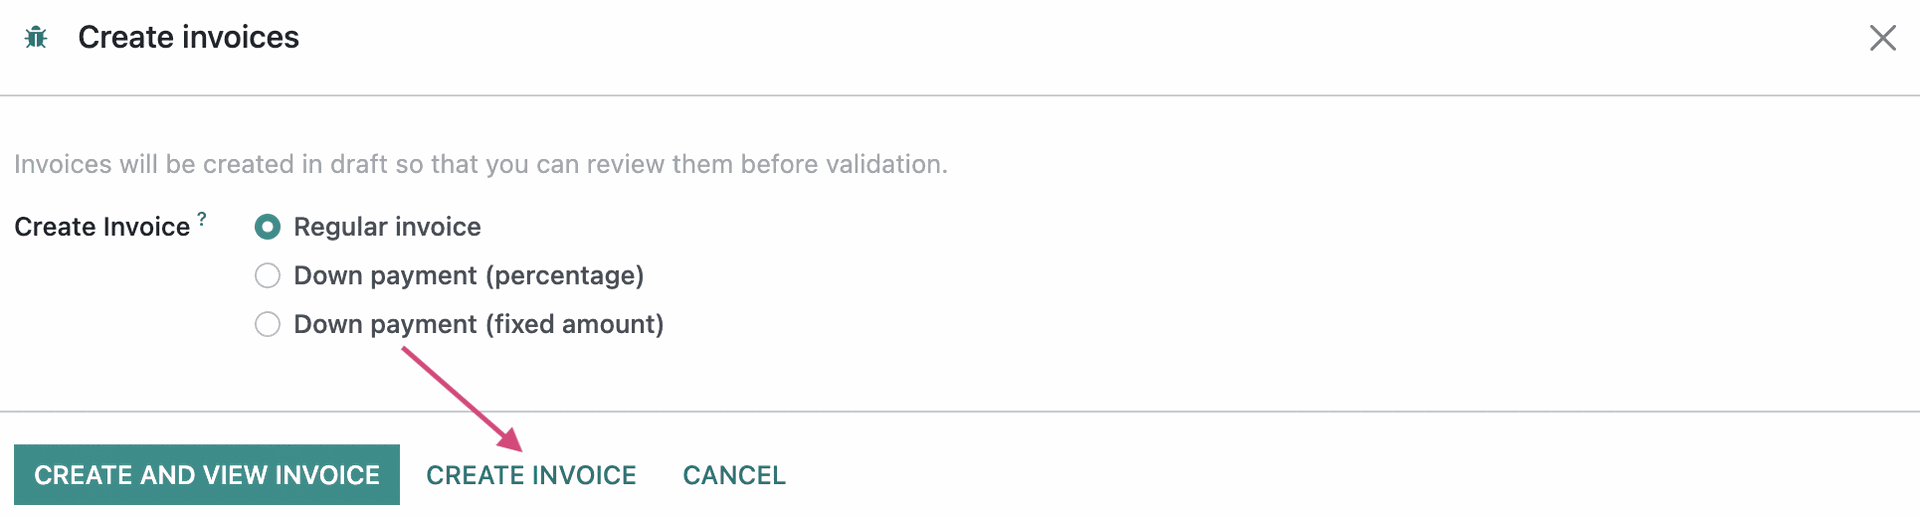
'Create Invoice' Button
The Create Invoice button on this modal window will create the invoice and redirect you back to the list view. This is a time-saving feature for batch work!
Click confirm to confirm the invoice and make it eligible for payment.

Combining Invoices
Often customers will ask for one combined invoice, which is very easily accomplished. First, navigate to the Sales app.
Click To Invoice > Orders to invoice, then Group By > Customer. Then, click the icon to expand the customer's invoices.
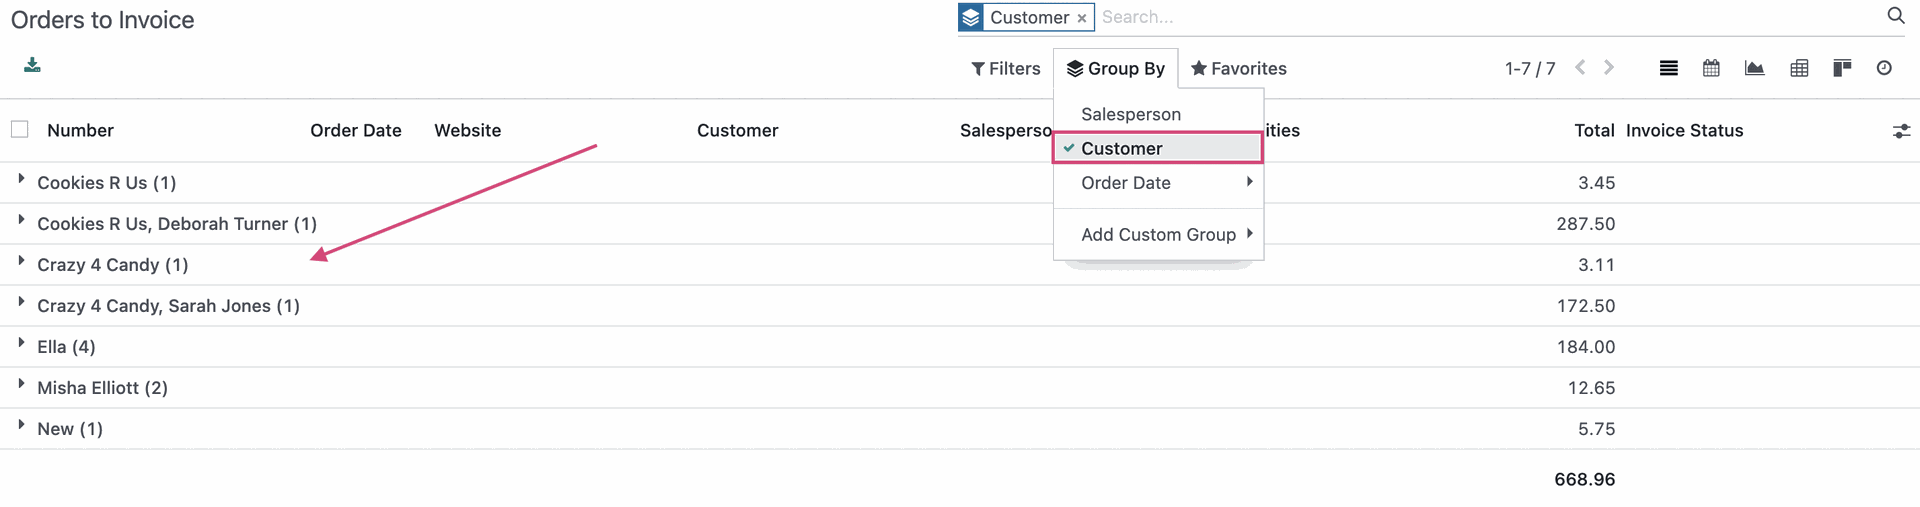
Click all invoices to combine, then click Action > Create Invoices.
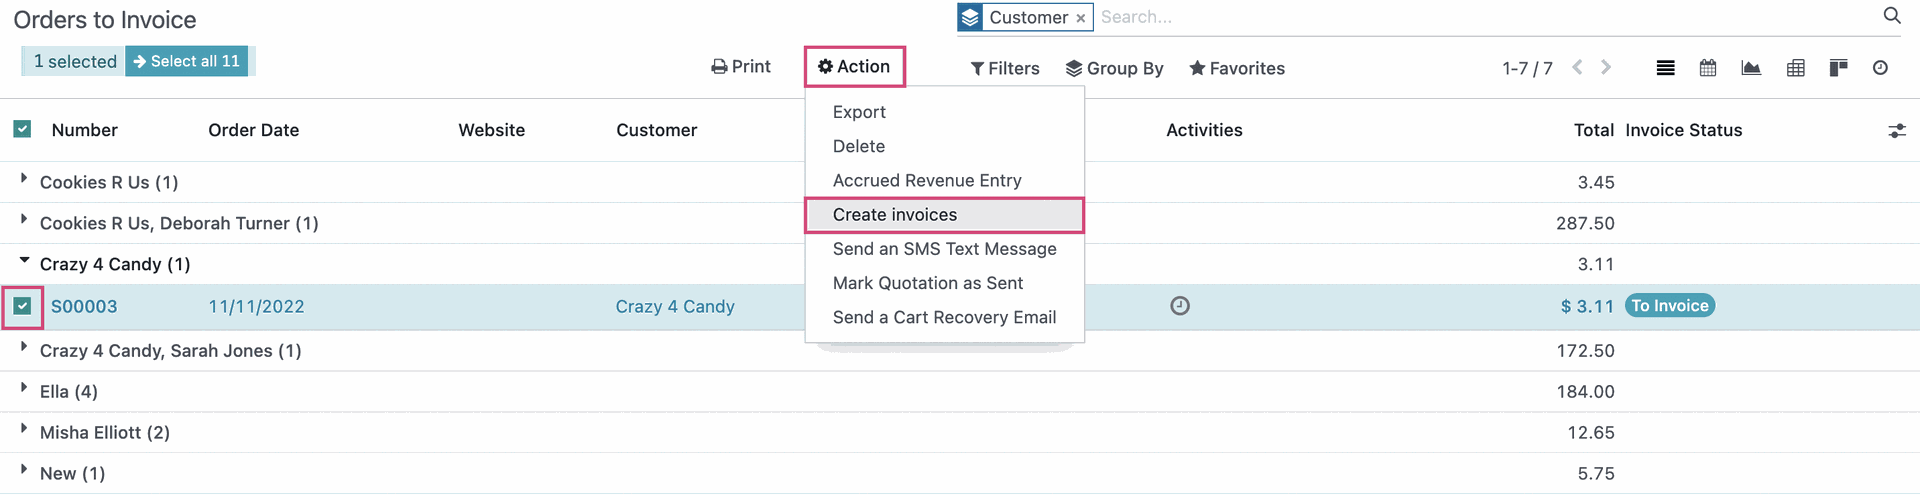
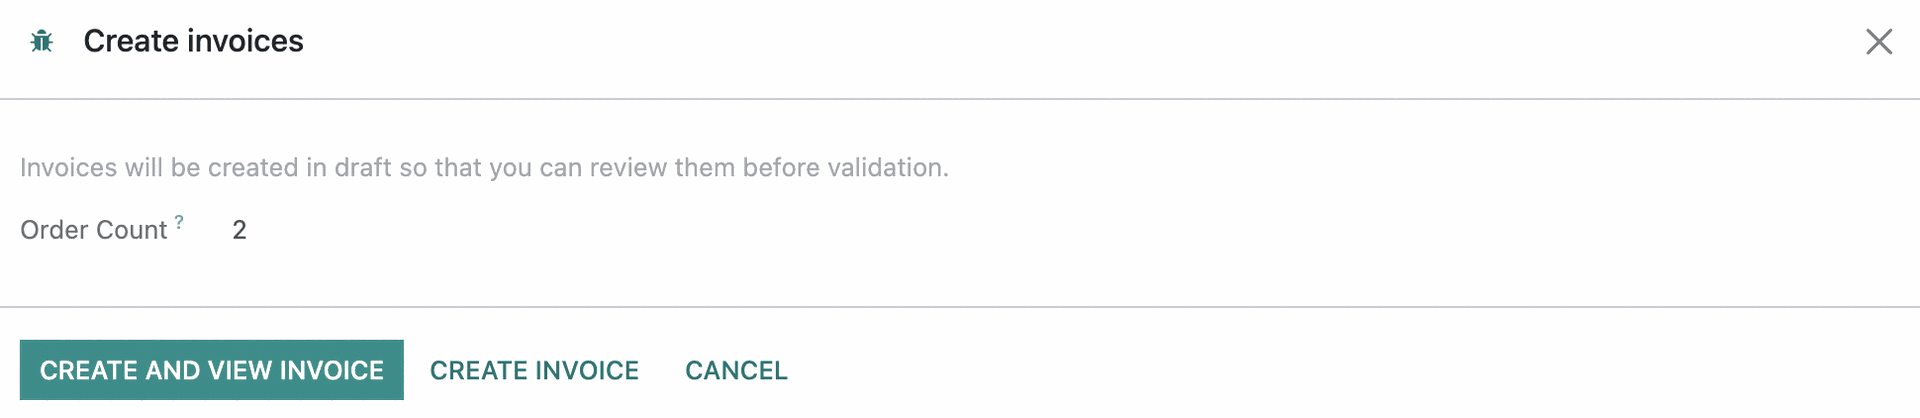
Here you'll see a modal window that displays the total number of invoices being combined. Click Create and View Invoice.
This brings you to a view of each of the individual invoices lines from each invoice you just created. Click CONFIRM to post it. At that point, you'll be able to register payments against the amount due.
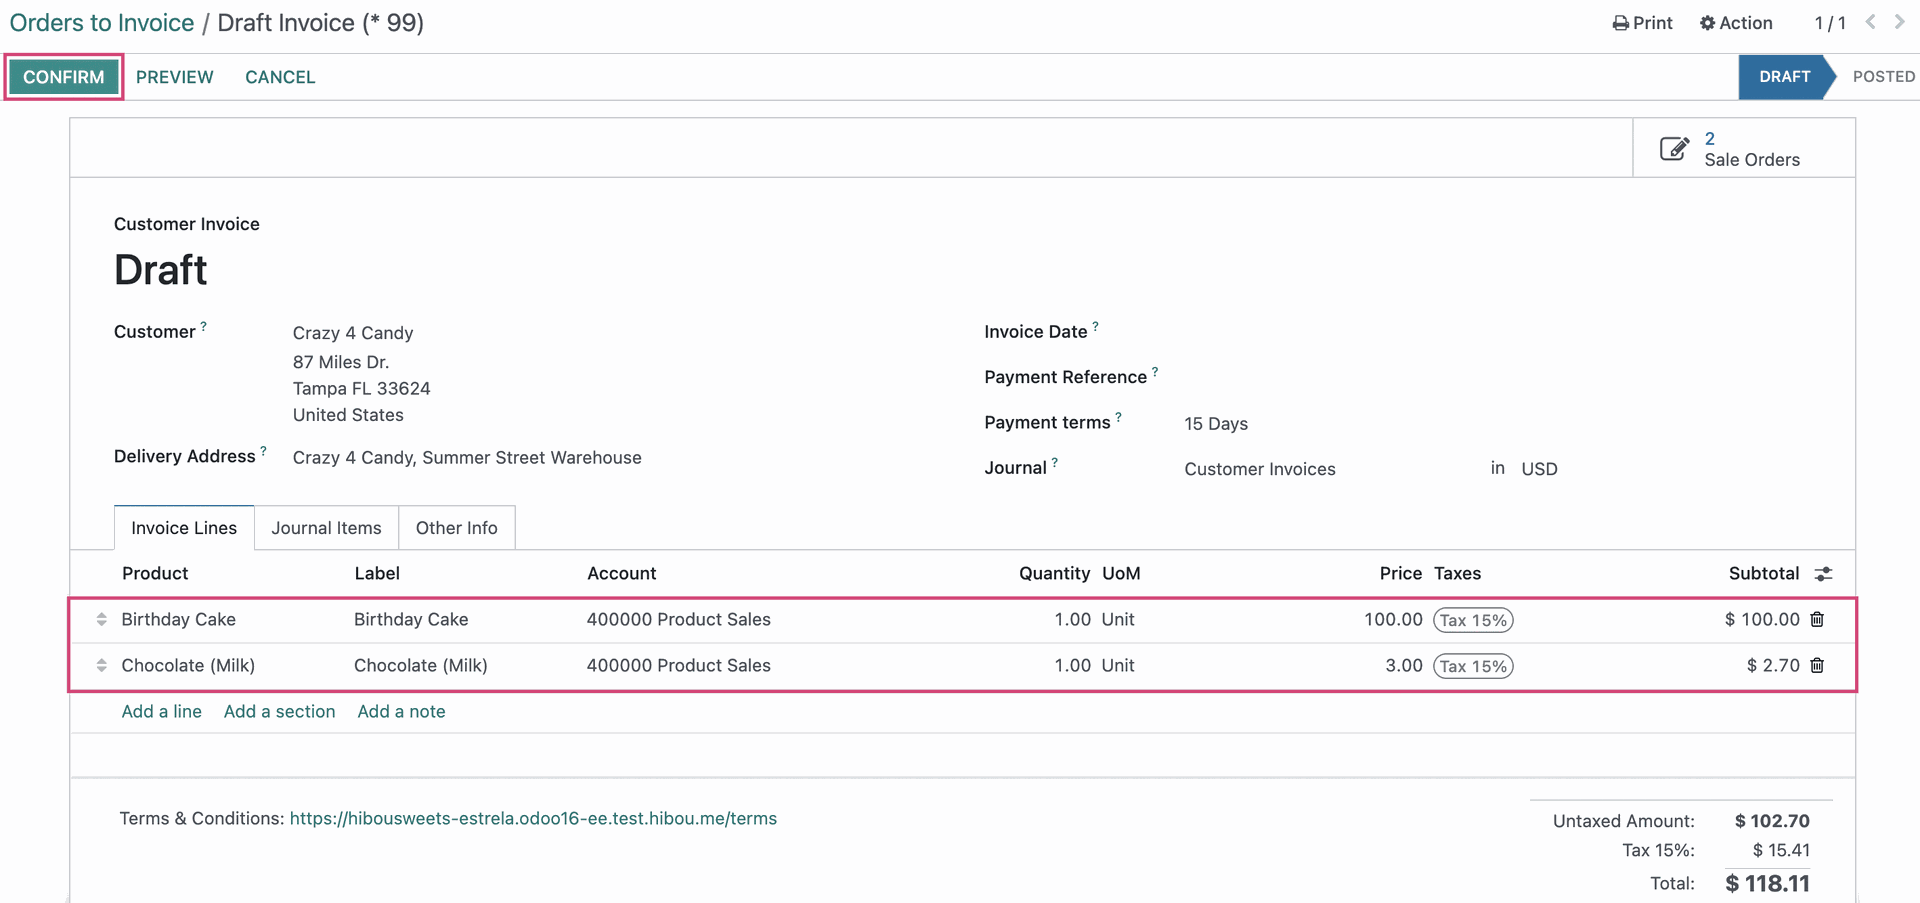
See Registering Payments to make a payment on an invoice.