Accounting: Customers + Vendors: Customers: Register a Customer Payment
Purpose
This document outlines the different processes to register payments in the Accounting application of Odoo 16. We'll go over registering full payments and partial payments. We'll also cover payment matching when applying a manual payment to several invoices.
Processes
To get started, navigate to the Accounting app.
Registering Full Payments on a Customer Invoice
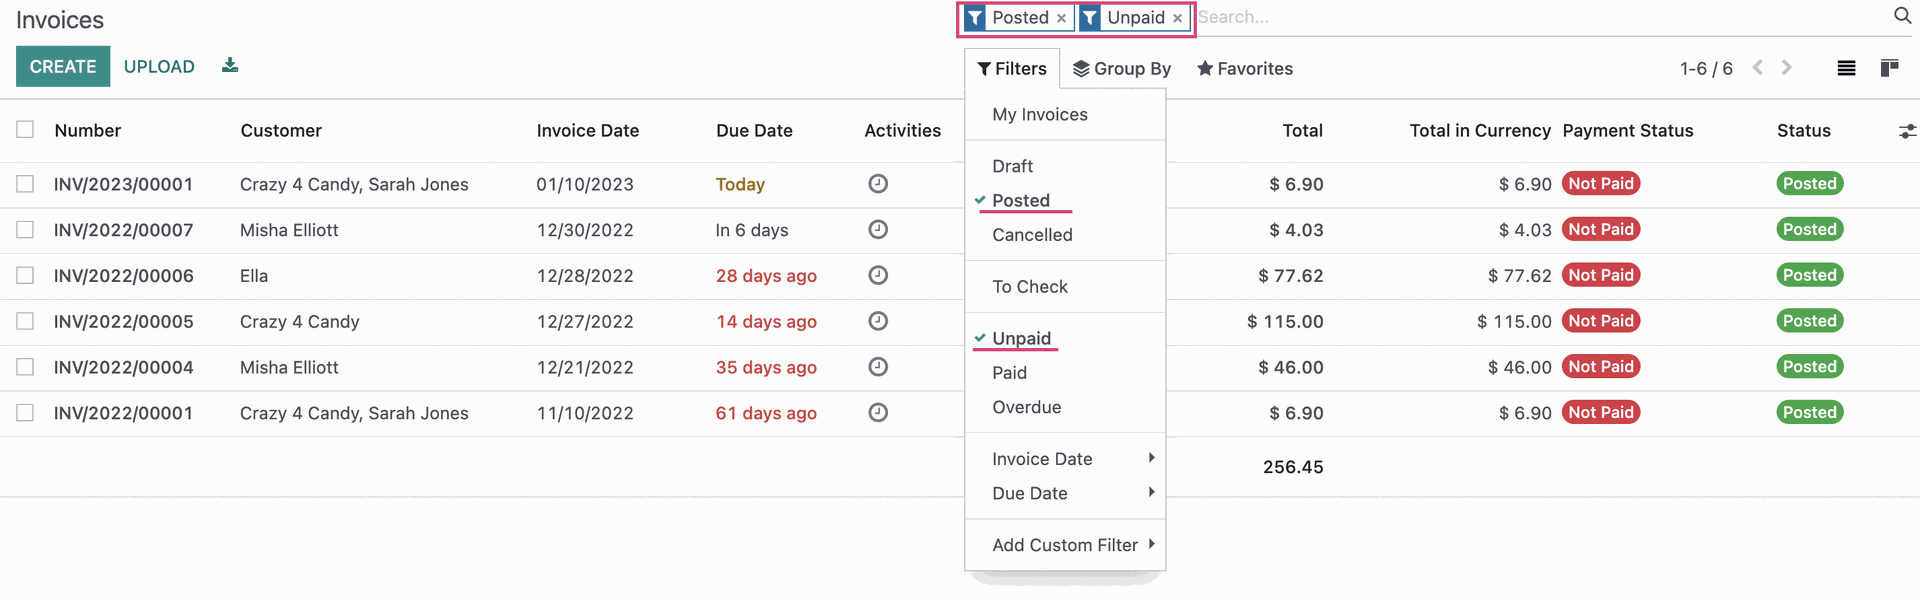
Click Customers > Invoices. Once there, filter for Posted + Unpaid to find an invoice in the payable state. Select an invoice from the list.
From within the invoice, click Register Payment.

A pop-up modal to register payment will appear. Enter the following information:
Journal: The journal to which the payment should be registered.
Payment Method
Manual: Select this to get paid by cash, check or any other method outside of Odoo.
Batch Deposit: Select this to encase several customer checks at once by generating a batch deposit to submit to your bank.
SEPA Direct Deposit: Select this to allow a creditor to collect funds from your bank account provided that you have a signed mandate and it has been granted by you the customer.
Recipient Bank Account: The field label is misleading; this represents the customer's account that funds are being drawn from and is an optional field.
Amount/Currency: This is set to the full amount by default, so we'll leave it as-is for this example. The currency will auto-populate with the set default currency, though it can be changed.
Payment Date: The date on which the payment was made.
Memo: This is set to the Invoice number by default, but can be changed. A common use case for this field is the check number for the check by which payment was made.
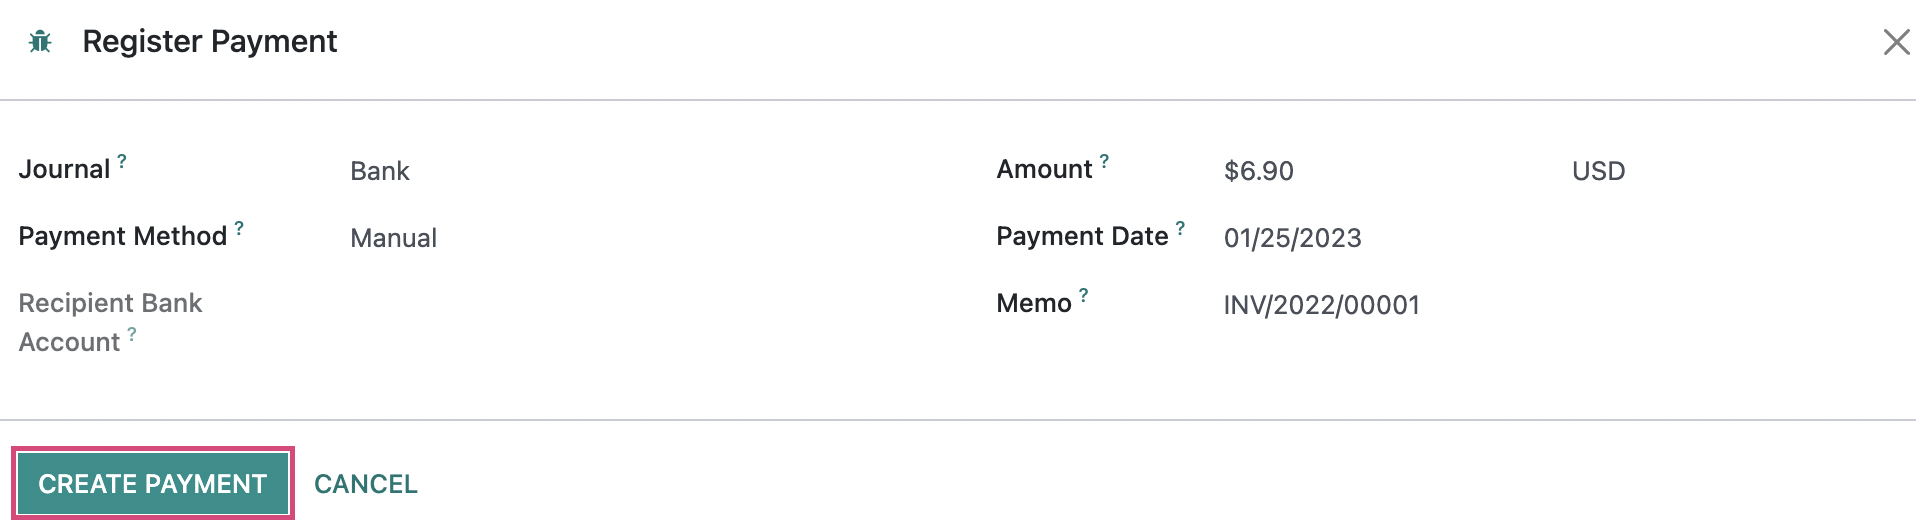
When finished, click CREATE PAYMENT.
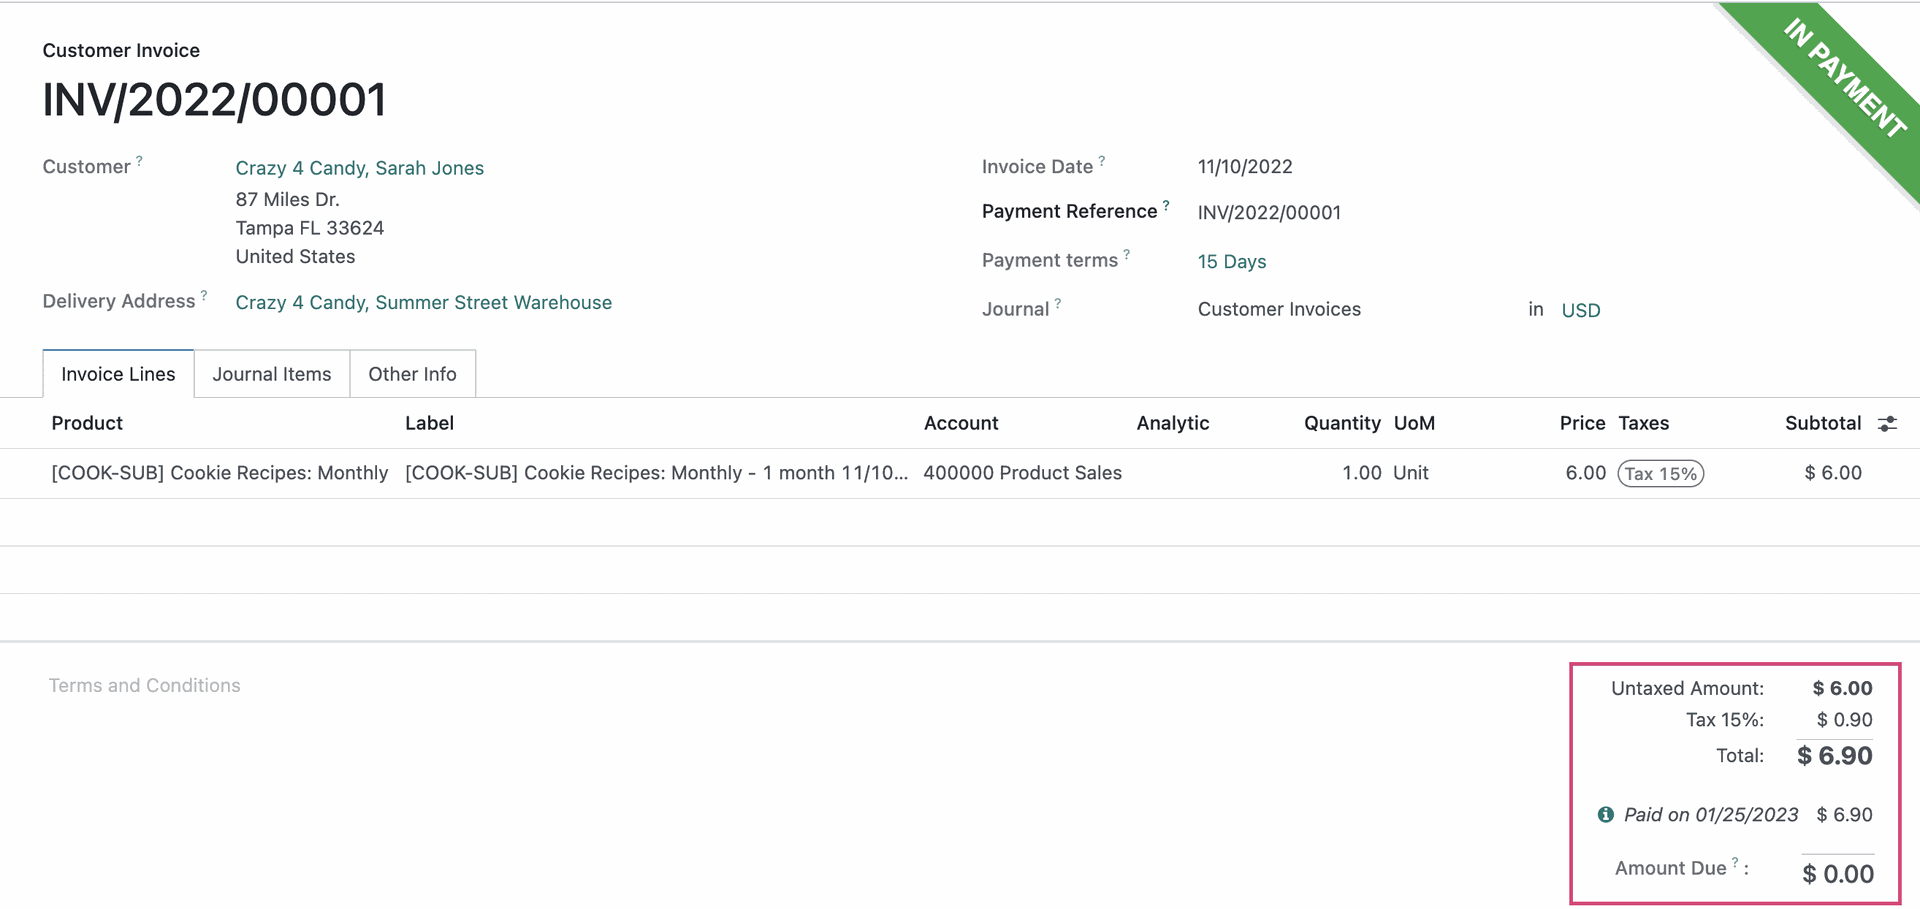
Once the payment is validated, you'll see the IN PAYMENT banner on the top-right of the invoice.
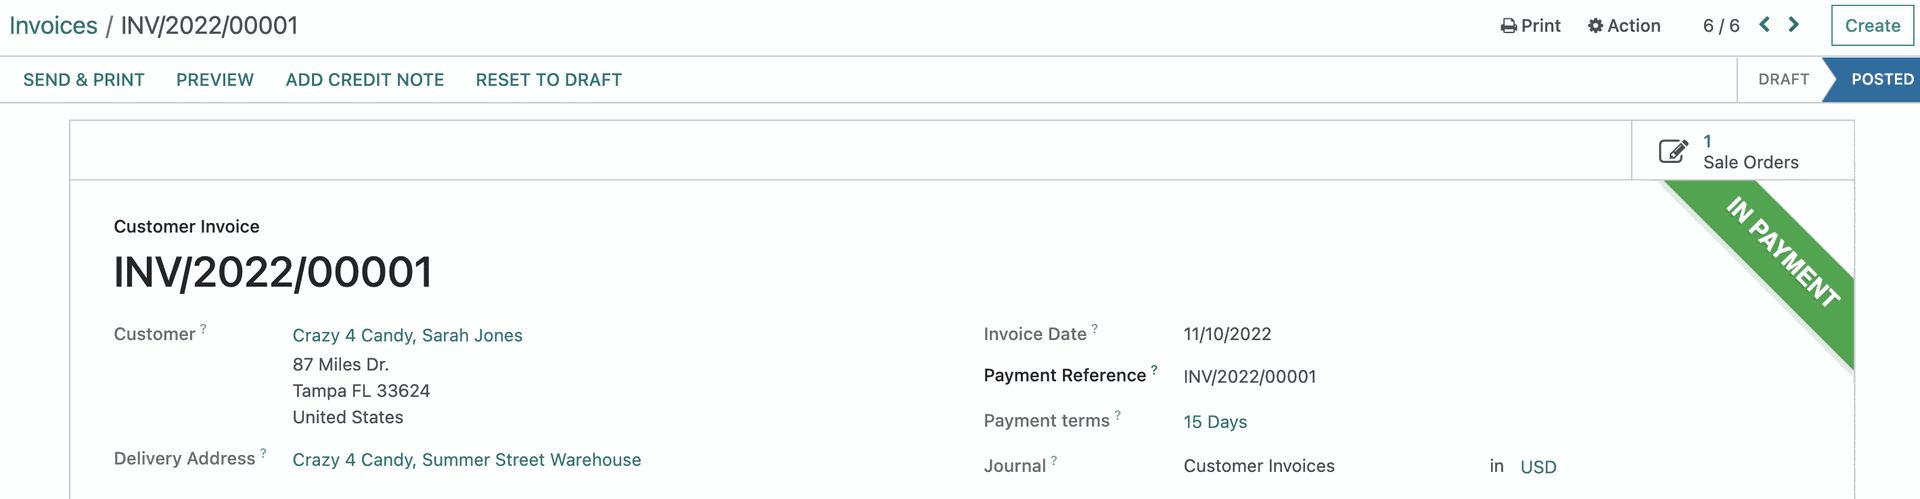
Once the payment has been confirmed by the bank, the banner will change to PAID.
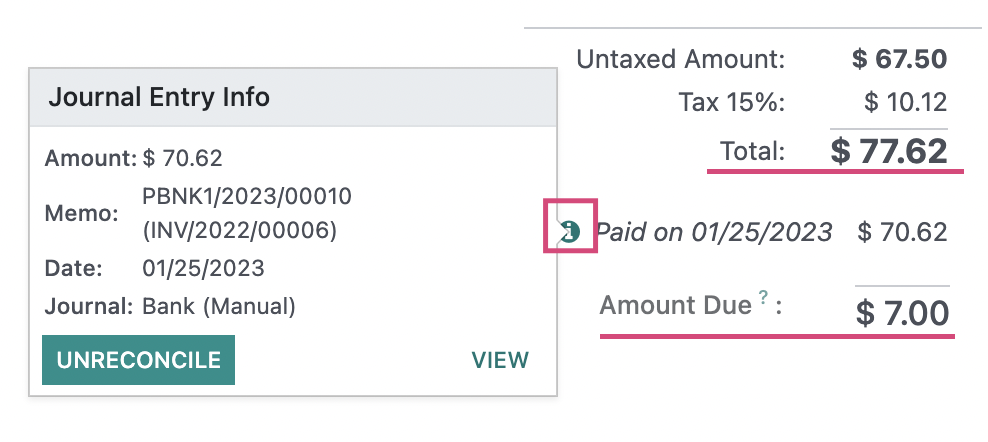
The Amount Due at the bottom of the invoice will also be updated and the payment will be logged with a date.
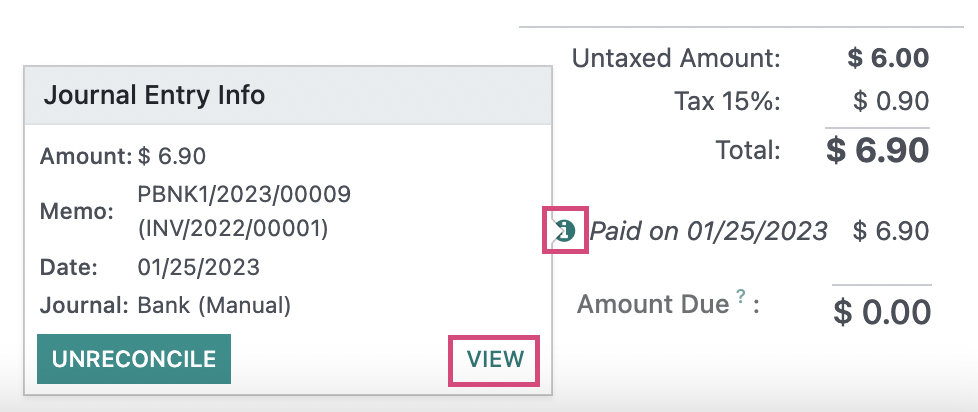
You can click the small info button to the left of the payment line to see the payment details. To view more details, click VIEW. To remove this payment from the invoice, click UNRECONCILE.
Registering Partial Payments on a Customer Invoice
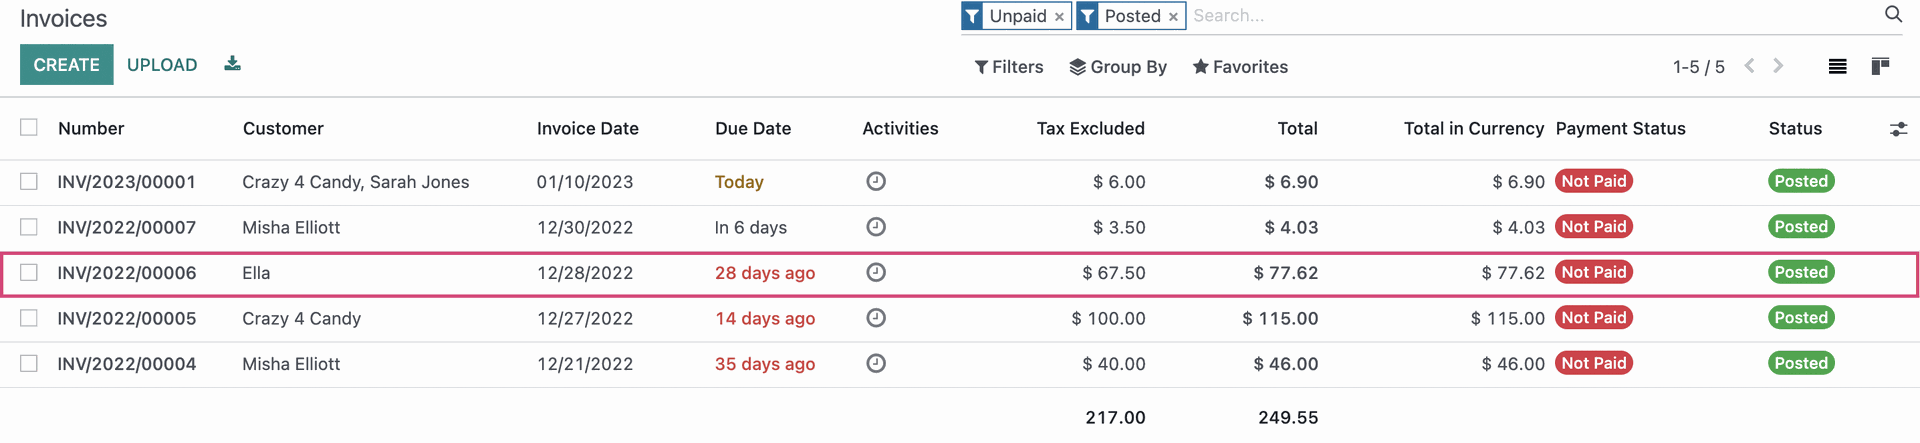
Click CUSTOMERS > INVOICES. Once there, filter for Posted + Unpaid to find an invoice in the payable state. Select an invoice from the list.
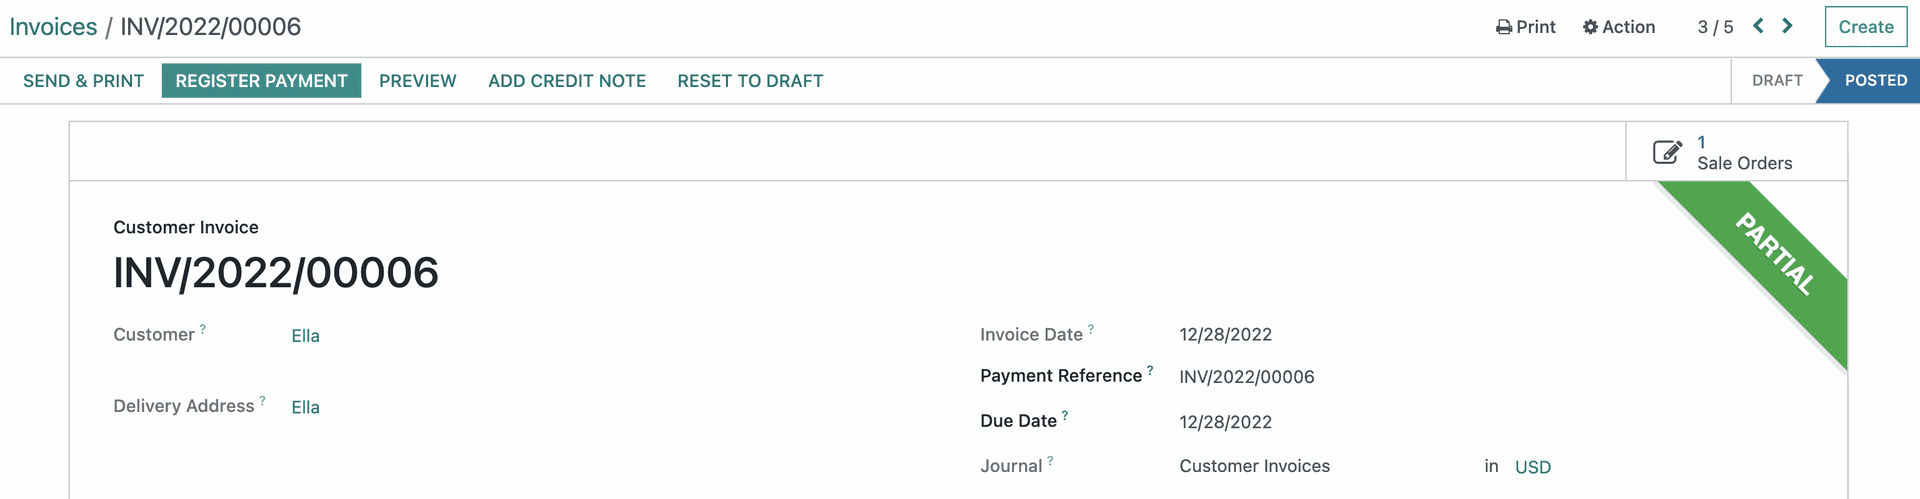
From within the invoice, click Register Payment.

A pop-up modal to register payment will appear. Enter the following information:
Journal: The journal to which the payment should be registered.
PaymentMethod
Manual: Select this to get paid by cash, check, or any other method outside of Odoo.
BatchDeposit: Select this to encase several customer checks at once by generating a batch deposit to submit to your bank.
- SEPA Direct Deposit: Select this to allow a creditor to collect funds from your bank account provided that you have a signed mandate and it has been granted by you the customer.
Recipient Bank Account: The field label is misleading; this represents the customer's account that funds are being drawn from and is an optional field.
Amount/Currency: This is set to the full amount by default. Adjust it to the partial payment amount being made. The currency will auto-populate based on your default currency.
Payment Date: The date on which the payment was made.
Memo: This is set to the Invoice number by default, but can be changed. A common use case for this field is the check number for the check by which payment was made.
Payment Difference: When you enter a partial payment, Odoo will ask what you want to do with the remaining balance. You'll have two options:
Keep open: Select this option for this example as we expect to collect the balance due at a later date.
Mark invoice as fully paid: We'd select this option if we want to consider this invoice settled and will write off the balance. When doing so, you'll be required to select the account to post the difference, as well as add a label/reason for the difference.

When finished, click CREATE PAYMENT .
Once the payment is validated, you'll see the PARTIAL banner added. Notice that you still have the option to register payment on the invoice. You'd use this option to add another full or partial payment.
The Amount Due at the bottom of the invoice will also be updated and the payment will be logged with a date. Click the small info button to the left of the payment line to see the payment details. To view more details, click VIEW. To remove this payment from the invoice, click UNRECONCILE.
Manual Invoice Payments + Payment Matching
As a rule, you should always make a payment directly from the invoice; however, there may be times when the payment is made manually. For example, a customer may write a check to pay off the entire balance of several different invoices. We need to register that payment manually, then distribute it across each invoice.
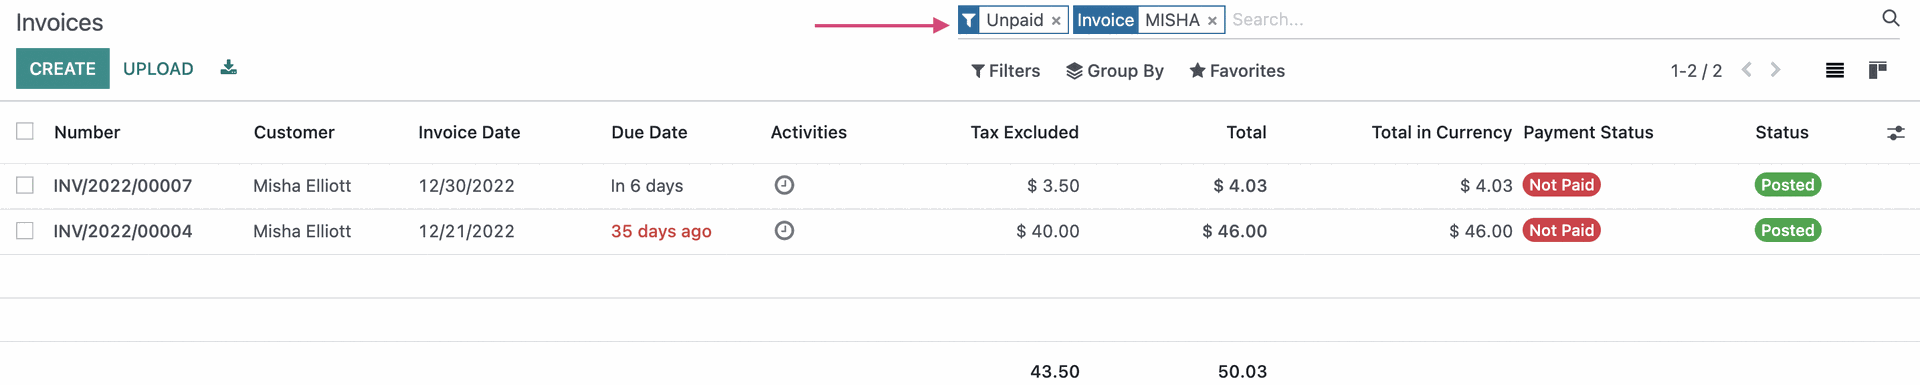
From Customers > Invoices, we then filtered for invoices that were "unpaid" for this customer.
From our results, we see that our customer, Misha, still has outstanding invoices in the amount of $50.03, and they have sent a bulk payment for this amount.
Let's register the payment. To do so, go to Customers > Payments, then click NEW. On the modal window, we'll enter the following details:
Internal Transfer: This is to be used when funds are being transferred from account to account; it's unlikely you'll be using this to record a customer payment.
Payment Type: Select "Receive Money".
Customer: Select the customer making the payment.
Amount: The amount of the payment.
Date: The date when the payment was received.
Memo: You can enter the invoice number as a reference to what this payment will apply to, however, this is for reference purposes only. It does not link the payment to any invoice(s).
Journal: Select the Journal where this transaction will be recorded.
Payment Method: Select "Manual" unless this payment is being made with several types of payment methods.
Customer Bank Account: The field label is misleading; this represents the customer's account that funds are being drawn from and is an optional field.
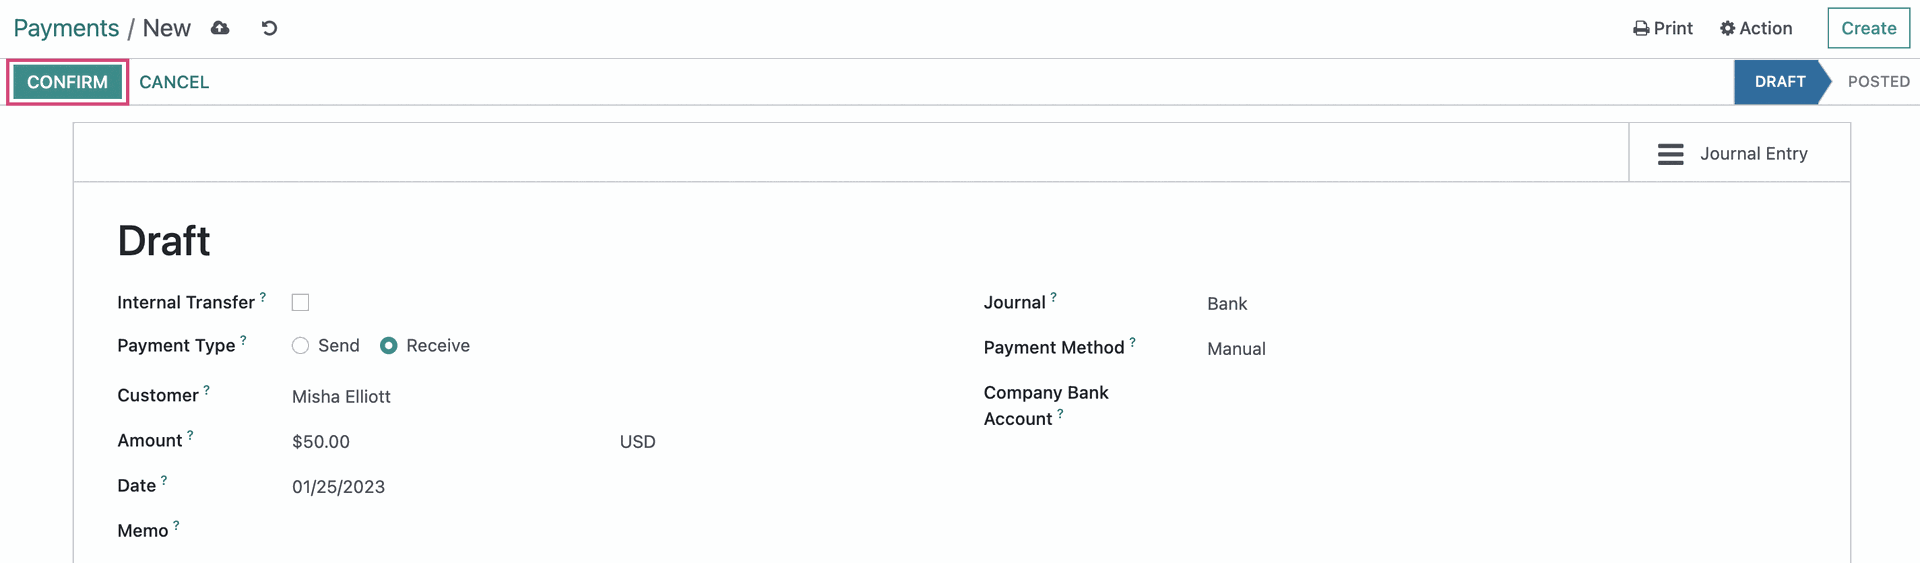
When ready, click CONFIRM.
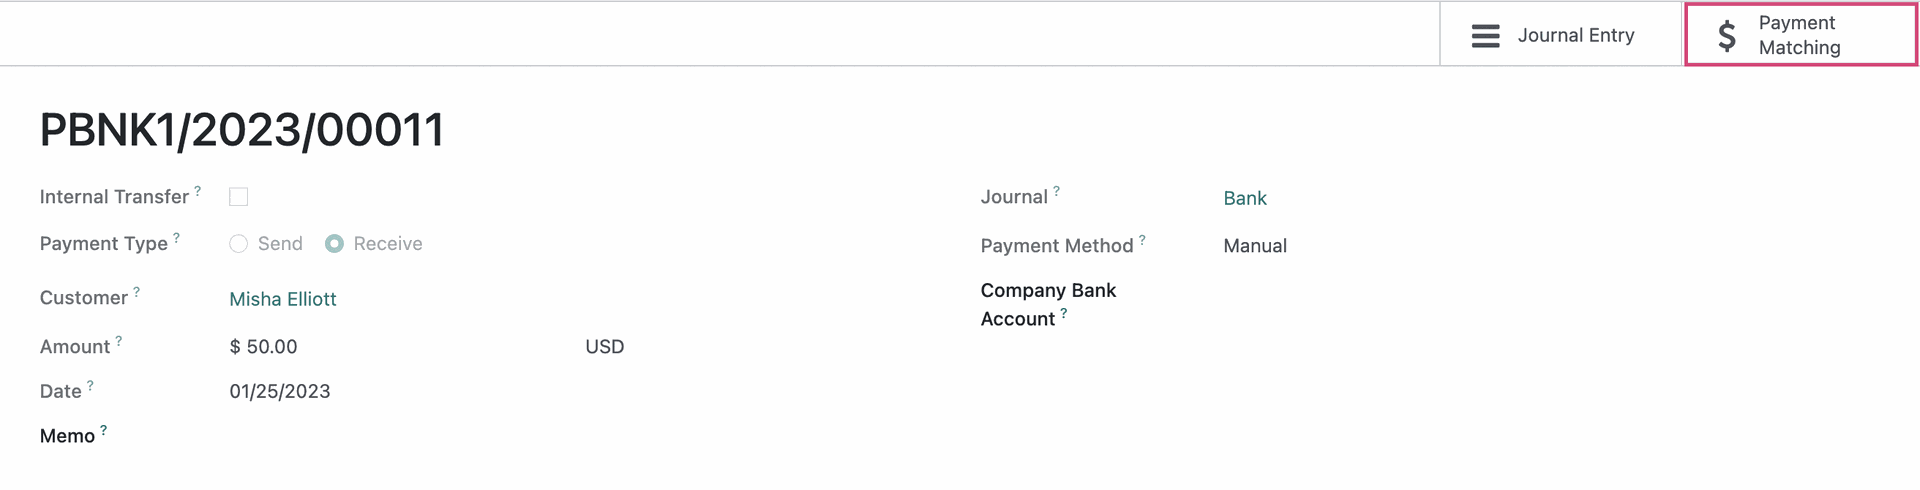
After confirming, you'll be in the validated payment record. Click the Payment Matching smart button.
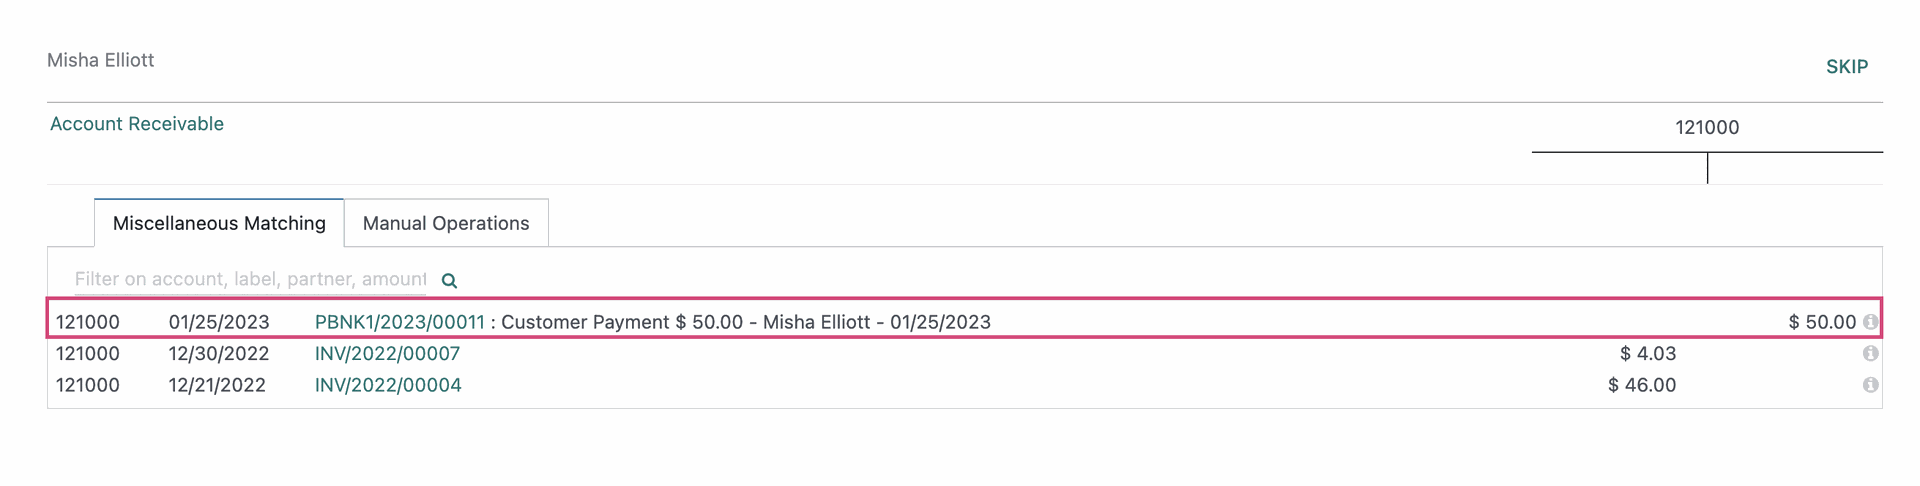
From here you'll see the payment we just recorded listed. Click the payment entry to add it to the T Sheet.
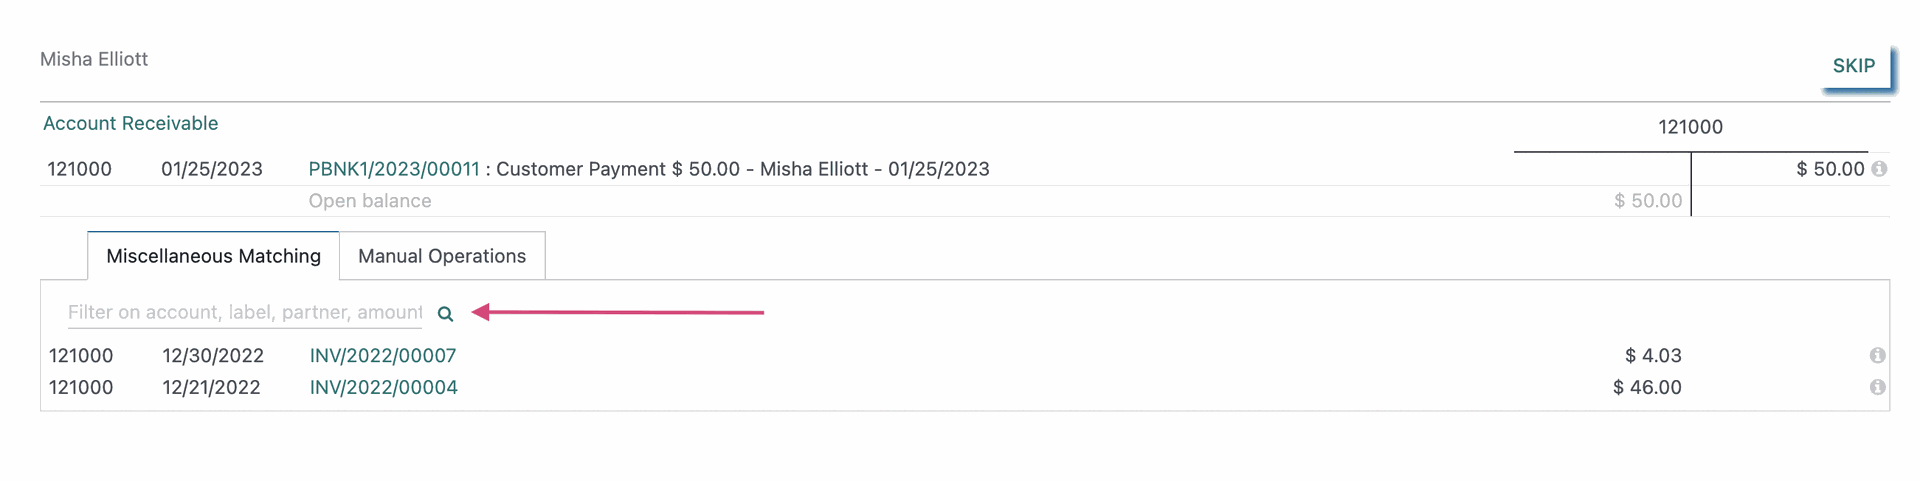
Next, click each related invoice to add them to the T Sheet. You can use the search field to narrow down what's displayed in this list.
When both columns balance, click Reconcile. Note that this button turns solid when the columns balance. If you reconcile items that don't balance, you'll need to account for the difference.

This payment has now been applied to all selected invoices, and we can confirm this by navigating back to the invoice using the breadcrumbs.

Then, click the Invoices smart button to see invoices associated with this payment.
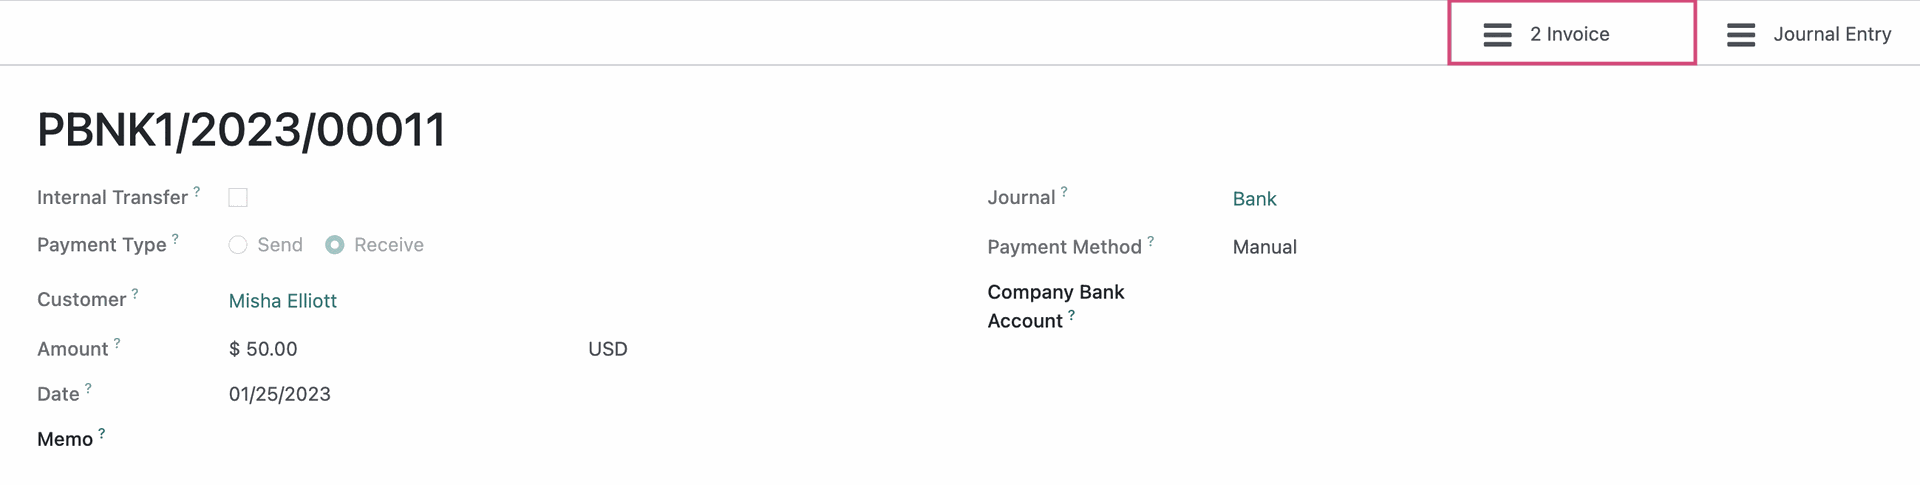
Here we see all of the invoices that this payment applied to. Notice the Payment Status shows In Payment. This will update as soon as the payment is confirmed with the bank.

Good to Know!
Register Payment on Multiple Invoices
If you know which invoices a manual payment is being registered on, you can do it directly from the Invoice listing page. Select the invoices to apply the payment to, then click Register Payment.

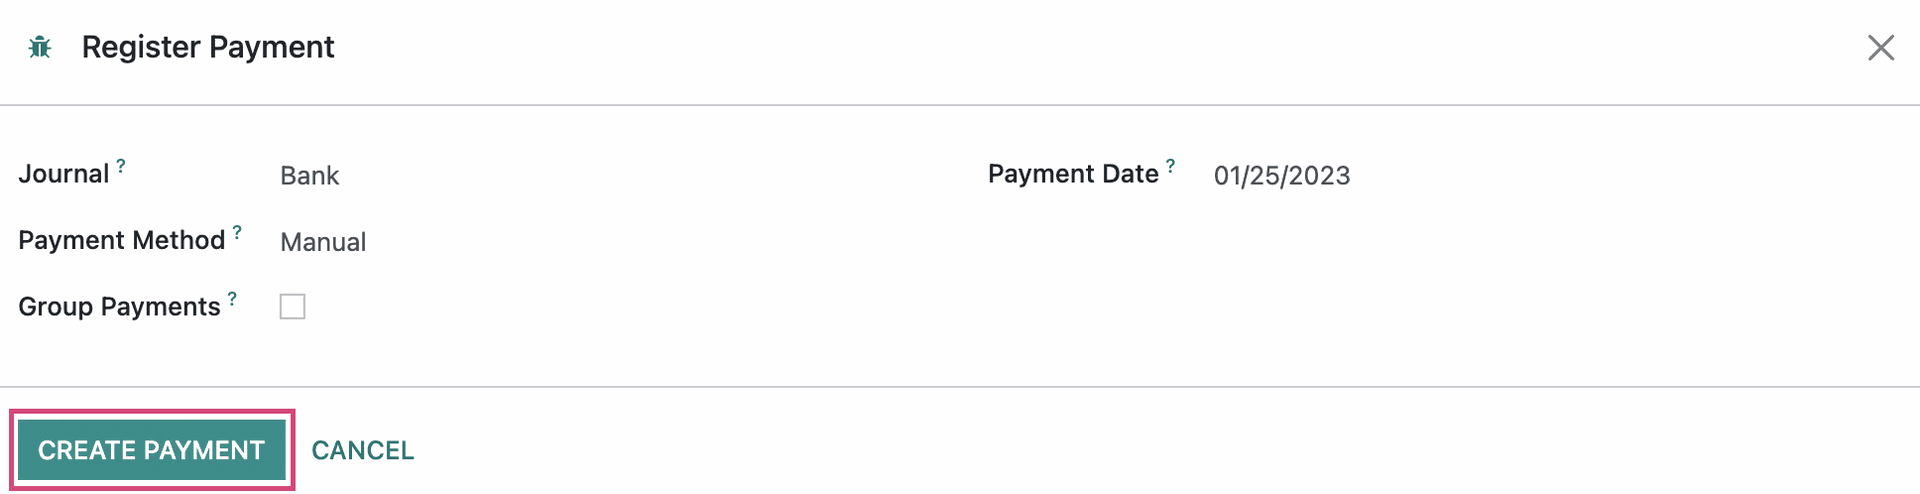
This brings up a modal window with minimal, pre-populated fields. Click Create Payment.
All selected invoices will then be marked In Payment until the payments are verified by the bank, then they will be marked as Paid.
Batch Payments
As stated earlier, as a rule, you should always make a payment directly from the invoice; however, there may be times when the payment is made manually. For example, our customer, Ash, has written a check to pay off the balance of a couple of different invoices. We just need to register that payment manually, then distribute it across each invoice. This follows the same workflow as above for manual payments.
From Customers > Invoices, we then filtered for invoices that were "unpaid" for this customer.
From our results, we see that our customer, Deco Addict, still has several outstanding invoices, and they have sent a bulk payment for the total amount.

Let's register the payment. To do so, go to Customers > Payments, then click NEW. On the modal window, we'll enter the following details:
Internal Transfer: This is to be used when funds are being transferred from account to account; it's unlikely you'll be using this to record a customer payment.
Payment Type: Select "Receive Money".
Customer: Select the customer making the payment.
Amount: The amount of the payment.
Date: The date when the payment was received.
Memo: You can enter the invoice numbers as a reference to what this payment will apply to; however, this is for reference purposes only. It does not link the payment to any invoice(s).
Journal: Select the Journal where this transaction will be recorded.
Payment Method: Select "Manual" unless this payment is being made with several types of payment methods.
Customer Bank Account: This is the customer's bank account that funds are being drawn from and is an optional field.

When ready, click CONFIRM.
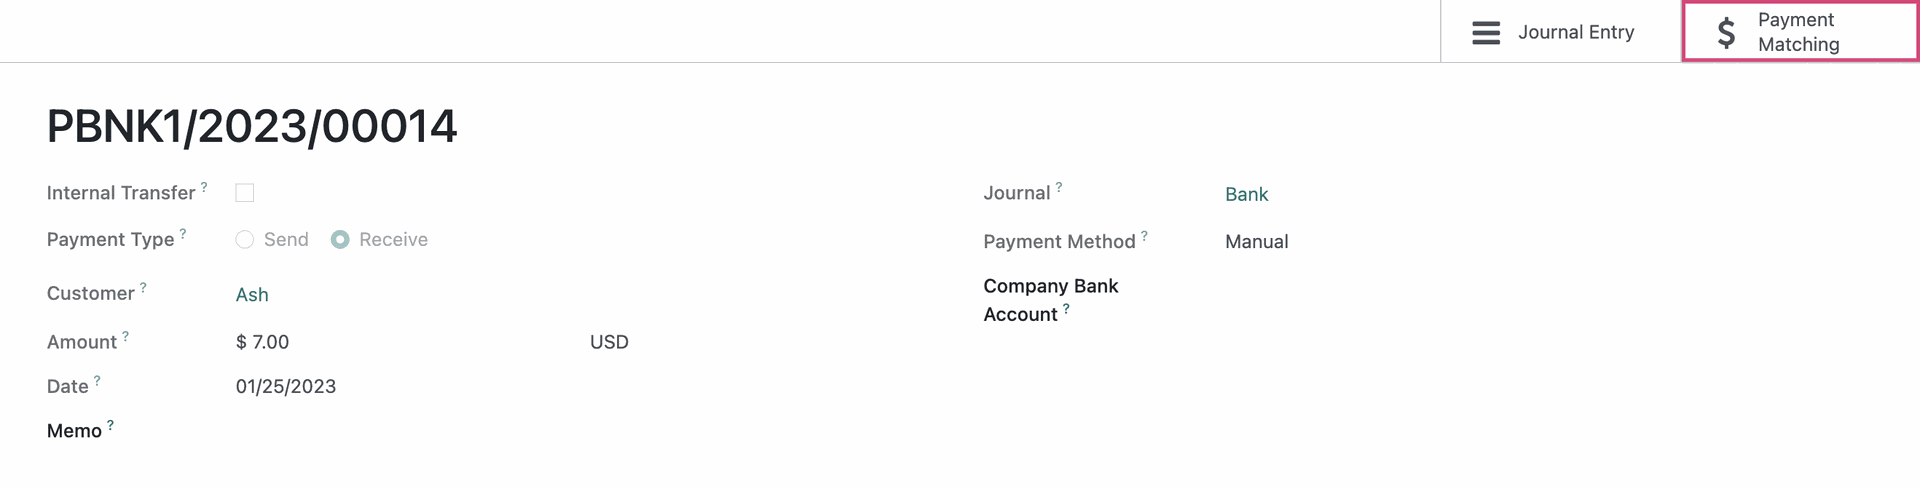
After confirming, you'll be in the validated payment record. Click the Payment Matching smart button.
From here you'll see the payment we just recorded listed. Click the payment entry to add it to the T Sheet.
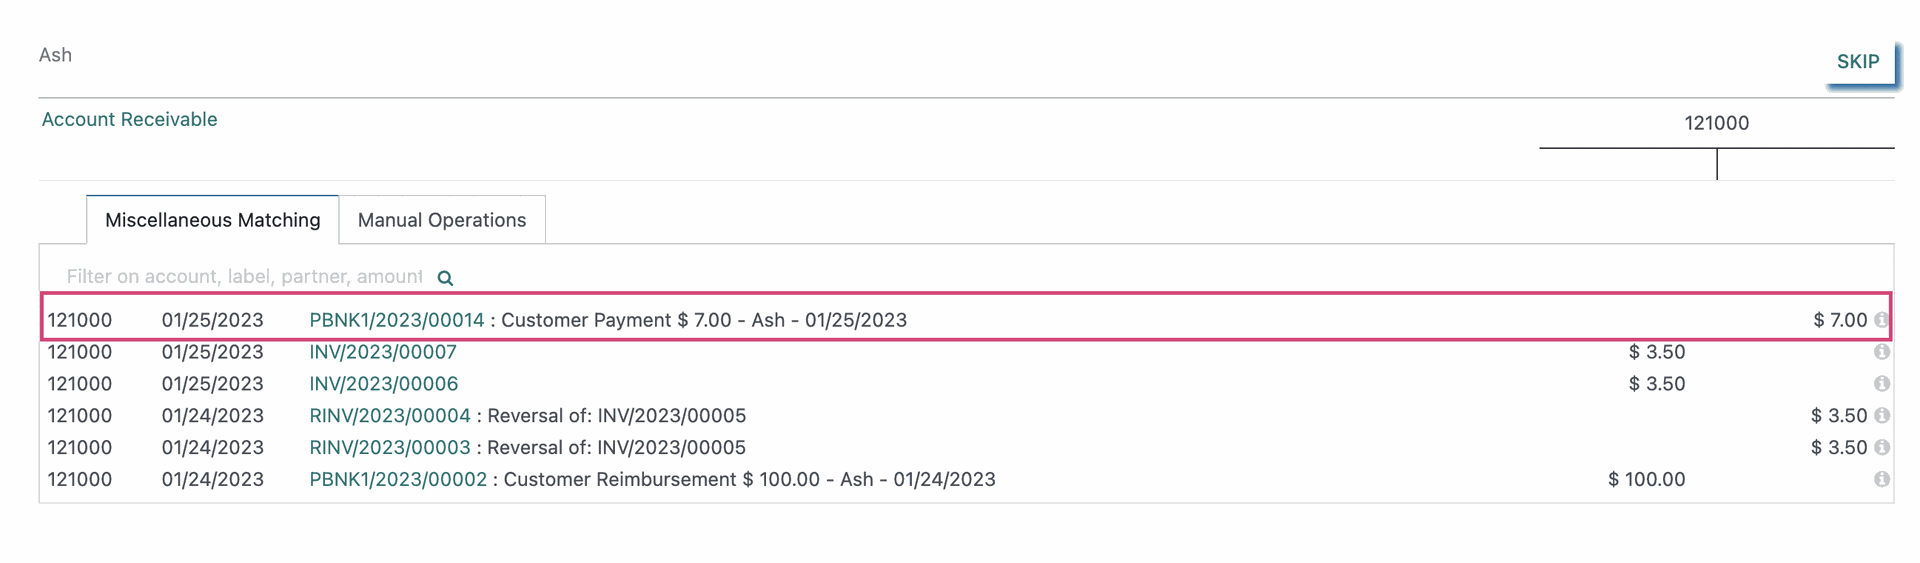
Next, click each related invoice to add them to the T Sheet.
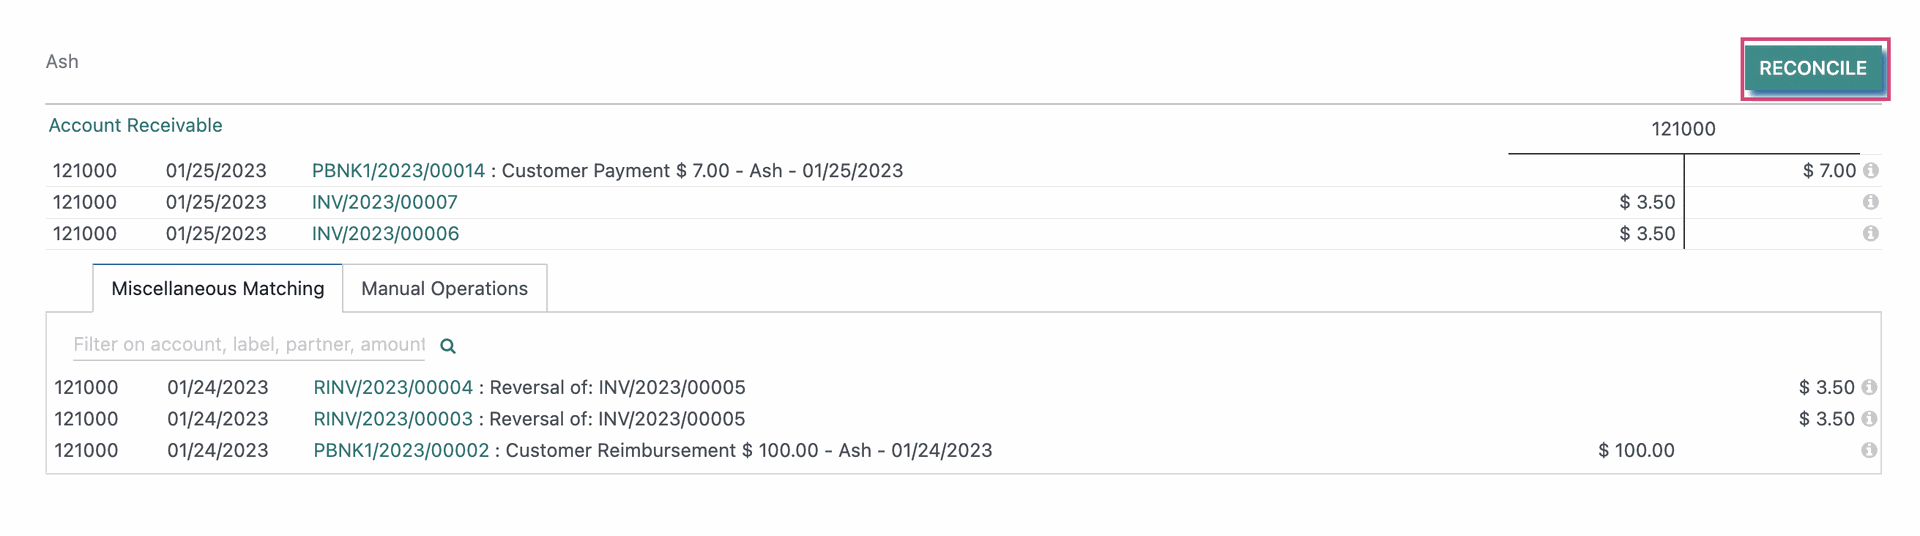
When both columns balance, click Reconcile. Note that this button turns solid when the columns balance. If you reconcile items that don't balance, you'll need to account for the difference.
This payment has now been applied to all selected invoices, and we can confirm this by navigating back to the invoice using the breadcrumbs.

Then, click the Invoices smart button to see invoices associated with this payment.
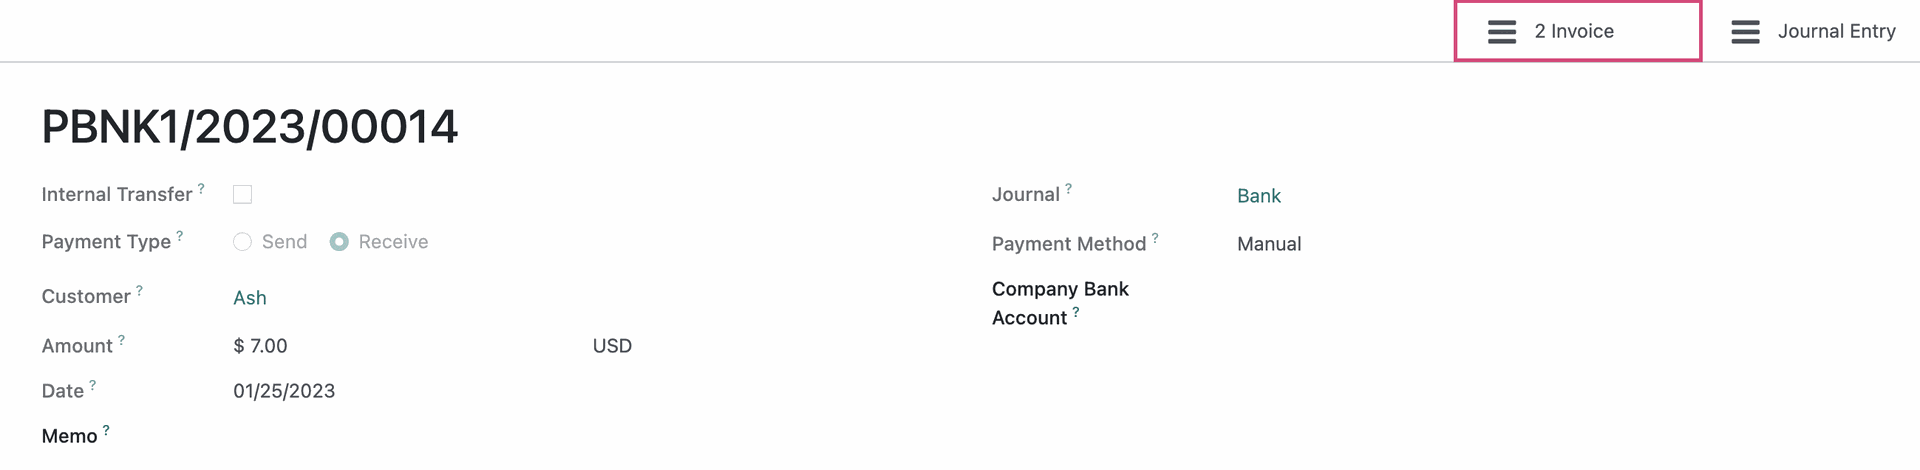
Here we see all of the invoices that this payment applied to. Notice the Payment Status shows In Payment. This will update as soon as the payment is confirmed with the bank.
