Accounting: Customers + Vendors: Customers: Follow-up Levels
Purpose
This document covers Payment Follow-Ups used within the Accounting app in Odoo 16. Follow-ups are an easy-to-use tool to help encourage your customers to pay their bills. Odoo 16 allows you to create your own Follow-up Levels.
Process
To get started, navigate to the Accounting app.
Click on Configuration > Invoicing > Follow-up Levels. This brings us to the following page which shows us the pre-set Follow-up Report levels. From here, you can configure each level by checking the corresponding boxes, or, select and click the level you would like to edit by clicking on the name of the level.

Create A Follow-Up Level
Click NEW.

Description: Name your Follow-up Level
After ____ days after due date: Number of days past due you would like your actions to occur.
Actions:
Send an Email: When processed, this will send a message to the customer's email address on file.
Send an SMS Message: When processed, this will send an SMS text message to the customer's phone number on file.
Send a Letter: When processed, this will send a physical letter to the customer's address on file.
Content Template: Here you can select or create and edit a template that will contain the message sent to the customer for this follow-up level. Different follow-up levels can each use their own dedicated template, or you can edit the message of a single template prior to sending to the customer.
Options:
Automatic: Selecting this will remove the Actions for Print a Letter and Manual Action. Selecting this option will trigger the Action type based on the number of days overdue you input in that field.
Attach Invoices: Selecting this option will attach a PDF of all open invoices with your follow-up notice unless the invoice has not previously been provided to the customers.
On the Activity tab, you can select to Schedule an Activity associated with this Follow-Up level.
Important!
To use the Attach Invoices option, all invoices must have already been submitted to the customer. If you have not provided an invoice to the customer before attempting to use the option, it will not work!
Example Follow-Up Levels
Now that we have shown you how to create Follow-Up Levels, we will show several examples and quickly cover each one. Each level has the same options, but slightly different configurations.
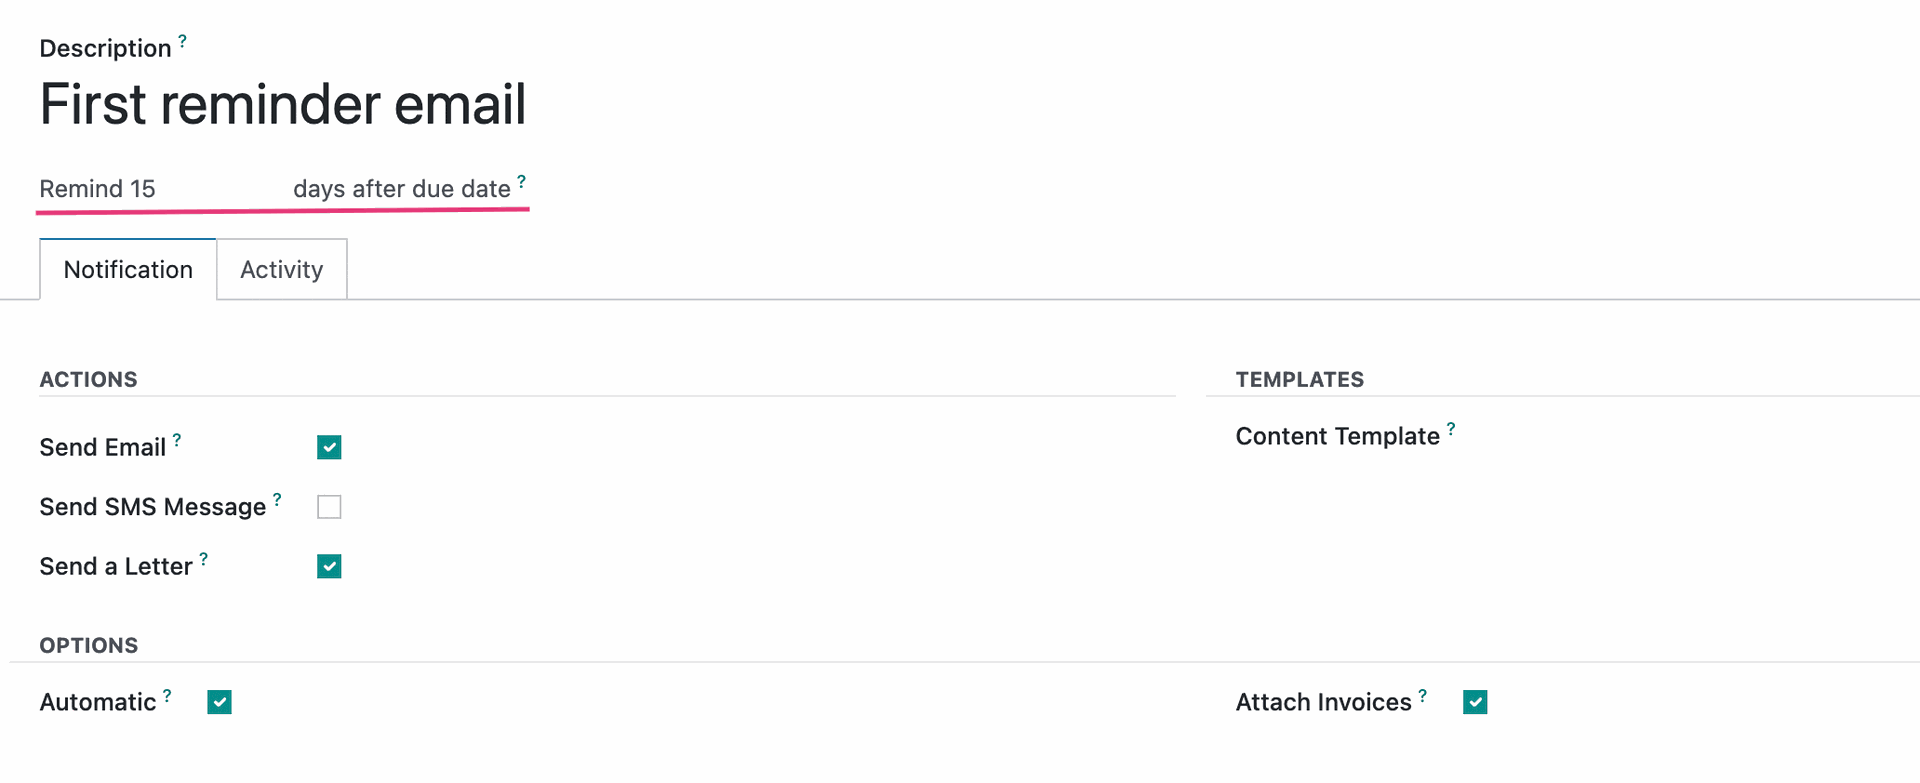
The first reminder email configuration shown above, will send an email to the customer and print a PDF of the reminder for your records once the payment is 15 days past due.
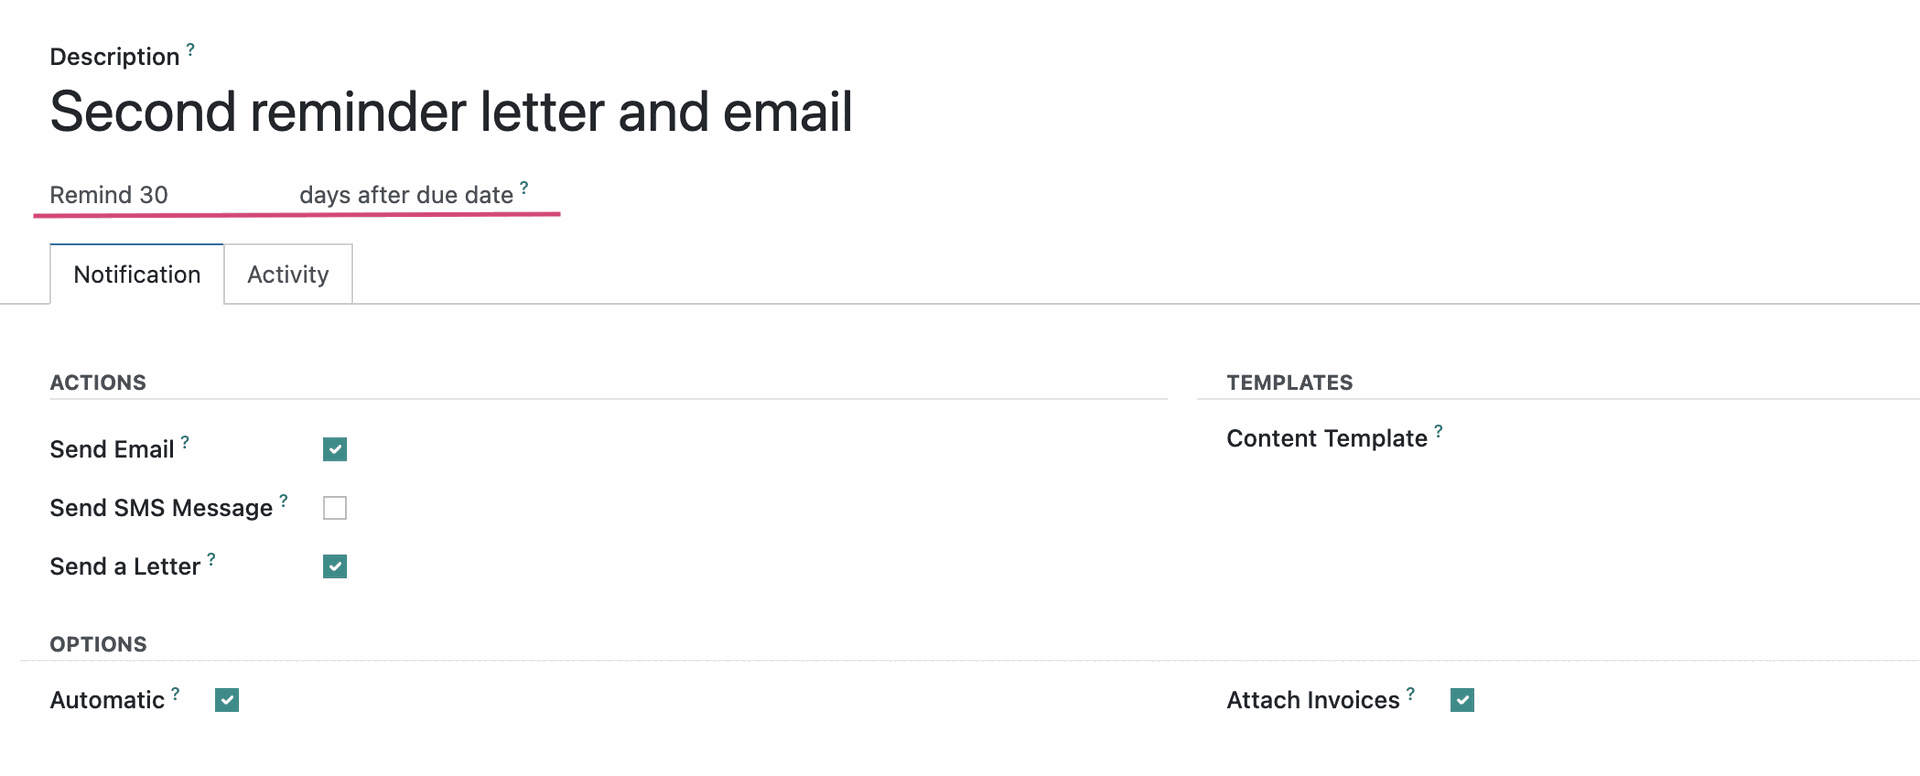
The second reminder letter and email configuration will send a second, potentially slightly stronger worded email (determined by the Content Template you can edit as needed) as well as print a PDF for your records once the payment is 30 days past due.
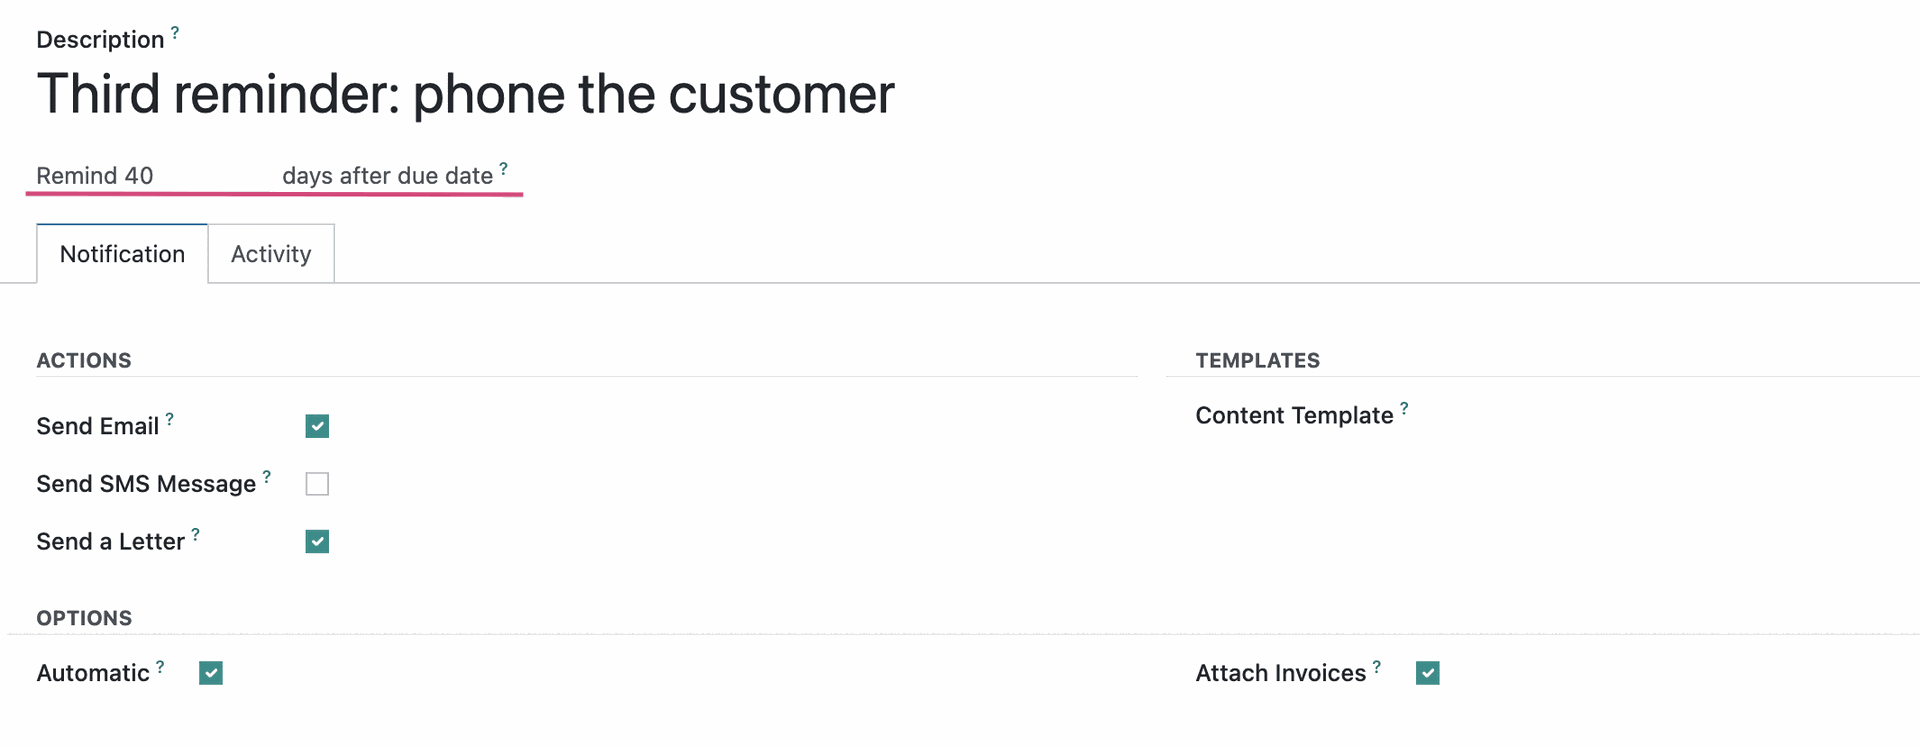
The Third reminder: phone the customer level will prompt the Manual Action of placing a phone call to the customer once payment is 40 days overdue. This level will also print a PDF for your records to show that you have attempted to communicate with the customer.
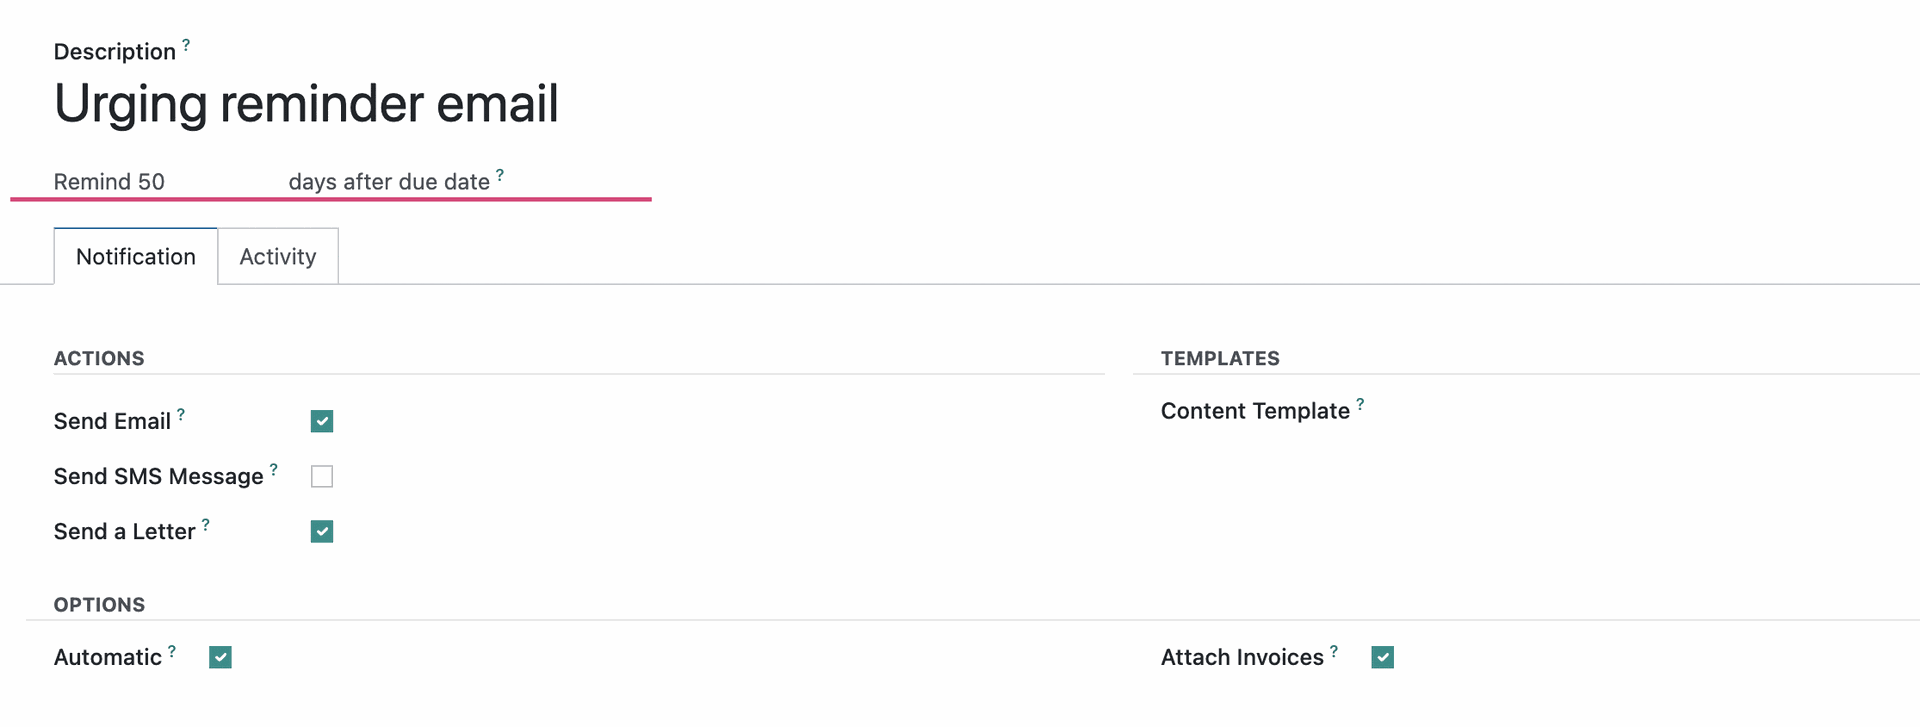
The Urging reminder email level will once again send an Email to the customer as well as print a PDF for your records once payment is 50 days overdue.

The Urging reminder letter will send a snail-mail letter to the customer as well as print a PDF for your records once payment is 60 days overdue.