Hibou Odoo Suite: Payroll Modules: Timesheets on Payslips
Purpose
This documentation outlines the processes associated with Hibou's Timesheets on Payslips module for Odoo 15, which allows you to include Timesheet numbers on Employee Payslips.
Getting Started
The first step is installing the module. To do so, navigate to the Apps application.
Once there, remove the 'Apps' filter from the search bar and search for 'Timesheets on Payslips'. When ready, click INSTALL.

Good to Know!
This module requires both the Payroll application and the Timesheets application. However, if you do not already have these installed, Odoo will install them for you during this module's installation.
Process
Configuring an Employee Contract
To get started, navigate to the Employees application.

Once there, click Employees > Contracts. This will bring you to a kanban view of all employee contracts. Select the employee contract you wish to modify, then click Edit.
Under the Salary Information tab and if the employee is set to be paid hourly:
Paid Hourly Timesheet: Enable this setting.
Hourly Wage: Once the Paid Hourly Timesheet option is enabled, enter the hourly rate into this field.
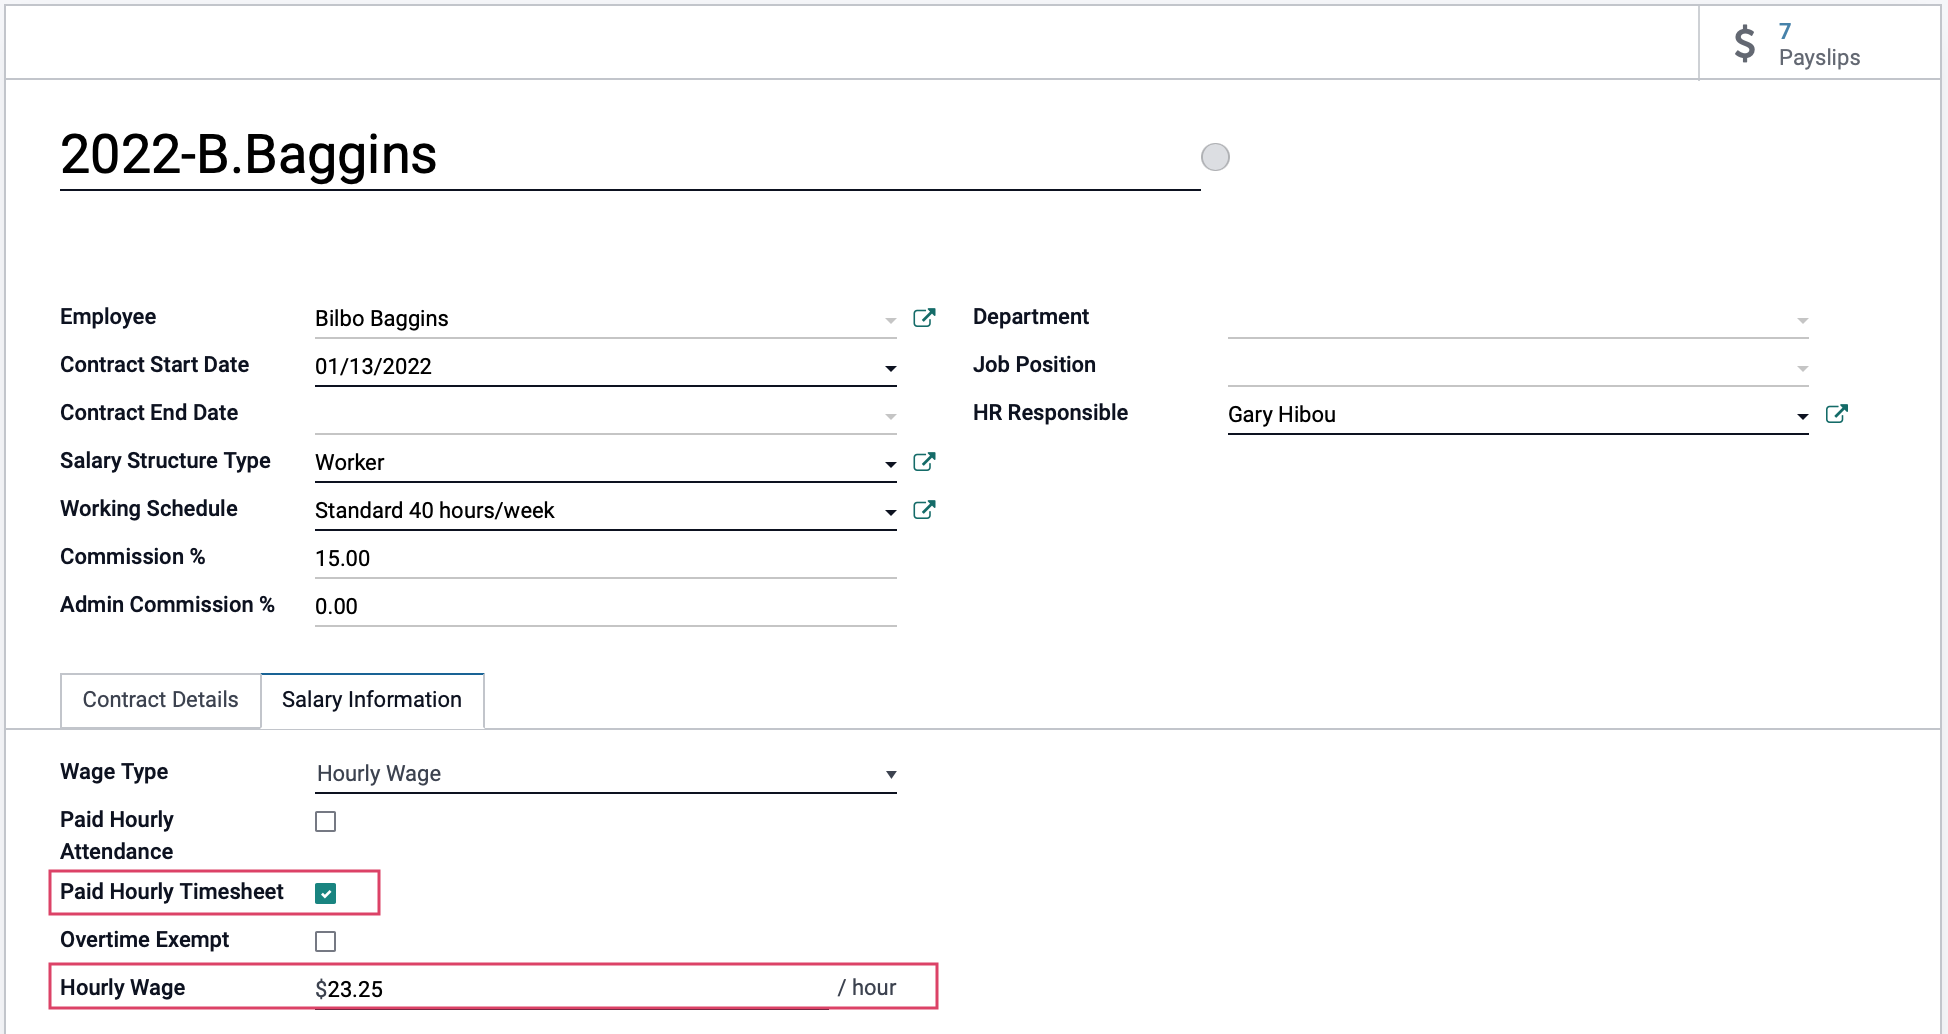
When finished, click SAVE.
Employee Timesheets
To show how this module works, we'll first need to record time on timesheets for this employee. Normally, the employee would do this themselves. To do this on the employee's behalf, navigate to the Timesheets app.
Go to Timesheet > All Timesheets, then click Add a Line. This opens a new window where you'll enter the following information:
Project: Select or create the project to record this time under.
Task: If this timesheet entry pertains to a specific task, select it here.
Employee: Select the employee whose time you're logging.
Date: Enter the date the work was performed.
Hours Spent: Enter the time spent on the task in hours and minutes.
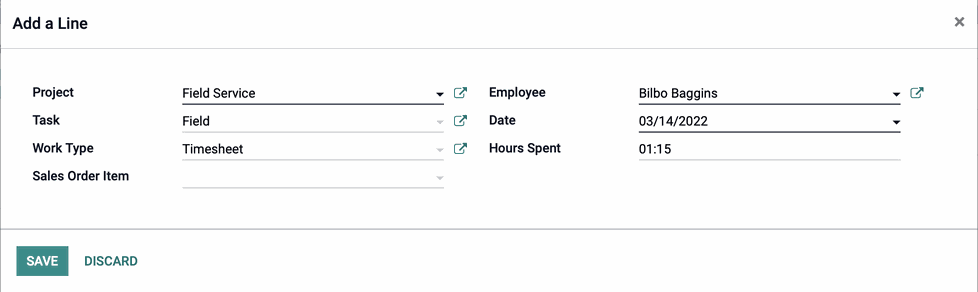
Click Save after each entry and repeat the process to enter all timesheets you'd like to have displayed on this employee's payslip.
Important!
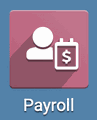
Enter the Pay Period First
You must enter dates in both Period fields before selecting an employee because the hours worked will be entered immediately when the employee is selected, and changing dates will not alter the hours worked after that point.
Employee: Select the hourly employee to run a payslip for.
Period: Select the start and end date of the pay period.
Reference: Odoo will generate a reference when the record is saved, but you can create your own here.
Contract: This field will populate with the selected employee's contract.
Structure: This field will populate with the selected employee's structure, based on their contract.
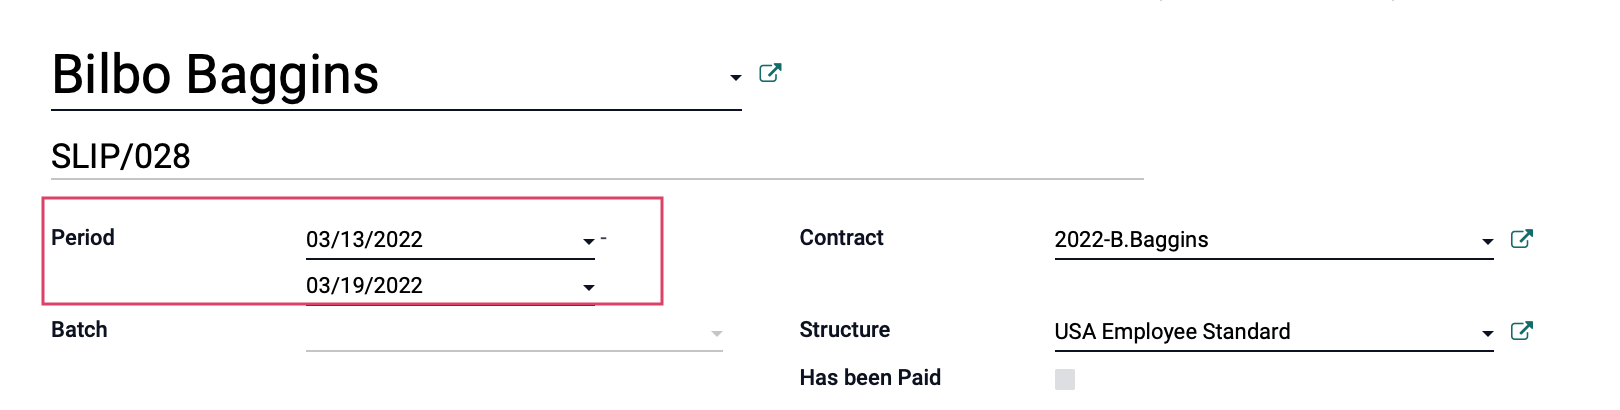
Payslip Name: Odoo will generate a Payslip Name when an employee is selected.
Once this information has been entered, click Save then click Compute Sheet.
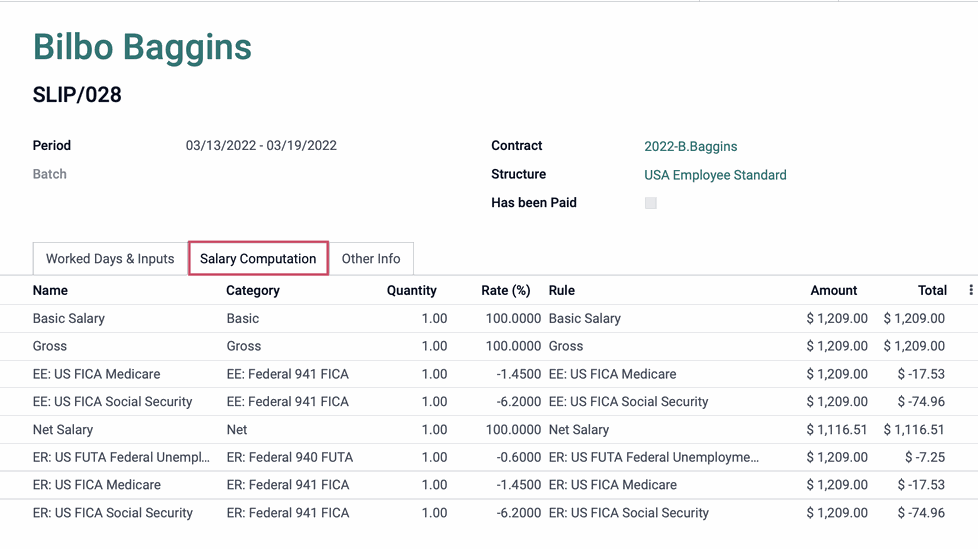
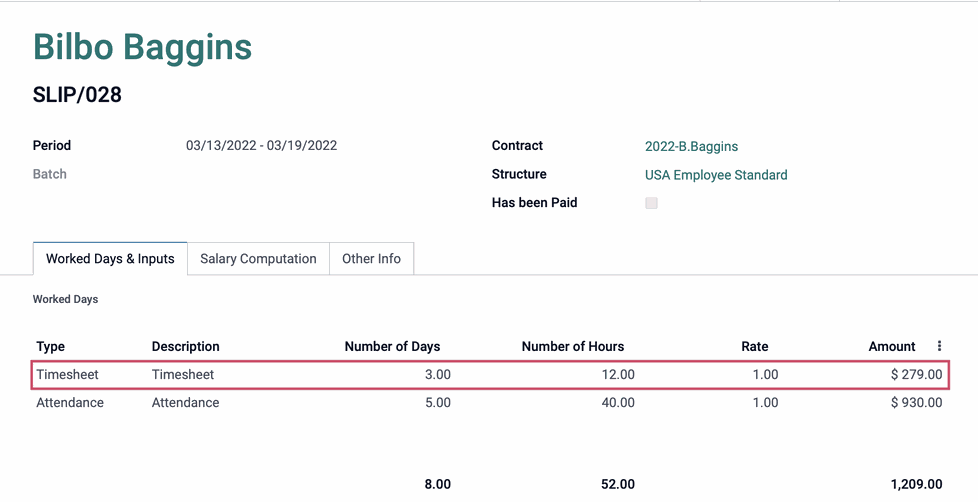
Under the Worked Days & Inputs tab, you'll see the number of days worked, and the total number of hours worked over those days.
Under the Salary Computation tab, you can see the amount reflects ther employee's hourly rate multiplied by hours worked.