Hibou Odoo Suite: Tools + Settings Modules: Boxes: PrintBox
Purpose
This documentation covers the installation, configuration, and functionality of Hibou's PrintBox module for Odoo. This module allows you to have numerous printers configured for your Odoo database, and provides the creation of profiles to grant permission for users to access and print to specific printers.
Important!
PrintBox requires a preconfigured Raspberry Pi. Please contact us for further details.
If you have already received the Raspberry Pi and need help connecting to it, please refer to our Boxes page for more information.
Getting Started
The first step is to install the module. To do so, navigate to the Apps application.
Once there, remove the 'Apps' filter, then search for 'PrintBox'. When you're ready, click install.

Good to Know!
The PrintBox module requires the Hibou Box - Base. However, if you do not already have this module installed, Odoo will install it for you during this module's installation.
Process
To get started, navigate to the Boxes app. This opens up the Boxes application on the Locations page.
Locations
To create a new Location, click NEW. This opens a form where you'll enter the following details:
- Location: Enter the name for your location.
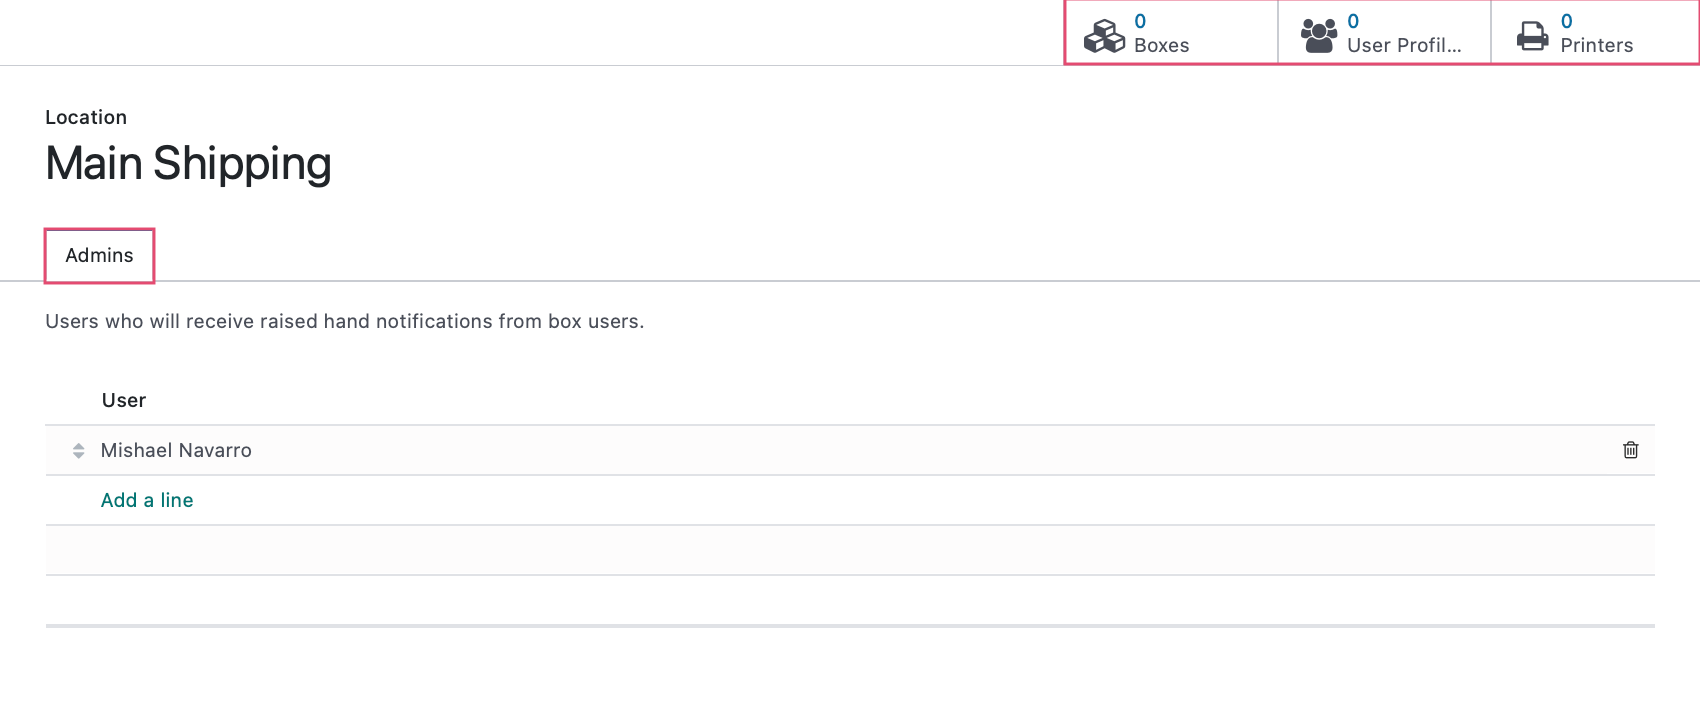
Smart Buttons
- Boxes: Allows you to create and view all boxes associated with this location.
- User Profiles: Allows you to create and view user profiles associated with this location.
- Printers: Allows you to create and view printers.
Admins
Under the Admin tab, this will allow you to indicate which users will receive a raised hand notification from box users.
Boxes
To configure a new box, click the Boxes smart button and click NEW.
Name: Name your box.
- Location: Select which location this box is associated with.
- Endpoint: Enter the endpoint for box with protocol, host, and port (e.g. https://127.0.0.1)
- External Endpoint: This is the URL Odoo will use to connect. It must include the protocol, host, and port (e.g. https://https://127.0.0.1)
- Use BoxMesh Protocol: Use external endpoint with boxmesh proxy protocal
- BoxMesh Token: Token to authenticate boxmesh service
- BoxMesh Pool: Specify which boxmesh to communicate with
- Override Internal Endpoint to https://localhost: Useful only in debug situations where you do not know the correct IP.
Use External Endpoint: Use only when your Odoo database is communicating directly with the box.
- Communication Timeout: The number of seconds befor the print process times out.
- Skip SSL Validation: Select when your Odoo database is directly communicating with the Box.
Box Configuration Options
There are currently 3 different configuration options to use to connect to your box; directly to the endpoint, using an external endpoint, or used the BoxMesh feature. Choose an option:
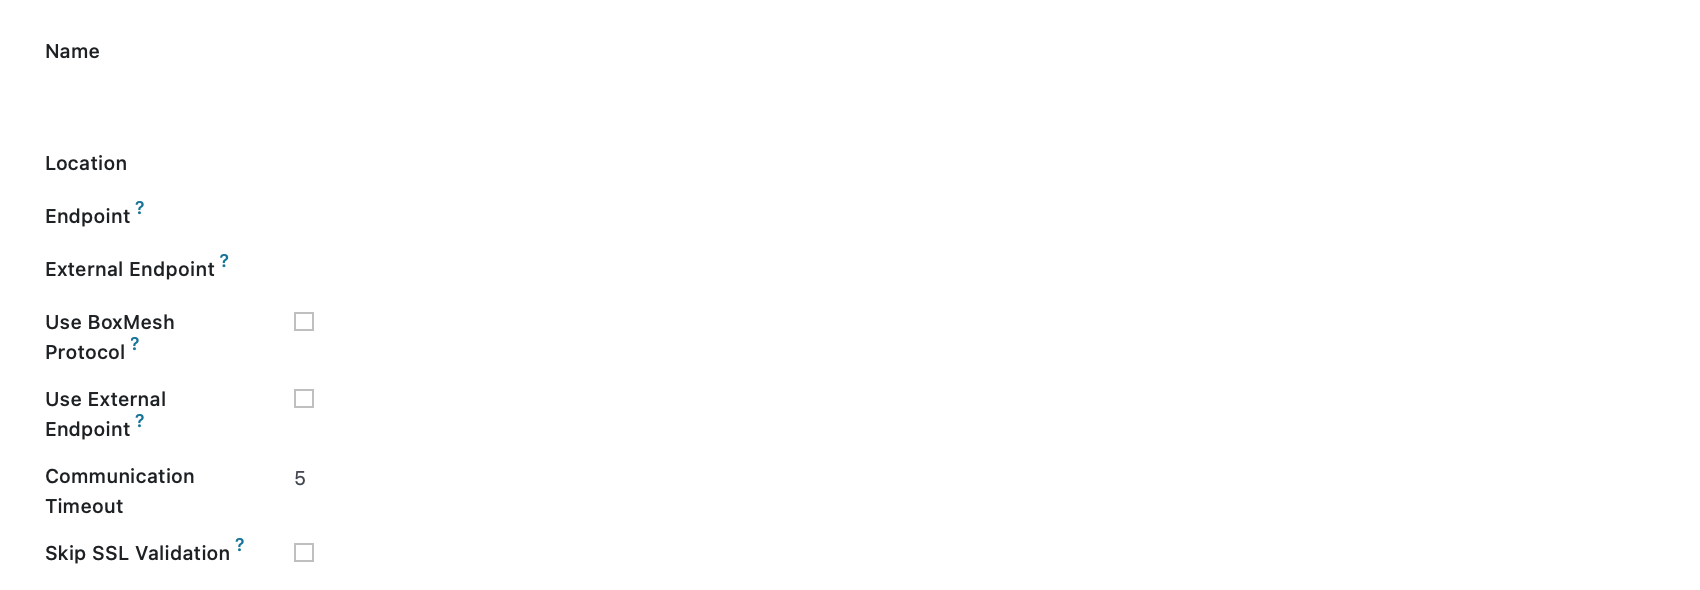
Option 1: Endpoint
Name: Name your box.
- Location: Select which location this box is associated with.
- Endpoint: Enter the endpoint for box with protocol, host, and port (e.g. https://127.0.0.1)

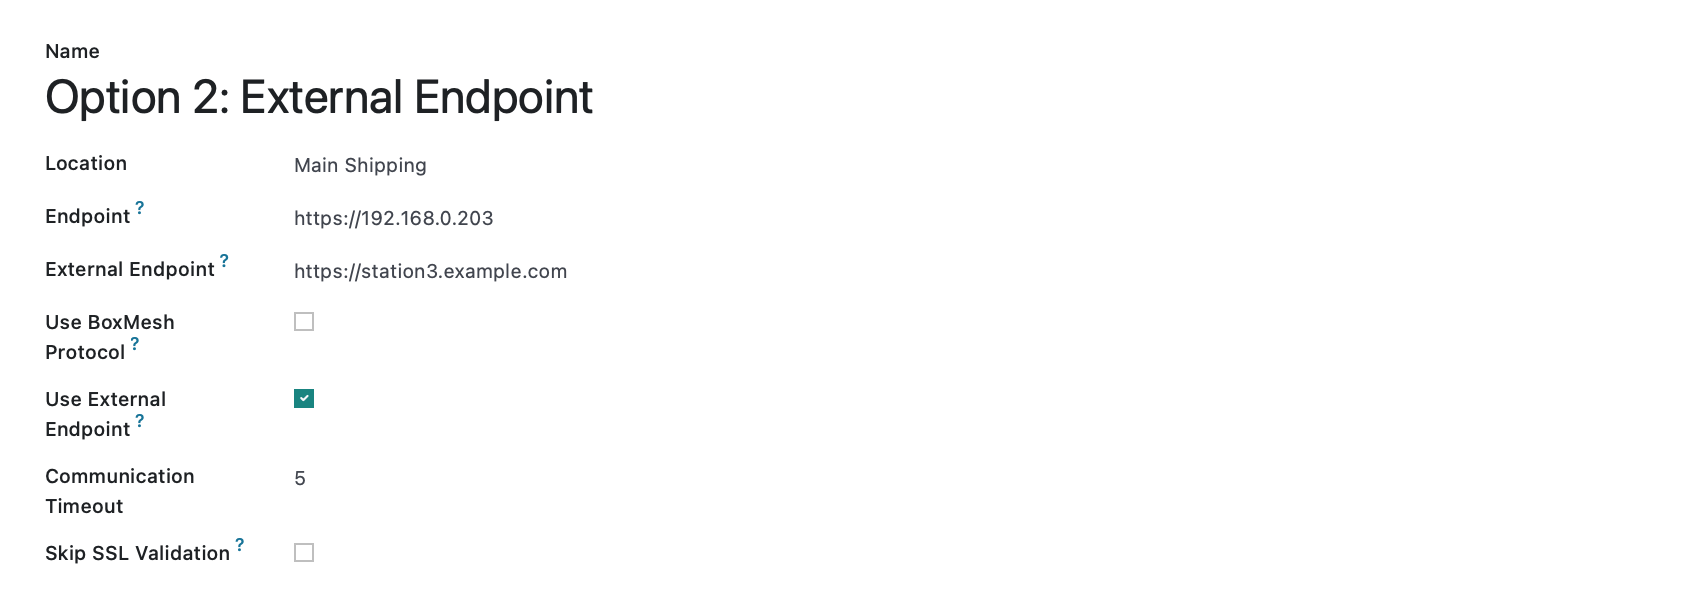
Option 2: External Endpoint
This configuration option will require you to open a port on your network, this will be end up being your external endpoint, which will point to your box on your internal network.
Name: Name your box.
- Location: Select which location this box is associated with.
- Endpoint: Enter the endpoint for box with protocol, host, and port (e.g. https://127.0.0.1)
External Endpoint: This is the URL Odoo will use to connect. It must include the protocol, host, and port (e.g. https://https://127.0.0.1)
- Use External Endpoint: enable this option
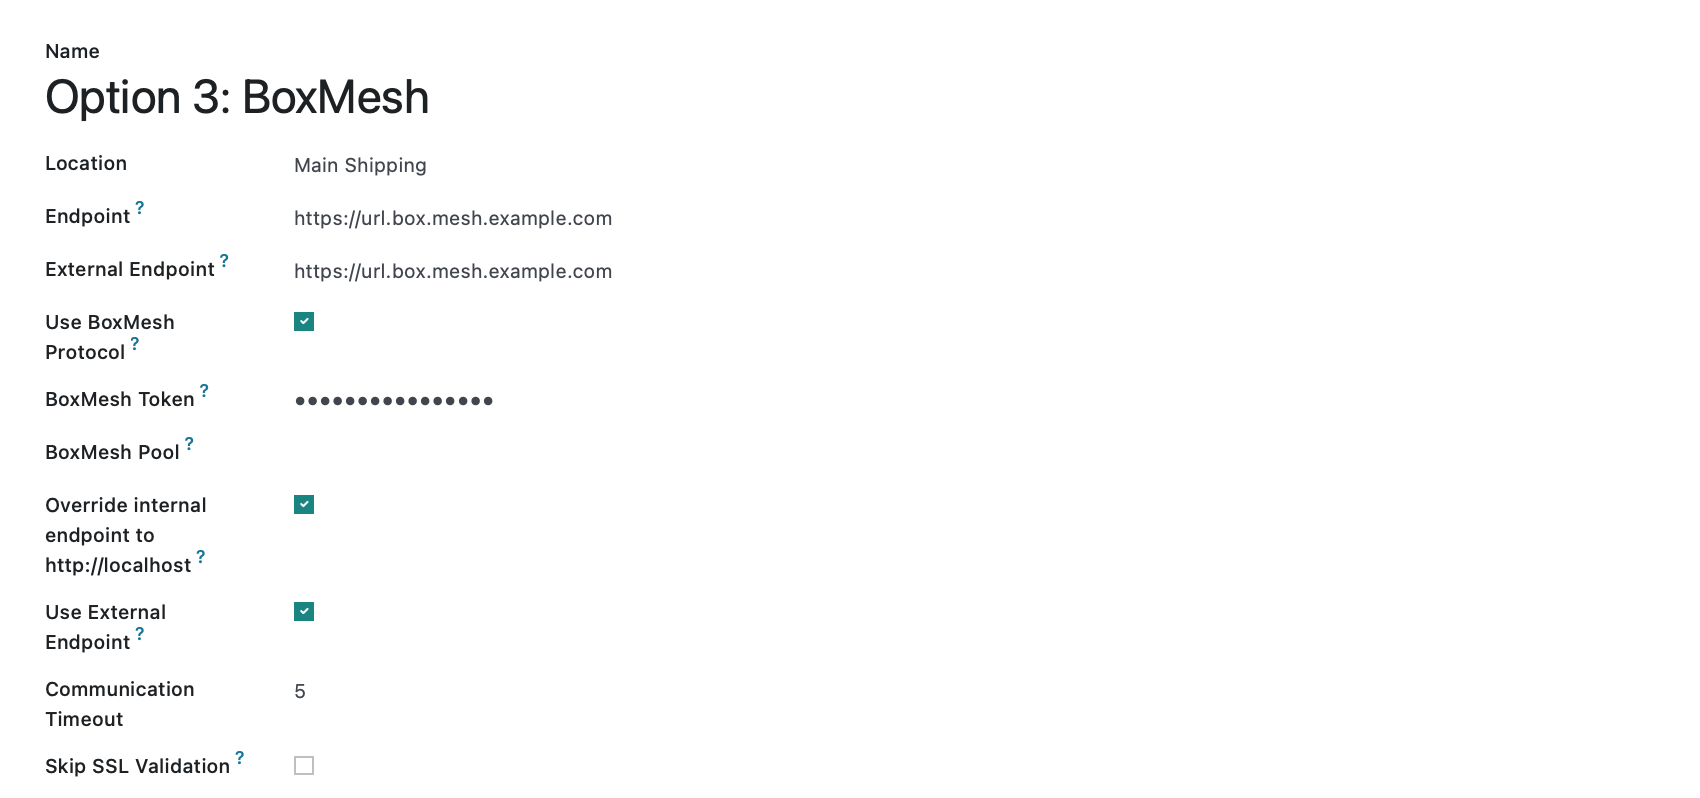
Option 3: BoxMesh
- Endpoint: Enter the endpoint for box with protocol, host, and port (e.g. https://127.0.0.1)
- External Endpoint: This is the URL Odoo will use to connect. It must include the protocol, host, and port (e.g. https://https://127.0.0.1)
- Use BoxMesh Protocol: Use external endpoint with boxmesh proxy protocal
- BoxMesh Token: Token to authenticate boxmesh service
- BoxMesh Pool: Specify which boxmesh to communicate with
- Override Internal Endpoint to https://localhost: Useful only in debug situations where you do not know the correct IP.
Use External Endpoint: Use only when your Odoo database is communicating directly with the box.
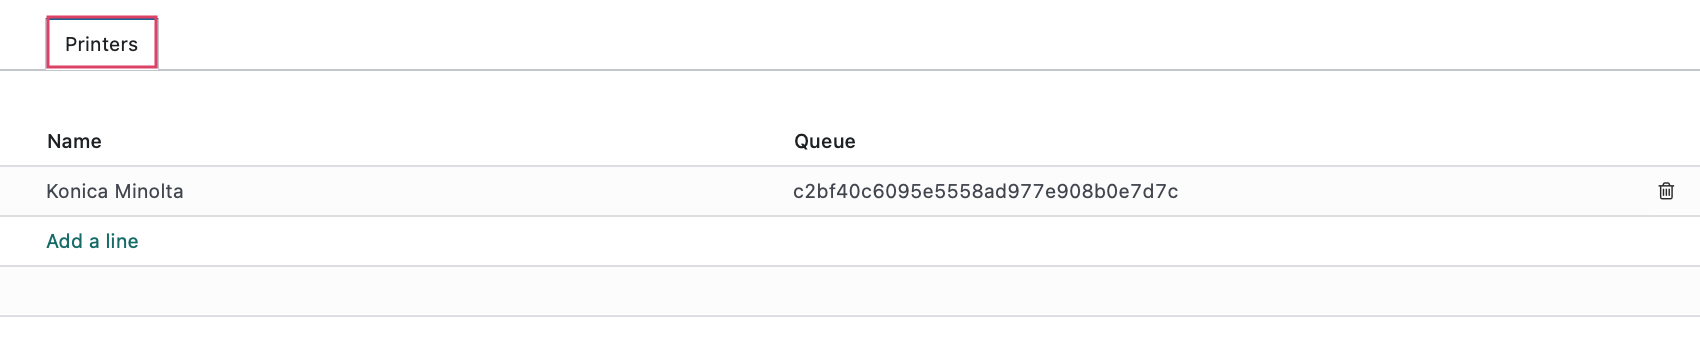
Add A Printer
To add a printer from the box configuration page, navigate to the Printer tab and click Add a Line, then fill in the following:
- Name: Name your printer.
- Queue: This queue name is obtained from CUPS, the printer server software on the raspberry pi.
Printers
While we can manually add the printer from the box itself, you can also do the same by going to the Printer menu. This will show you all existing printers, as well as which location and box they are associated with and even run test prints to verify that everything is connected properly.
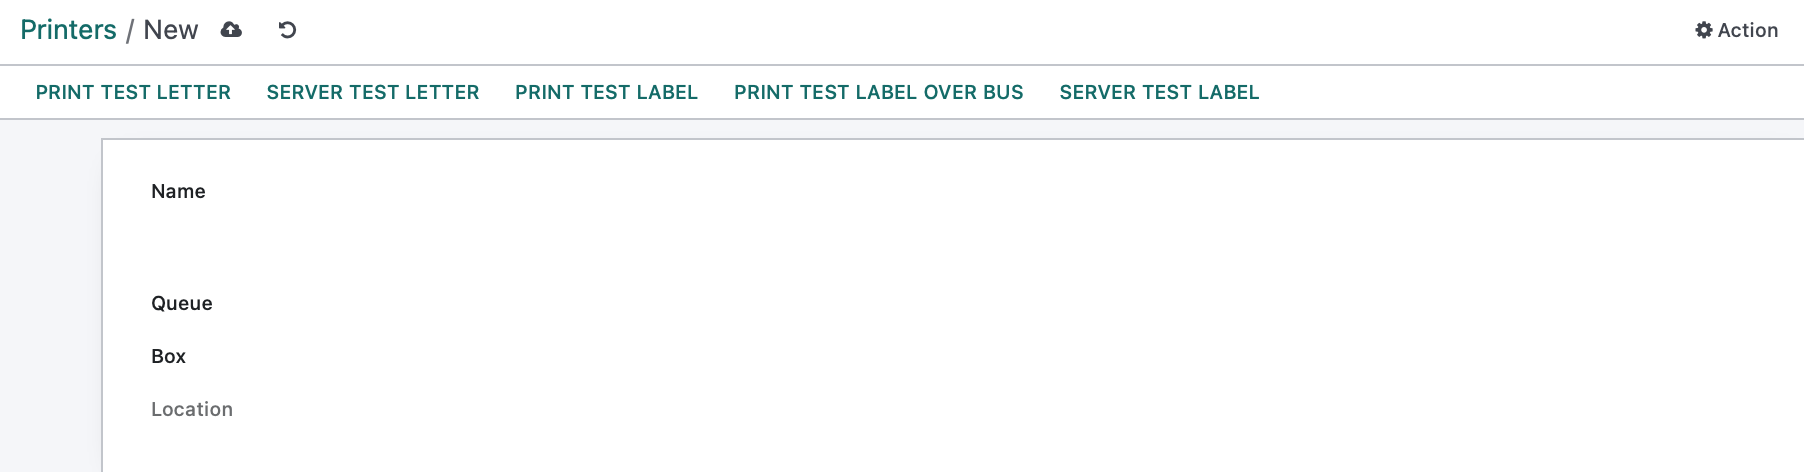
Click New, to make a new printer.

Then fill out the following:
- Name: Name you printer
- Queue: This queue name is obtained from CUPS, the printer server software on the raspberry pi.
- Box: Select a box to associate the printer with.
- Location: This is a read only field, and will show you which location the box you selected is associated with.

Test Your Printer
You will notice that right above, you have a couple buttons. These are used to test your printers depending on how you configured your box.
- PRINT TEST LETTER to print to the local letter printer.
- SERVER TEST LETTER to print to the network letter printer, use when the box is configured to use BoxMesh
- PRINT TEST LABEL to print to the local label printer.
- PRINT TEST LABEL OVER BUS:
- SERVER TEST LABEL to print to the network label printer, use when the box is configured to use BoxMesh
User Profiles
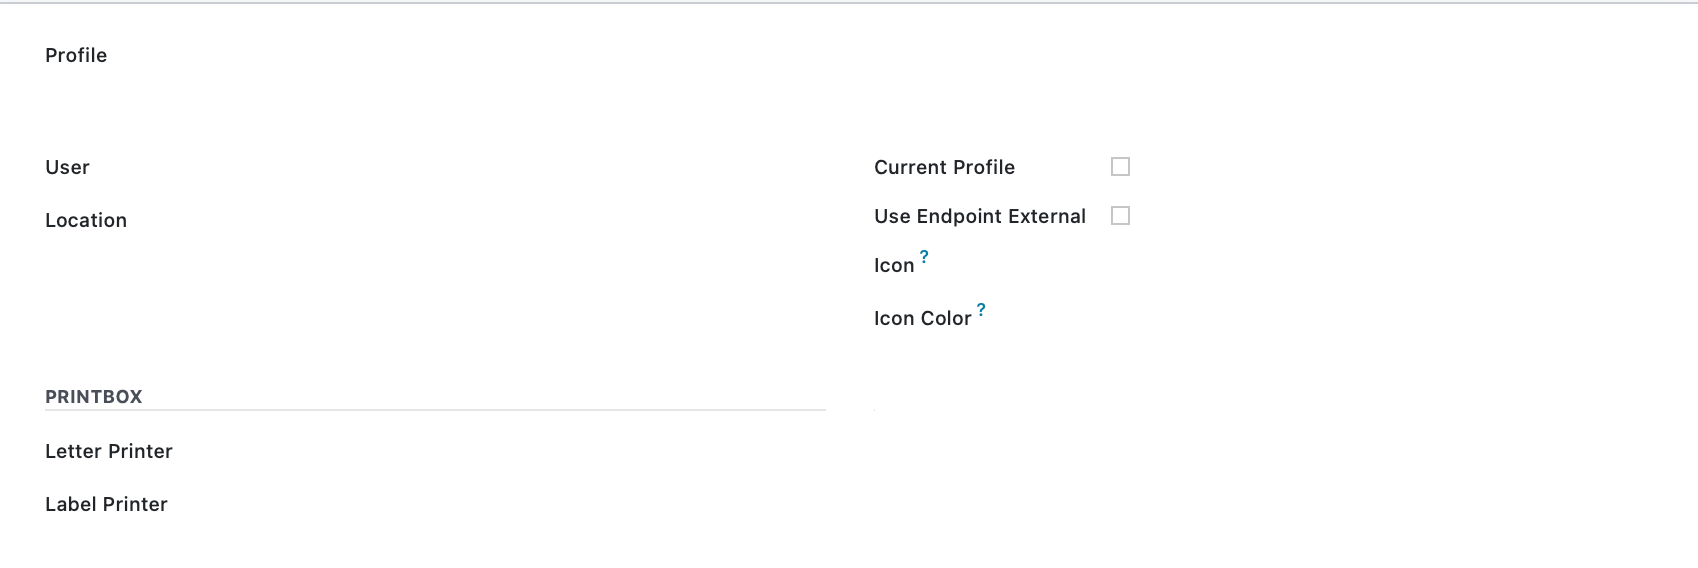
Navigate over to the User Profile, and click NEW, then fill in the following:
Profile: Enter a name for the profile.
- User: Select the user.
- Current Profile: Check this box if this is an active profile for this user.
Use Endpoint External: Use only when your Odoo database is communicating directly with the box.
Icon: Choose an icon class to visually identify the user profile.
Icon Color: An HTML color attribute to help identify the profile.
PrintBox
- Letter Printer: Select a pdf printer
- Label Printer: Select a label printer.
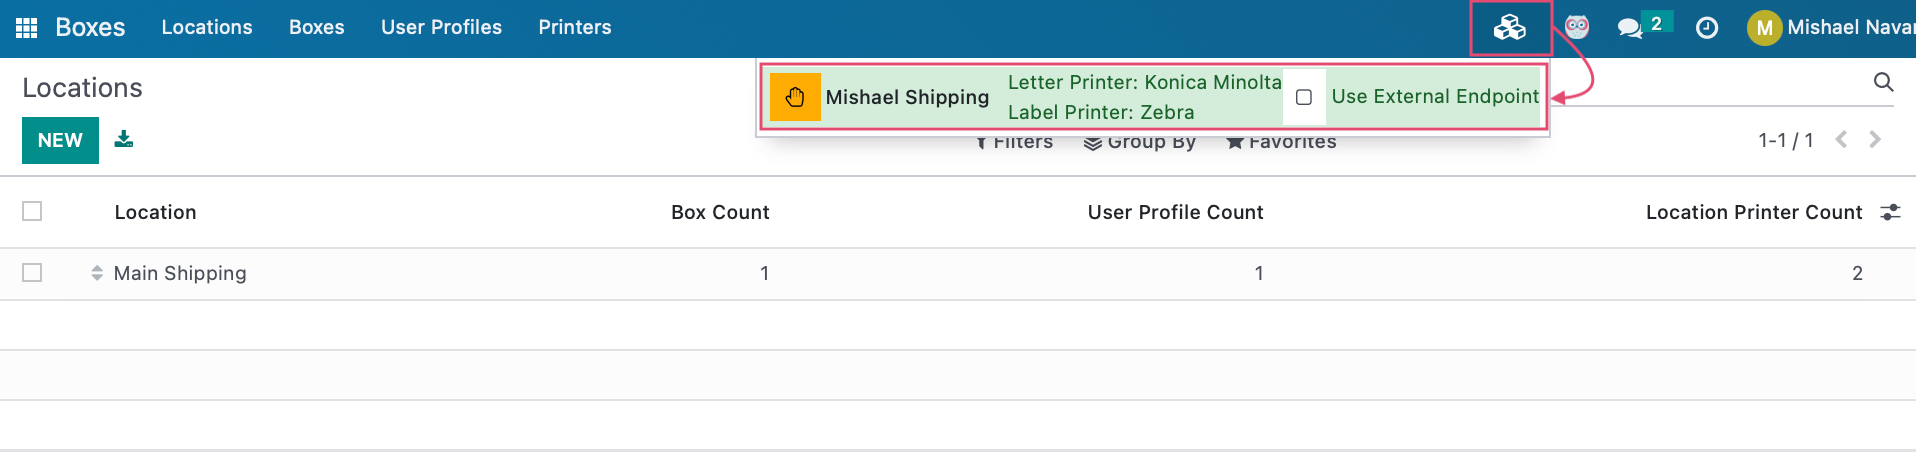
Activate / Disable Profile
Users may have multiple profiles depending on which location they need to print to. To activate a profile, click the icon on the top-right of the screen, then click on the profile to activate it.
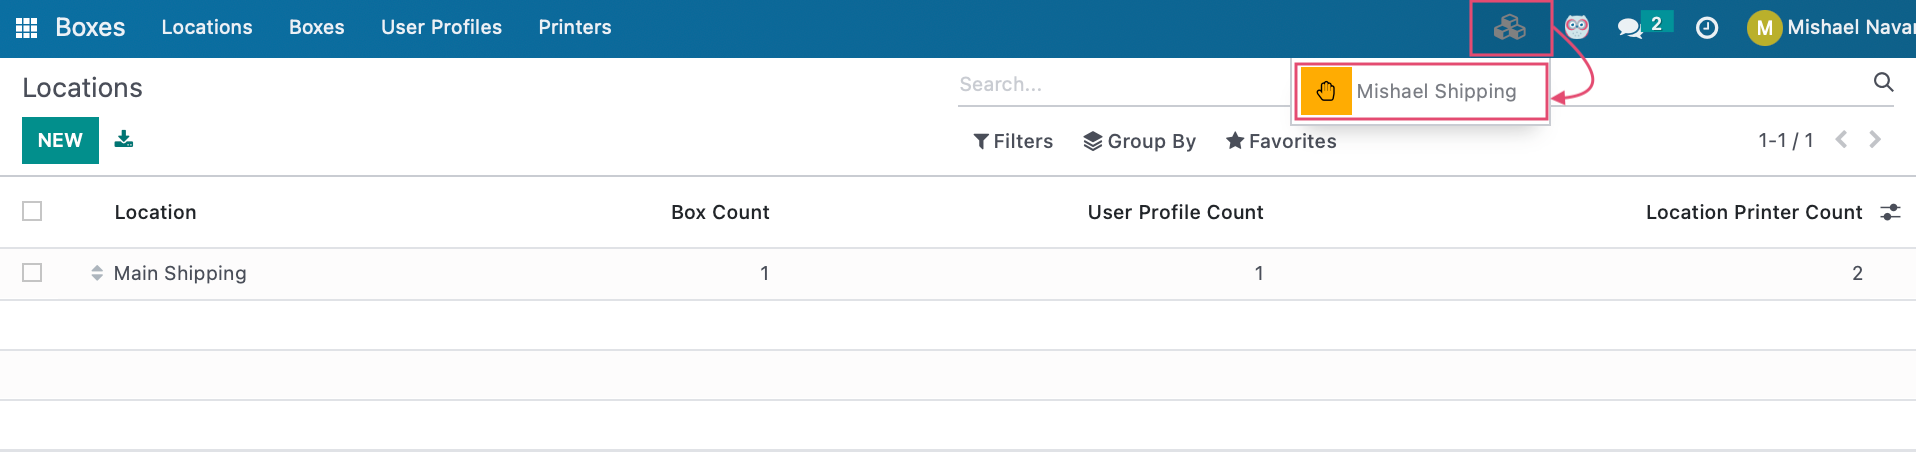
To disable the profile, again click the icon on the top-right of the screen, then click on the profile to deactivate it.
Important!
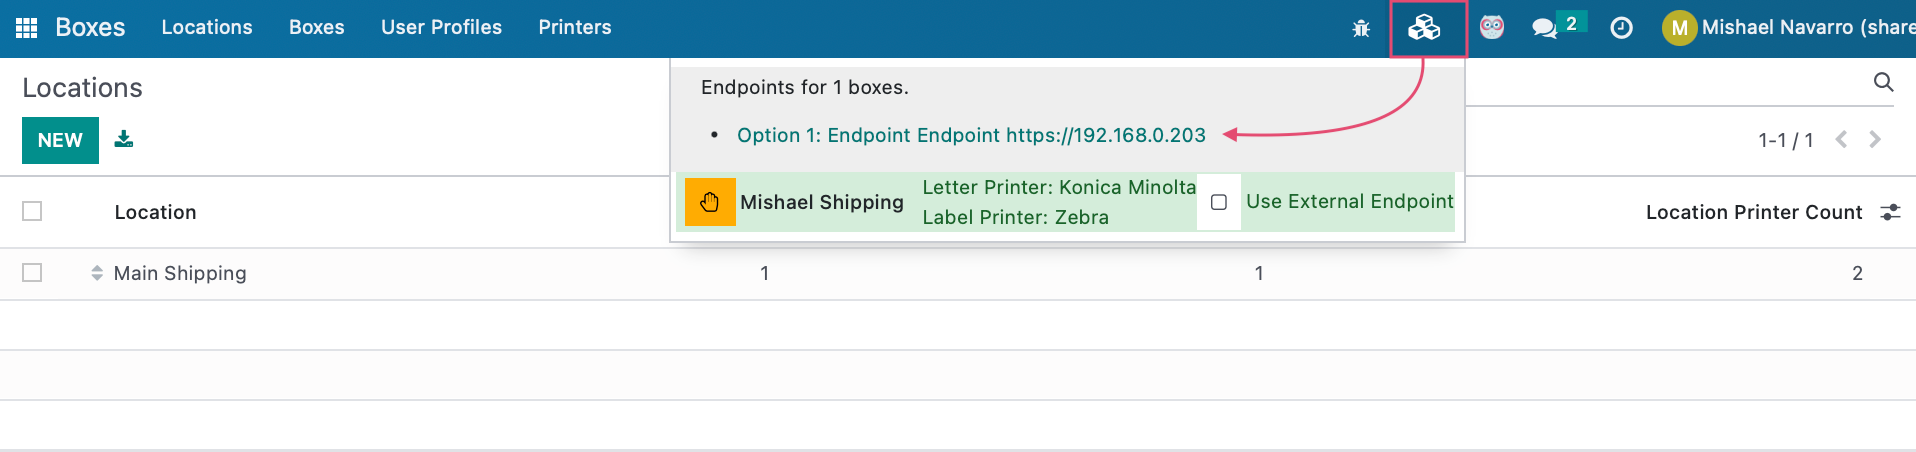
In order for User to be able to print in Odoo, they will need to visit the Main Endpoint in their browser to accept the SSL.
This can be done by entering Debug mode, clicking on the Boxes icon in the menu bar, and then clicking the endpoint/IP link.
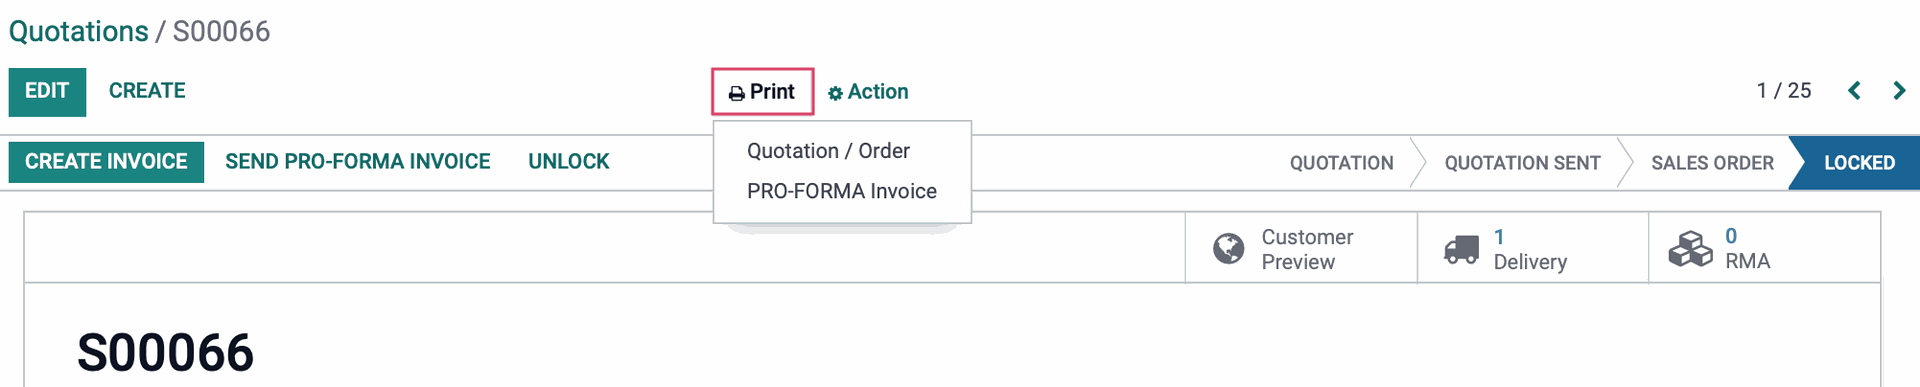
PrintBox in Action!
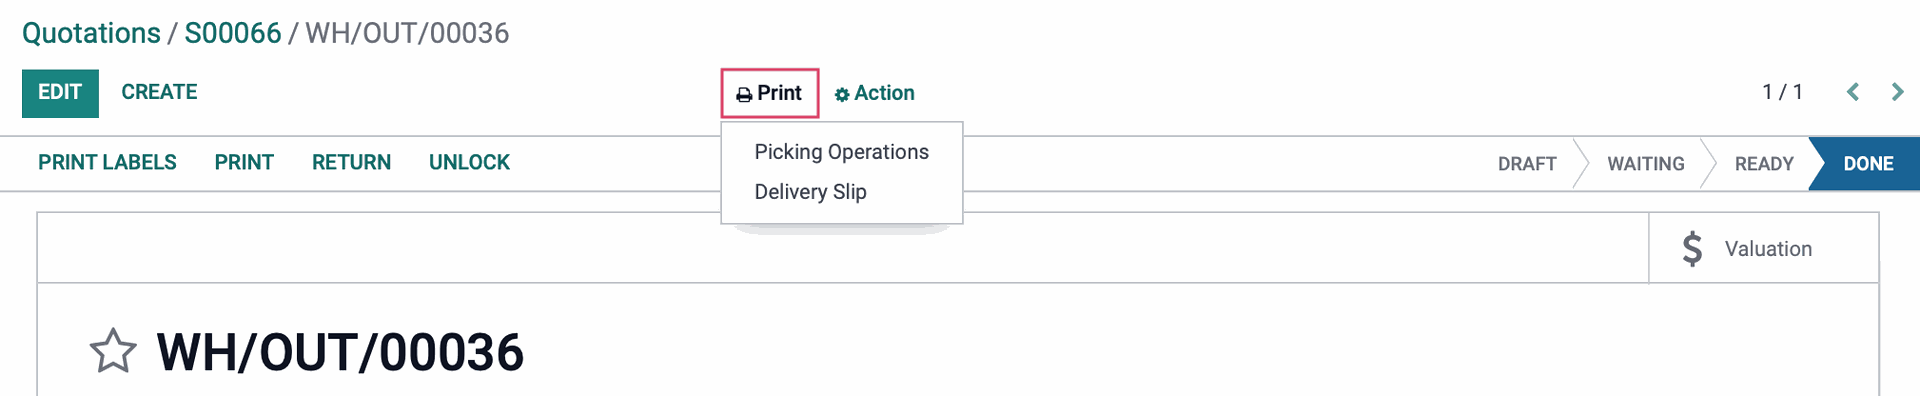
By navigating to a Sale Order and using the Print action and then Quotation/Order, if you have a letter printer enabled on the active user profile, this SO will now print to that printer.
If you navigate to the Delivery or an OUT transfer and use the Print action, you can then select an option that will print a label with the related information, be it a Picking Operations slip or a Delivery Slip.