Hibou Odoo Suite: Inventory Modules: Golden State Overnight (GSO) Shipping
Repository Versions:
Modules:
OPL-1
Purpose
This documentation covers the installation, configuration, and functionality of Hibou's Golden State Overnight Shipping module for Odoo.
Getting Started
The first step is to install the module. To do so, navigate to the Apps application..
Once there, remove the 'Apps' filter, then search for 'Golden State Overnight (gso.com) Shipping'. When you're ready, click install.

Good to Know!
The Golden State Overnight (gso.com) Shipping module requires the Delivery Hibou module. However, if you do not already have this module installed, Odoo will install it for you during this module's installation.
Process
To get started, navigate to the Inventory app.
Once there, go to Configuration > Delivery > shipping Methods.
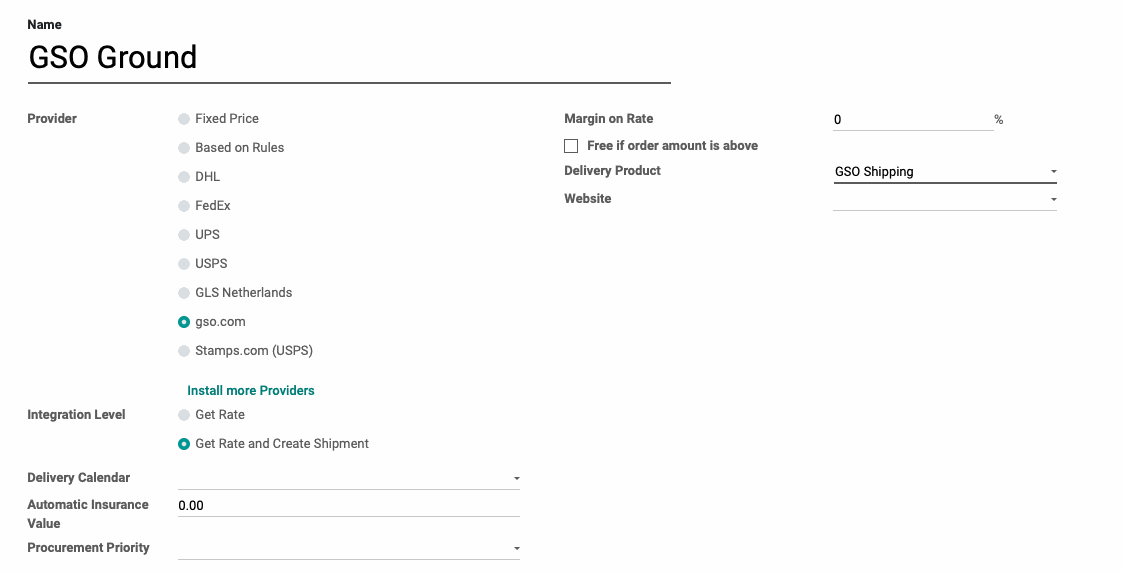
Here you will see all of your existing delivery methods that will be used to calculate shipping rates on your deliveries. Click Create and complete the following form fields:
Name: The name of the shipping method.
Active: When checked, this shipping method will be available to use in Odoo.
Provider: Select 'gso.com'.
Integration Level
Get Rate: Choose this option if you only want to fetch rates to add shipping charges onto sale orders.
Get rate and Create Shipment: Choose this option if you also want to print shipping labels in addition to getting a shipping rate.
Automatic Insurance Value: To add a set insurance value automatically, enter that value here.
Procurement Priority: Enter the priority for this carrier. You selection will affect pickings and procurements related to this carrier.
Invoicing Policy
Estimated cost: When selected, the customer will be invoiced the estimated cost of shipping.
Real cost: When selected, the customer will be invoiced the actual cost of shipping and it will be updated on the Sale Order after the delivery.
Margin on Rate: This percentage will be added to the shipping price.
Free if order amount is above: Select this to enable free shipping over a specific amount. When checked, a new field will display where you'll enter the amount in your respective currency.
Delivery Product: Indicate which product should be associated with this carrier method.
Website: To use this method on one website only, select that site here.
Under the gso.com Configuration tab:
gso.com Username: Enter the username provided by gso.com.
gso.com Password: Enter the password provided by gso.com.
gso.com Account Number: Enter the account number provided by gso.com.

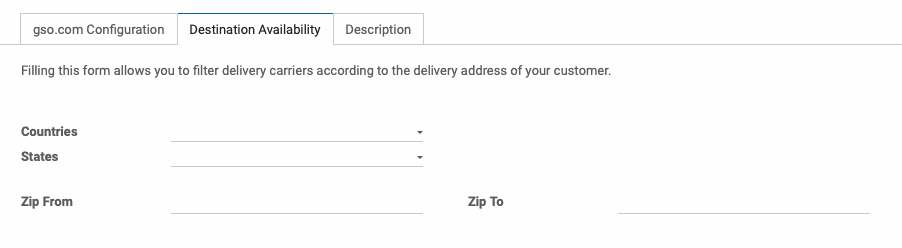
Under the Description tab, you can add text that will display on the ecommerce and online quotations.

When you're ready, click Save.
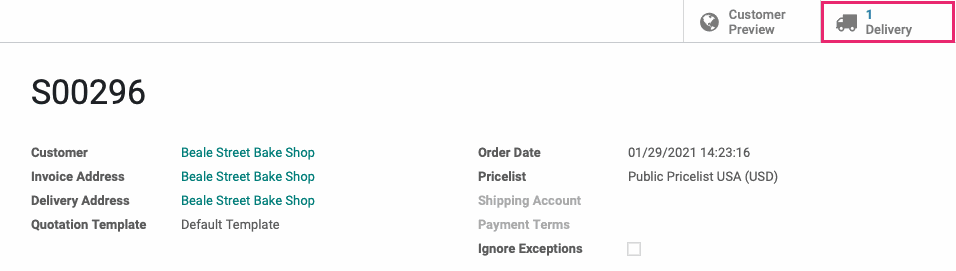
Selecting GSO on Sale Orders

Once you have added a customer and your desired products to the sale order, select click Add Shipping.
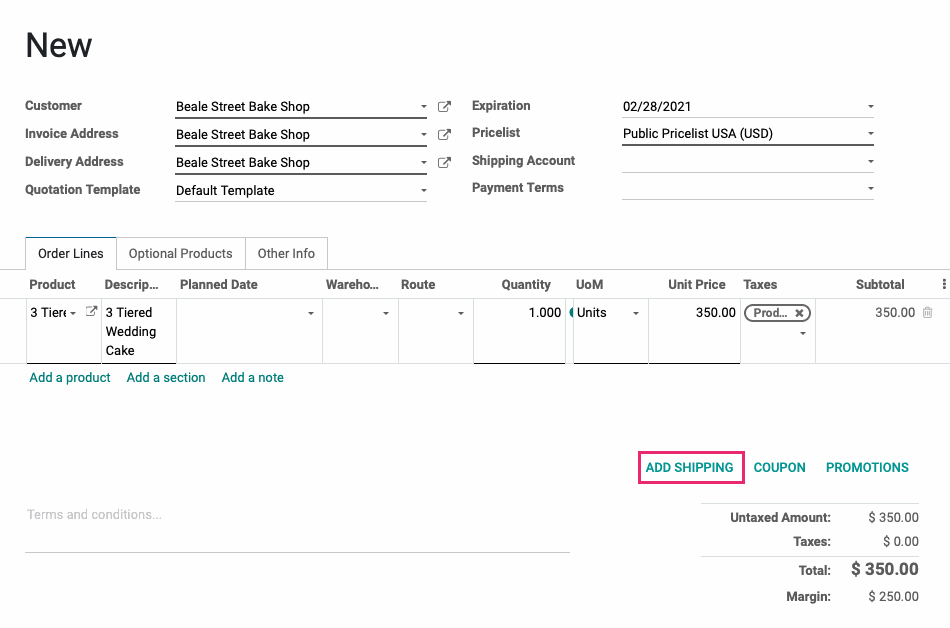
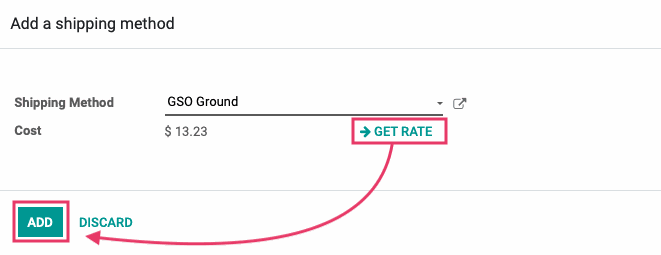
This opens a modal window where you'll select the GSO service you just configured as your Shipping Method, then click Get Rate. Once a rate has been retrieved, click Add.
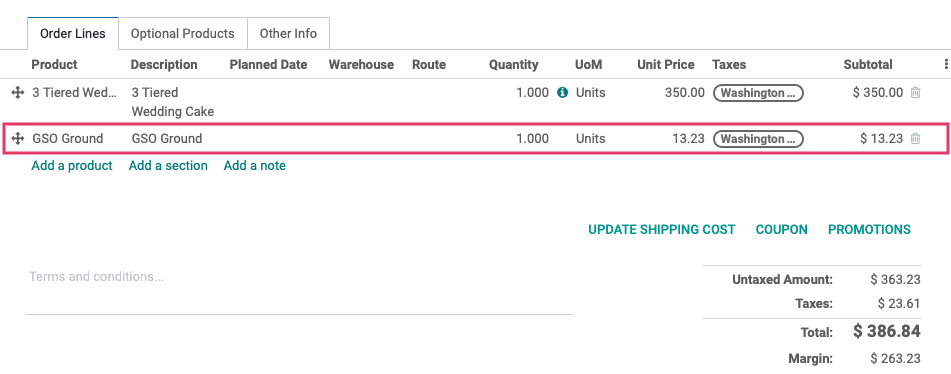
You will see the delivery product associated with the delivery method appear on the sale order along with the delivery cost that you fetched from GSO.
When you're ready, save the order then confirm.
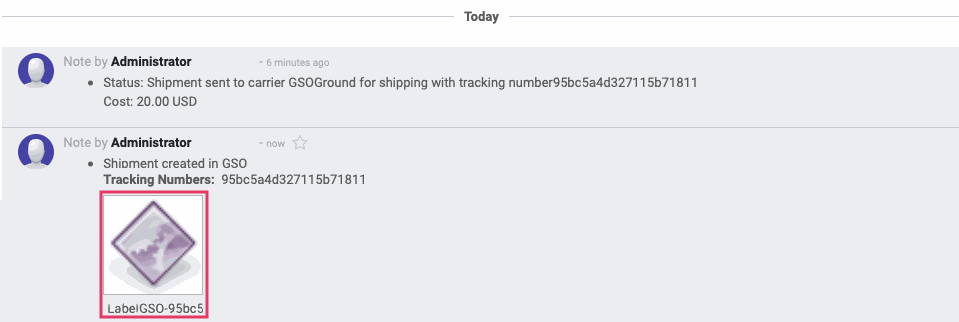
Printing a Shipping Label and Generating a Tracking Number
Once your quotation has been confirmed, click the Delivery smart button.
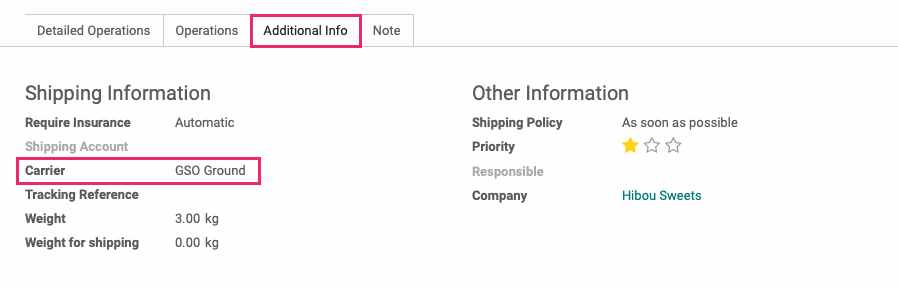
Once there, navigate to the Additional Info tab. In the Carrier field, the GSO service type connected to your delivery method should be inputted automatically.
Once your delivery is ready to ship, click Validate the deliver order. You will see the tracking reference (your tracking number) added under the Delivery Information section.
![]()
Additionally, a shipping label will be added to the chatter that you can download and print.