Hibou Odoo Suite: Payroll Modules: Payslip Batch Date
Repository Versions:
Modules:
AGPL-3
Purpose
This document will walk you through how to install and use the Payslip Batch Date Hibou Odoo Suite module. This module allows users to overwrite the date on their payslip batches so that the default date for the payslips will not be the end date of the period.
The module also allows you to edit both the payslip batch date and the journal that the payslips will be posted to for any payslips in the batch that are still in a draft state.
Getting Started
The first step is installing the module. To do so, navigate to the Apps application.
Once there, remove the 'Apps' filter, then search for 'Payslip Batch Date'. When ready, click INSTALL.

Good to Know!
This module requires the Payroll application. However, if you do not already have this application installed, Odoo will install it for you during this module's installation.
Process
To get started, navigate to the Payroll app.
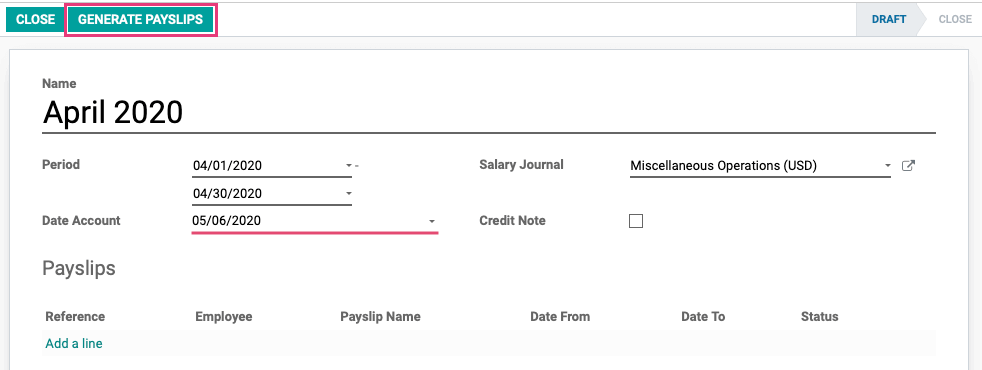
Once there, click Payslip Batches. To start a new payslip batch, click Create.
You'll now see the new Payslip batch screen. Complete the form as follows:
Name: Enter the name of the batch.
Period: Select the start and end date for the payslips to generate. This will auto-populate with the current period.
Date Account: This is the new field added by this module. Enter the date the payslips will be marked as validated. If you leave this field blank, it will default to the last day of the pay period.
Salary Journal: Select the journal where your salary payments are recorded.
Credit Note: Mark this box if these payslips are credits of other payslips.
When you've completed these fields, click Generate Payslips.
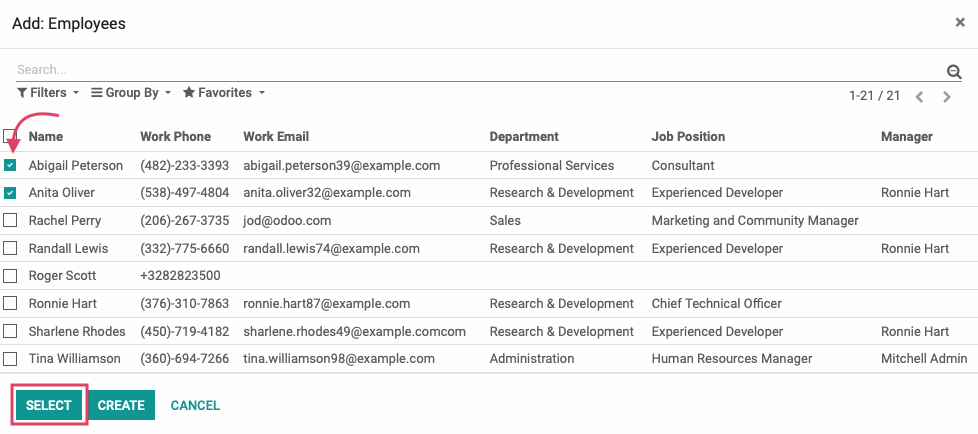
This brings up a modal window where you will select the employees to generate payslips for. To do so, click Add a Line.
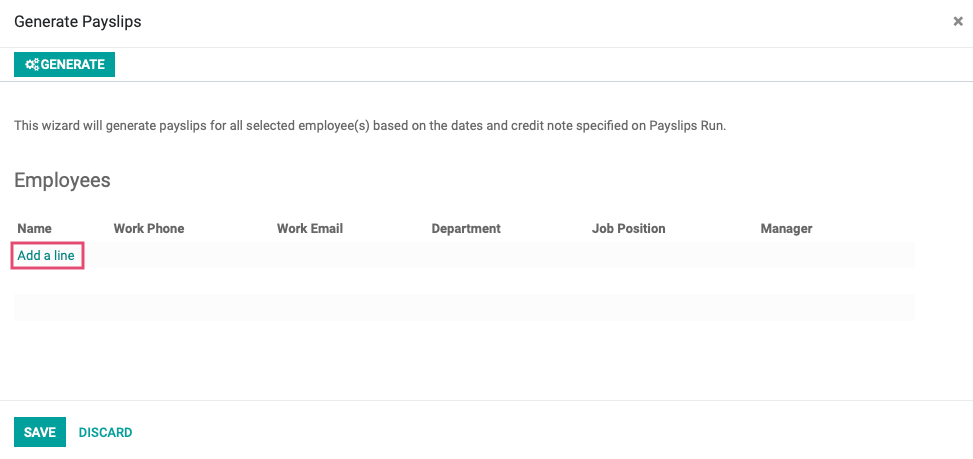
This brings up another modal window where you'll select individual employees to add. When you've selected the employees to add, click Select to return to the previous modal window.
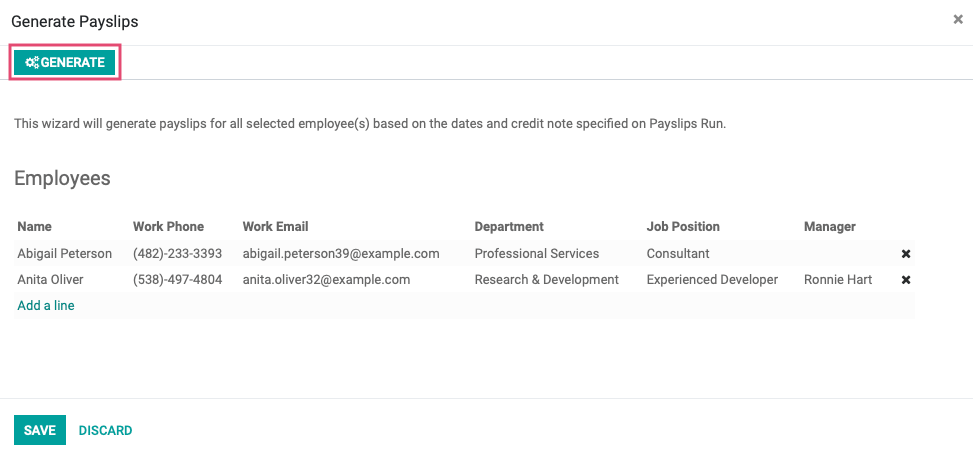
Once you have all of your required employees selected, hit the GENERATE button on the top-left of the modal. This will bring you back to the initial Payslips Batches form.
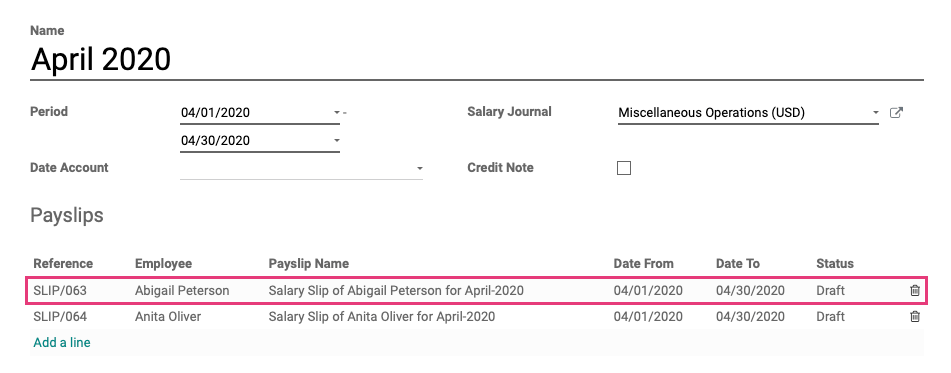
From the Payslips list, select any of the draft payslip entries.
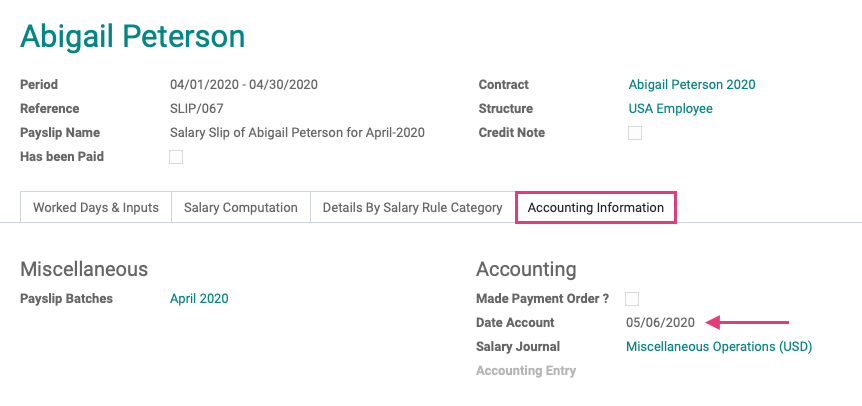
In the modal window that opens, navigate to the Accounting Information tab and you will see the date that you entered into the Date Account field listed.
Good to Know!
While any payslips are in a draft state, changing the Date Account and the Journal fields for the batch will automatically change the date and the journal that the remaining payslips will be posted to.
You also have the option to change the Date Account field or the Journal for each payslip individually.