Hibou Odoo Suite: Human Resources (HR) Modules: Hibou Commissions: Hibou Commissions Workflow
Purpose
This document covers the Hibou Commissions menu in the Sales application. Be sure to go through Hibou Commissions configuration before proceeding with this document.
In this document, we will also illustrate a commissions workflow through an example.
Process
To get started, navigate to the Accounting app.
Automatic Commissions
Once there, go to COMMISSIONS > Commissions. Here's our scenario:
Our employee, Hedwig, earns a 10% commission.
We've configured Hedwigs coach, Ella, to earn a 5% commission off Hedwig's sales.
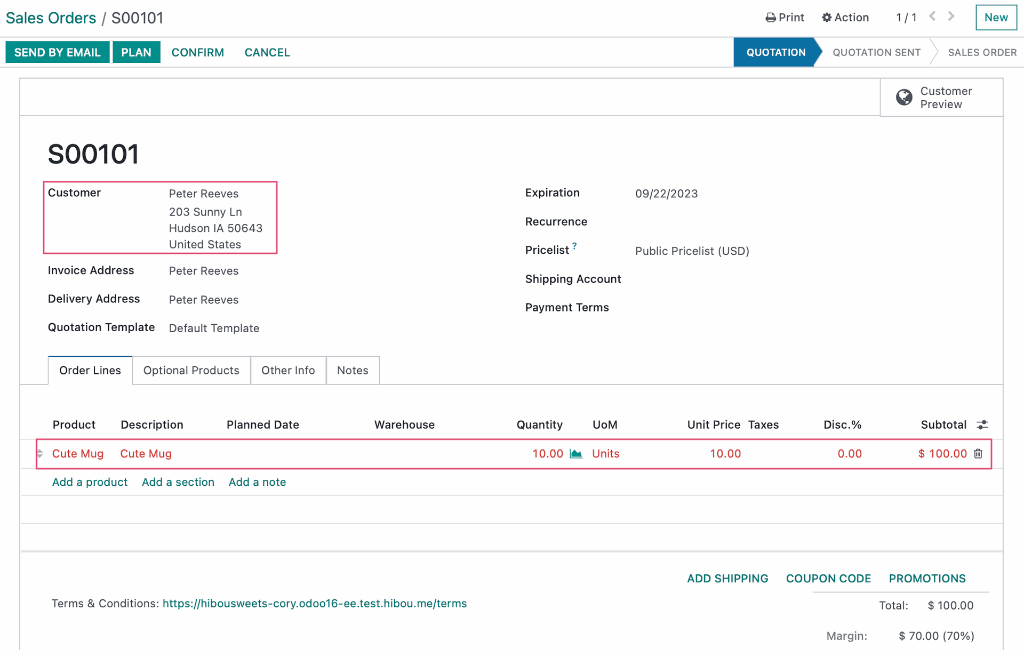
Let's create an invoice on Sale Order with Hedwig as the salesperson.
Go to Orders > Orders and click NEW. Select a customer and add some products.
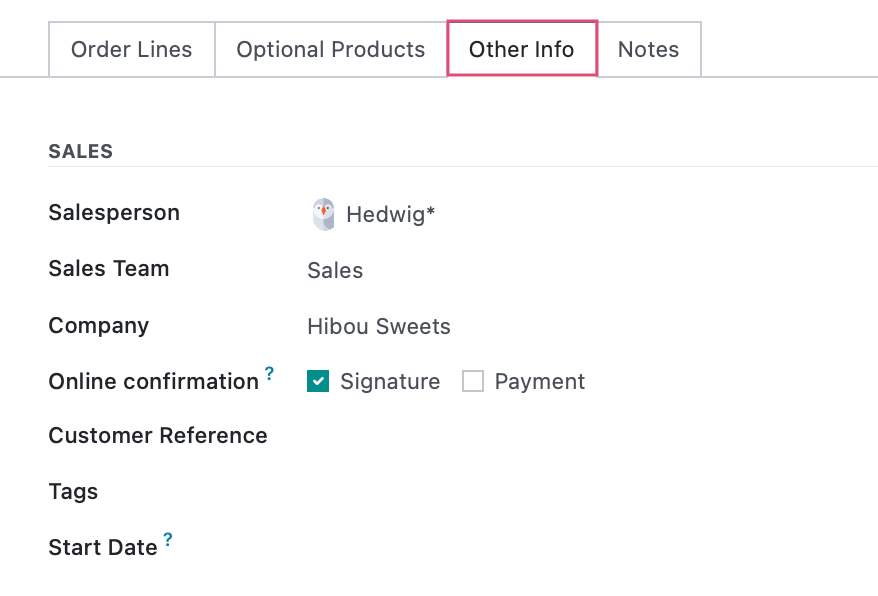
Under the Other Info tab, we'll set the Salesperson as Hedwig.
Good to Know!
Employee Isn't a Salesperson Option?
Remember, an employee must also be a database user in order to be added as a Salesperson.
Save and then click Confirm.
Once confirmed, click Create Invoice. (Note that if the Create Invoice button isn't a solid color, you'll need to first deliver the products.)

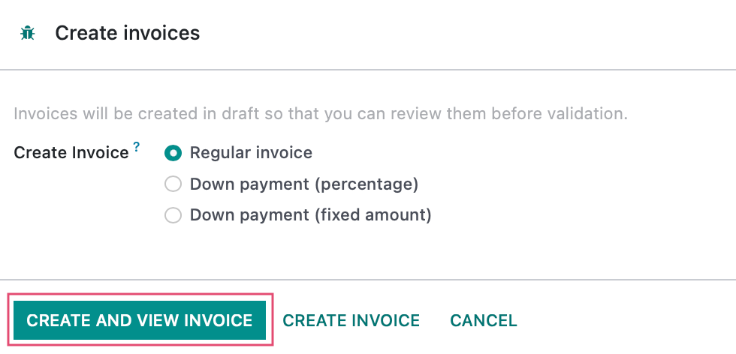
On the modal window, select 'Regular Invoice', then click Create and View Invoice.
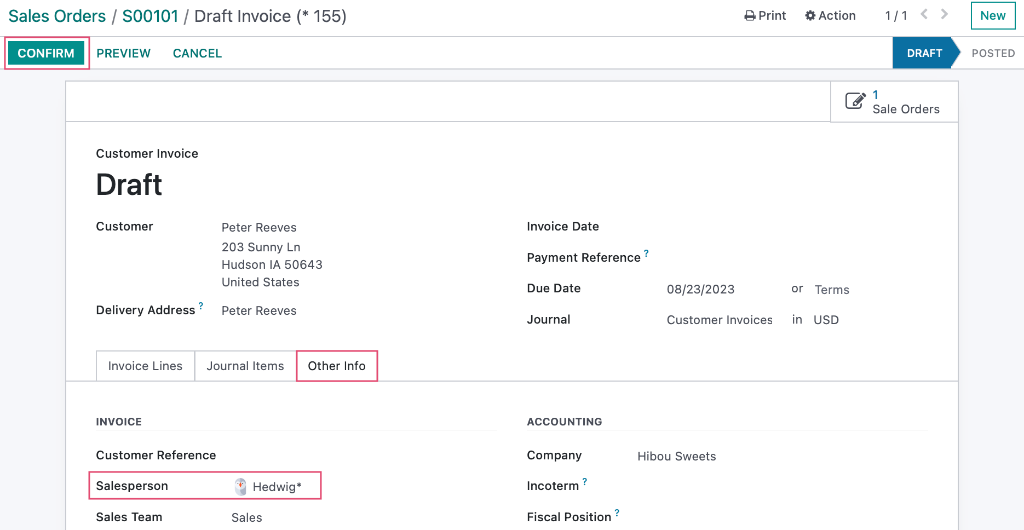
Under the Other Info tab of the invoice, confirm the Salesperson is correct, then click confirm.
We'll now see the Commissions smart button. If you click that button, you'll see there are two commissions in the 'New' state.

We can see one for Ella for $5 (5% of the Invoice total) and the other for Hedwig for $10 (10% of the Invoice Total).

Use the breadcrumbs to navigate back to the invoice.

Commissions are marked as confirmed when an invoice is paid, so next, Register Payment.
On the now paid invoice, click the Commissions smart button again.
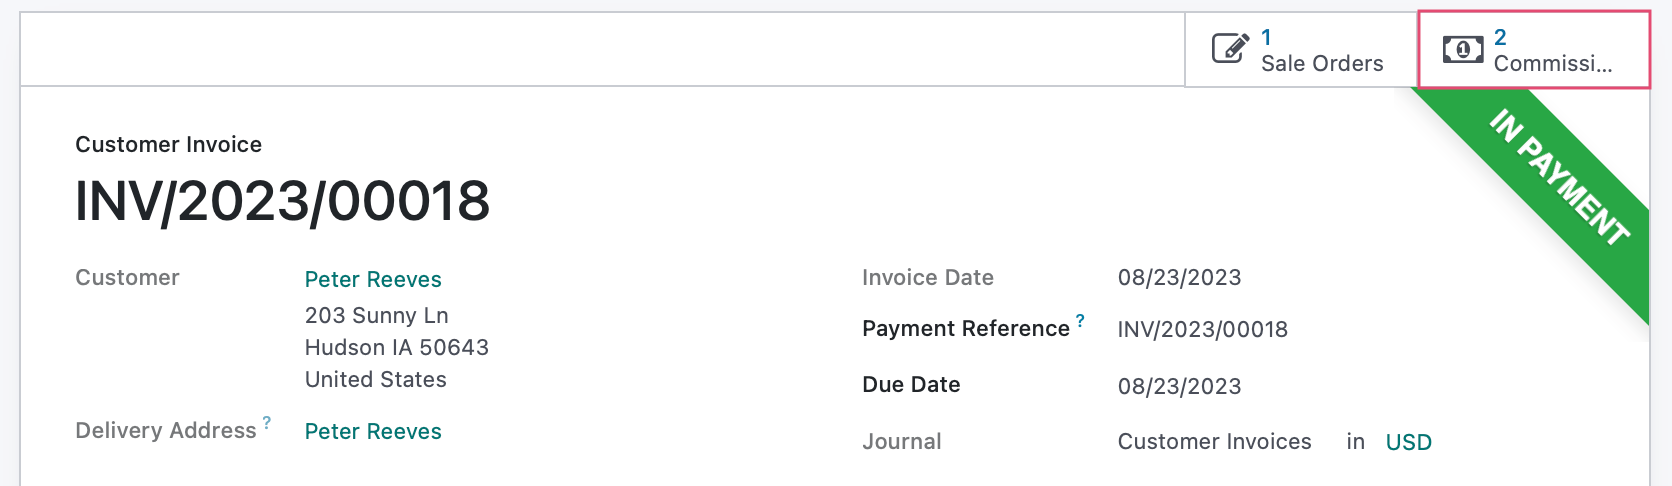
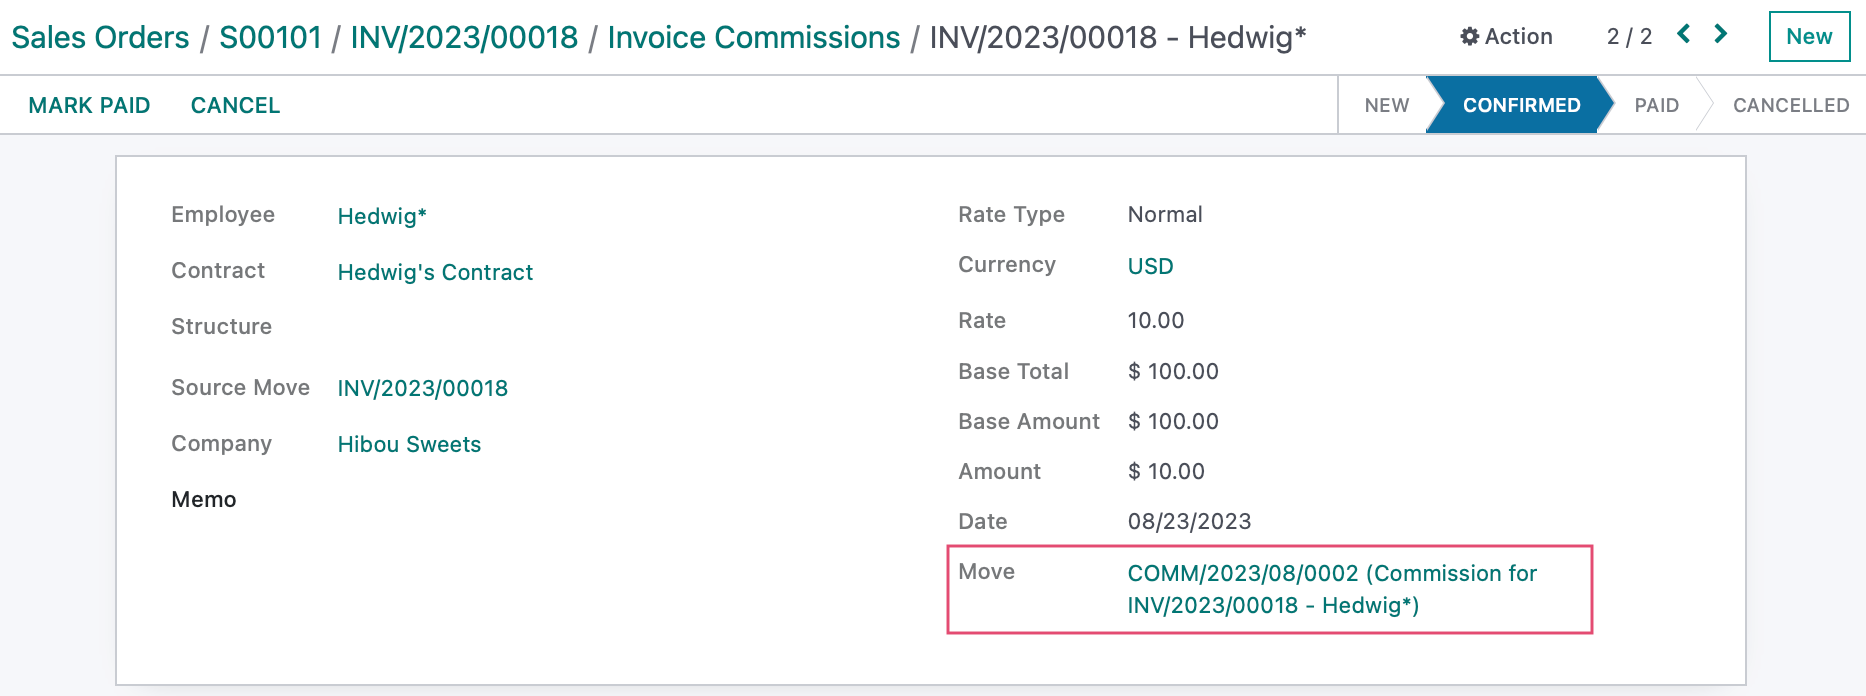
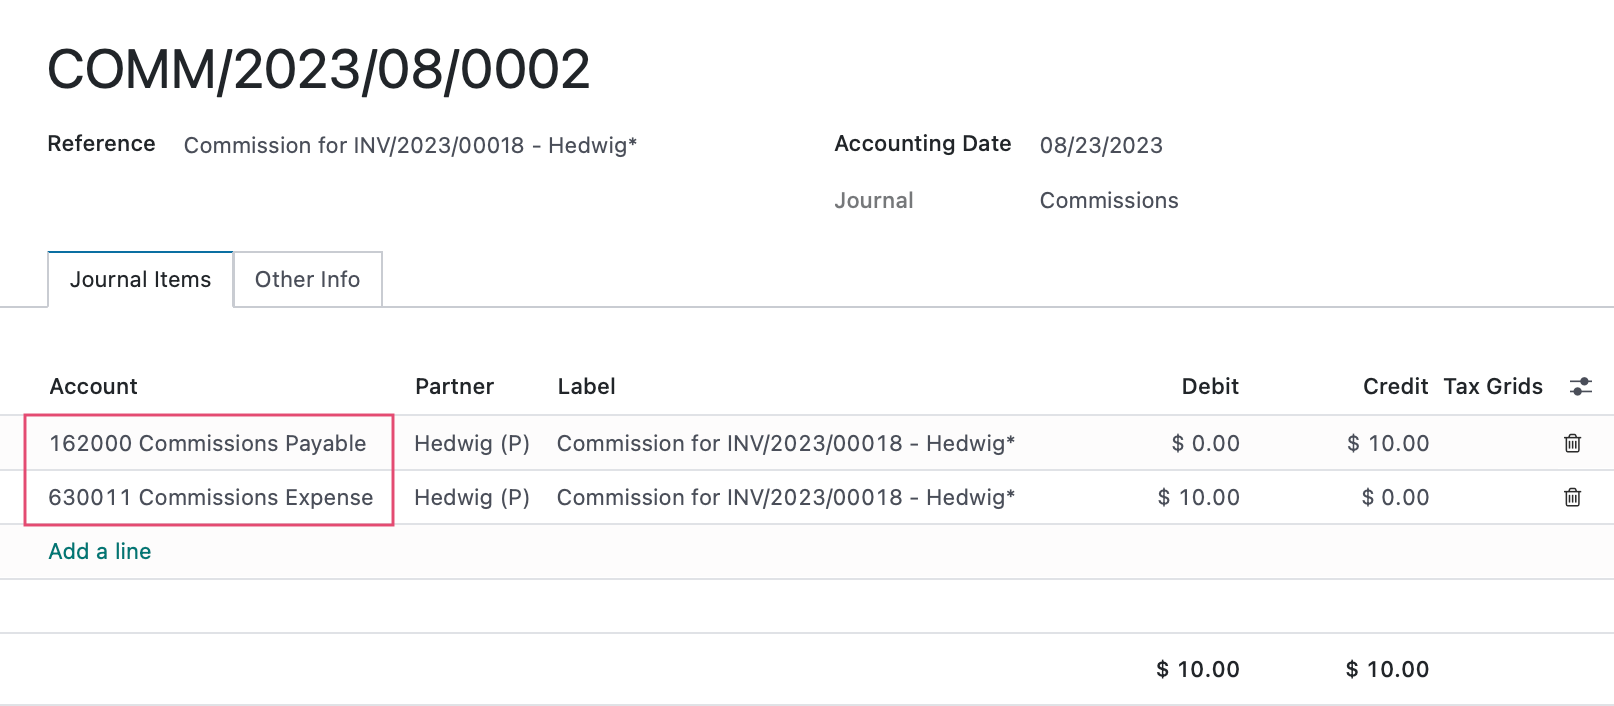
Here we see our two confirmed commissions. Let's click into Hedwig's commission payment for more details.

The link in the Move field takes you to the journal entries in Accounts/Commissions payable for this commission.
Refunded Invoices
Let's take a look at what happens when a credit note is issued on a sale order payment that generated commissions.
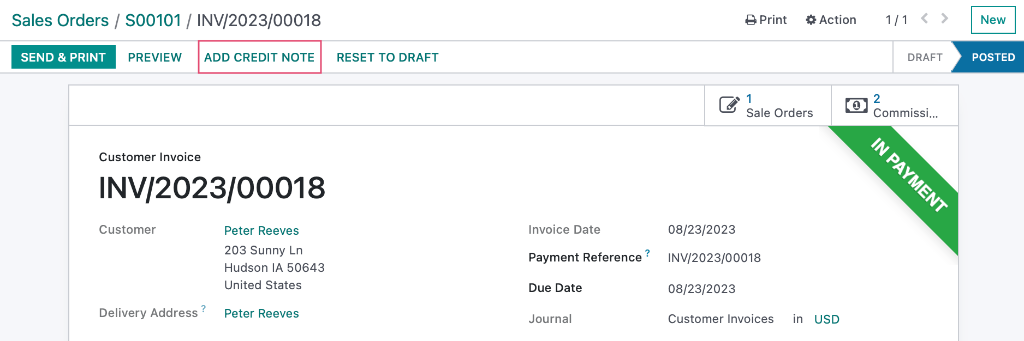
Use the breadcrumbs to navigate back to the invoice.

Click Add Credit Note.
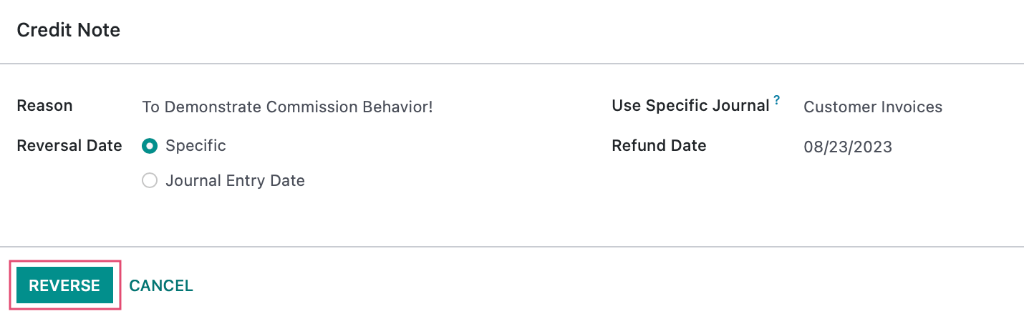
Enter a reason for the refund, then click Reverse.
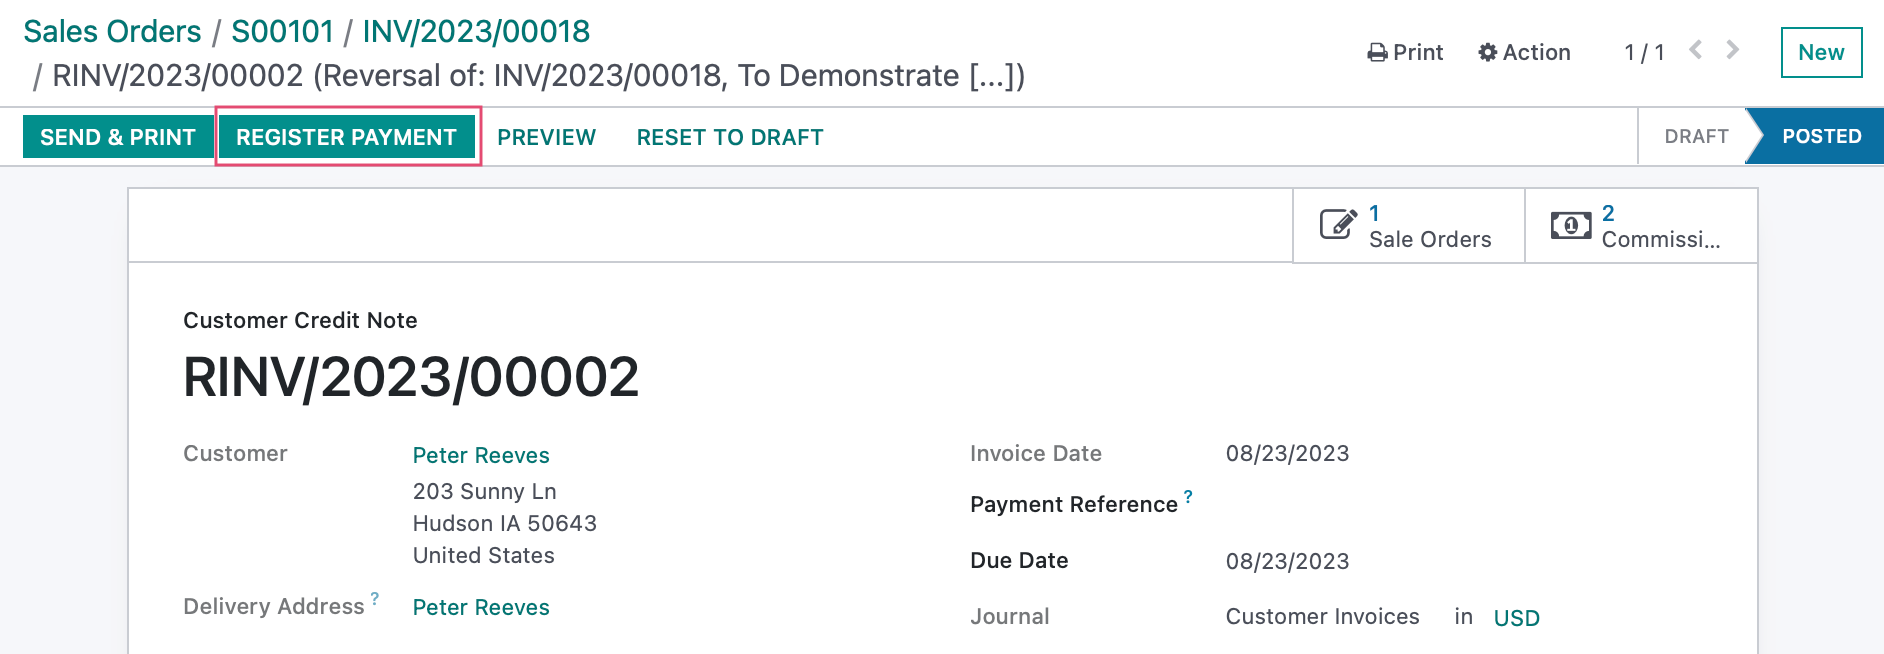
On the draft credit note, click confirm.

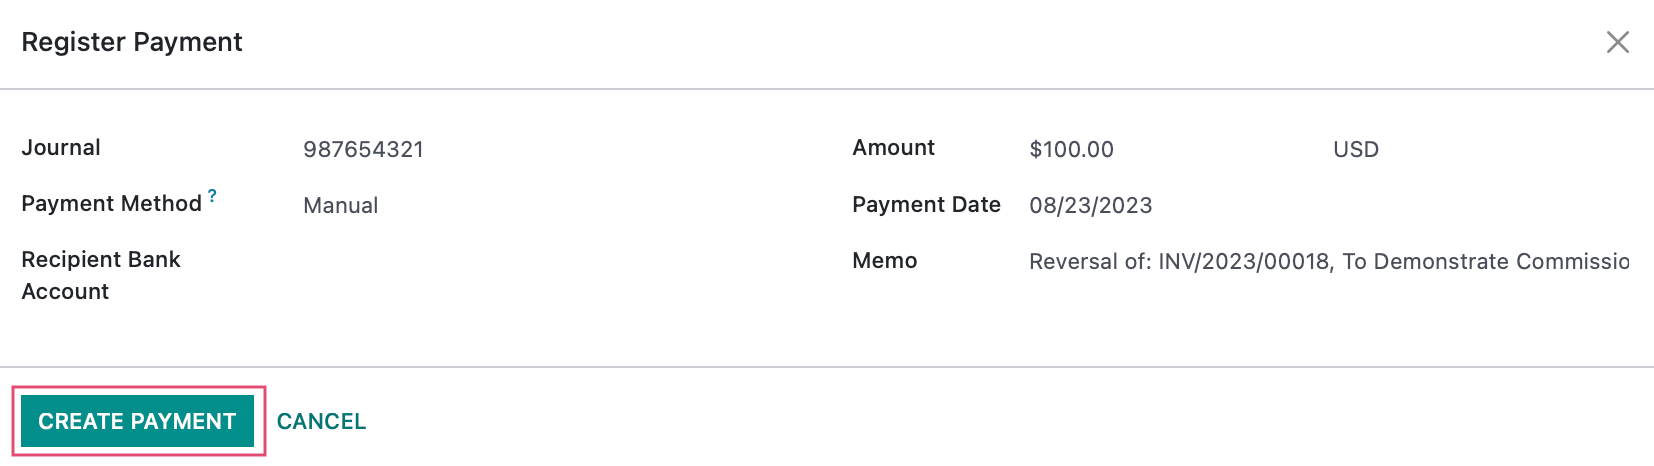
Click register payment. Note that we also now have our Commission smart button and clicking that will allow you to see the reverse entries for the commissions that were generated when the original invoice was paid.
Then click Create Payment to confirm the refund.
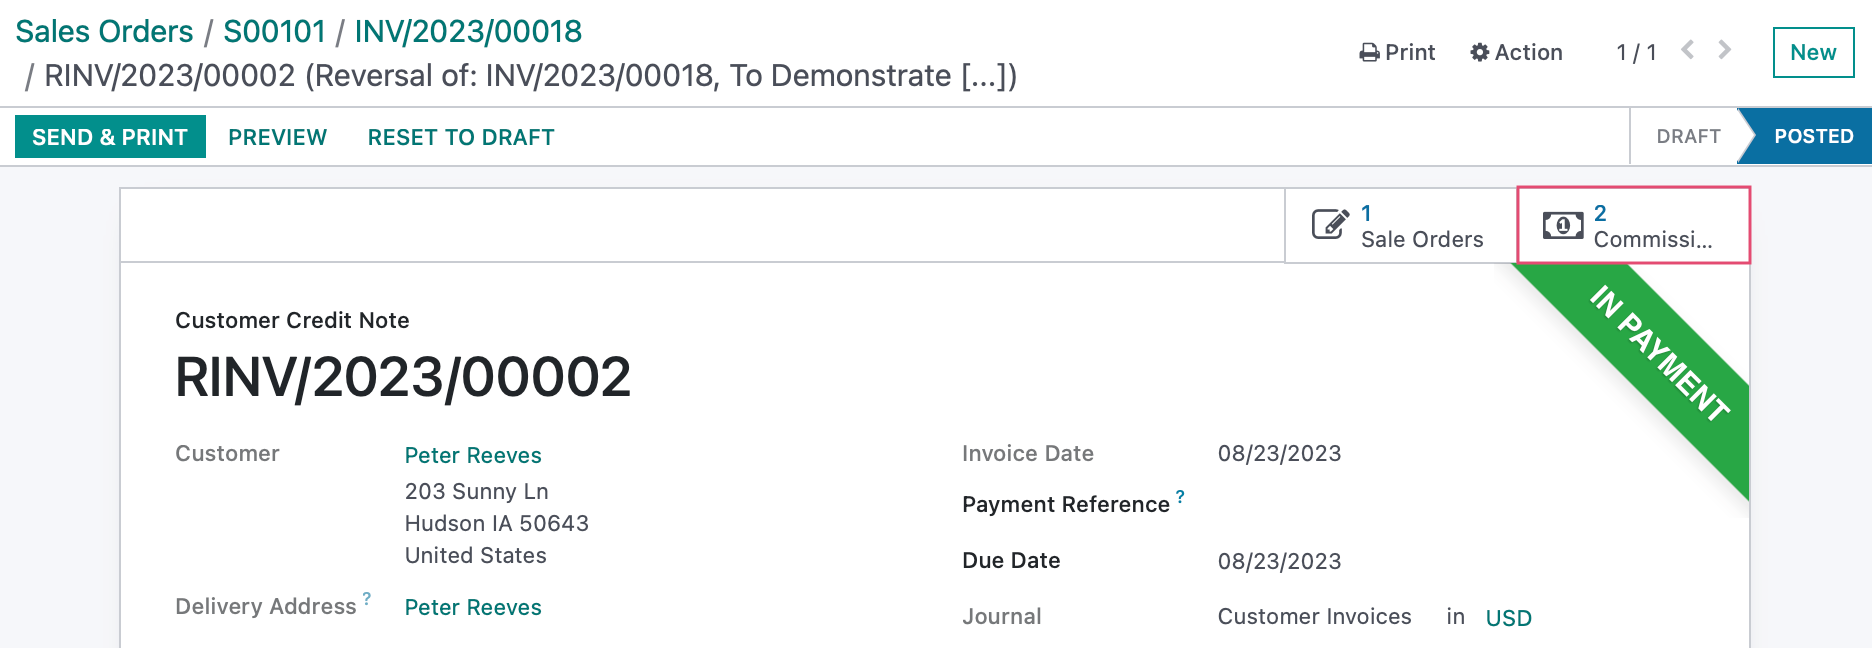
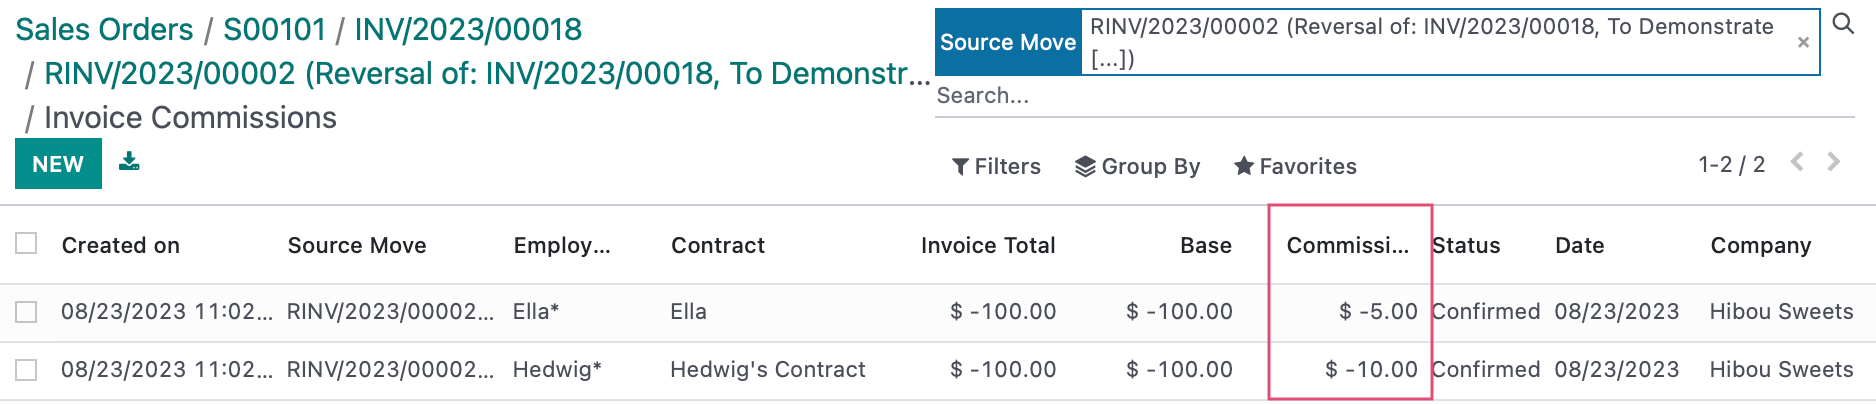
Things brings you to the refunded invoice. Click the Commissions smart button to see the reverse commissions.
Creating Manual Commissions
Within the Sales app, go to COMISSIONS > COMMISSIONS the click NEW. Complete the form as follows:
Employee: Select the employee earning the commission.
Contract: The contract for the selected employee. This informs the rate, when Rate Type is set to Normal or Admin. This is not a required field, though filling it in reduces the amount of data entry.
Structure: To utilize an existing commission structure, select it here. Alternatively, you can create a new structure or leave this field empty.
Source Move: The document associated with the the commission. This is not a required field.
Company: This field appears if you are using multiple companies and automatically is set to the current company.
Memo: A notes field to reference the reason for the commission. This is not a required field and becomes read-only when the commission is in the Paid state.
Rate Type: This indicates if you will be using the Commission % from the contract, the Admin Commission % from the contract, or will be manually entering all amounts.
Normal: Commission % from the contract
Admin: Admin Commission % from the contract
Structure: A commission structure
Manual: Manually entering all amounts
Rate: This is automatically filled in based on the contract, if selected. If a contract is not selected, the rate can be set manually.
Base Total: If an invoice is selected, this will be the total on the selected invoice. If creating a commission manually, there is no need to enter a number into this field.
Base Amount: The amount from which the commission will be calculated. If an invoice is selected, this will be the margin on the selected invoice. If no invoice is selected, this should be filled in manually for calculation of the commission total.
- Note that this can be a negative value to reduce the amount of commissions paid to an employee (for example, if shipping was not charged and the salesperson is responsible for that difference).
Amount: The commission the salesperson receives. This is a computed field, based on the Rate, base Total, and Base Amount inputs.
When you're ready, save and then Confirm.
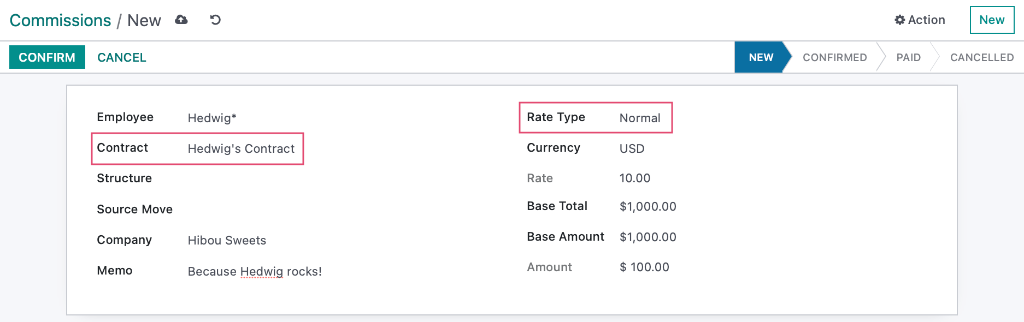
Normal Rate Type
Below is an example of a manual commission created using the Normal Rate Type, which uses the commission rate set on this employee's contract.
Manual Rate Type
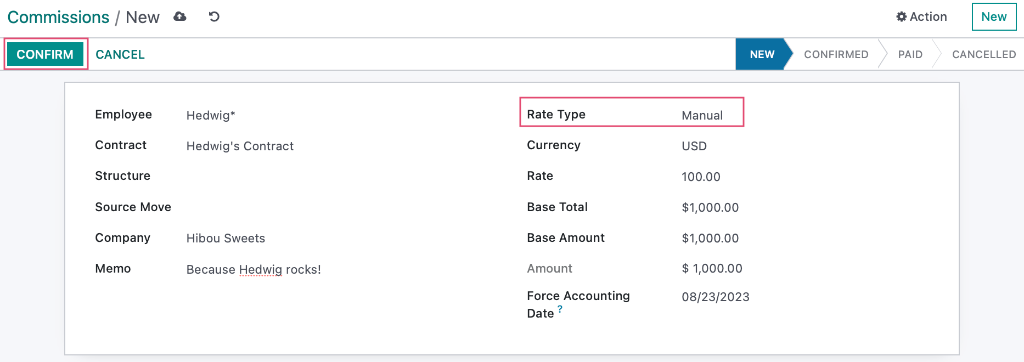
Below is an example of a manual commission created using the Manual Rate Type. Note a few things that are different when the Rate Type is set to Manual.
Rate is automatically set to 100 on a Manual Rate Type, requiring only the Base Amount to be entered to perform calculations.
You'll also see the Force Accounting Date field. Entering a date here will override the default date.
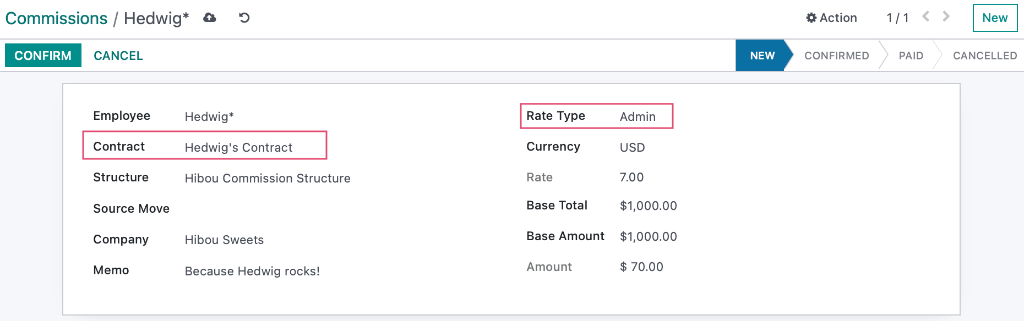
Admin Rate Type
Below is an example of an admin commission created using the Admin Rate Type. Note that the Rate is set to 7.00%, which is the selected Admin Commission rate for this employee set on their contract.
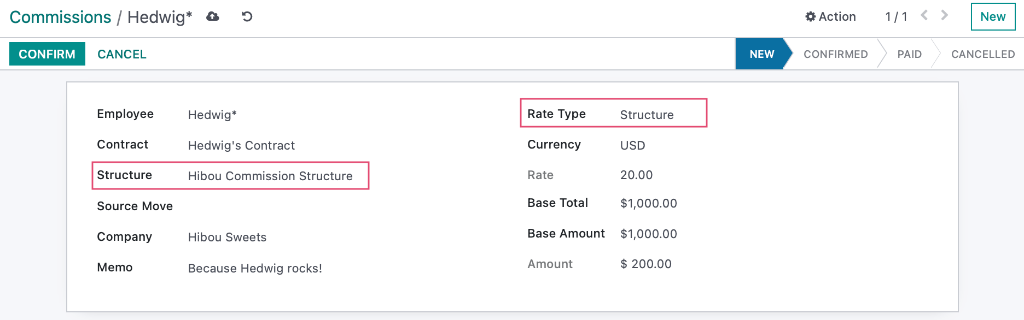
Structure Rate Type
Below is an example of a manual commission created using the Structure Rate Type. Note that the Rate is set to 7.50%, which is the selected Commission Structure rate for this employee.
Once you've created your commission entry manually, be sure to click Confirm.
Registering Payment on Commissions
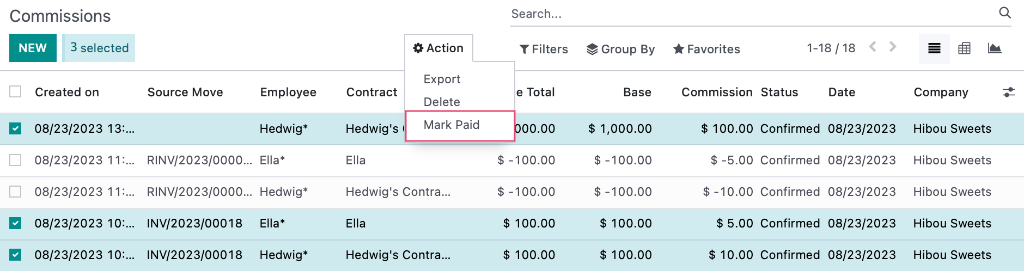
A commission will be moved to the Paid state when the MARK PAID button is clicked

You can also move multiple commissions to the Paid state by selecting them from the Commissions tree view and clicking Action > Mark Paid.
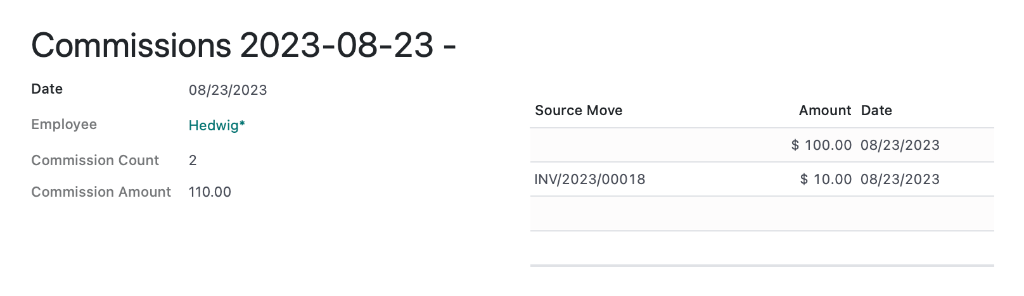
Marking as paid will redirect you to a Commissions Payments list view, which displays the Commission Payment objects. These show how many commissions were grouped into a single payment and what the total amount was. You can click on one to view more information.

Name: This includes the date of the first commission within the group and the last commission within the group.
Date: The date the commissions were marked as Paid.
Commission Count: The number of commissions paid out.
Commission Amount: The amount of the commissions paid out.
A list of the commissions along with the associated invoice (if applicable), the amount and the date.