Hibou Odoo Suite: Human Resources (HR) Modules: HR Holidays Accrual
Purpose
The purpose of this documentation is to outline the use case and processes associated with Hibou's HR Holidays Accrual module for Odoo.
HR Holidays Accrual allows you to grant leave allocations by simply adding a tag to an employee, which makes employee leave allocation easier than ever.
Getting Started
First thing's first, we want to install the module! Navigate to the Apps application and search for 'HR Holidays Accrual'. When ready, click Install .

Good to Know!
This module requires the HR Holidays module. However, if you do not already have this module installed, Odoo will install it for you during this module's installation!
Processes
To get started, navigate to the Leaves application.
Creating a New Leave Allocation
Once there, click My Leaves and then Allocation Request.
This will bring you to a list view of allocation requests. Create a new Allocation by clicking CREATE.
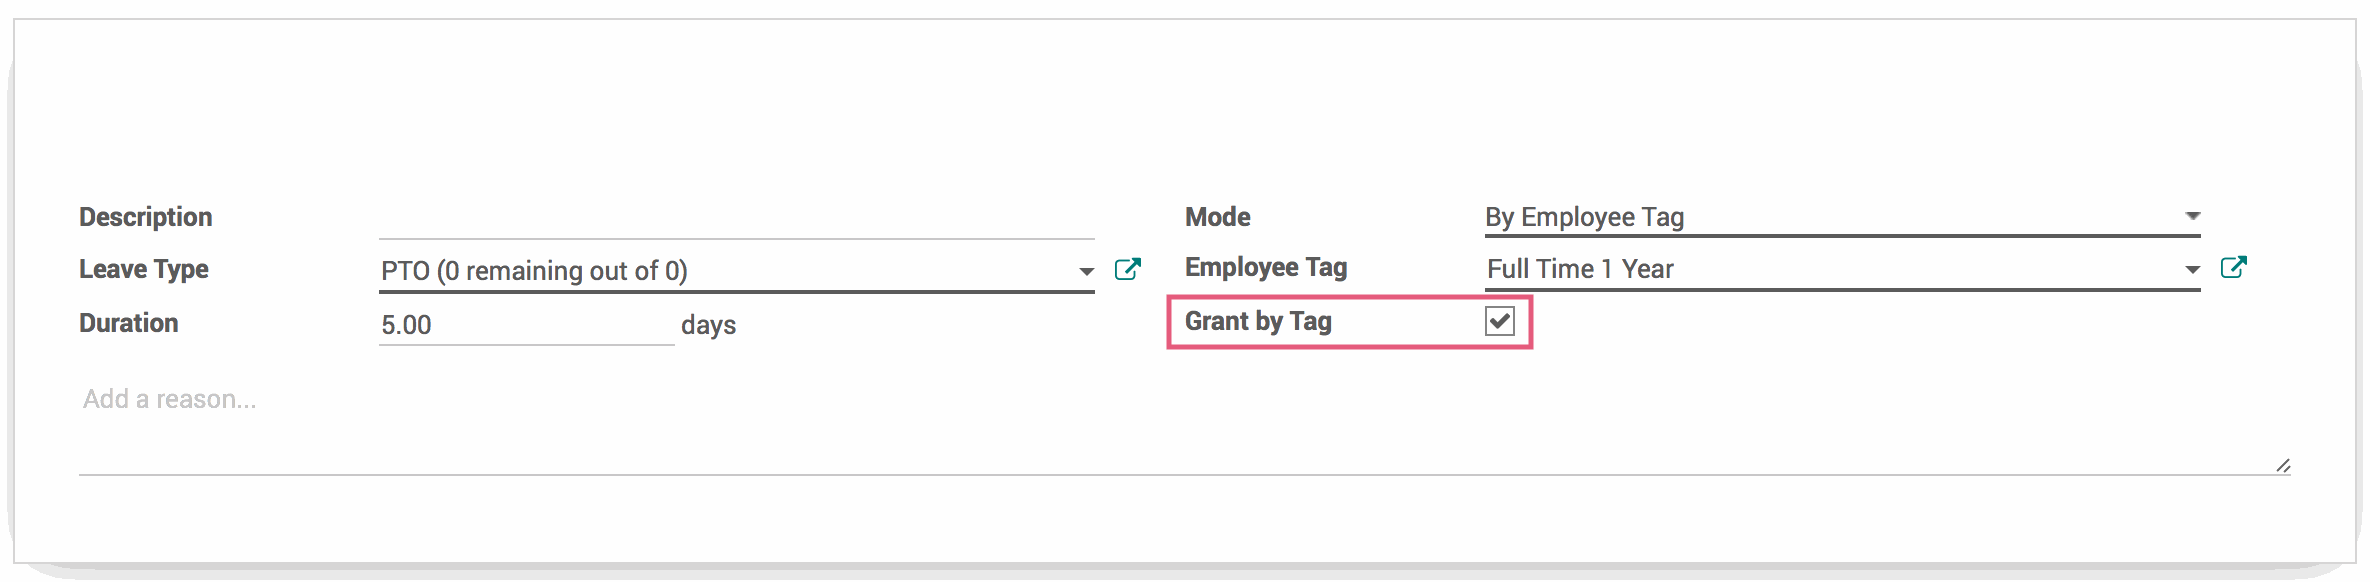
Here you will see the Allocation Request form. This is where we're going to create the Leave Allocation we wish to assign by using an Employee Tag. Fill in the following information:
Description: A description of the leave allocation. This is not a required field.
Leave Type: Choose a leave type from the dropdown menu.
Duration: Fill in the number of days that will be allocated.
Mode: Select 'By Employee Tag' from the dropdown menu. After making this selection, the 'Employee' dropdown will change to an 'Employee Tag' dropdown. Create a new tag by clicking CREATE AND EDIT from the dropdown menu. Enter the desired name for your new tag and hit SAVE .
Grant by Tag: Select this checkbox.
When ready, hit SAVE followed by APPROVE.
Important!
Be careful when using existing tags! If there is an existing employee with this tag, they will recieve the allocation outright once it has been approved!
Tagging an Employee to Grant the Leave Allocation
Navigate to the Employees application.

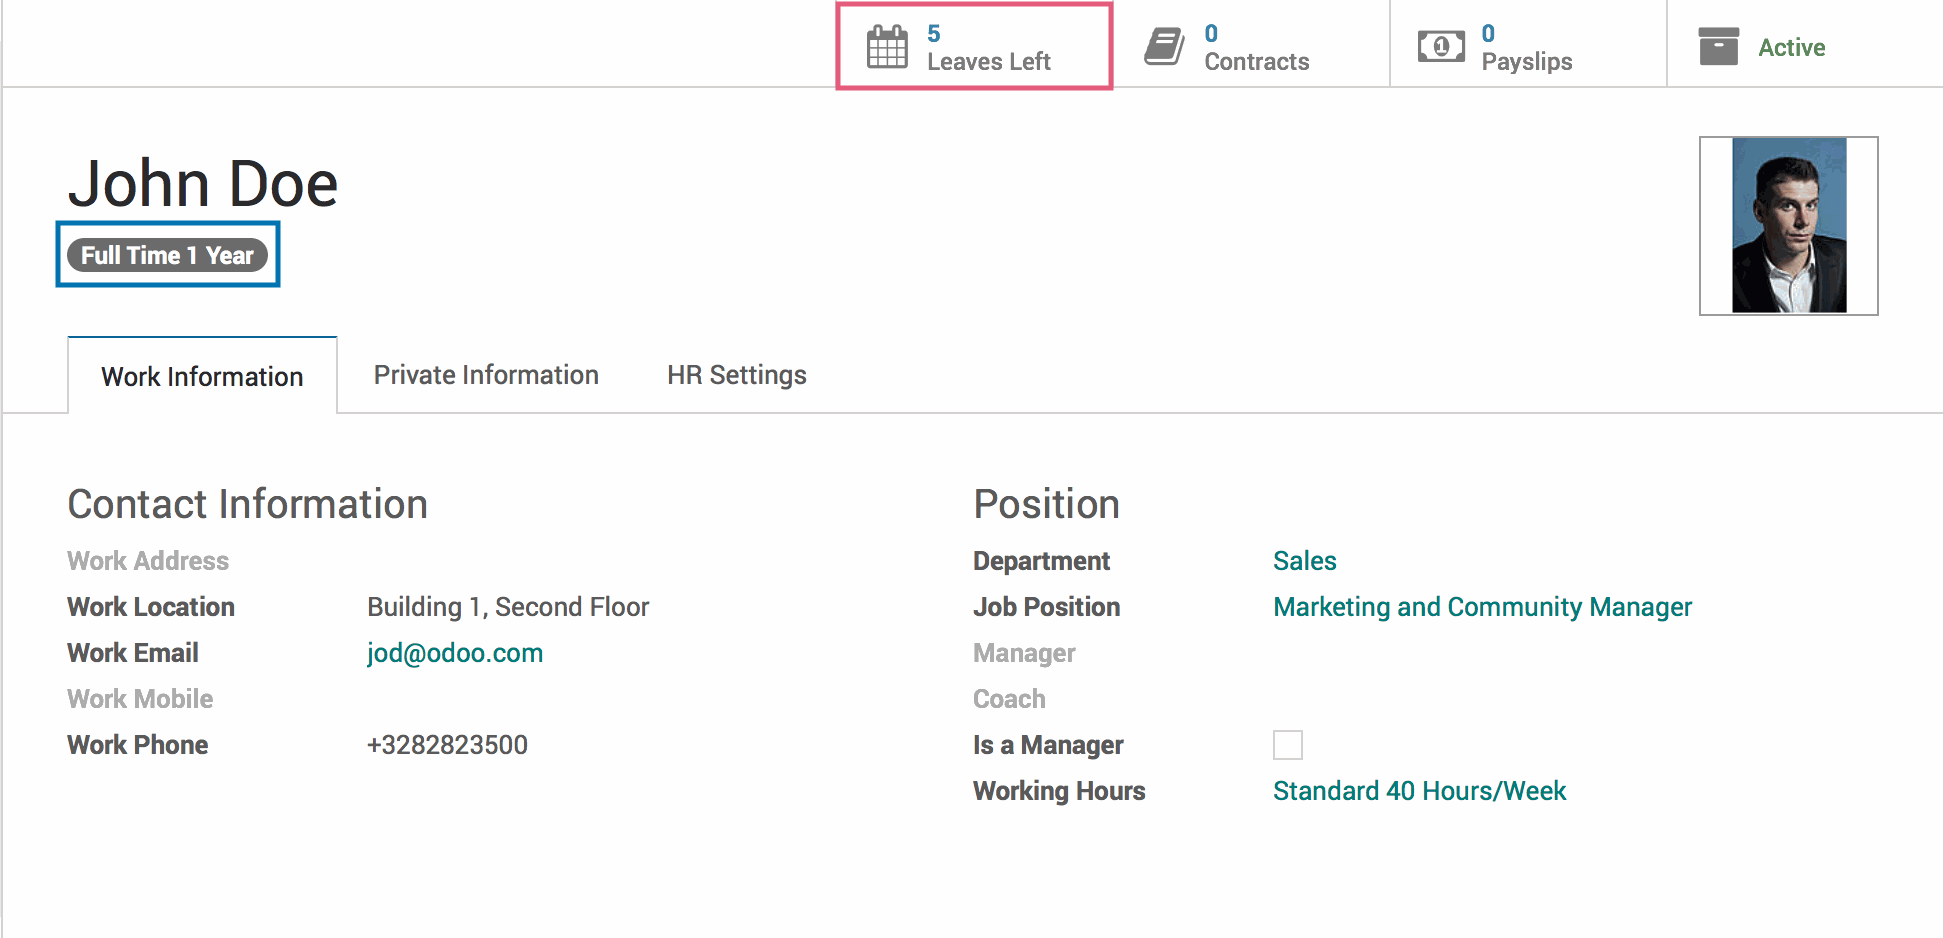
Click on the Employee you'd like to grant the newly created Leave Allocation to. Once in the Employee form view, hit Edit. Select the recently created tag from the dropdown menu underneath the 'Name' field. Once the tag has been applied, hit Save. In the Leaves Left smart button, above the employee information, you will see the new Leave Allocation amount!
The tag can be reused as many times as needed, so you may tag all of the Employees that require the same Leave Allocation.
Technical
This module adds a new field grant_by_tag for the `hr.holidays` model. This field acts as a flag to create a new Leave Allocation once the tag is applied to the Employee. This field is added to the Edit Holiday New view, visible only when creating a leave allocation.