Hibou Odoo Suite: Human Resources (HR) Modules: HR Payroll Attendance
Repository Versions:
Modules:
OPL-1
Purpose
The purpose of this documentation is to outline the use case and processes associated with Hibou's Attendance on Payslips module.
The Attendance on Payslips module allows you to easily add Attendance Worked Days lines onto employee payslips.
Getting Started
To get started, navigate to the Apps application.
![]()
Once there, remove the Apps filter from the search bar and search for 'Attendance on Payslips'. Then, click Install on the module.

You will be ported back to your Odoo home screen.
Good to Know!
This module requires both the Payroll and Attendances applications. However, if you do not already have these applications installed, Odoo will install them for you during this module's installation.
Process
Next, navigate to the Employees application.
Setting up the Employee Contract
Once there, click Contracts.
This will bring you to a kanban view of all employee contracts. Select an existing contract or create one by clicking Create.
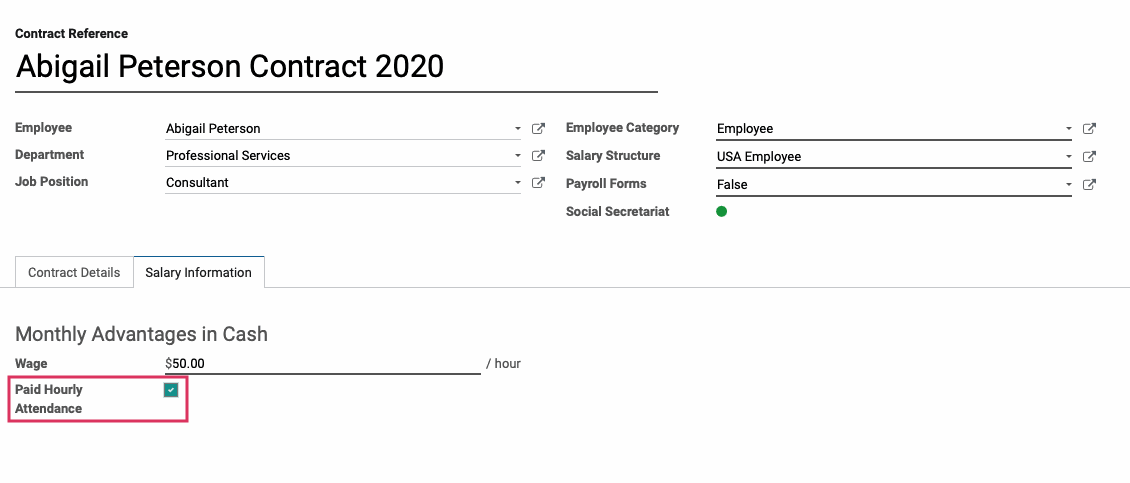
On the contract page, navigate to the Salary Information tab. There, you will see a checkbox field for Paid Hourly Attendance. Select this checkbox.
When done, click Save.
Important!
Ensure that the status of the contract is Running. A contract that is not Running cannot be used during payroll. To change this, simply click "Running" in the status bar on the contract.
Logging Attendance
We will now log an Attendance for our employee, so that it will appear on the payslip.
Navigate to the Attendances application.

Once there, click Manage Attendances > Attendances. Then, click create to create a new Attendance record.
Here, fill in the following fields:
Employee: Select the employee from the drop-down menu.
Check In: Using the drop-down menu, select the date and time of check-in.
Check Out: Using the drop-down menu, select the date and time of check-out.
When ready, click save. Repeat this process for the additional Attendances you wish to log.

Creating the Payslip
Next, navigate to the Payroll application.

Once there, create a new payslip by clicking create.
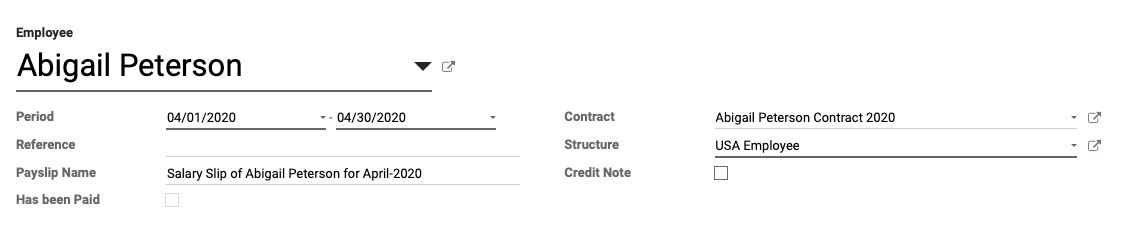
In the payslip, fill in the following fields:
Employee: Select the hourly employee to run a payslip for.
Period: Select the start and end date of the pay period.
Important!
Enter the Pay Period First
You must enter dates in both Period fields before selecting an employee because the hours worked will be entered immediately when the employee is selected, and changing dates will not alter the hours worked after that point.

Reference: Odoo will generate a reference when the record is saved, but you can create your own here.
Payslip Name: Odoo will generate a Payslip Name when an employee is selected.
Has been Paid: This checkbox indicates the payslip has already been paid.
Contract: This field will populate with the selected employee's contract.
Structure: This field will populate with the selected employee's structure, based on their contract.
Credit Note: This checkbox indicates the payslip is a refund of another payslip.
Once this information has been entered, click save. Then, click compute sheet.
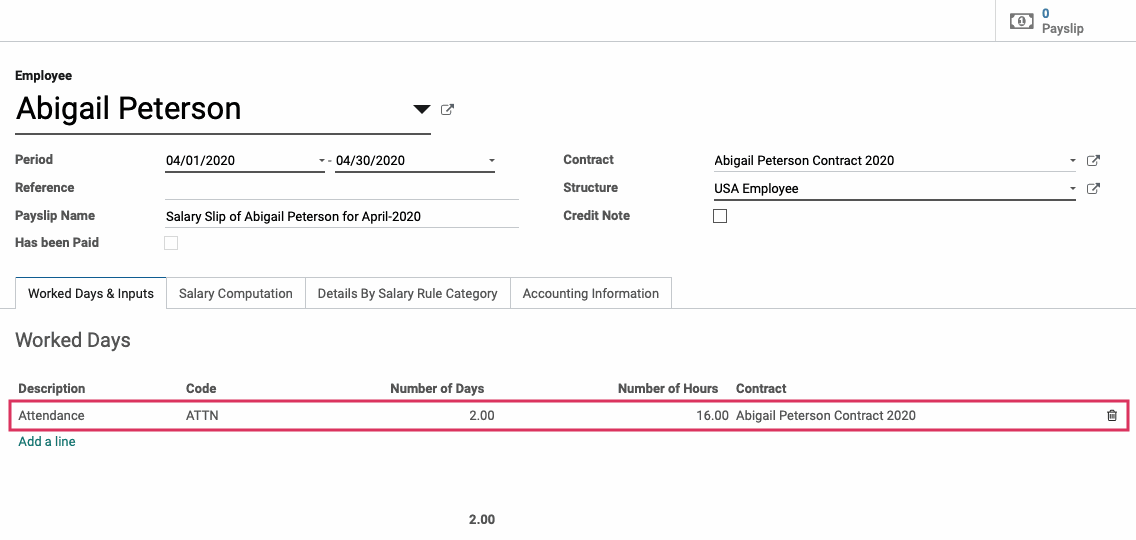
In the WORKED DAYS & INPUTS tab, you will see that a line called "Attendance" has appeared under Worked Days. It lists the Number of Days and the Number of Hours worked.