Manufacturing: Operations: Work Orders
Purpose
Work Orders are the individual steps of a Manufacturing Order as outlined in its Routing. To learn more about Routings, please review the Master Data: Routings documentation.
The purpose of this document is to show you how to find and process Work Orders within Odoo 13.
Good to Know!
Work Orders cannot be created manually. They are generated when a Manufacturing Order is created on a product that has a Bill of Materials using Routings.
Process
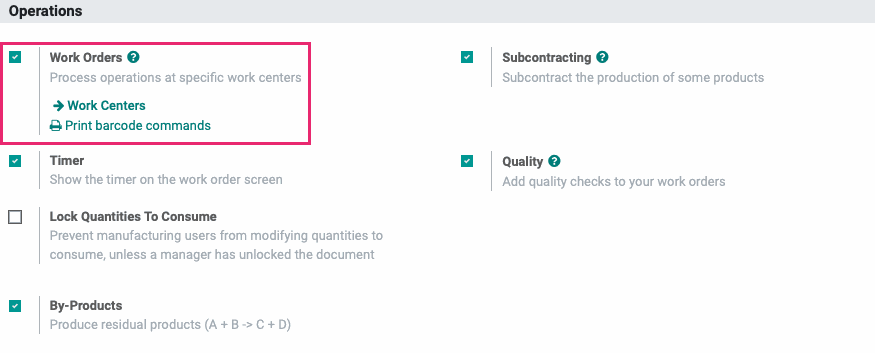
First, we need to be sure Work Orders have been enabled in Odoo. To get started, navigate to the Manufacturing app.
Select the Work Orders option under the Operations section and click save.
Processing Work Orders
Work Orders Page Overview
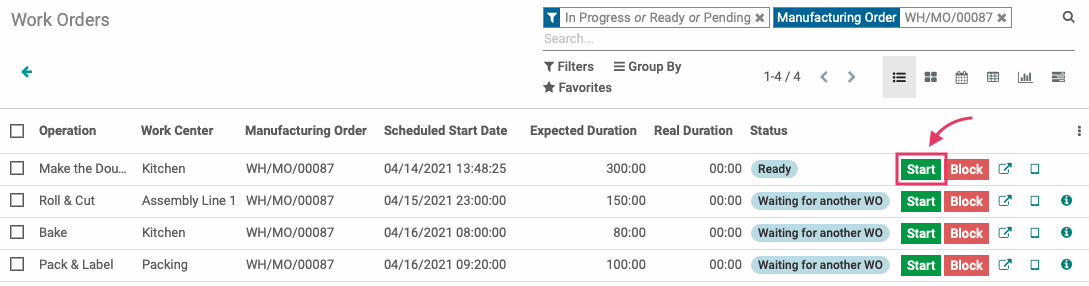
To see a list of incomplete Work Orders (WO), click Operations > Work Orders. In our example, we've filtered down to one manufacturing order (00087) to see the work orders generated.
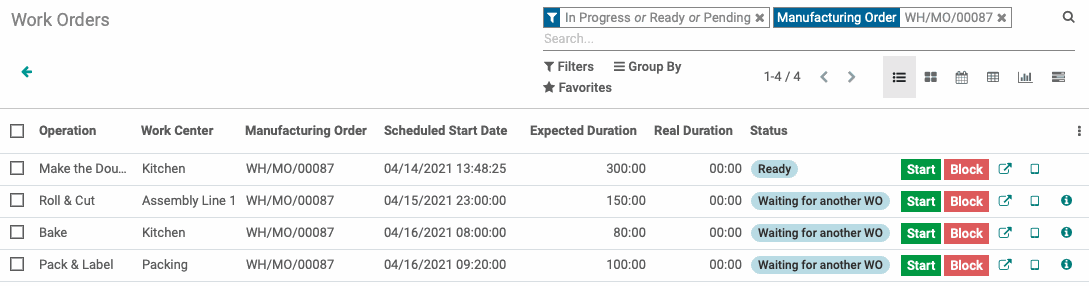
This page gives you a quick view of the details of each work order:
Operation: A short name for the step to be completed.
Work Center: Where this step is taking place.
Manufacturing Order: The ID of the MO that generated these Work Orders.
Scheduled Date Start: The date this step is scheduled to begin.
Expected Duration: The time expected to complete this step for all products.
Real Duration: When the work orders are complete, the real duration will display here.
Status: This shows which work order is ready for action, and which cannot be processed yet because it's waiting on another operation to complete.
Process Orders
Click Start on the work order in Ready status to begin production. This means once you click this button, you'll begin work on this step.
Once started, the Real Duration column will start the clock. If you need to stop for any reason with the intention of continuing later, click Pause. You can then resume by clicking start again.

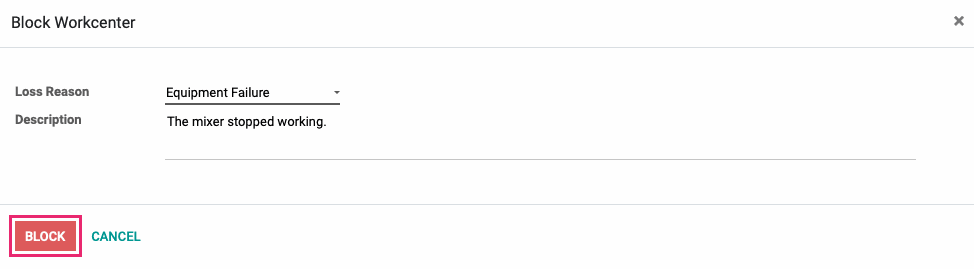
If something occurs to block production, such as broken machinery or damaged components, click Block.

This brings up an additional modal window where you'll create or select a Loss Reason.
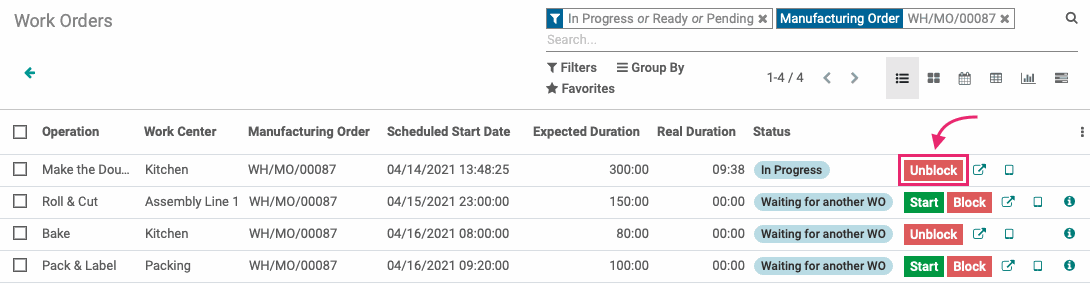
This blocks the work order as well as the associated work center. To unblock the work center, and subsequentially the work order, click Unblock. You can then click start to continue the work order.
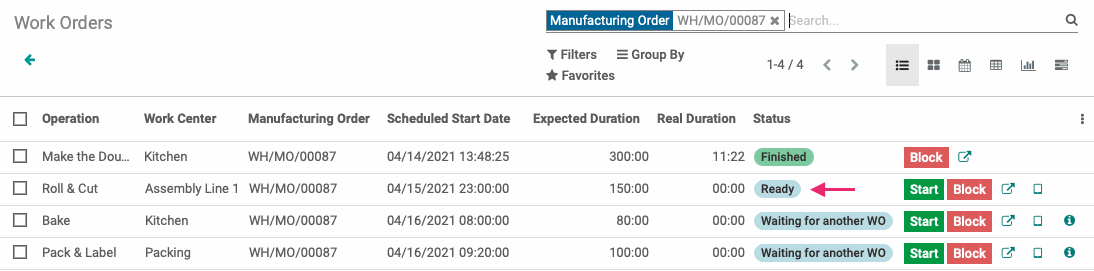
When the work order is complete, click Done.

Doing so will set the next work order to the Ready state. Note that you can still block the work center after the step is complete. Continue processing all work orders until they're all finished.
Good to Know!
Other Icons + Options
To the far-right of the work orders, you'll see a few more icons.
![]()
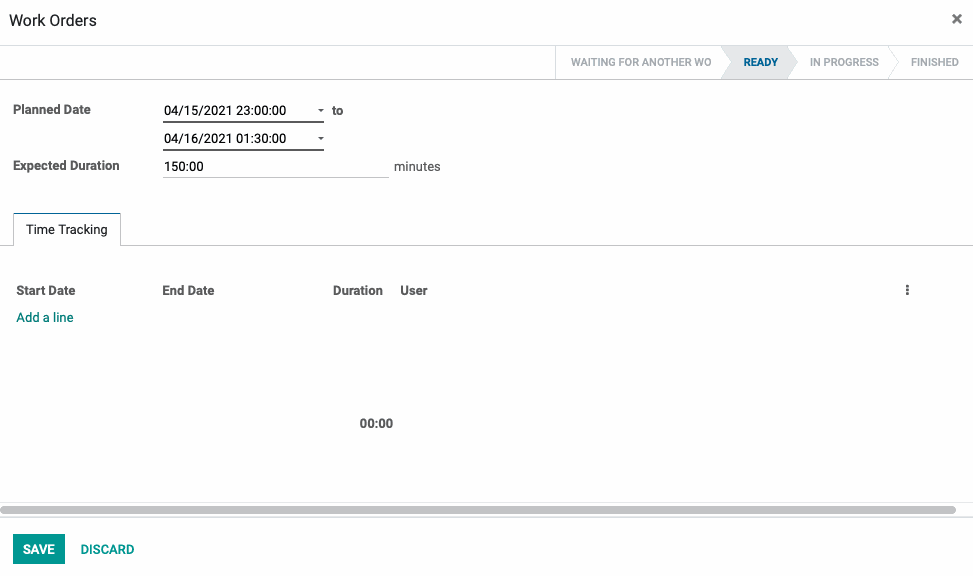
Open the Work Order in a Modal Window
Here, you can manually add durations and change dates.
Open the Work Order in Mobile View
This is useful for those who work on tablets or other touchscreen devices. This screen allows you to adjust quantities, assign lot/serial number(s), pause, and continue. You may also have the ability to go to the previous step and skip the step, depending on configuration.
Click the icon to see additional options.

The options on this additional menu:
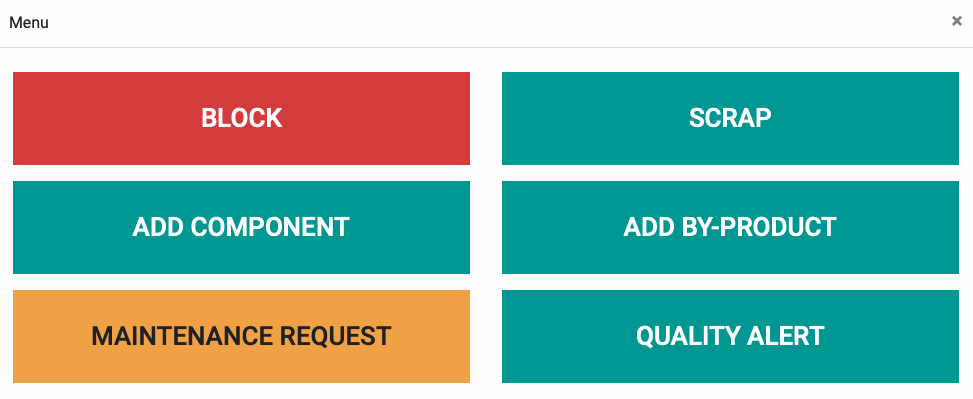
Block: Block production on this work center and associated work orders.
Scrap: Scrap a component product.
Add Component: Add a component product.
Add By-Product: Record a by-product.
Maintenance Request: Request maintenance on the equipment.
Quality Alert: Record an issue with product quality.
This view allows you to finish the entire manufacturing order without leaving the interface. To leave this view, click the icon on the top-left.
More Information
Click this icon to see details on what this work order is waiting on.

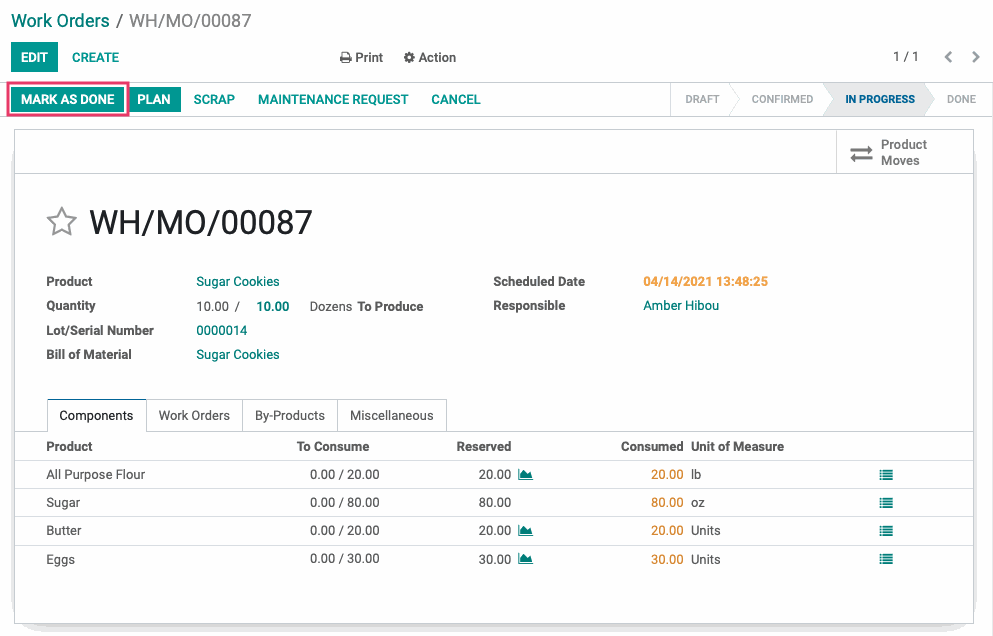
Once all work orders are complete, you can access the Manufacturing Order by double-clicking it in the Manufacturing Order column.

If you did not use the mobile interface to complete this order, you can click Edit and complete the process directly from this manufacturing order.
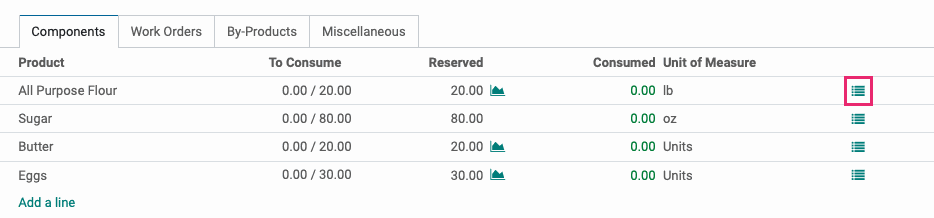
Enter Consumed Component Quantities
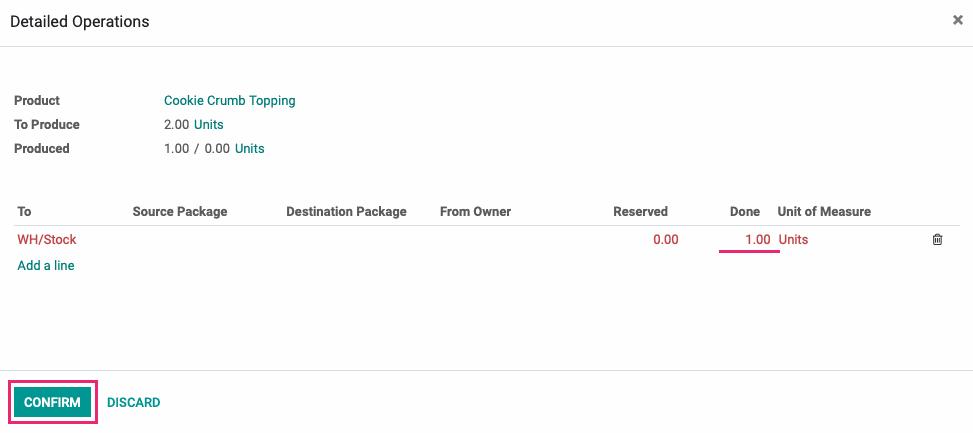
Under the components tab, click into the detailed operations icon to the far right of a component line.
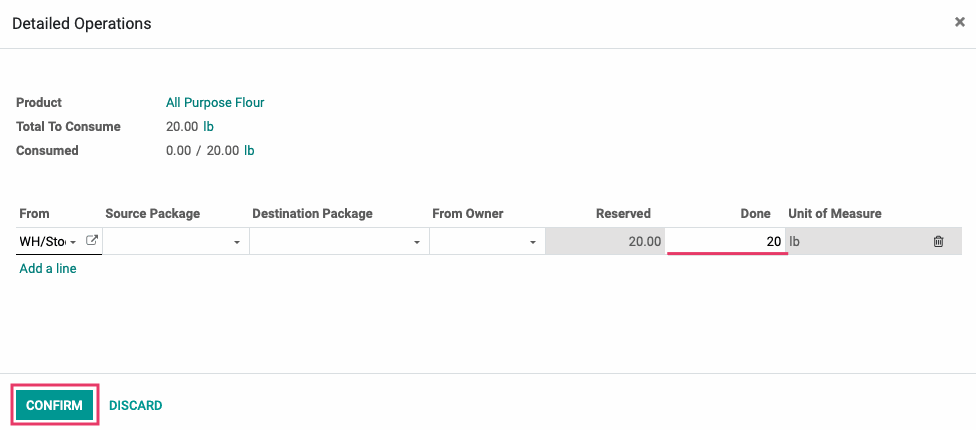
This opens a modal window where you'll update the Done quantity accordingly, then click confirm. Repeat this for all components by entering the exact quantity consumed during production.
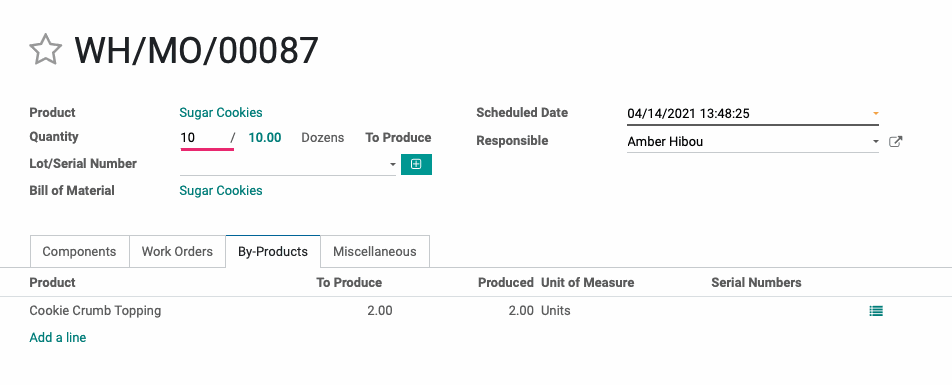
Record By-Products
Under the BY-PRODUCTS tab, you can choose to increment a by-product that already exists on the work order by clicking the detailed operations icon. Alternatively, you can click Add a Line to add a new by-product.

Once added, click save and Edit again, then click detailed operations to increment Done quantities on the following modal window by using the Add a Line option.

Record Done Quantities
In the Quantity field, enter the number of products manufactured in this process.
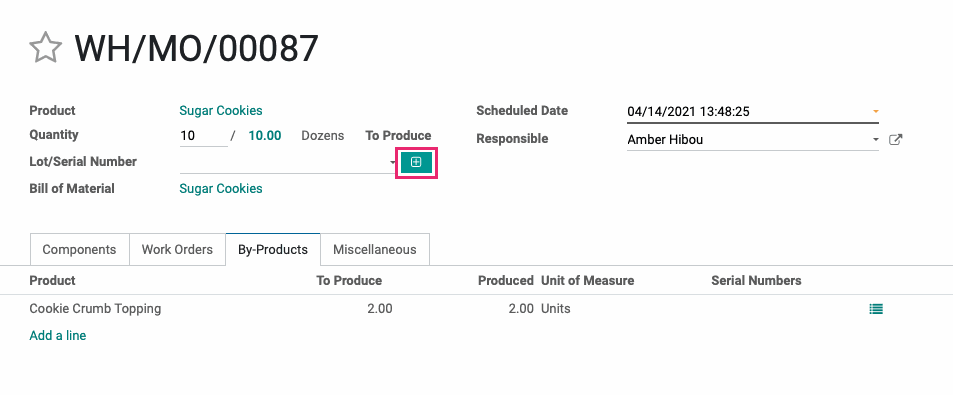
Record Lots/Serial Numbers
Click the icon next to Lot/Serial Number to auto-generate numbers.You also have the option to select or create new numbers here.
Complete the Order
Finally, click Save, then click Mark as Done.