Manufacturing: Manufacturing Workflows: 2-Step Manufacturing
Purpose
The purpose of this document is to demonstrate the workflow of the 2-step manufacturing process, starting with a Sales Order (SO), in Odoo 13. This process includes picking components before manufacturing.
Good to Know!
Enabling 2-Step Manufacturing
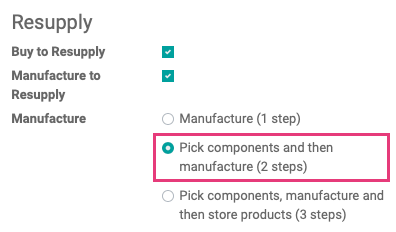
2-Step Manufacturing is enabled for individual warehouses in the Inventory app in CONFIGURATION > WAREHOUSES.
Process
Sales Order
In this scenario, we'll create a sales order for our Make to Order (MTO) product to get the process started. We can also create a Manufacturing Order directly. To get started, navigate to the Sales app.
Once there, click CREATE and configure a sales order for a manufacturable product, as shown below. Our product, the Chocolate Croissant, is set to Replenish on Order (MTO).
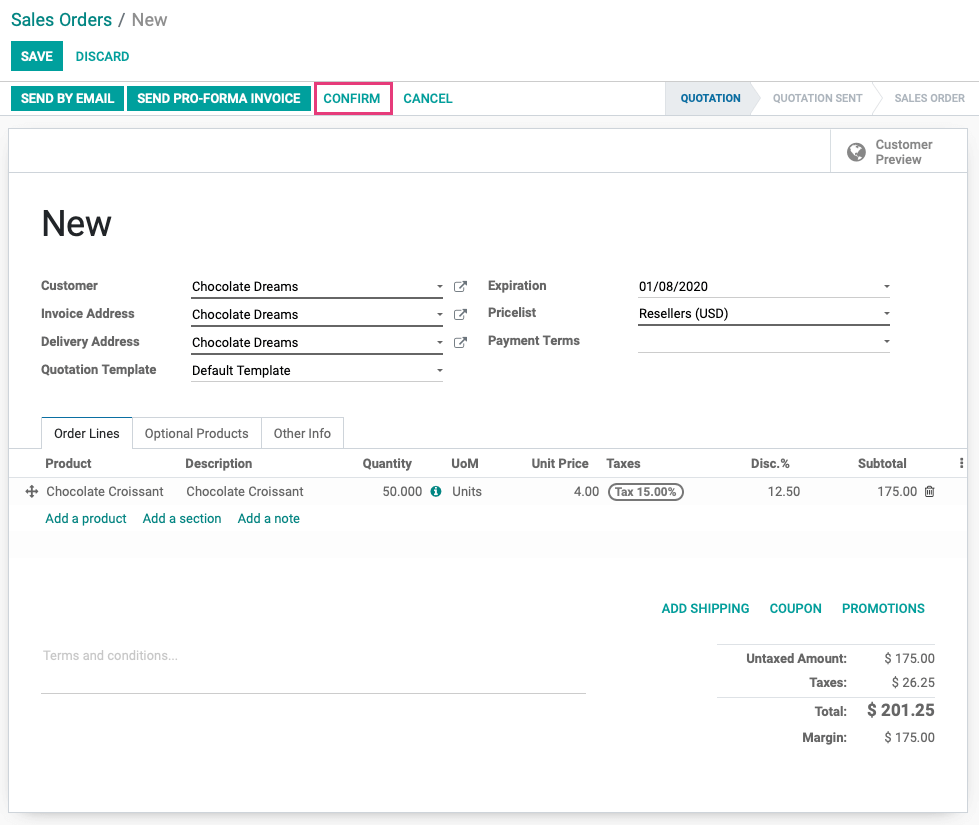
Click CONFIRM when your Sales Order is complete and this will initiate the process. Once confirmed, click the Delivery smart button to show the transfer order for our components.
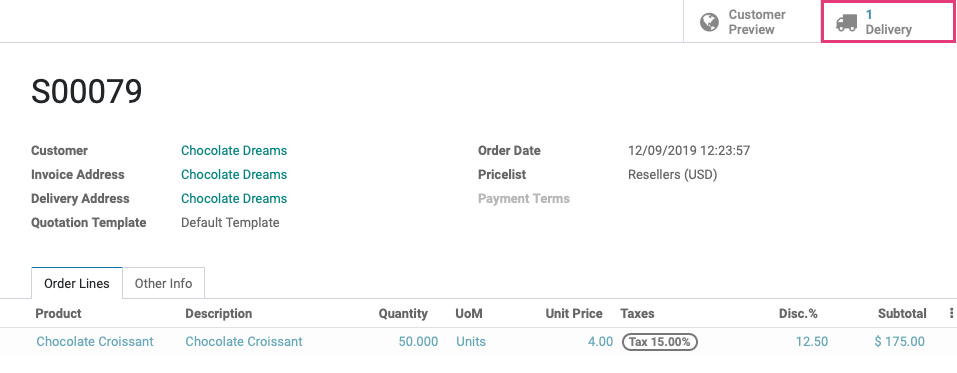
On this page, you can see that the status has changed to Waiting Another Operation. The manufacturing of the product is that operation.

Manufacturing Order
Now, let's take a look at the Manufacturing Order (MO) that was generated from the SO we just created. Navigate to the Manufacturing app.
Once there, click Operations > Manufacturing Orders, then select the MO that was just created.

From the MO, click the Transfers smart button.
![]()
From this page, click CHECK AVAILABILITY to reserve components. You can also do this manually by clicking Edit, then adding each product and quantity to the Detailed Operations tab.

If the products are available from storage, those line items should turn from red to black to show they've been reserved. At that point, click VALIDATE to complete the transfer.

Then click Apply on the next window to verify the immediate transfer.
![]()
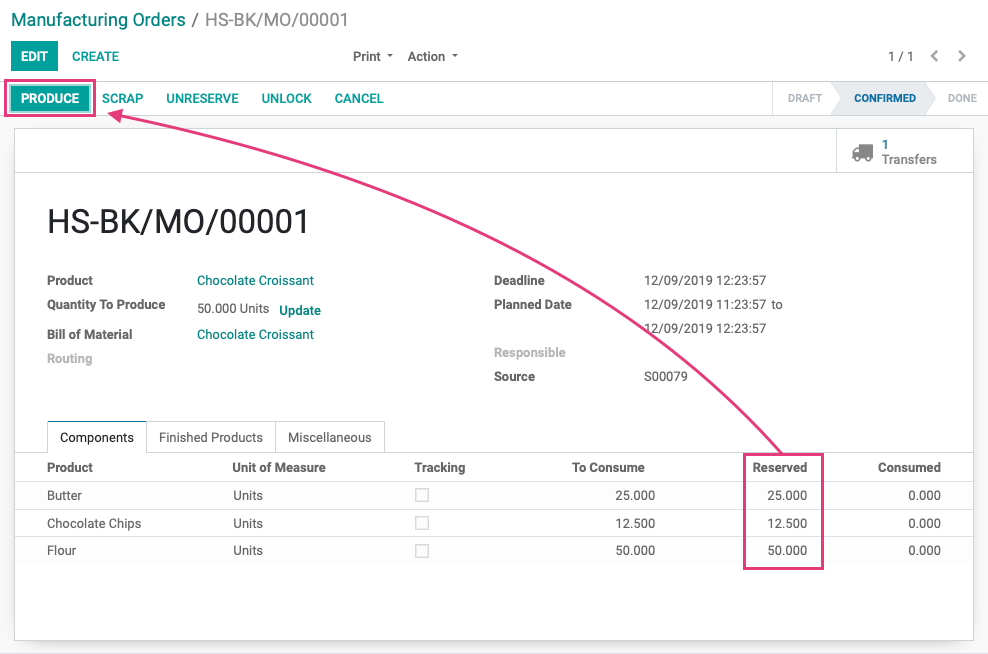
If available, all components should now show in black, meaning they've been reserved. Use the breadcrumbs to navigate back to your Manufacturing Order and you'll now show all components have been reserved and you're ready to manufacture. Click Produce to begin production.
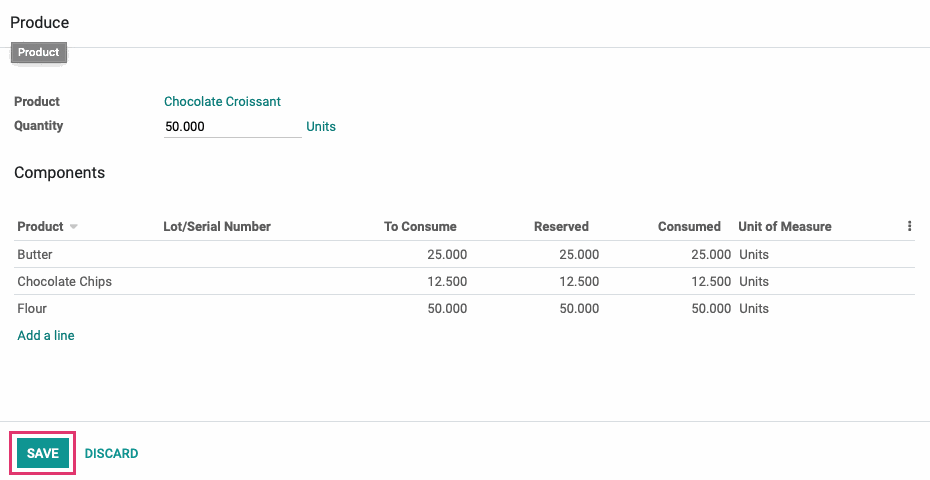
On the next window, if everything looks correct on your MO, click Save.
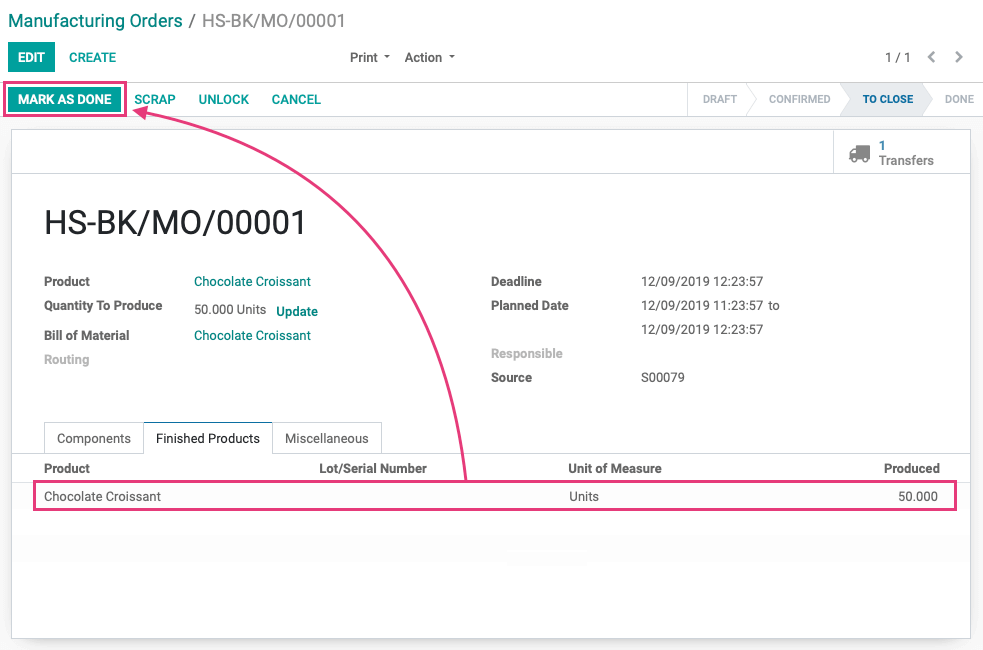
Now, from the Finished Products tab, you can see the products that were produced and you can click Mark as Done to close the order.
A Done MO will show a variety of smart buttons for your reference.

Deliver the Order
Since we began this process with a Sales Order (SO), let's go back to that order and complete the delivery of our manufactured product. Navigate to the Sales app.

Once there, click the SO for this original order, then click the Delivery smart button. Click VALIDATE to process the transfer as usual, and verify it on the following window.