Manufacturing: Manufacturing Workflows: 3-Step Manufacturing
Purpose
The purpose of this document is to demonstrate the workflow of the 3-step manufacturing process in the Manufacturing application of Odoo 15.
Process
Configuration
To get started, navigate to the Inventory app.
Navigate to Configuration > Warehouse Management > Warehouses. Edit an existing warehouse, or create a new warehouse. Refer to the Inventory > Warehouses + Locations documentation for more information on creating a new warehouse.
Under the Warehouse Configuration tab, find the Manufacture field in the Resupply section and set it to 'Pick components, manufacture and then store products (3 steps)'.
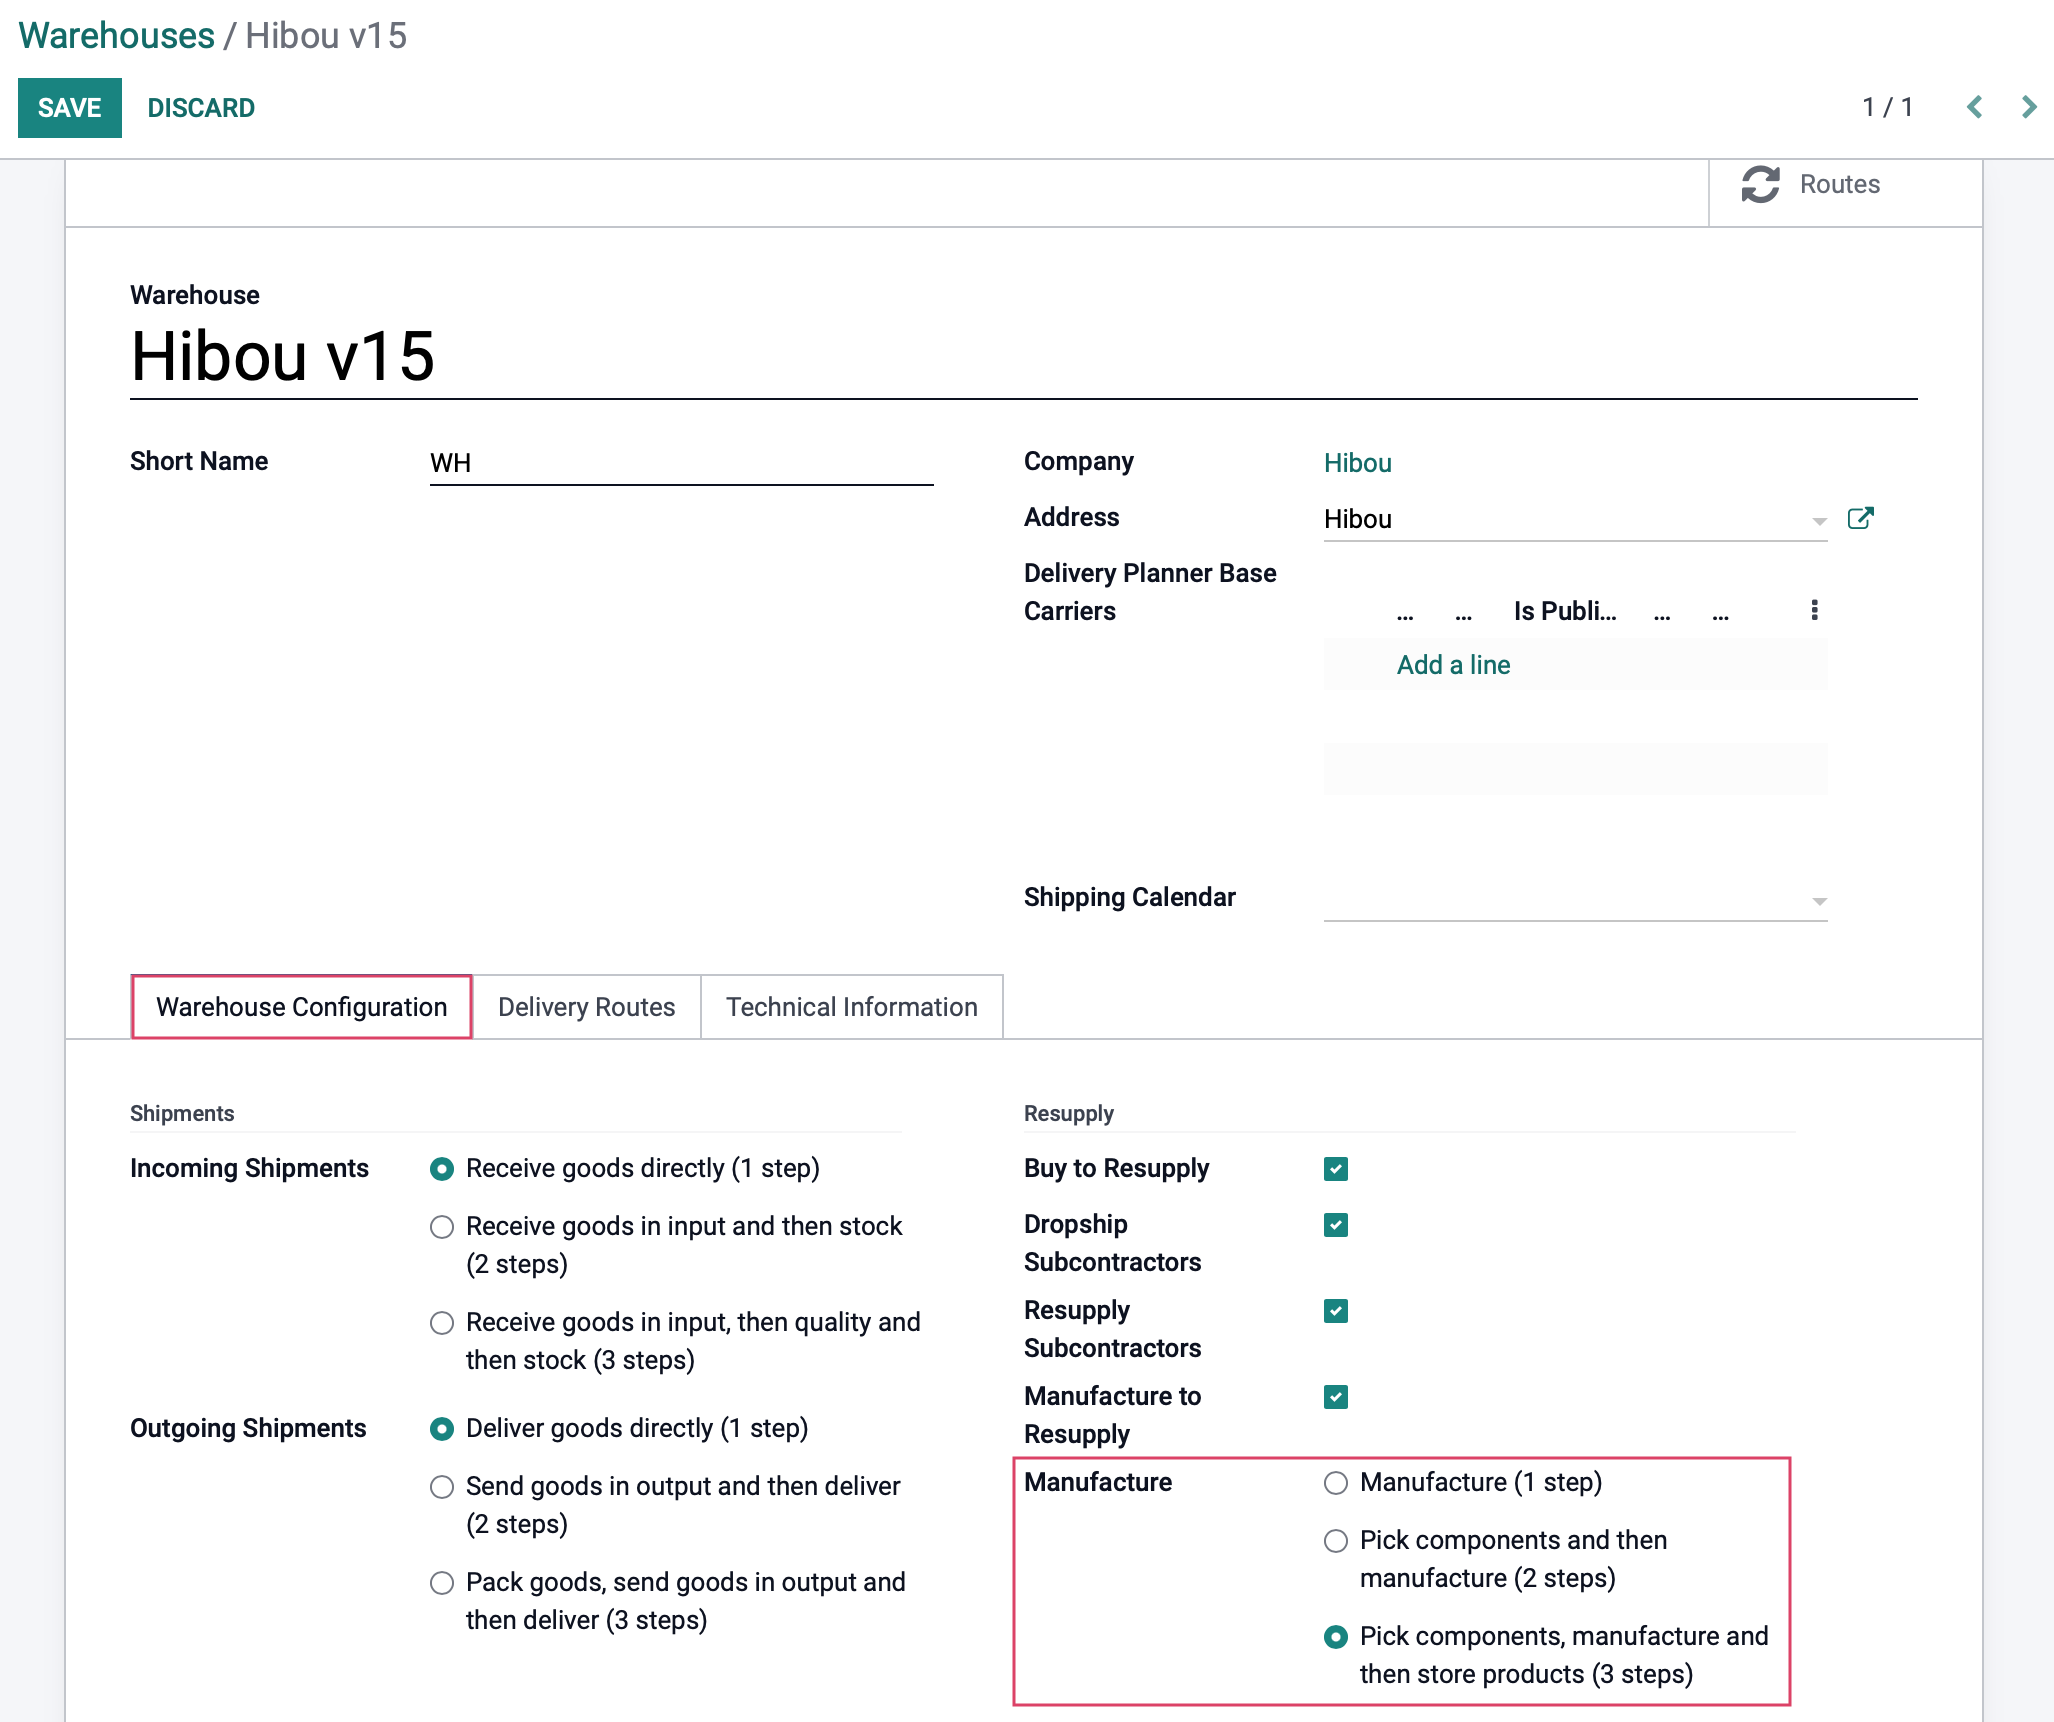
When done, click save.
Manufacturing Order
Navigate to the Manufacturing app.
![]()
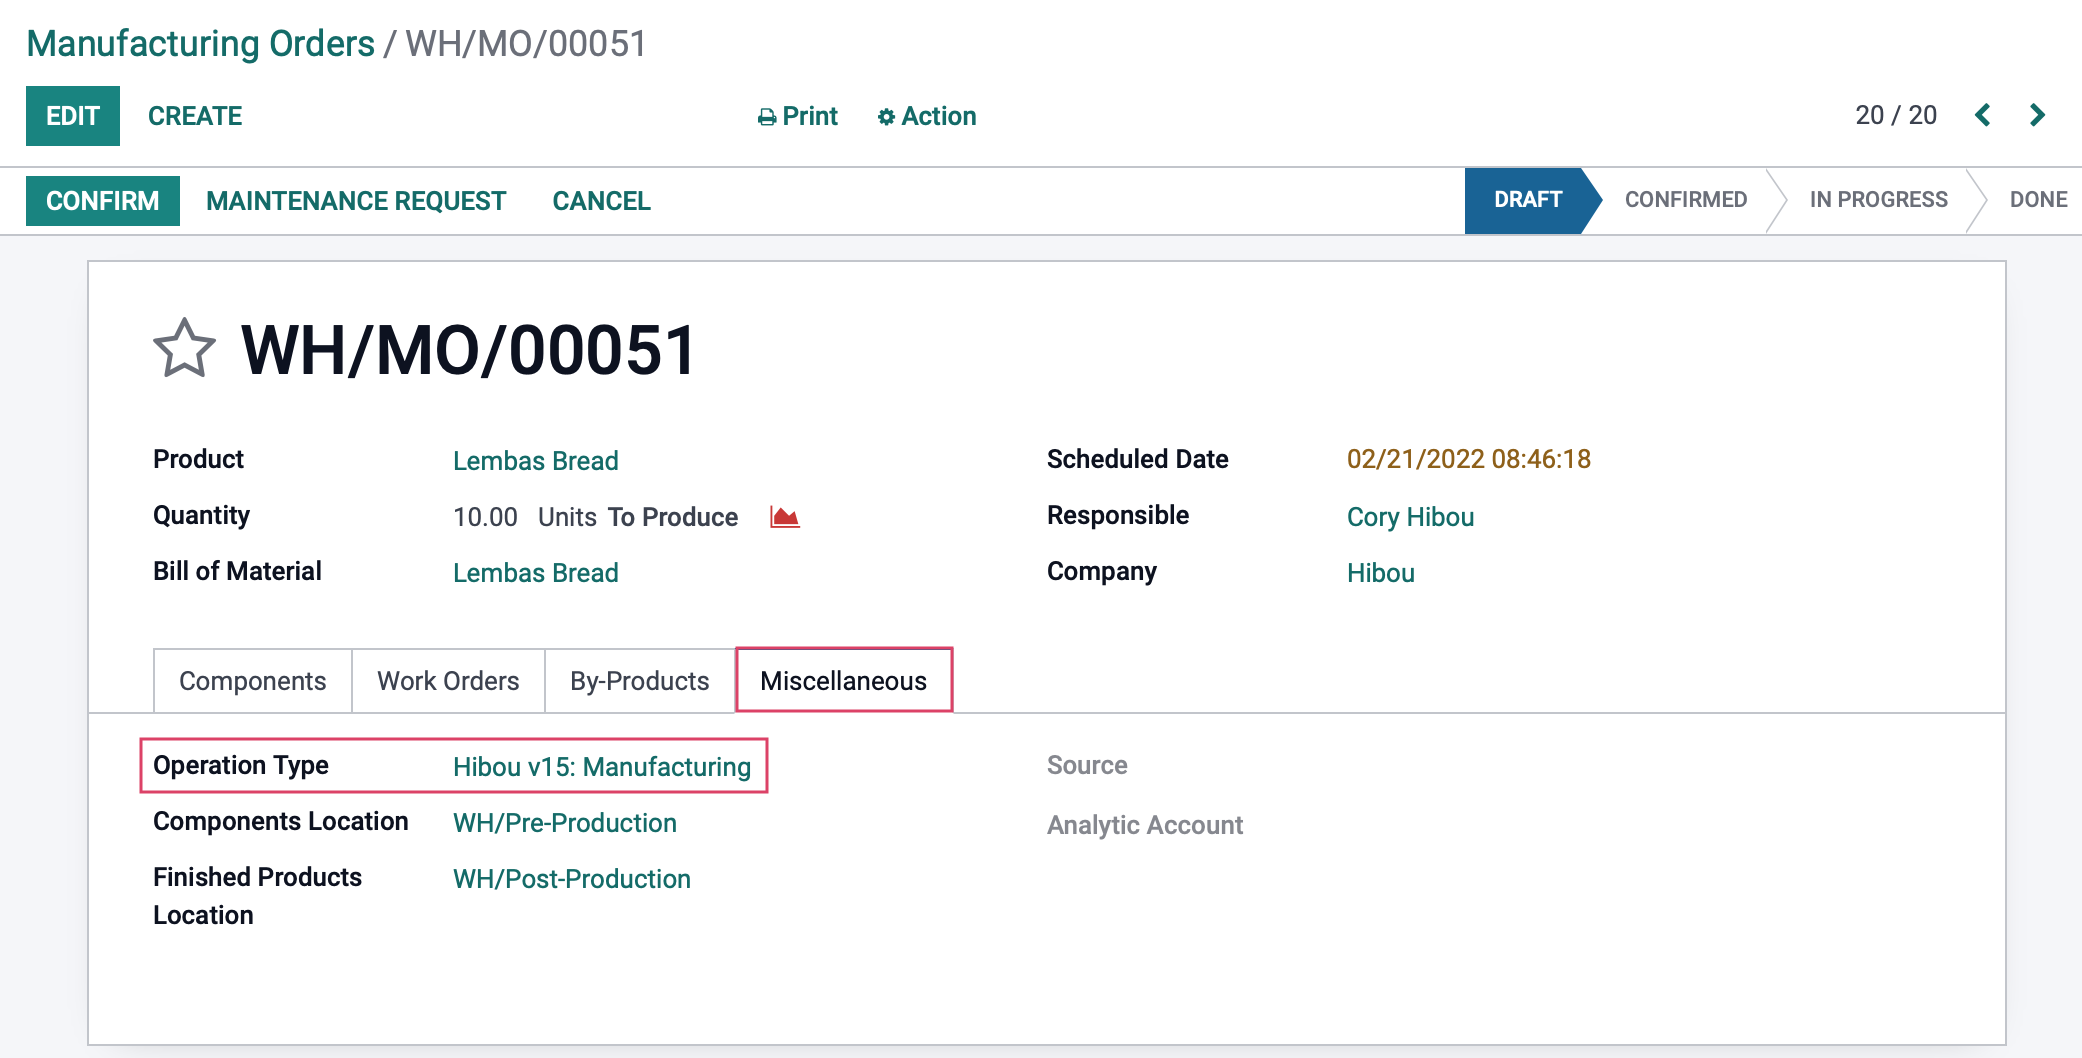
Once there, go to Operations > Manufacturing Orders and click create. Complete the form according to the instructions outlined in the Manufacturing Orders documentation. Under the Miscellaneous tab, ensure the warehouse you've configured for 3-step manufacturing is selected.
When you're ready, click confirm.
Step 1: Transfer Components from Stock to Pre-Production
You'll now see a Transfers smart button because the first step of this process is to move components to the pre-production location. Click the Transfers smart button.
![]()
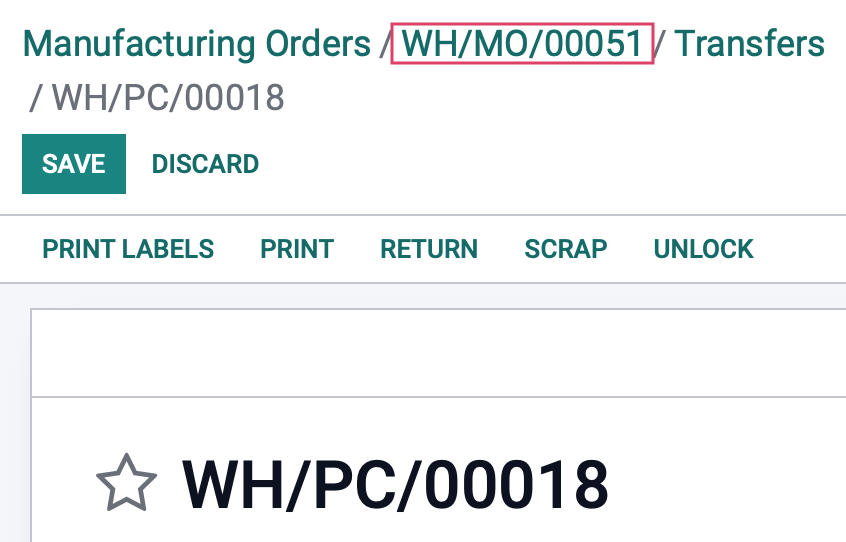
This will bring you to a list of two transfers. Select the transfer in ready status.
![]()
Click the Operations tab. Here we can see that the components have been reserved. This happens automatically if Odoo detects the system has the products in stock. If items are not reserved however, click Check Availability.
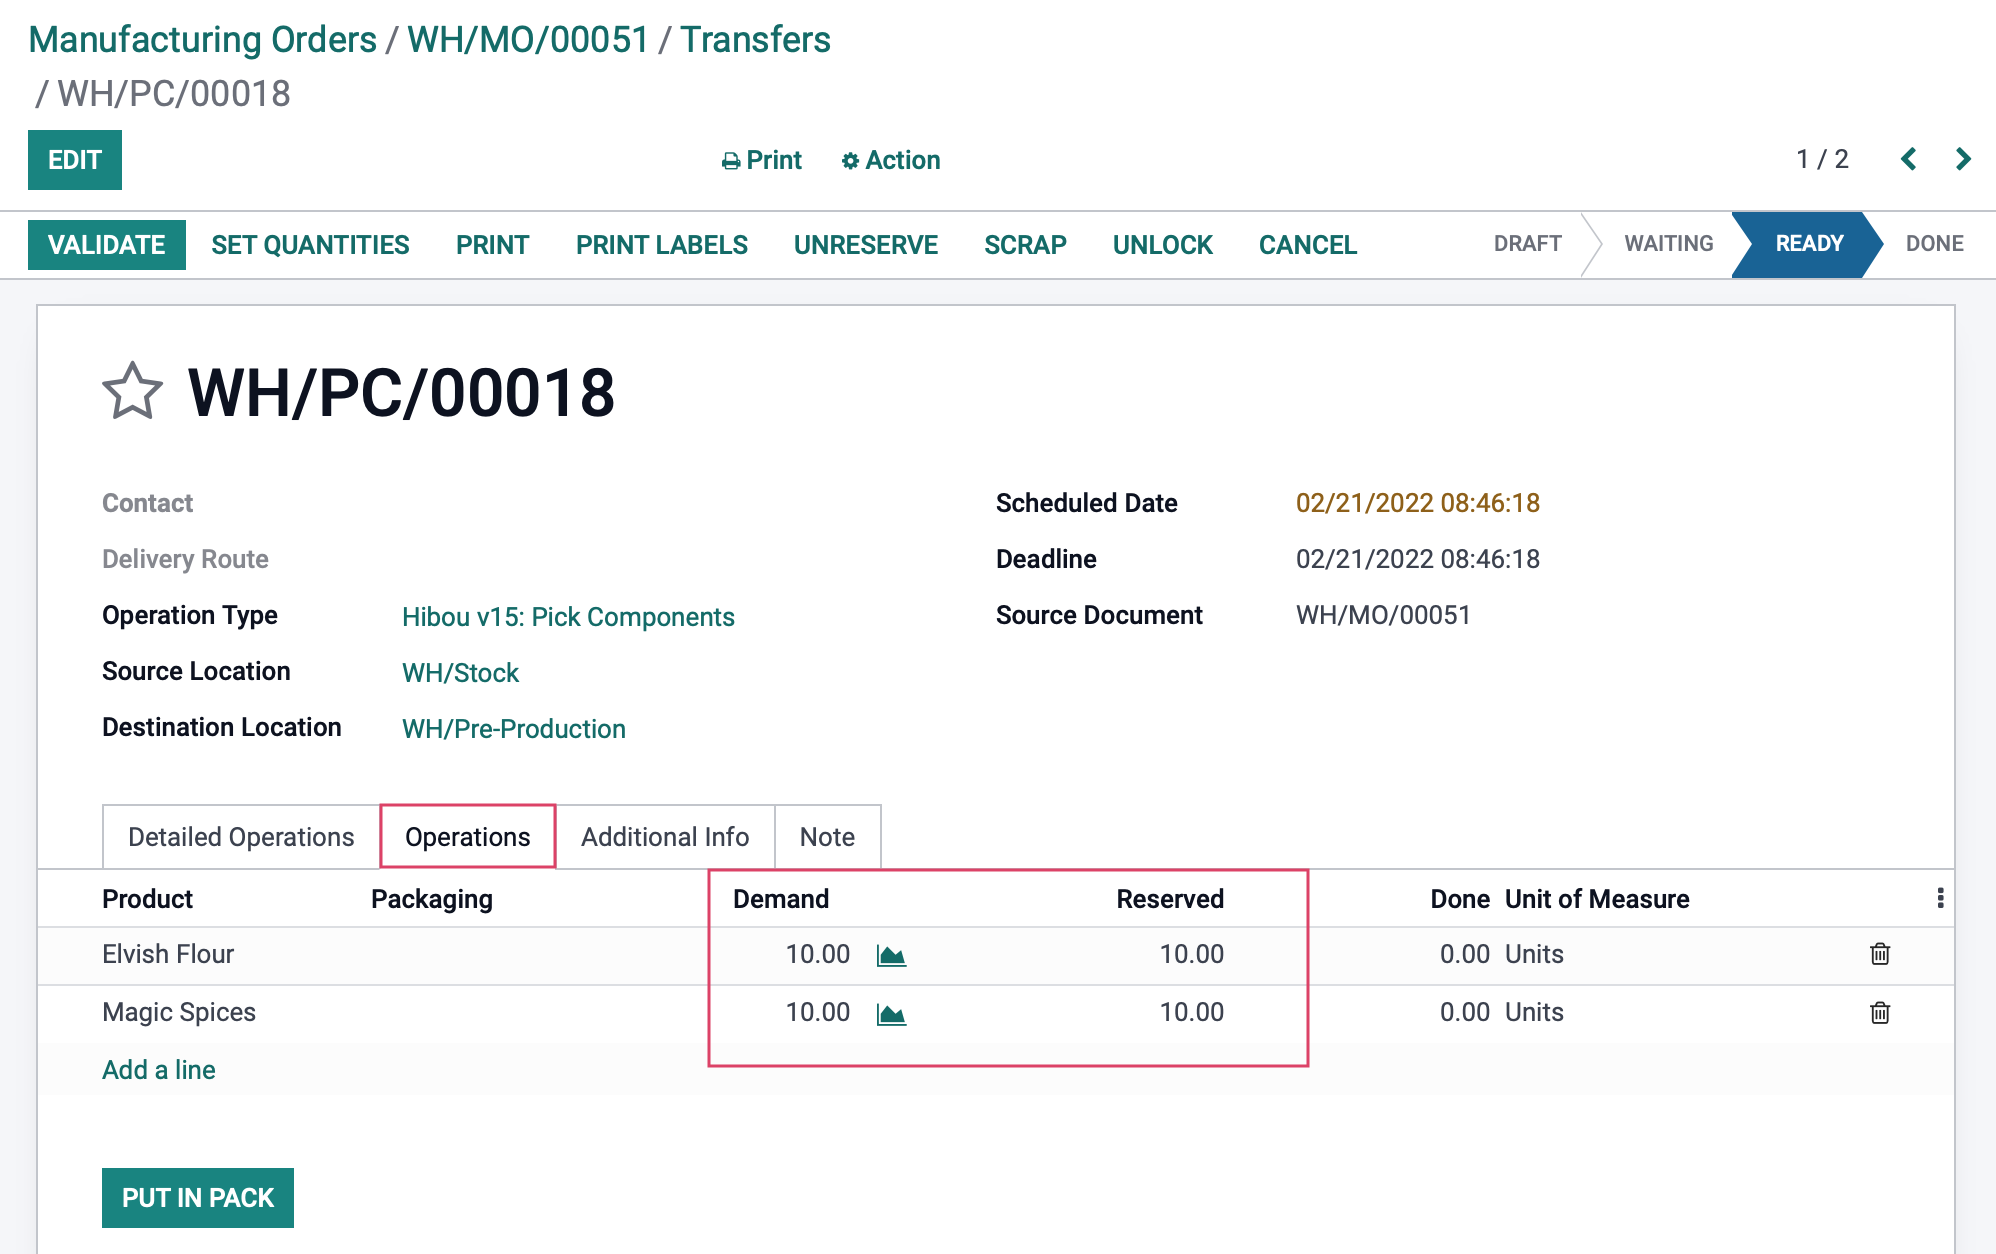
Once all necessary components have been reserved for this operation, click Edit, then enter the actual quantities being transferred in the Done column under the detailed operations tab. When all Done quantities are entered, click Validate.
![]()
Components have been transferred from the stock location to the pre-production location; the first step of the manufacturing process has been completed. Next, use the breadcrumbs to navigate back to the manufacturing order.
Step 2: Complete Production
Good to Know!
Work Orders?
If you have Work Orders enabled in configuration, and there are operations on your Bill of Materials, you'll Plan your order and complete it via work orders first.
You'll now complete the production of your product. When you're done, click Edit and enter the quantity that was completed in the Quantity field, then click Mark as Done.
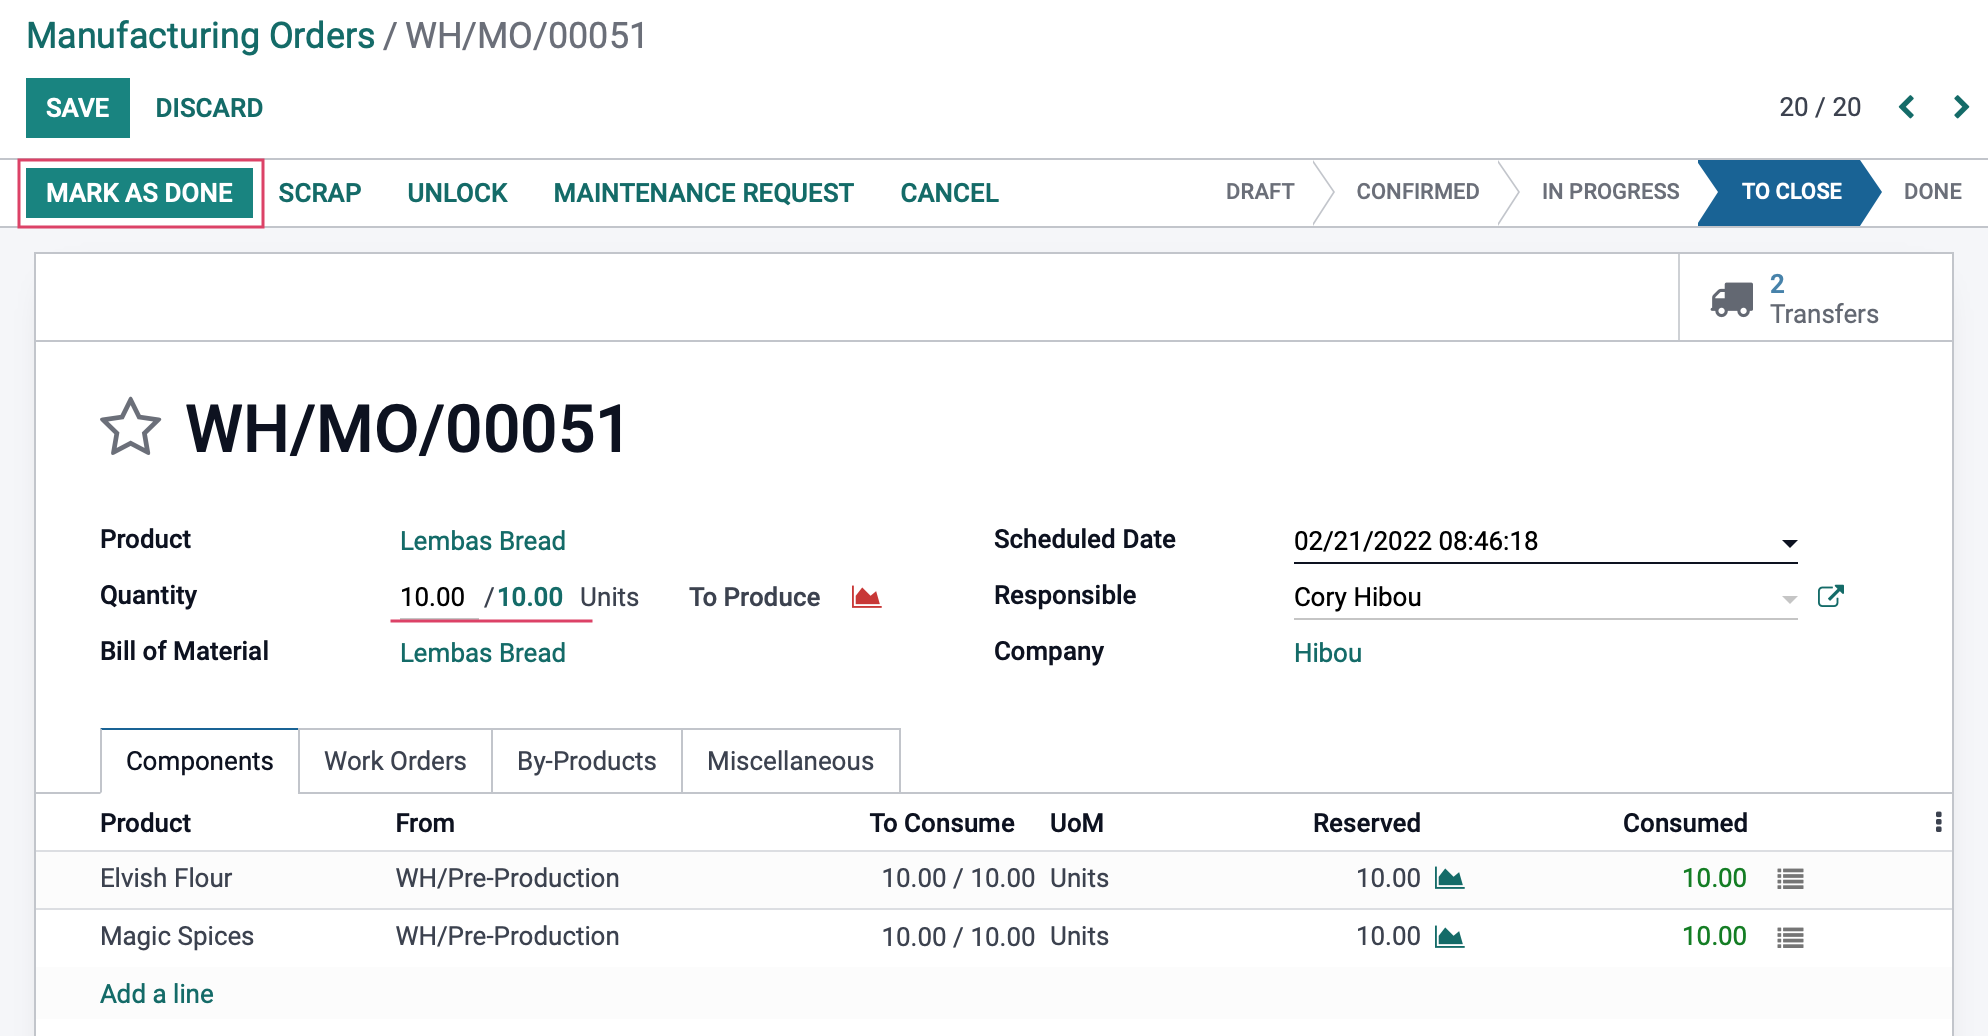
The second step of your manufacturing order is now complete. Now, click the Product Moves smart button.
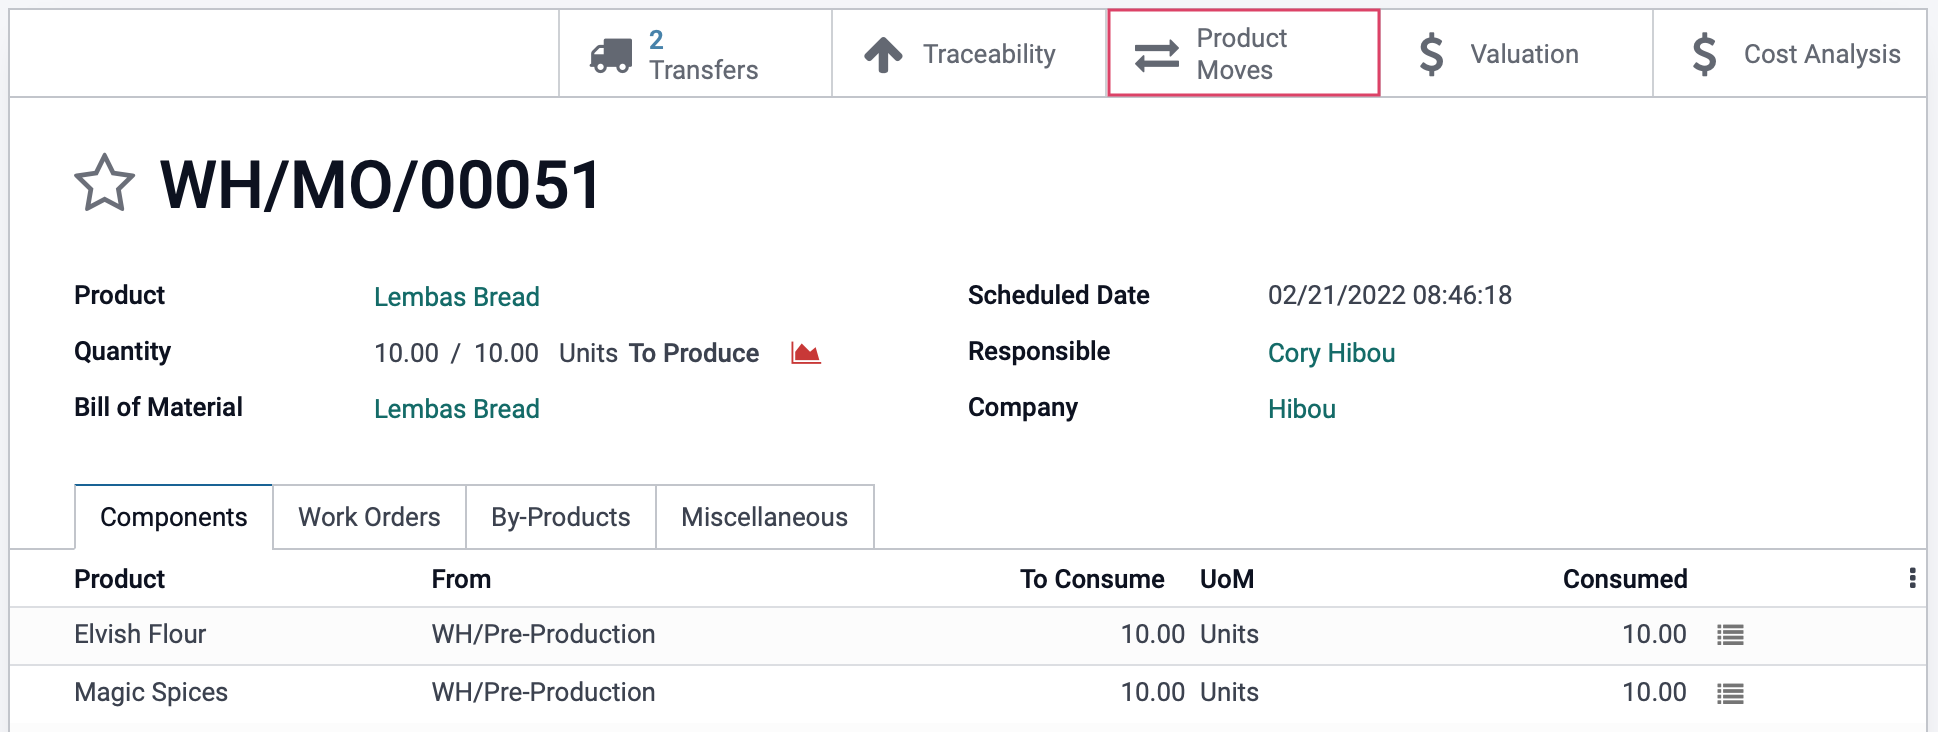
Here we can see that components were moved from pre-production to production, then finished products were moved from production to post-production.

Use the breadcrumbs to navigate back to the manufacturing order.

Step 3: Move Finished Products from Post-Production Location to a Stock Location
To complete the final step, click the Transfers smart button.
![]()
Select the transfer in Ready status.
![]()
From the final transfer, click Edit and enter the number of items being transferred in the Done quantities column under the Detailed Operations tab. When you're done, click Validate.
![]()
The finished product has been moved from the post-production location to the stock location, and your manufacturing order is complete.