Manufacturing: Manufacturing Workflows: Multi-Level BoM
Purpose
This document covers how to configure the advanced scenario when a Bill of Materials (BoM) has a component product with its own BoM, and how they work in the Manufacturing application of Odoo 15.
Process
To get started, navigate to the Manufacturing app.
![]()
We will use a product, "Bat-Costume", which has multiple BoMs: One for the Suit which contains products like boots, chest piece, and a cowl, and a sub-BoM for a Belt which is made up of components like smoke bombs and batarangs.
There are two types of sub-BoMs that can be created:
Phantom BoM: This is a Kit BoM that, when triggered, creates pickings to gather the components. There is no Manufacturing Order.
Subassembly: This is a Manufacturing BoM that, when triggered, creates pickings to complete a Manufacturing Order. In a subassembly, there is a Manufacturing Order.
We're going to start by creating a BoM for the Costume. Because there is no assembly needed (i.e. no Manufacturing Order required), this will be considered a Phantom BoM.
Creating a Phantom Sub-BoM
First, go to Products > Bills of Materials, then click Create. This opens a new Bill of Materials form where we'll complete the following fields:
Product: The product we're creating with this BoM.
Variant: If there are variations of this product, select the one that applies to this BoM only.
Quantity: The number of finished products being created via this BoM.
Reference: This is an optional field; here you can enter keywords or codes for internal use.
BoM Type: Because this is a Phantom BoM, select "Kit".
Under the Component tab, click Add a Line. This opens a blank line where you'll select the first component of the product, as well as the Quantity required for this BoM. The Unit of Measure will auto-complete based on the product.
Repeat this for each component of the sub-BoM.
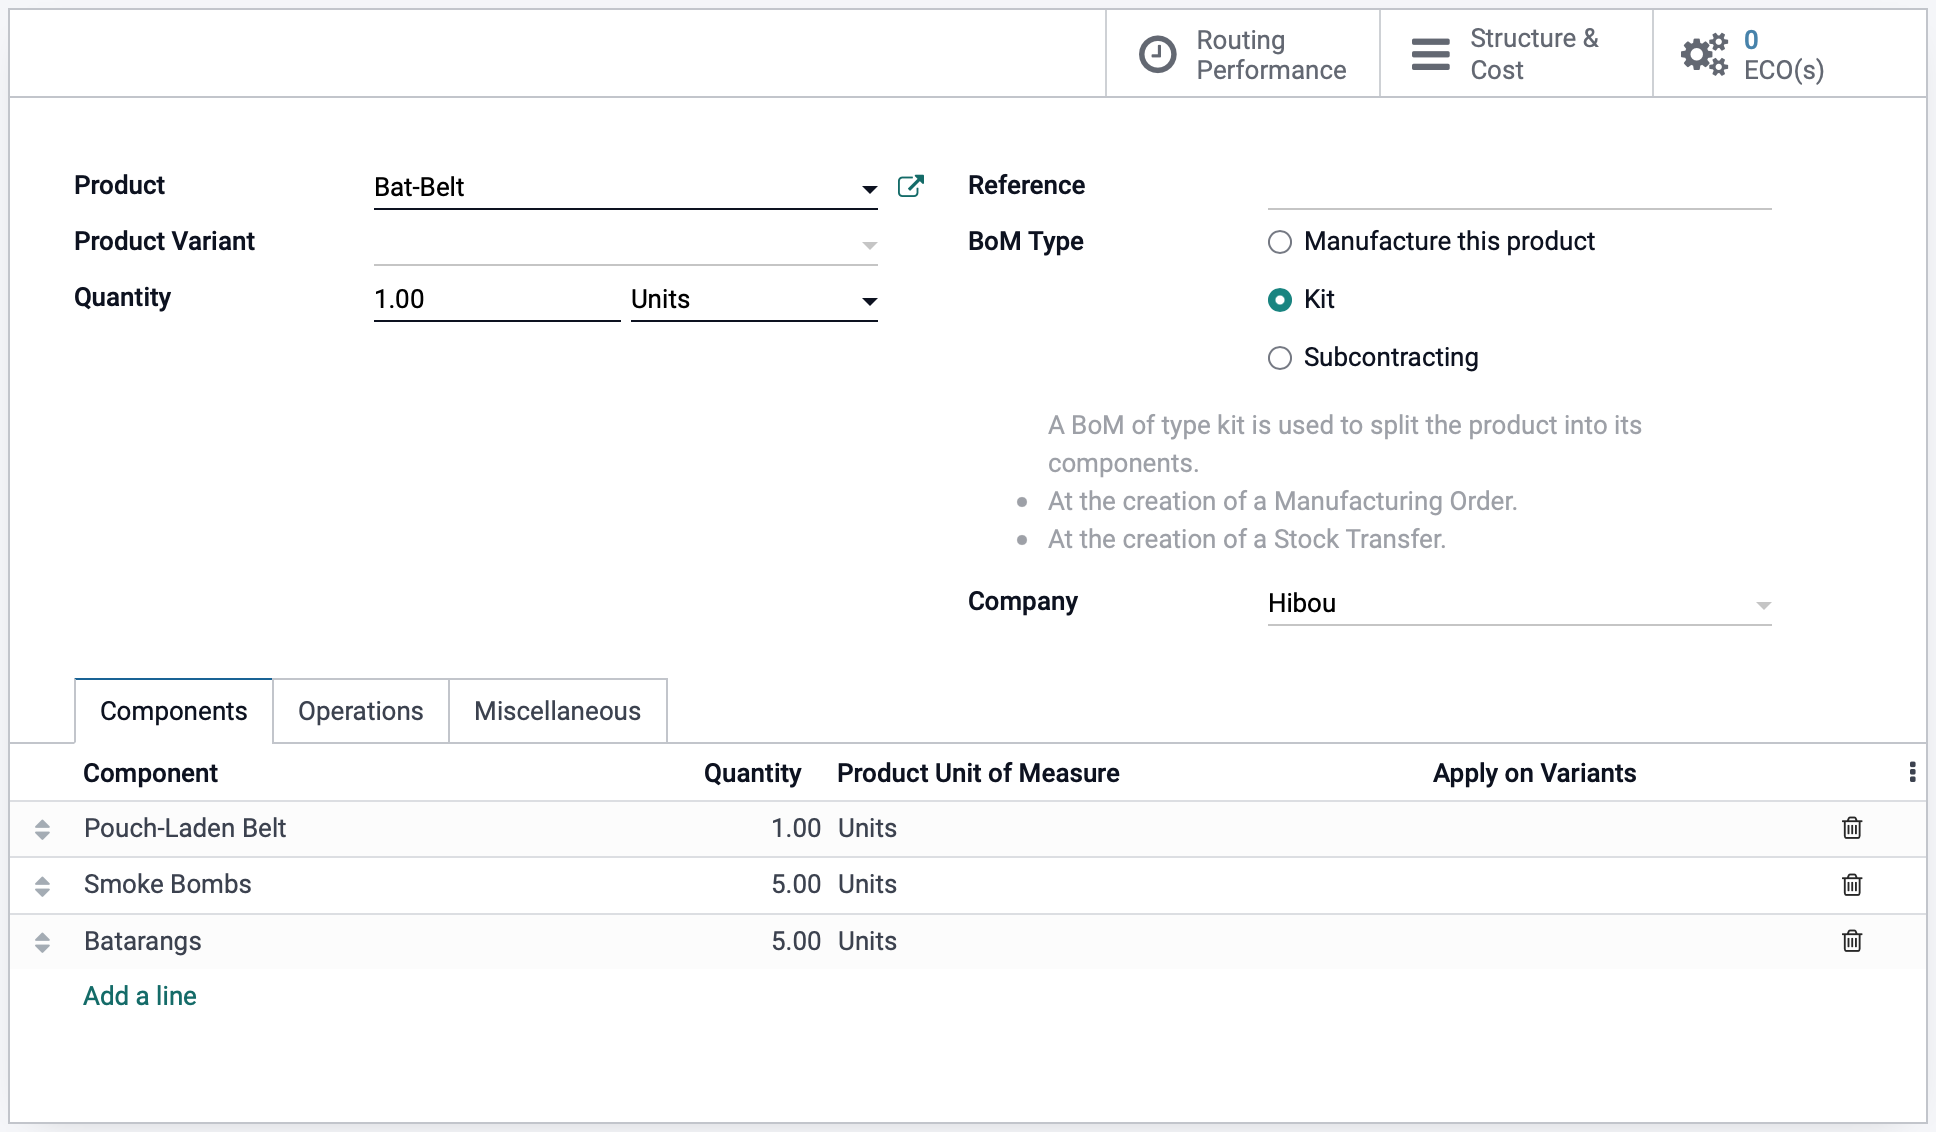
When you're ready, click Save.
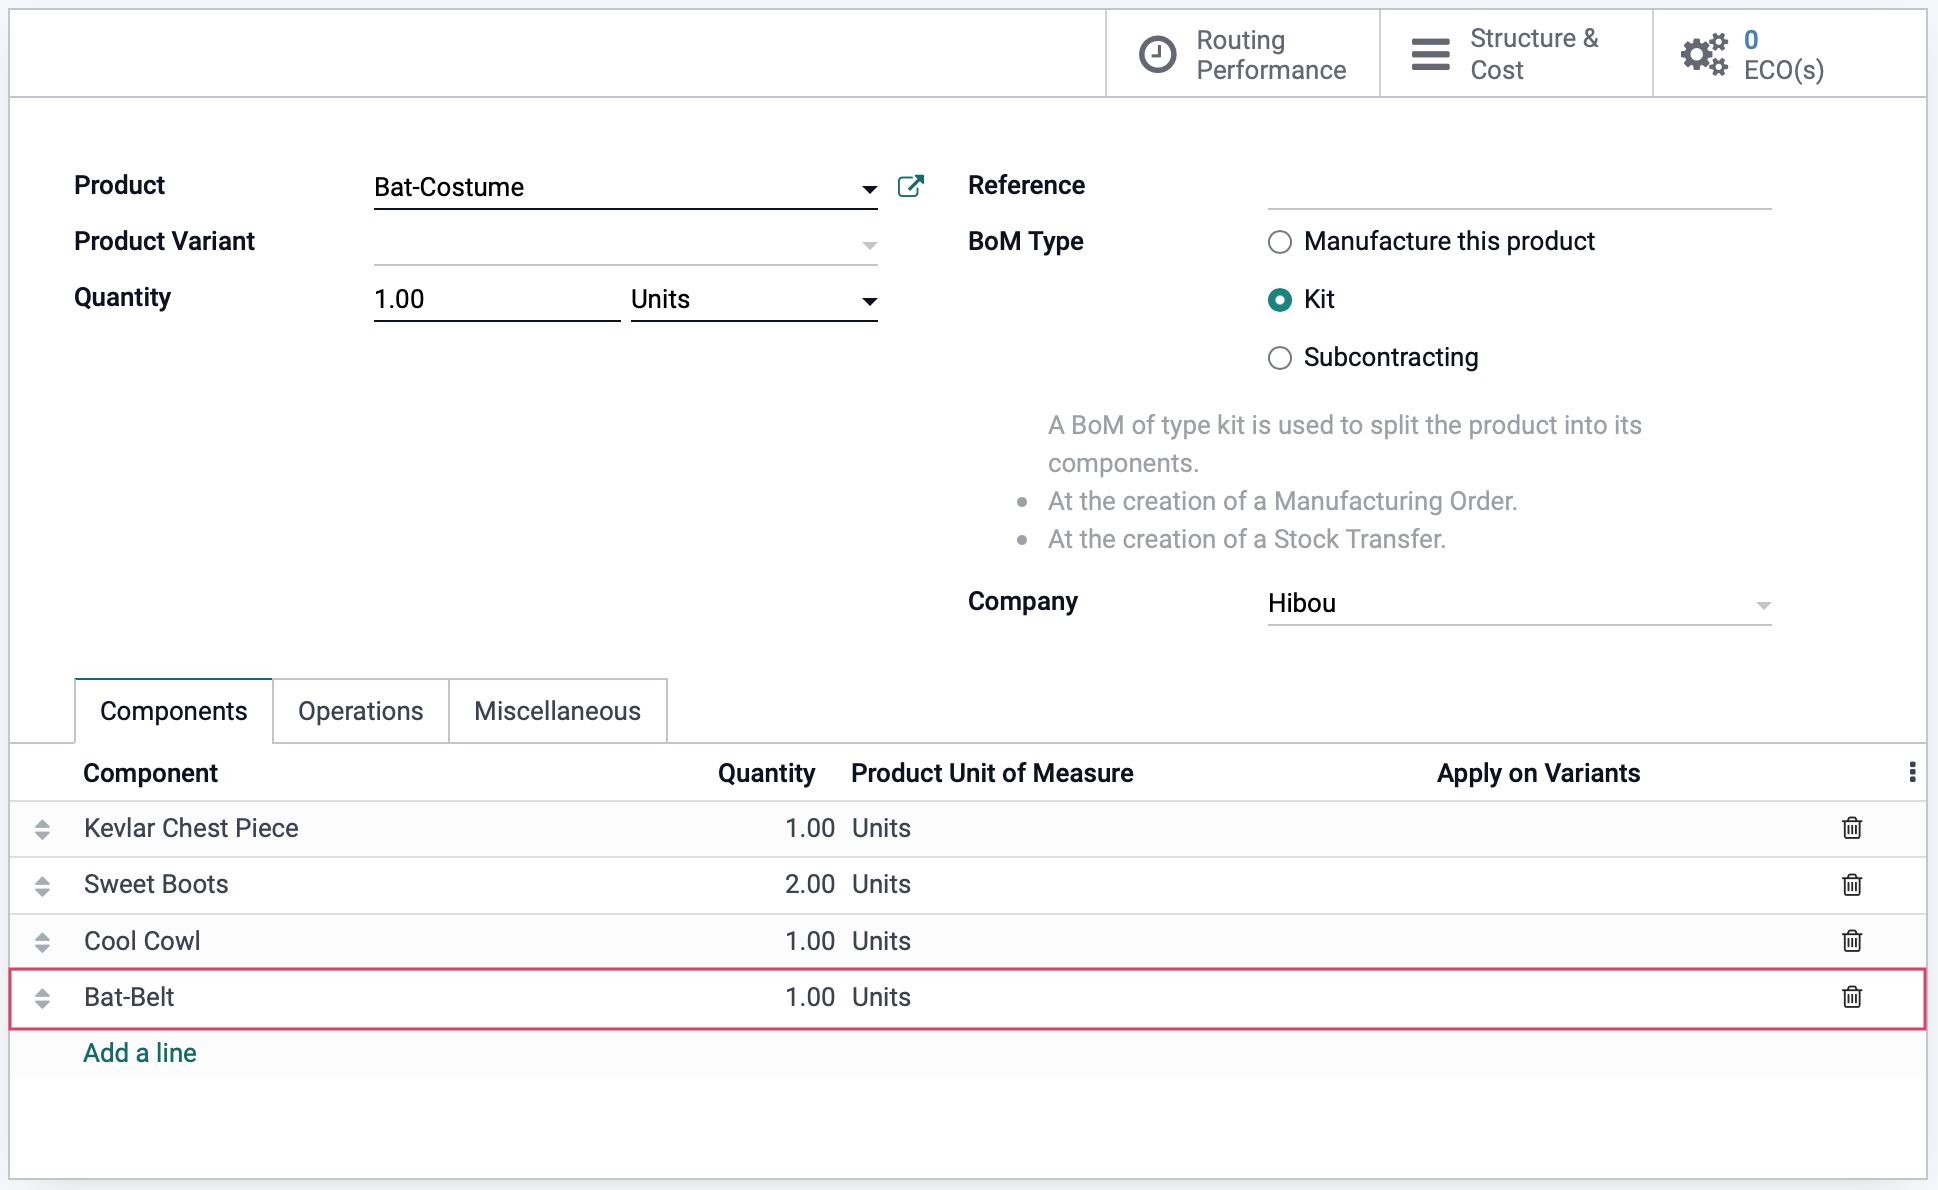
Create the Parent BoM
Next, we need to create a BoM for the parent product: Bat-Costume. Staying on the Products > Bills of Materials page, click create. This opens a new Bills of Materials form where we'll complete the following fields:
Product: The product we're creating with this BoM.
Variant: If there are variations of this product, select the one that applies to this BoM only.
Quantity: The number of finished products being created via this BoM.
Reference: This is an optional field; here you can enter keywords or codes for internal use.
BoM Type: This is also a kit BoM as we purchase the components rather than manufacture them.
Under the COMPONENT tab, click ADD A LINE. This opens a blank line where you'll add the components of the final product, including the Phantom BoM, created in the previous step.
Under the Operations tab, click Add a Line and add each Operation of the manufacturing process for the final product.

When you're ready, click SAVE.
Product Configuration
We only produce this product when it is ordered and therefore will need to configure the product to have both Manufacture and Replenish on Order (MTO) routes.
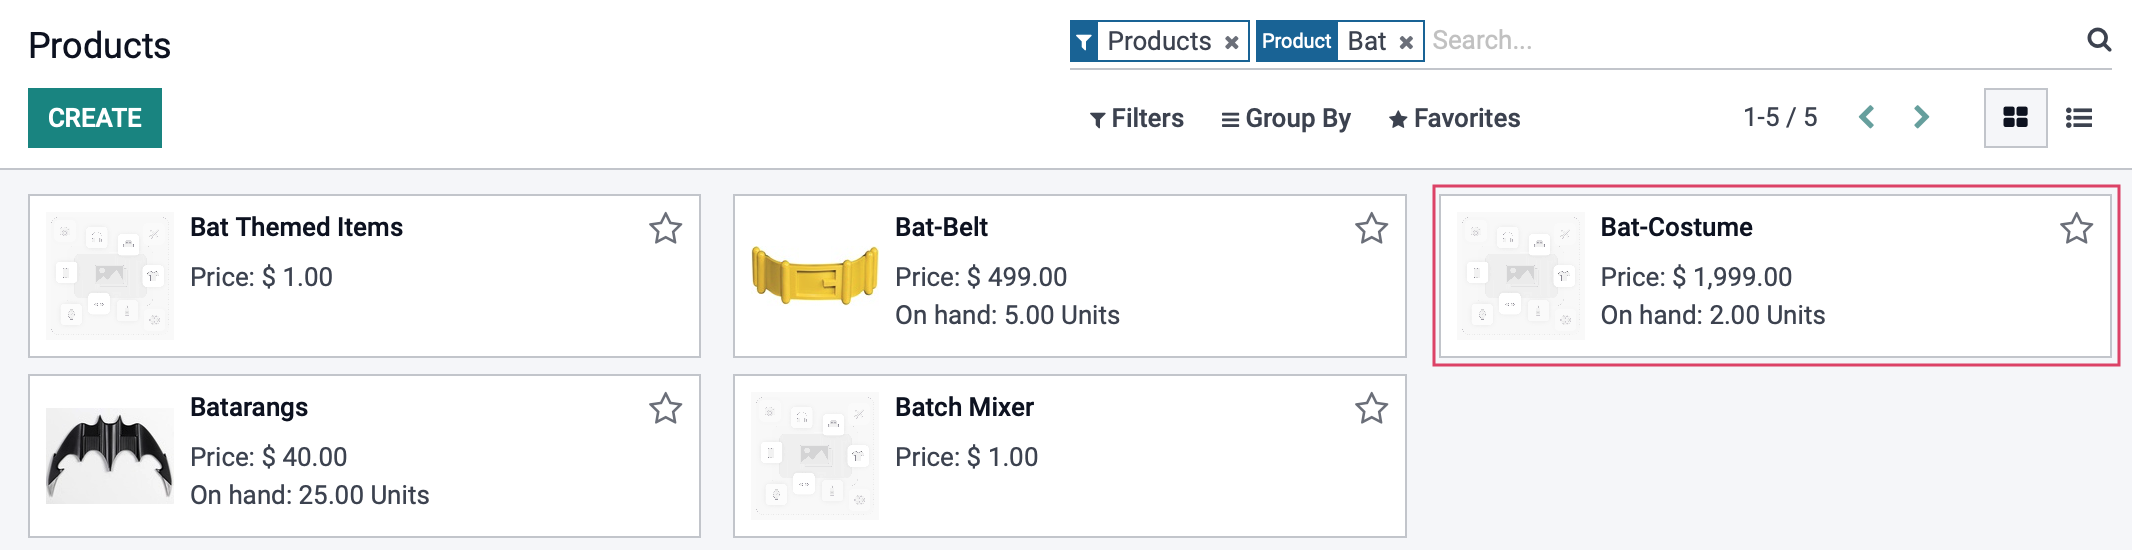
To do this, click Products > Products. Once there, find and open the product.
In the product template, click Edit. Under the Inventory tab in the Operations section, select both the "Manufacture" and the "Replenish on Order (MTO)" routes. This tells Odoo that this product is created by us, and we need to create it each time it's ordered.
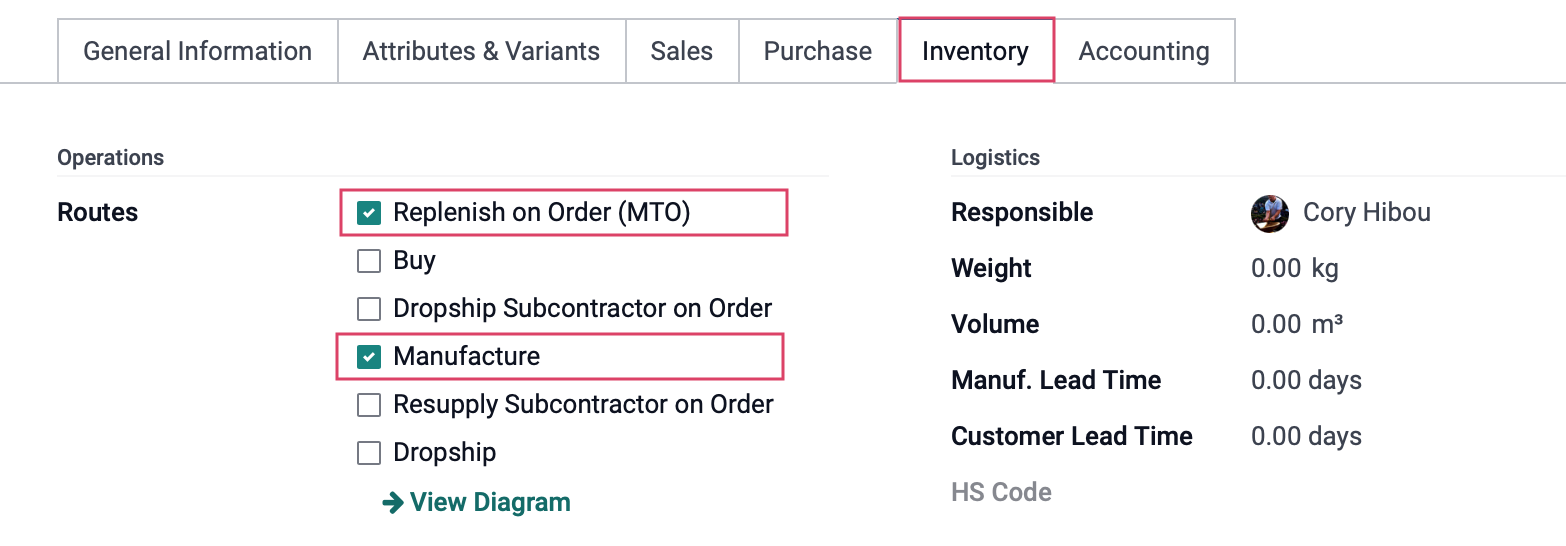
When you're ready, click Save.
Good to Know!
Sub-BoM Components
While we won't be covering it in this document, it's also important to configure procurement routes for all components of the Phantom BoM to ensure you always have what you need to produce the final product in a timely manner.
Producing the Parent Product with a Phantom BoM
Now that we have our BoMs created, we can manufacture our product via a Sales Order. We do this, again, because we only manufacture this product when it is ordered by a customer.
Navigate to the Sales app.

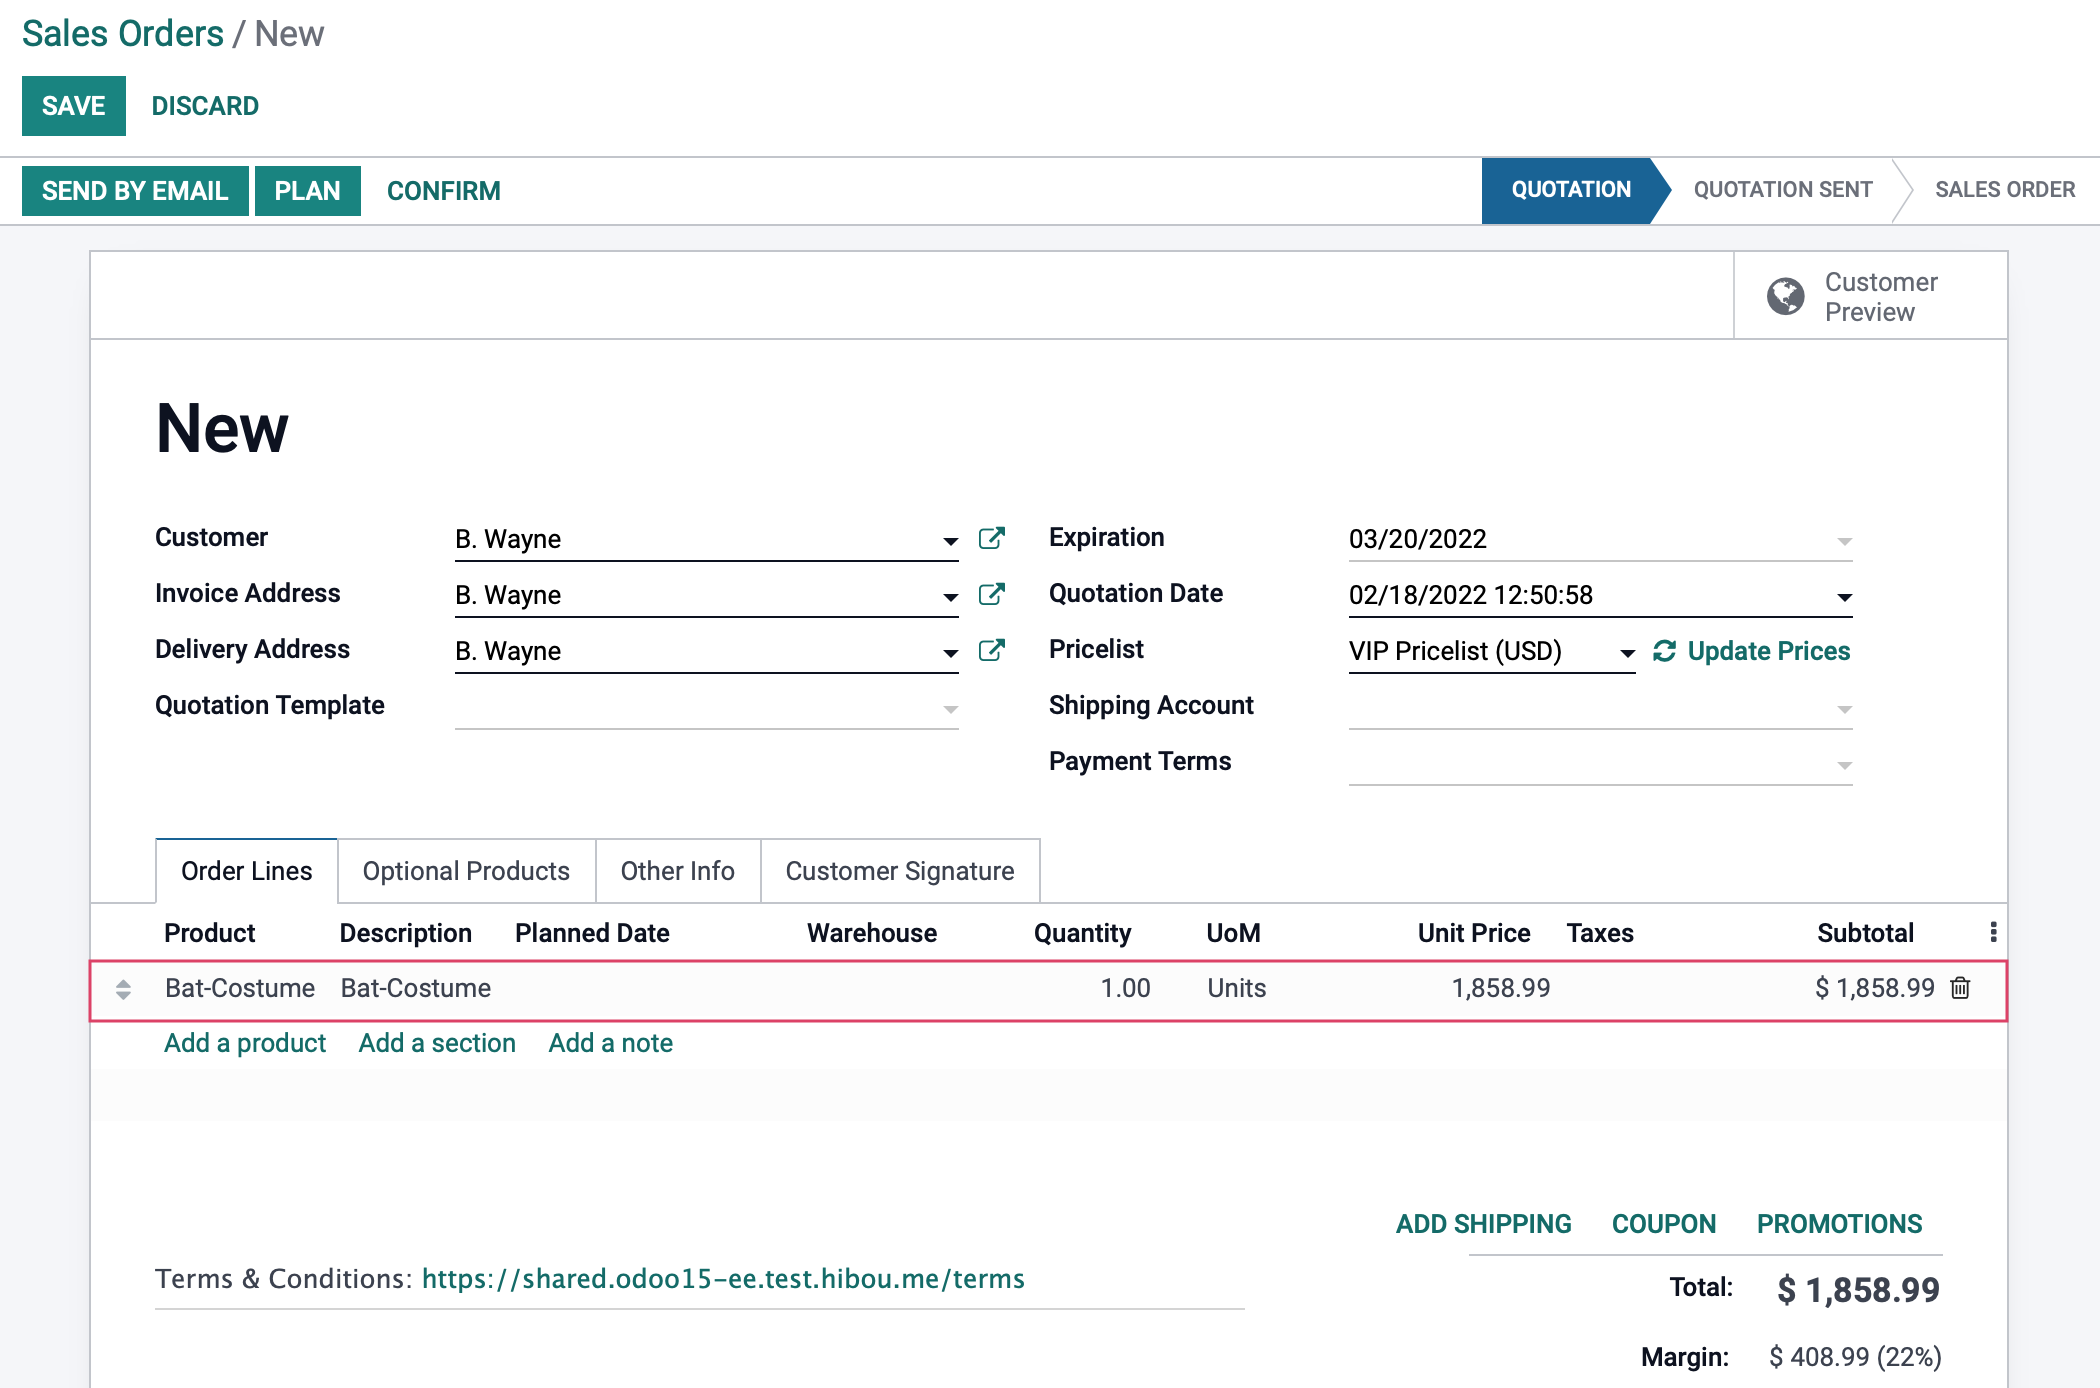
Once there, go to Orders > Orders, then click create. Add a Customer, and under the Order Lines tab click Add a Product to add your parent product. Follow the regular workflow for Sale Order creation.
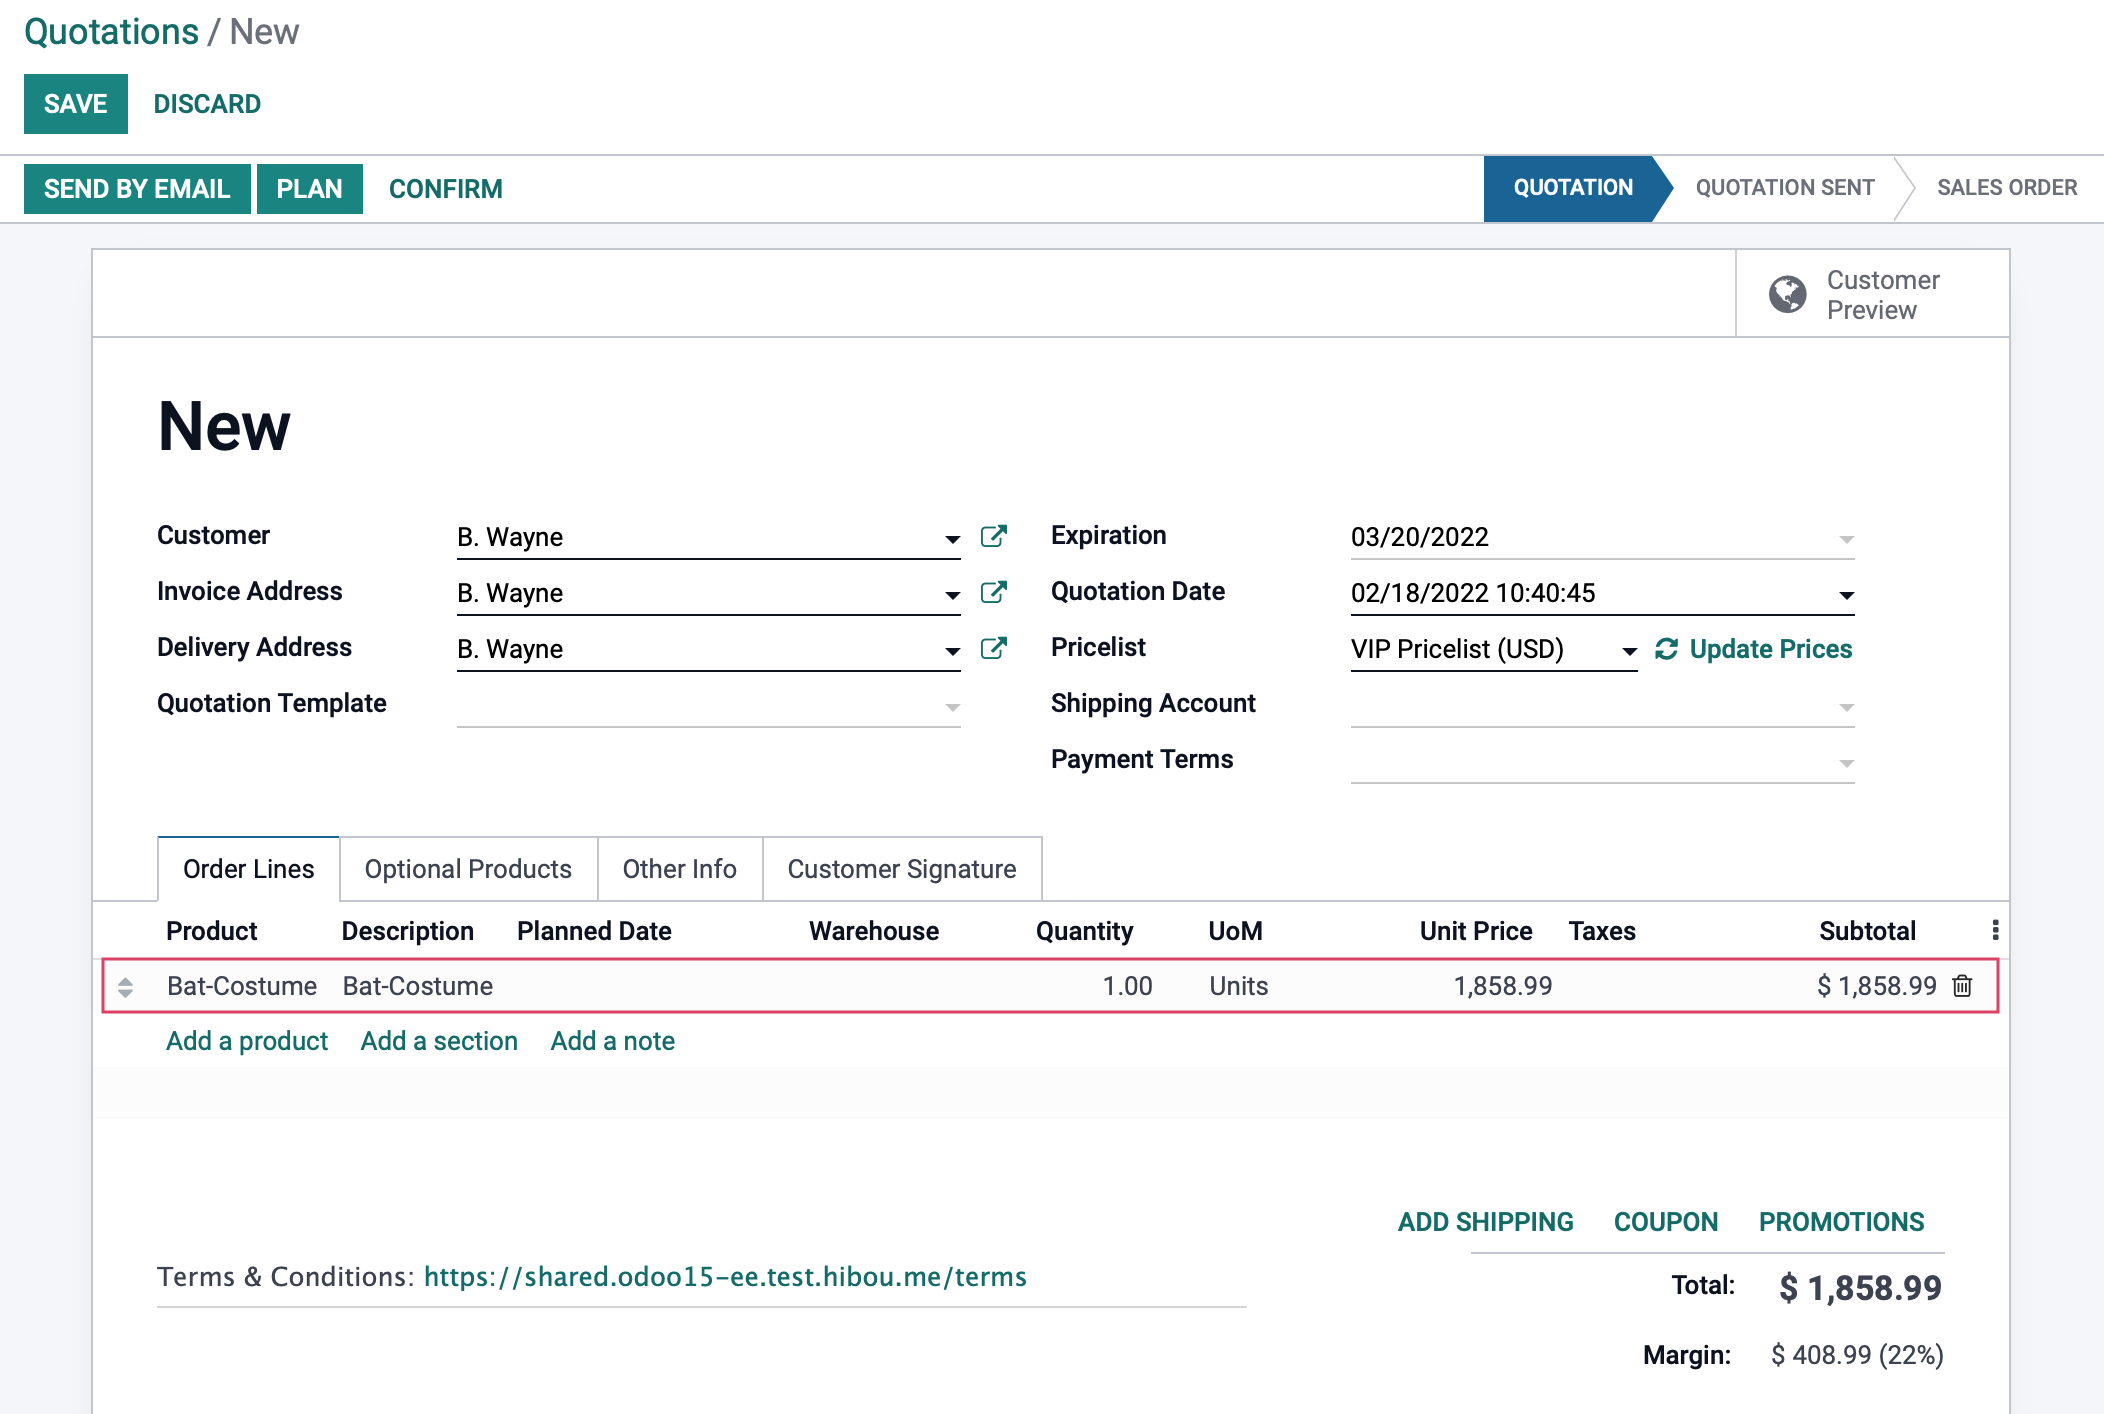
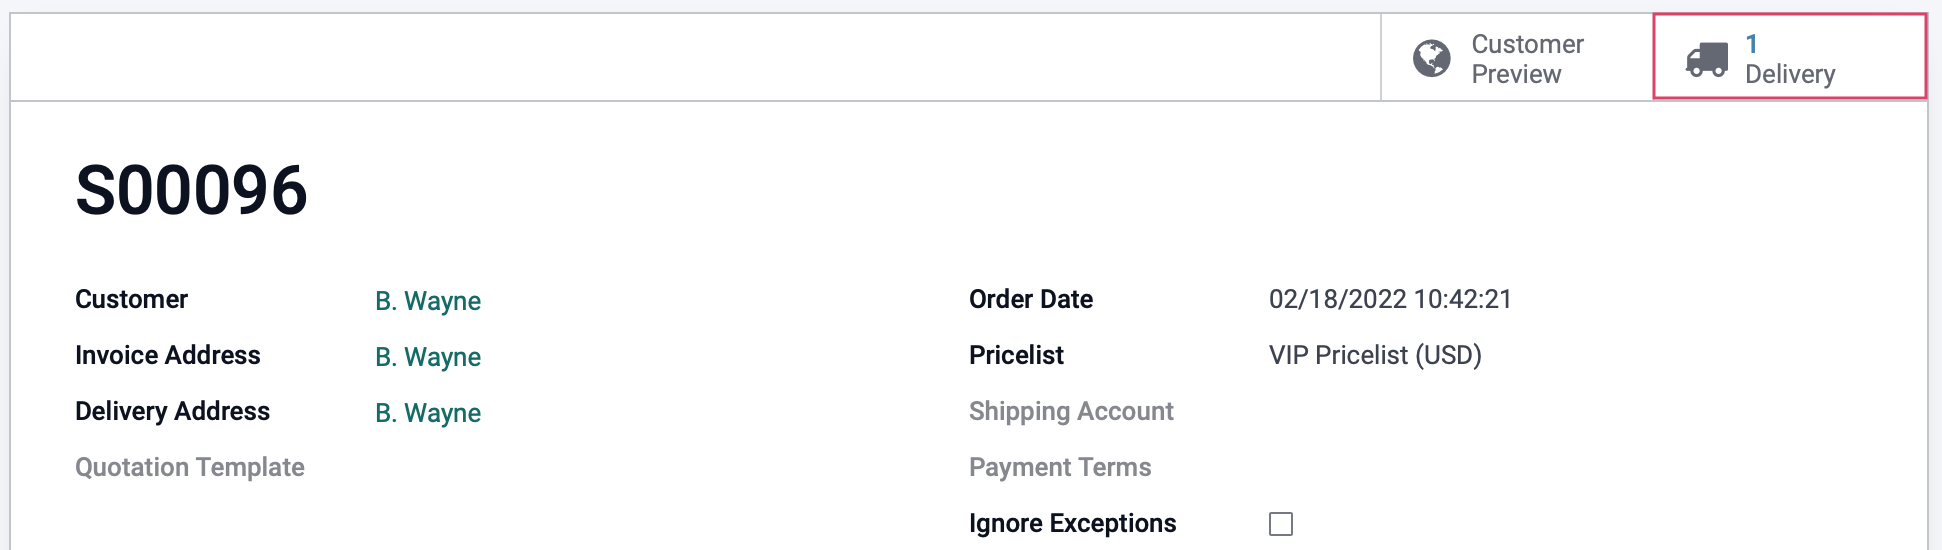
When you're ready, click save, then confirm. On the confirmed Sale Order, click the Delivery smart button. If this were a truly manufactured item, there would be a Manufacturing smart button which would bring you to the production process.
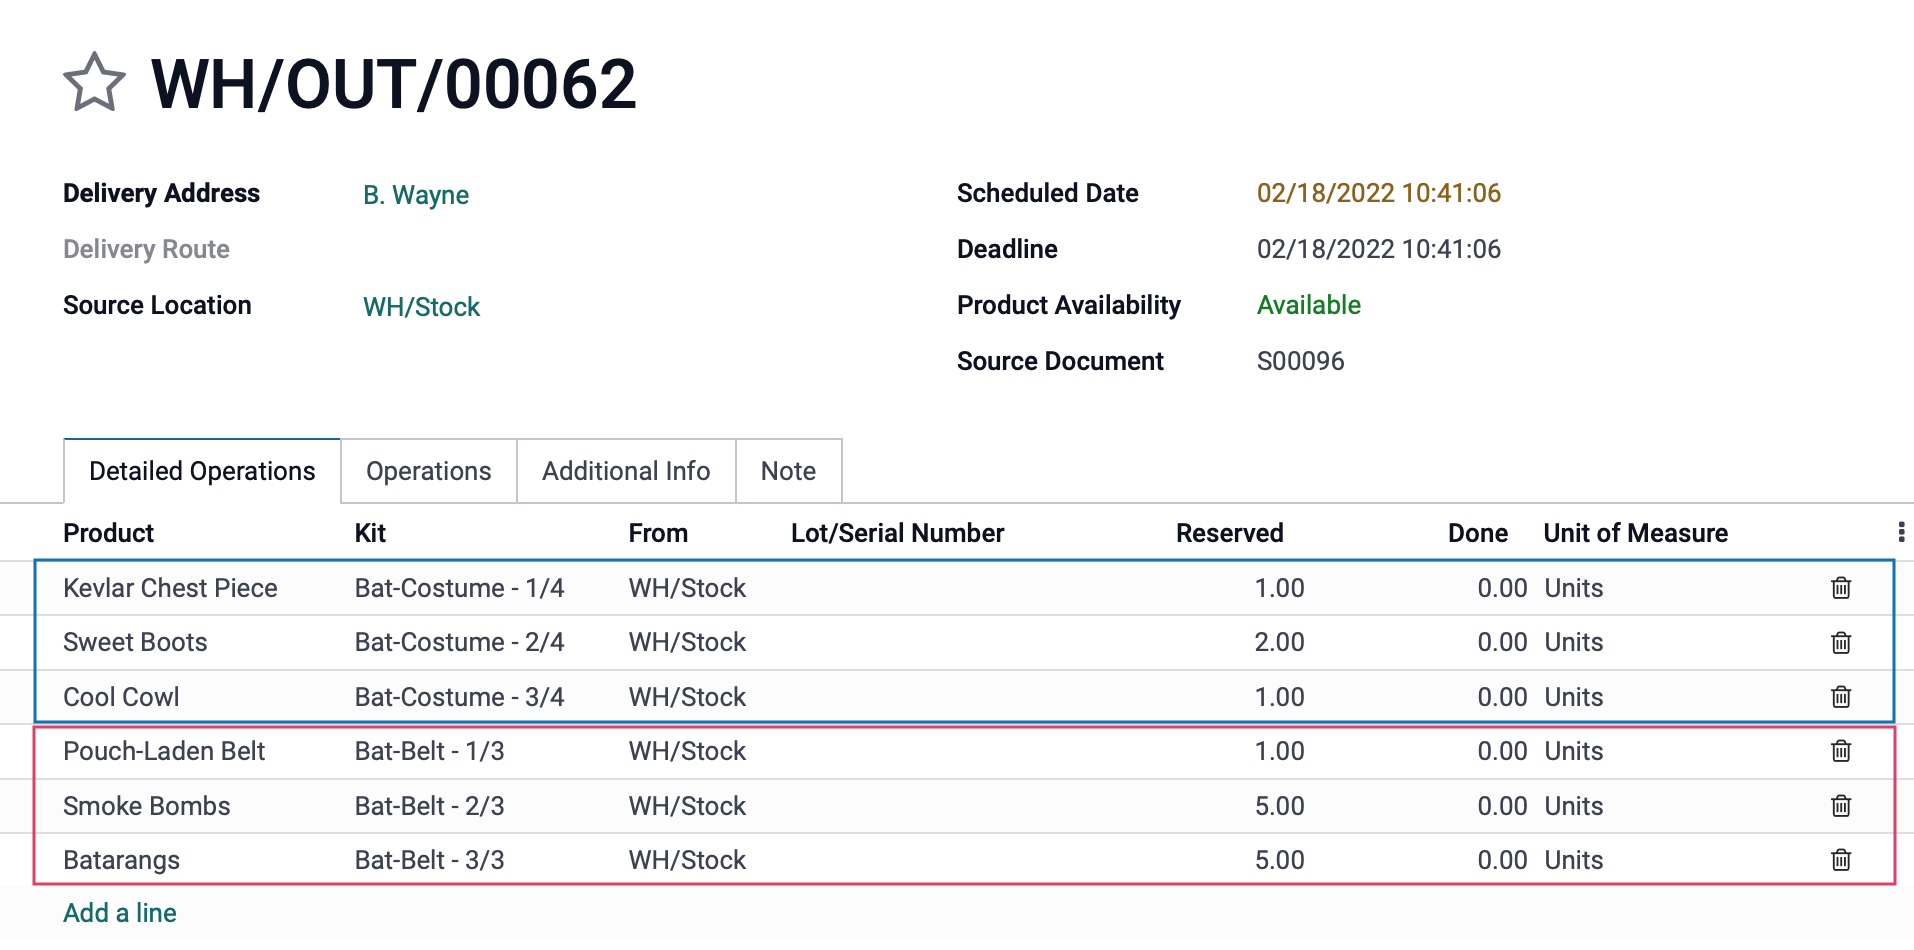
Here you'll notice that all of the products in the Phantom BoM are now listed as components of the parent product on the transfer, in this case an OUT, but could be an MO depending on your configuration of the BoM.
Complete your Manufacturing Order either by working through the Work Orders, clicking Validate, or by clicking Mark as Done. See Manufacturing Orders documentation for more information on how to complete Manufacturing Orders.
Once done, your product is ready for delivery.
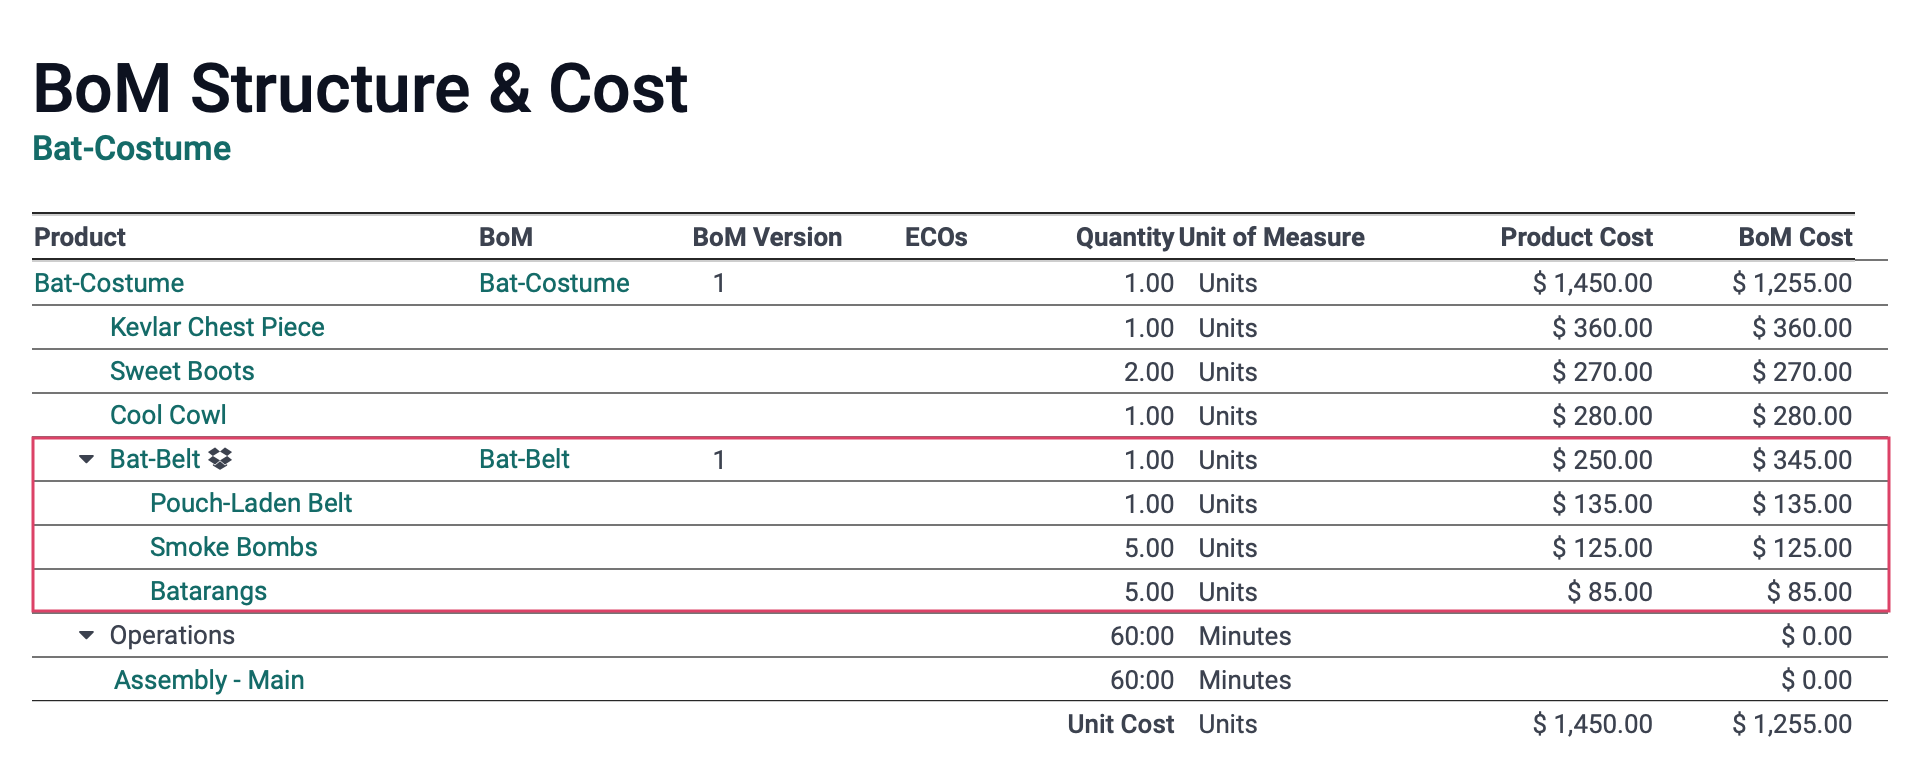
Structure & Cost
Odoo makes it easy to see the costs involved in producing a final product. Navigate to the Manufacturing app.
![]()
Click Products > Bills of Materials and select the BoM for your parent product.

From the BoM, click the Structure & Cost smart button.
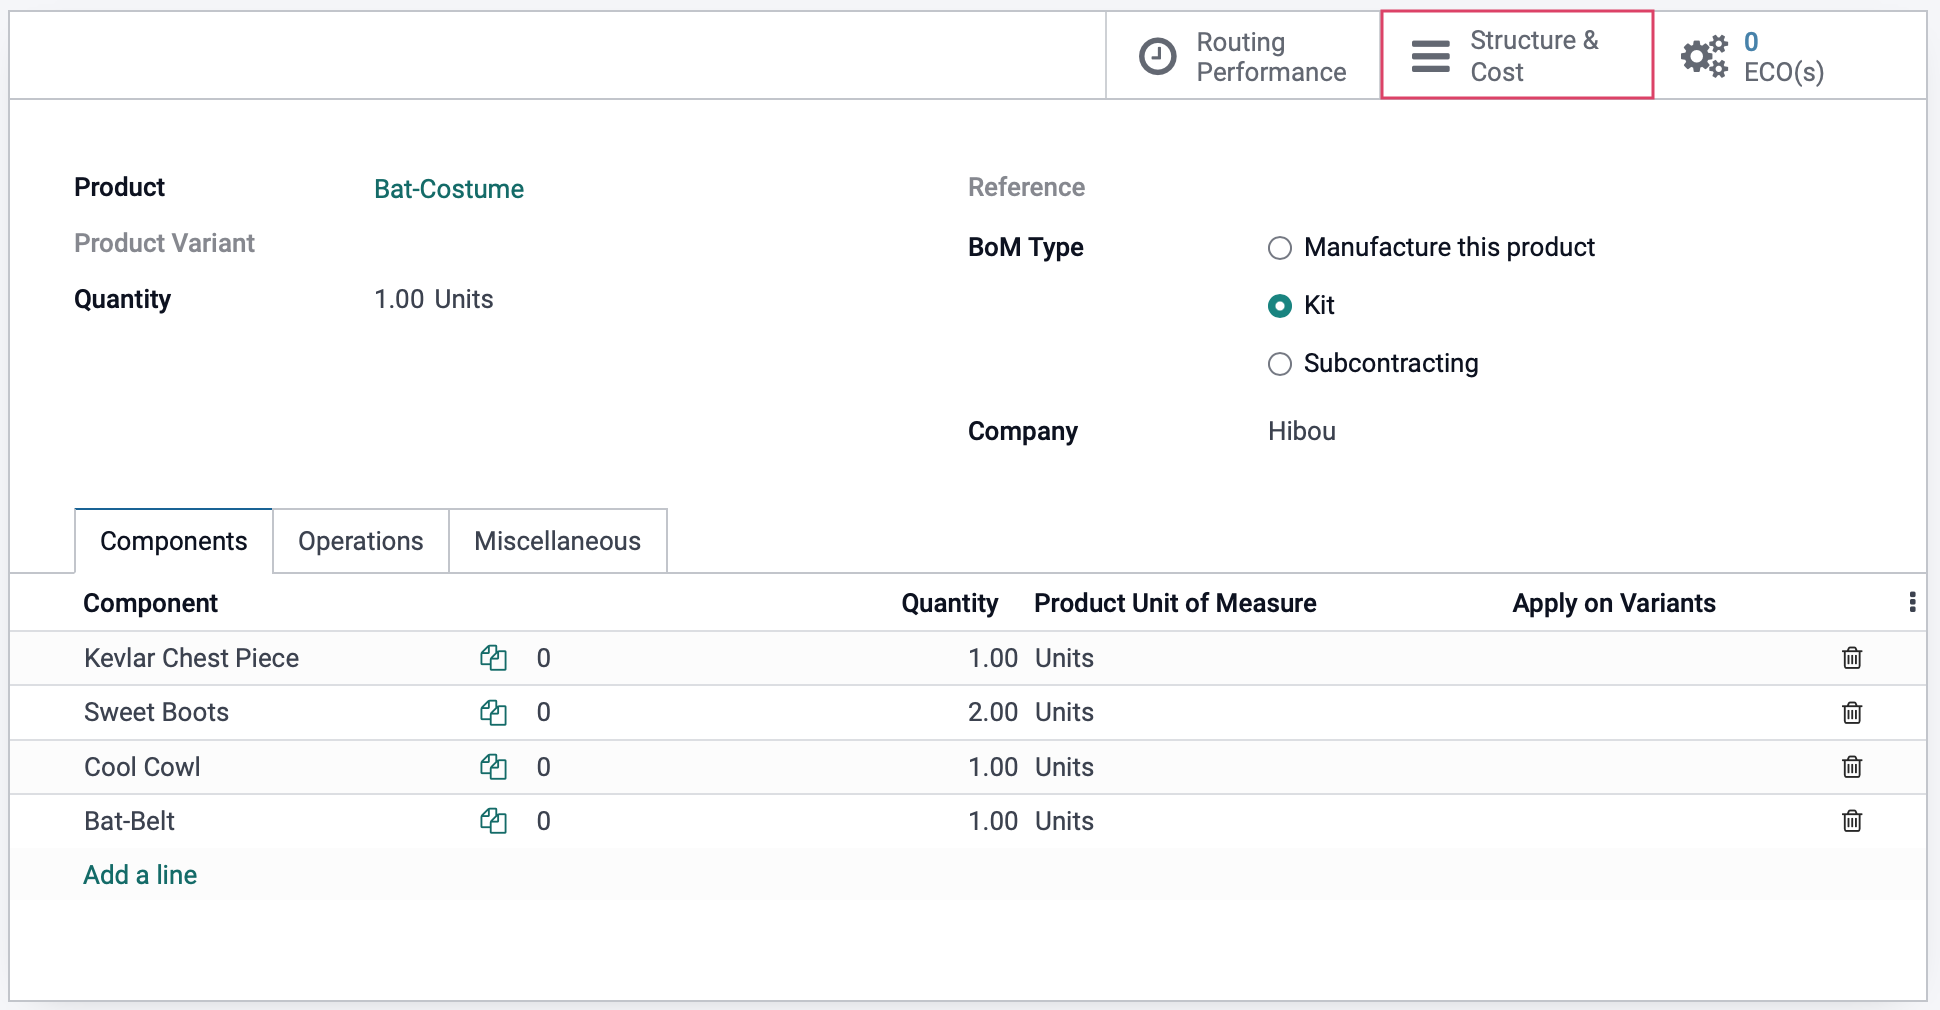
Use the down arrows to expose the expandable sections of the report. You'll see the sub-BoM is listed separately and figures into the total product cost.
Subassembly BoM
Let's say our sub-BoM requires assembly before including it with the suit. We can use a Subassembly BoM rather than a Phantom BoM.
Navigate to the Inventory app.
From Products > Products, we'll select the Bat-Belt product.

From within the product template, we'll click the Bill of Materials smart button.

Select the existing Kit BoM.

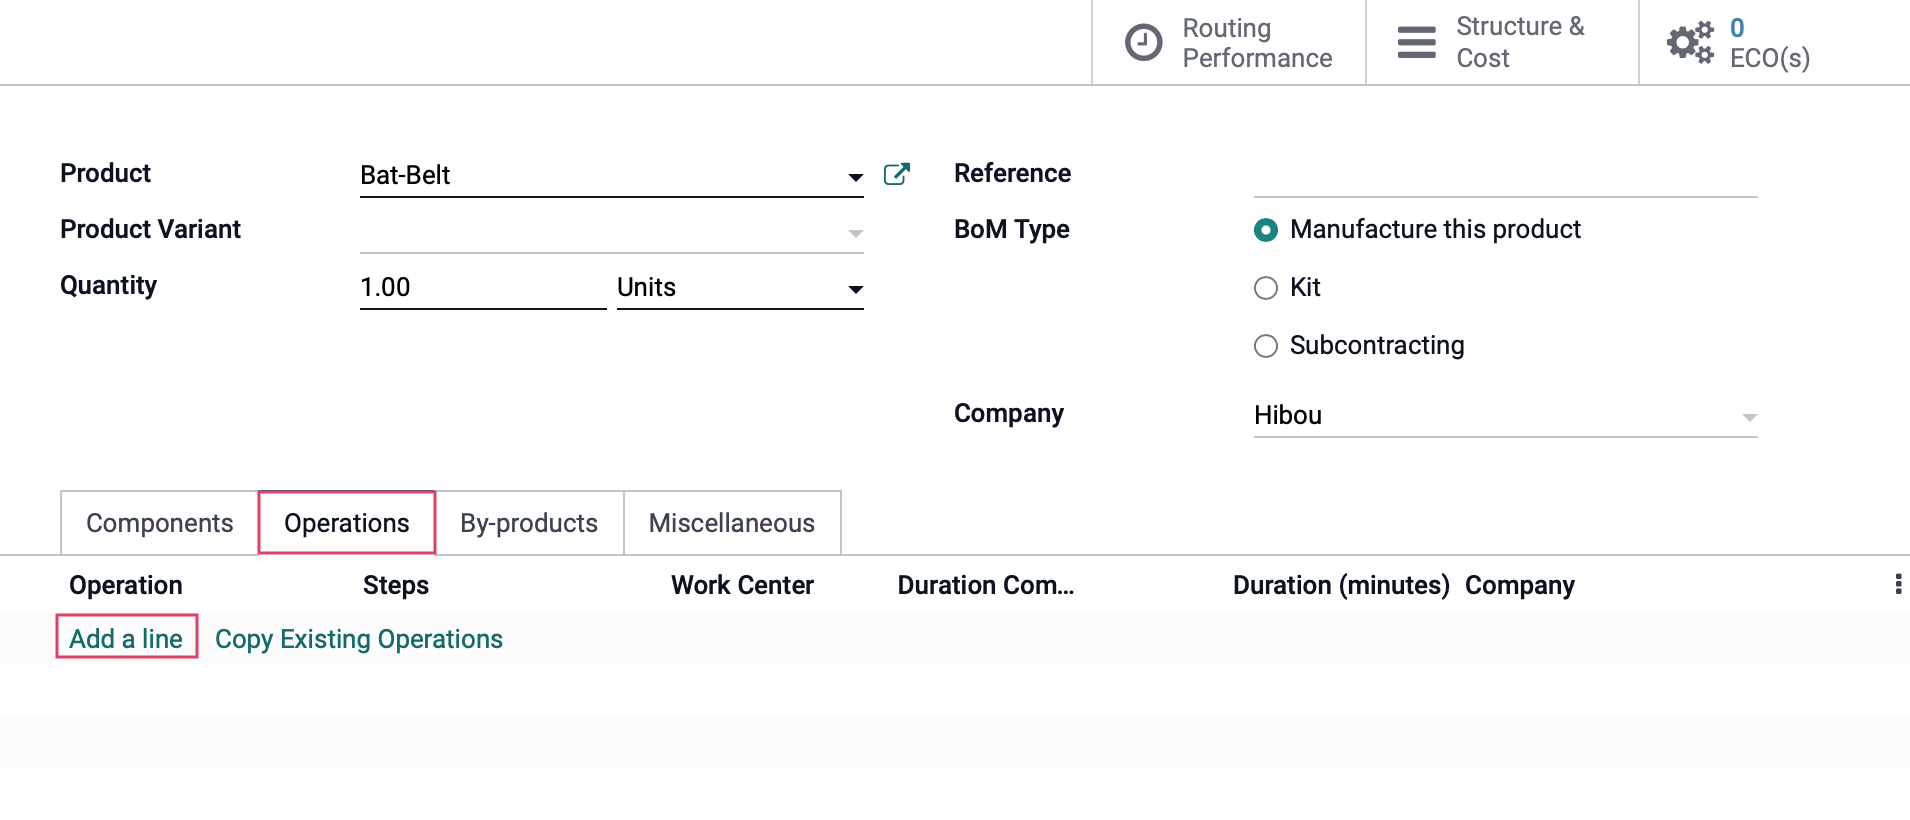
From within the BoM, click Edit. Here we'll make a couple adjustments.
BoM Type: Set this to Manufacture this Product
To specify the actual assembly (manufacturing) process, click Add a Line under the Operations tab,
This brings up the Operations modal where we'll complete details of the operation.
Operation: Enter the name of the operation.
Work Center: Select the Work Center where this operation will be completed.
Sequence: This provides a sequence order when displaying a list of work orders. Since we're only using one operation, we'll leave it at the default setting.
Duration Computation: Indicate the method you want to use to calculate the time required for this task. Our user has already determined that it takes 15 minutes, so we'll use that figure.
Under the Work Sheet tab, you have the option to provide visual steps via PDF, Google slide, or text.
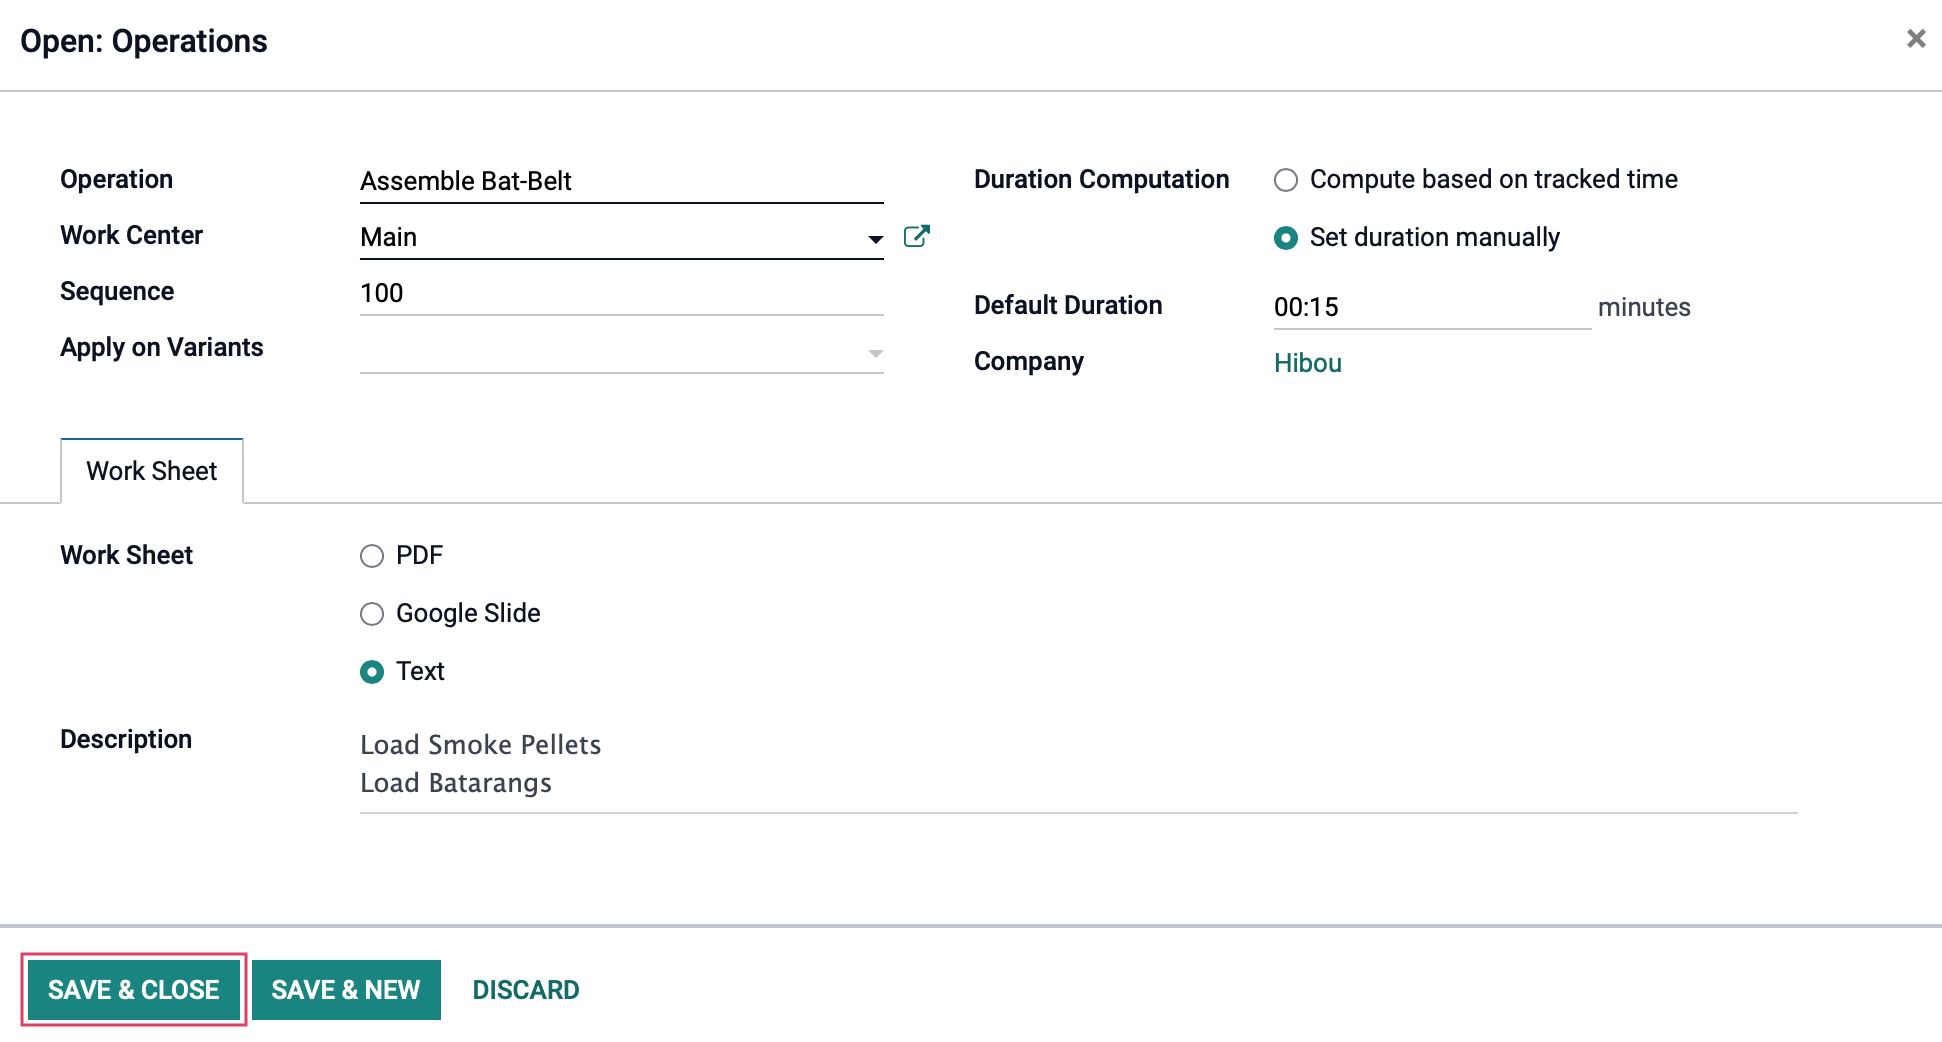
When you're ready, click Save & Close.
On the BoM, click Save.
Producing the Parent Product with a Subassembly BoM
Now, let's see the difference in processes when we create a Sale Order for the product using the new BoM structure.
Navigate to the Sales app.

Once there, go to Orders > Orders, then click create. Add a Customer, and under the Order Lines tab click Add a Product to add your parent product. Follow the regular workflow for Sale Order creation.
When you're ready, click save, then confirm. On the confirmed Sale Order, click the Manufacturing smart button.
Instead of the individual components from the Phantom BoM being listed, we'll now see the subassembly product shown as NOT AVAILABLE until its respective Manufacturing Order is completed.

Complete your Manufacturing Order either by working through the Work Orders, or by clicking Mark as Done. See Manufacturing Orders documentation for more information on how to complete Manufacturing Orders.
Once done, your product is ready for delivery.