General Settings

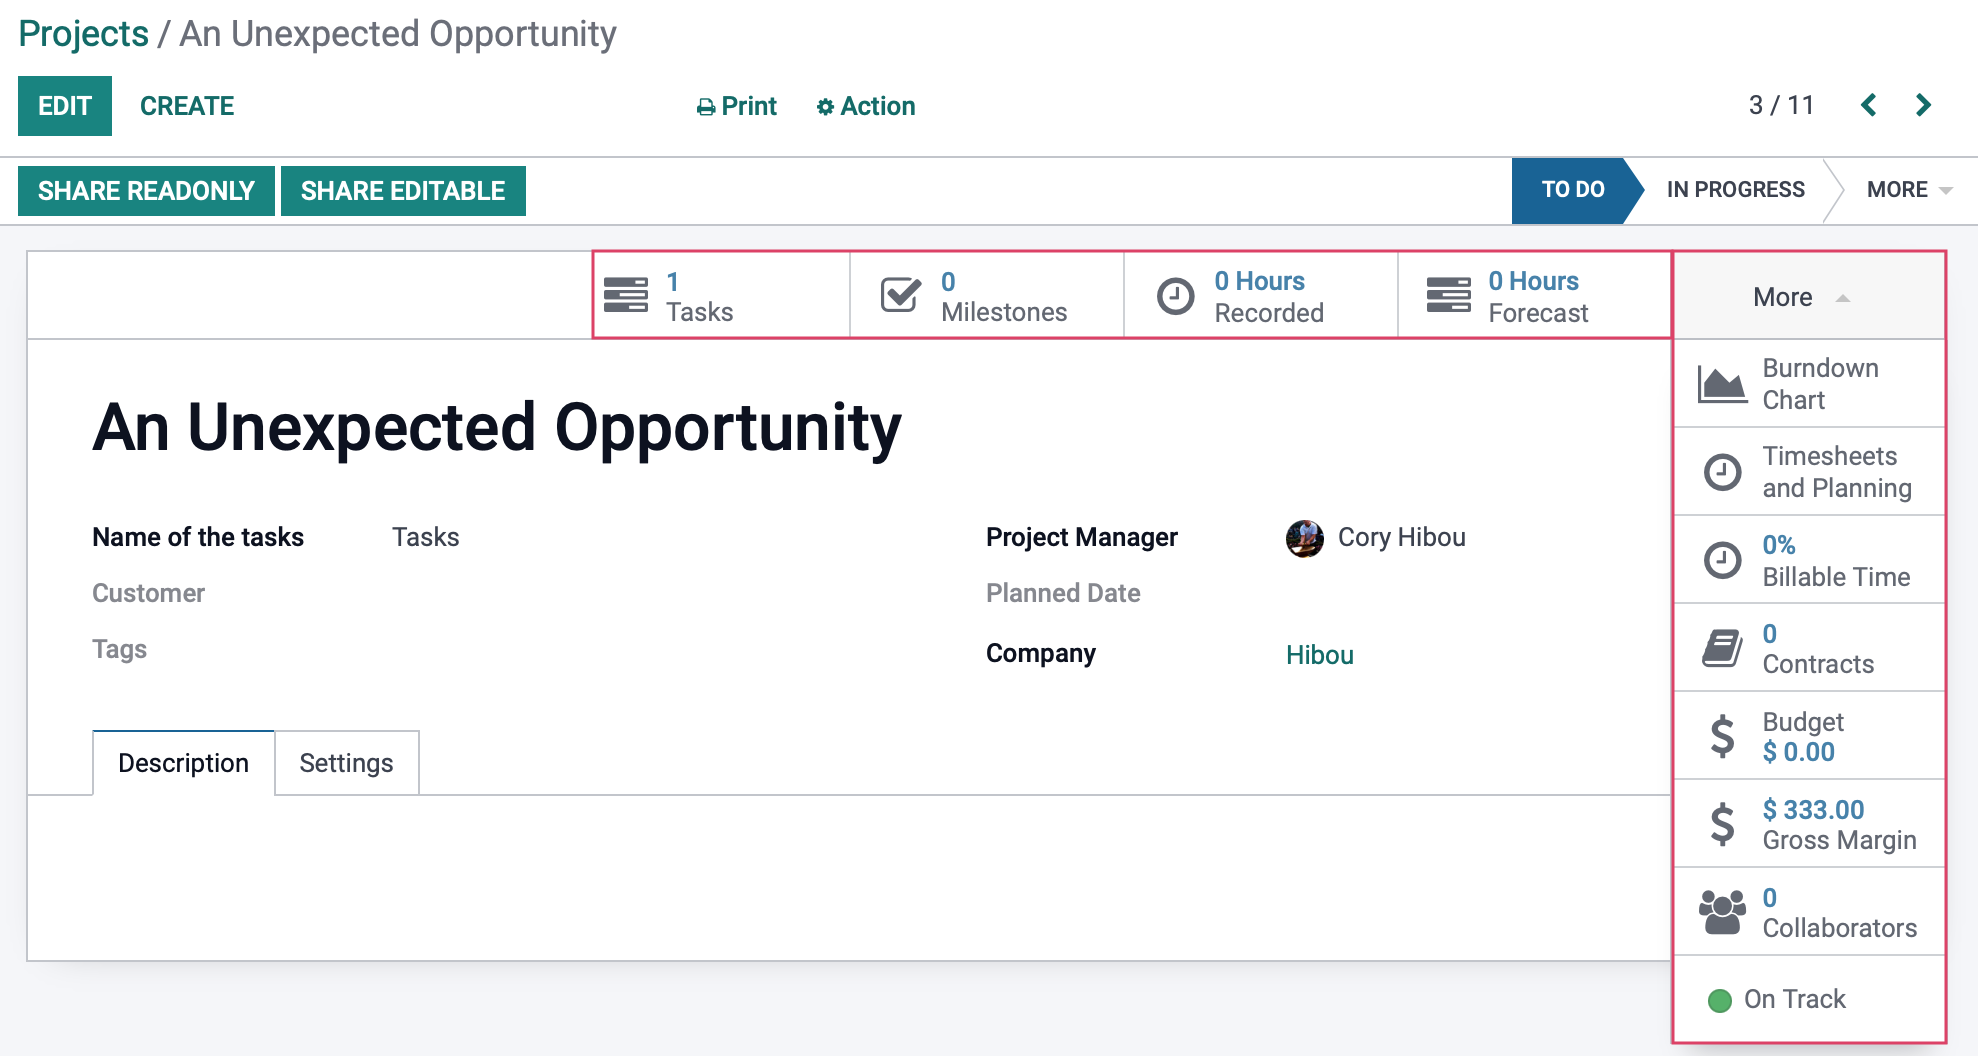
Name: The name of the project.
Name of the tasks: This defaults to "Tasks" but you can change it to reflect the type of project it is, such as "Steps".
Project Manager: The employee in charge of this project.
Customer: The customer this project is for.
Planned Date: Set a beginning and ending date for the project if you would like.
Tags: Any tags you wish to associate to the project for filtering purposes.
Company: The name of the company managing this project.
Under the description tab, you can enter an overall description of the project.
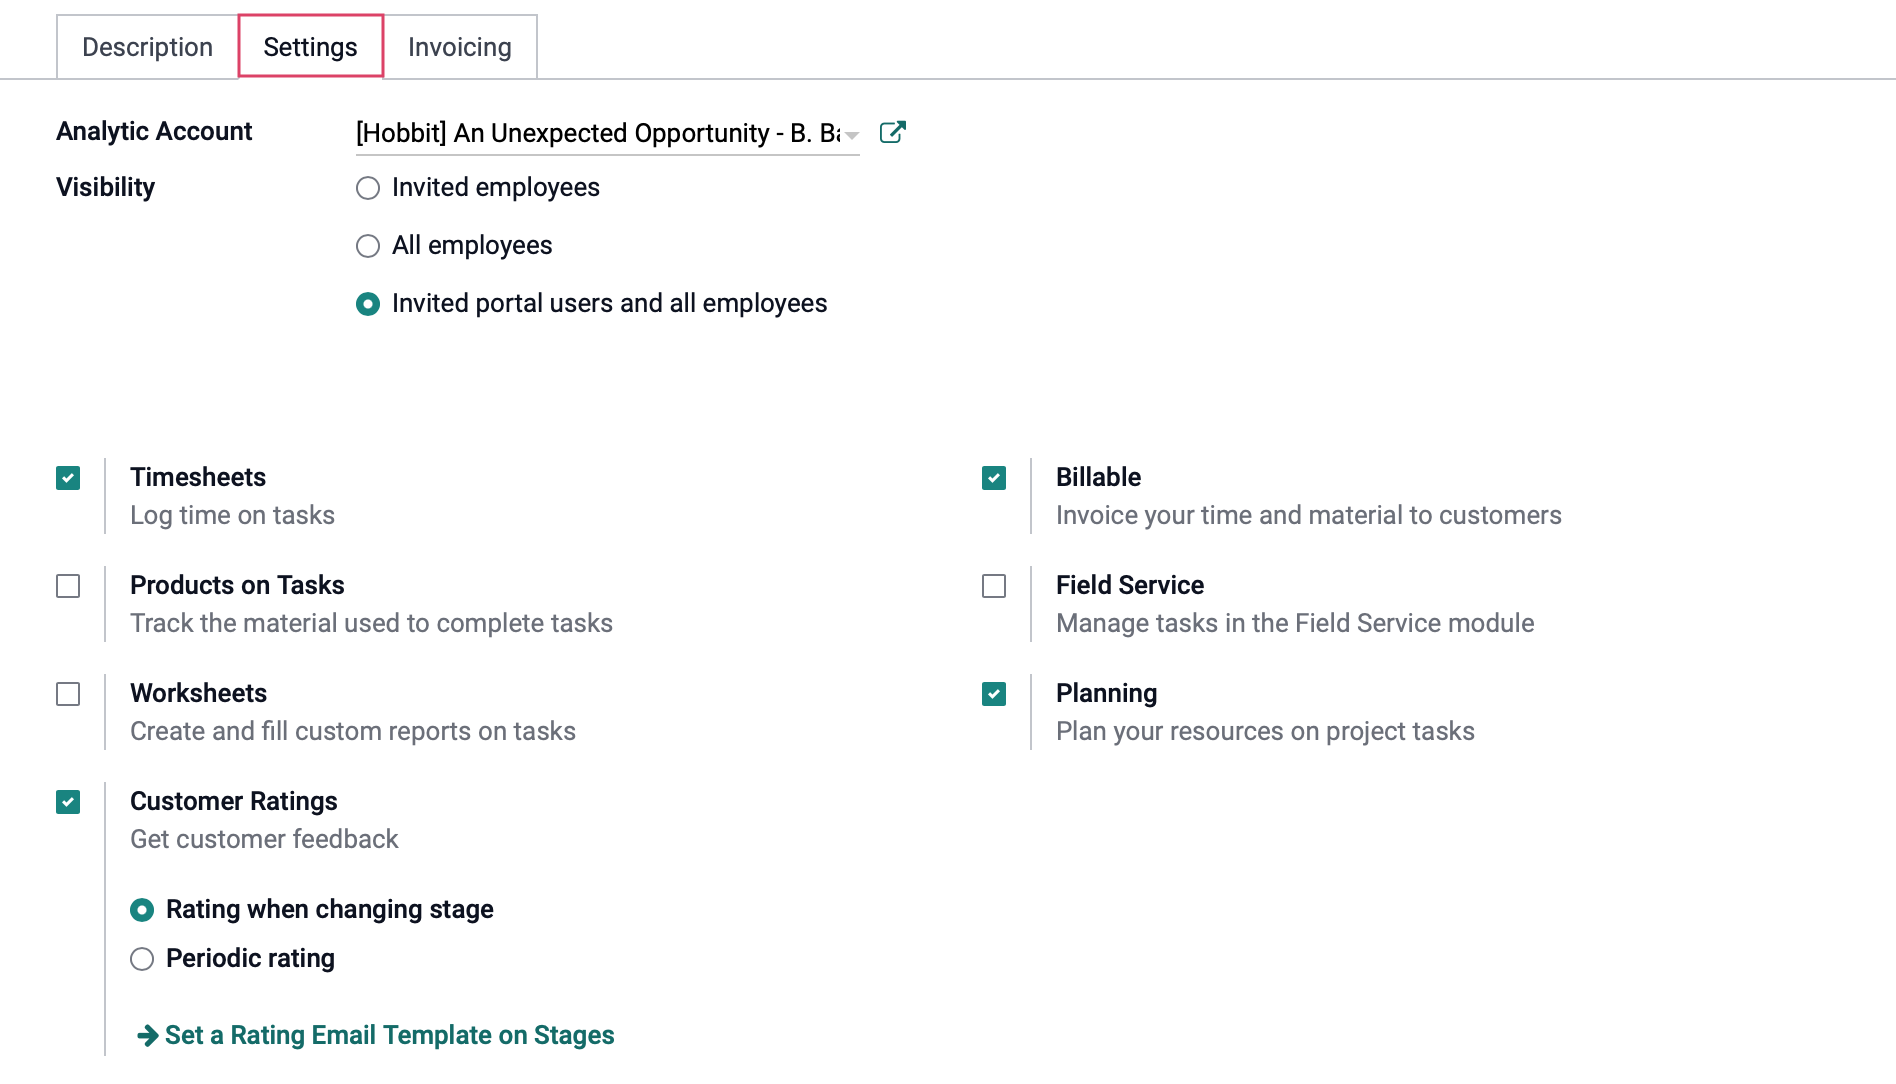
Under the Settings tab:
Analytic Account: For accounting purposes, the designated Analytic Account.
Visibility: Indicate who can see this project.
Invited Employees: Only employees who have this project Shared with them have access, covered below.
All Employes: If selected, any employee will have access.
Portal users and all employees: If selected, all employees and those contacts with Portal Access will have access.
Timesheets: Enabling this option allows users to enter timesheets on tasks. See Using Timesheets with Projects.
Products on Tasks: Enabling this option allows the tracking of materials used on tasks.
Worksheets: Enabling this option allows the customization of worksheets on tasks.
Customer Ratings: Enabling this option allows customers to give ratings on tasks. For more information on ratings, read our Project: Ratings documentation.
Billable: Enabling this option will allow you to invoice your customers for time and materials used on tasks.
Field Service: Enabling this option will allow the management of tasks in the Field Service application.
Planning: Enabling this option will allow you to plan your employees or resources to be set on a project. See Using Forecasts with Projects.

Under the invoicing tab, you can set a Default Sales Order Item if you would like, and then click Add a line to add employees, the related sale order item, and the cost for each employee.

If you've made any changes to the project details, be sure to click Save.
Share
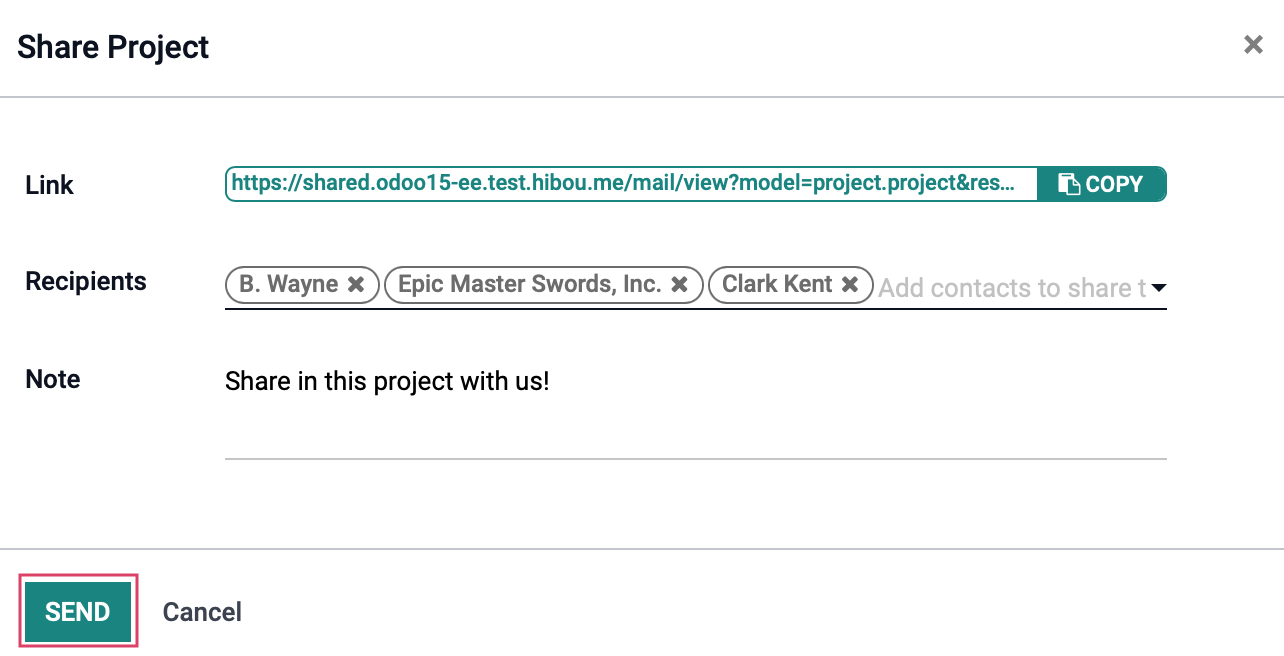
V15 now has the ability to share with two different options: Share Readonly and SHARE editable. The buttons allow you to invite others to view the project without administrative permissions by either copying the link and sharing with them manually, or adding them as a recipient to the Share Document form.


