Project: Project Workflows: Planning (Project Forecasting)
Purpose
This document will show you how to utilize the forecast feature in the Project app to plan when your employees will be working on different projects and tasks.
Process
To begin, navigate to the Project Application.

Settings
Once there, navigate to configuration > Settings. Put a checkmark in the checkbox next to forecasts and then select the Time Unit and Time Span that you want to use to schedule yourself and your employees for.
In our example, we will be forecasting by Hours with the time span of Days.
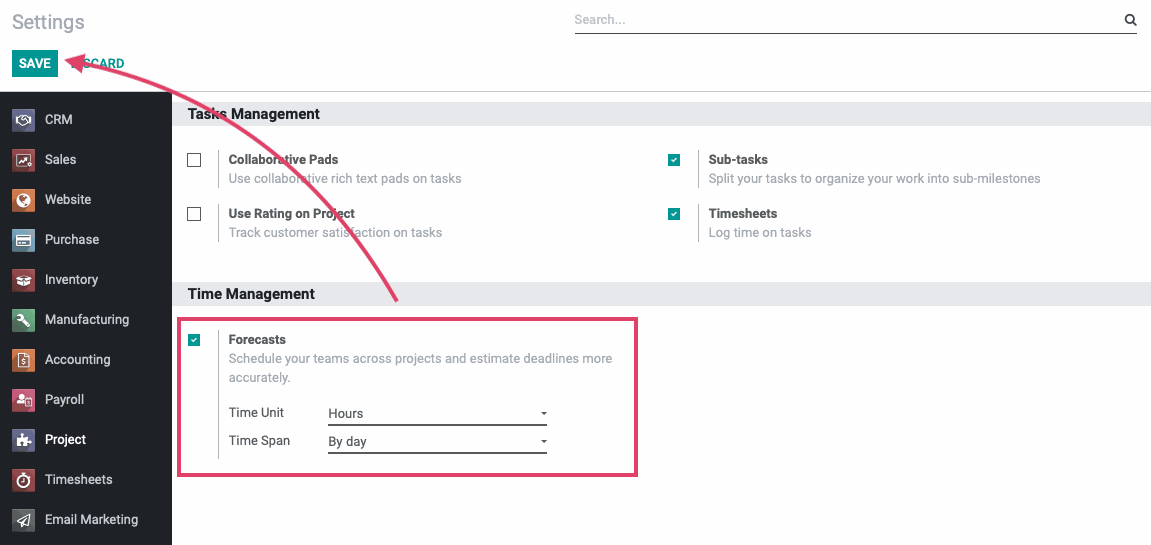
Once inputted, click Save.
With the forecast feature activated, you can choose to input your forecasting by Employee or by Project. We will provide an overview for both.
Good to Know!
You cannot have multiple kinds of forecasts scheduled for a project simultaneously. So, you will need to decide per project if you would like to forecast by Employee or by Project before you begin forecasting.
Forecasting by Employee
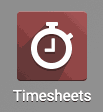
To get started, navigate to the Timesheets application.
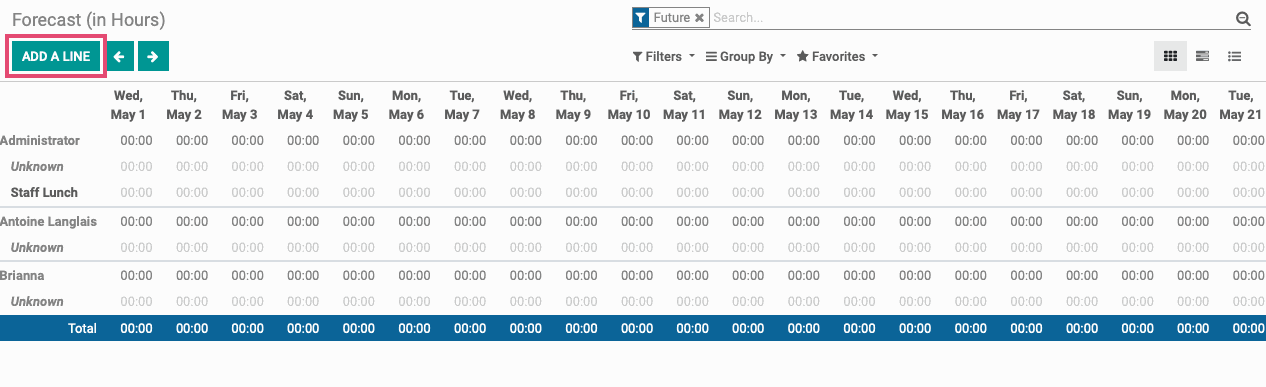
Once there, go to Forecast > By Employee.
Your default view will be to see your future forecasting for the time unit and duration that you selected in the Settings.
To create a new forecast for a project or task, click the add a line button.
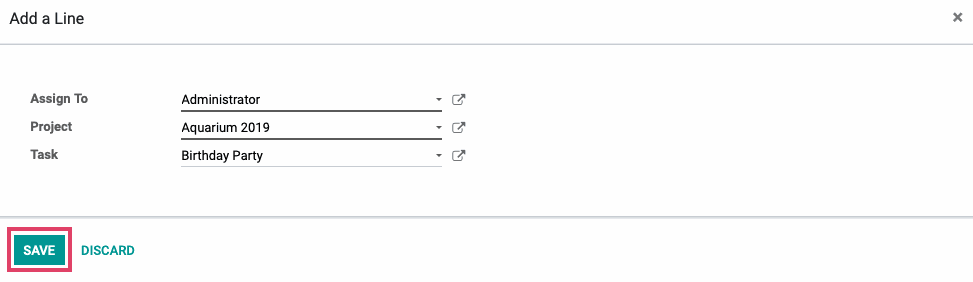
Choose the Employee you want to assign the forecast to and the Project and Task that you want the forecast to be associated with and click Save.
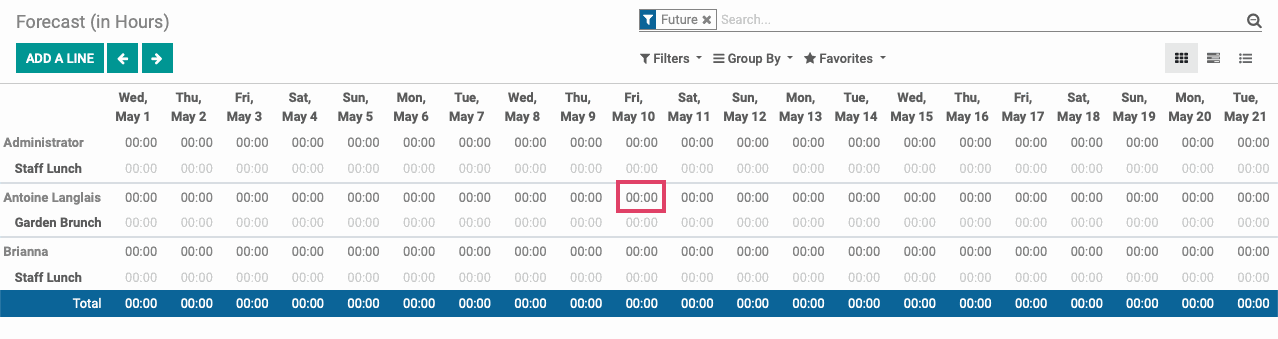
Once you’ve added the lines for the projects and tasks that you want to forecast for, input the time on the days that you want the employee to work on the project or task.
Simply click on the intersection of the date and employee that you want to forecast for and input the time that you want the employee to be scheduled for.
Good to Know!
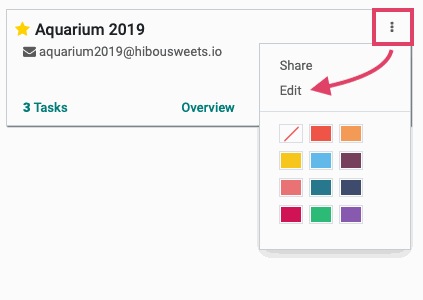
By default, you will only be able to set forecasts on Tasks. To use Forecasting on the Project level, you will need to go to the project that you want to use forecasting on, click the icon, choose edit, and put a checkmark in the Allow Forecast checkbox.
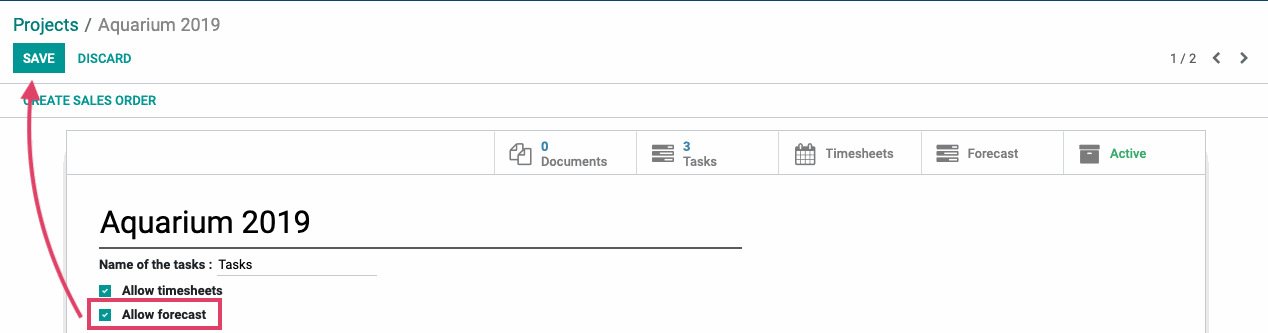
Click SAVE on the project and you will now be able to set forecasts on your project.
Forecasting by Project
When you do forecasting by projects, you can schedule and forecast multiple employees at once.
Your default view will be to see your future forecasting for the time unit and duration that you selected in the Settings in a grid view.
To add a new employee to the project forecast, click ADD A LINE.
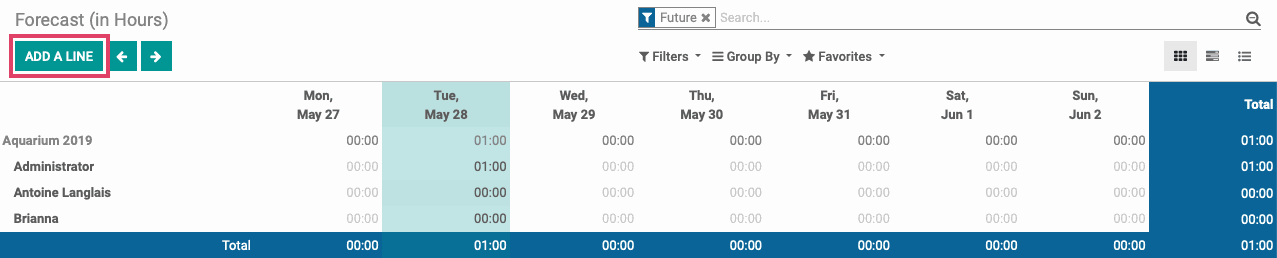
Enter the employee and the project that you would like to forecast for. You do not need to select a task because we are forecasting at the project level.
Once your employees are all selected, you can schedule each one and how much time they will each contribute to the project across the timeframe you selected in the Settings.
Simply click on the intersection of the date and employee that you want to forecast for and input the time that you want the employee to be scheduled for.
