Project: Project Workflows: Service Tracking from a Product: Create a Task in an Existing Project
Purpose
This document will show you how to configure a service product to create a project from a confirmed sale order, then create a task within that project.
Important!
Products must be configured as Service products in order for them to generate projects and tasks. Follow the guidelines in the Product Creation Workflow document. The steps below will build upon your preconfigured service product.
For this step, you'll also need an existing project to link this product to. To create a project, follow the Basic Project Workflow documentation.
Process
To get started, navigate to the Inventory app.
Click EDIT.
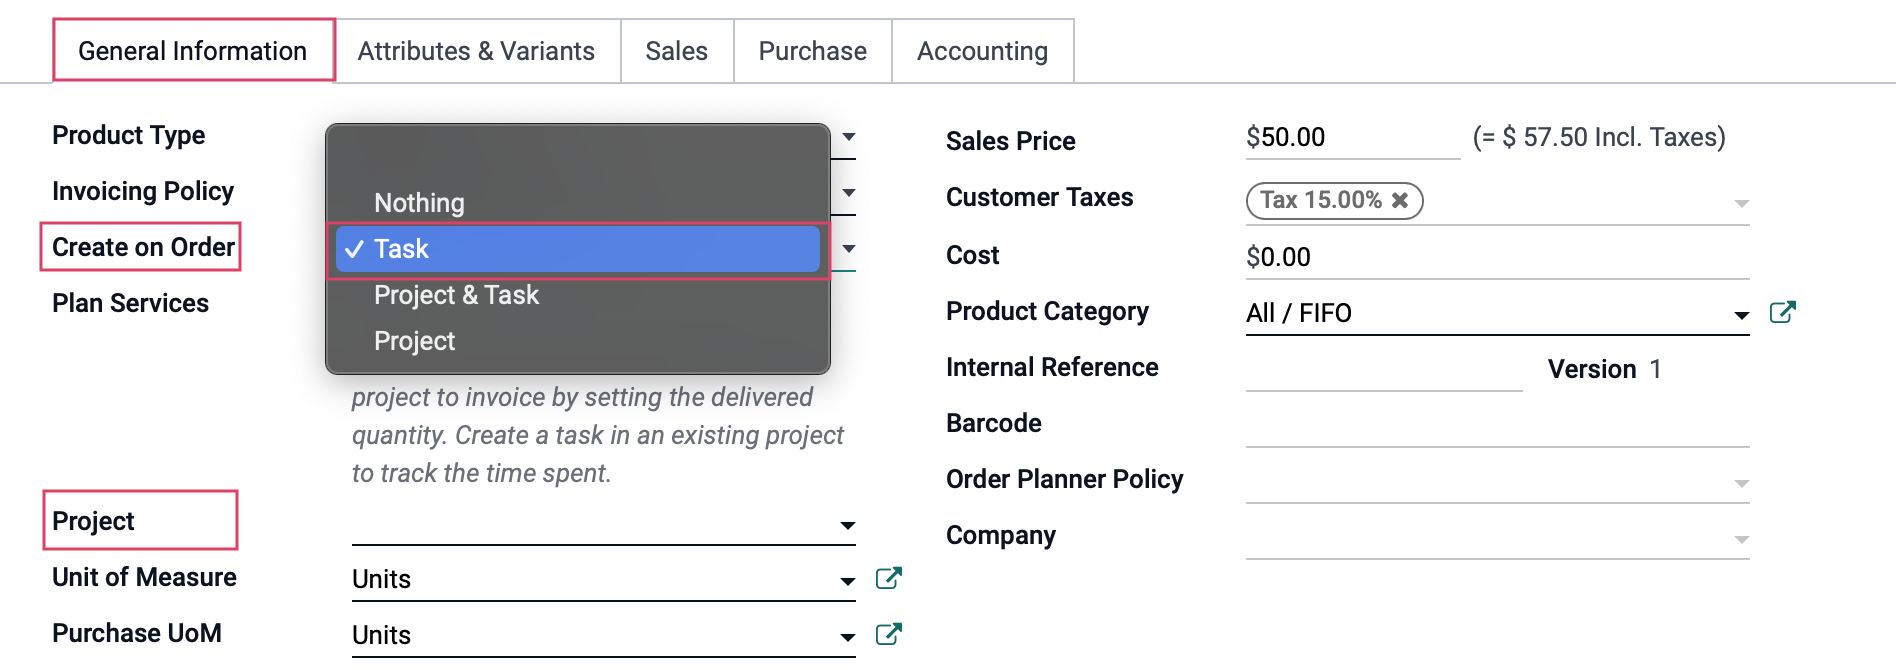
Under the general information tab, configure as indicated:
Create On Order: Select Task.
Project: Select an existing project template from the drop-down list. To create a task on order, Project becomes a required field.
When you're done, click Save.
Create a Sales Order
Next, navigate to the Sales app.
Click Create and complete the form as indicated. Many of these fields will auto-populate with the selected customer's data:
Customer: Select the appropriate customer.
Quotation Template: The base template used for this quotation if you choose to use one.
Expiration: The date the quote will expire.
Pricelist: Customer's default pricelist, this field will populate once the customer is selected.
Payment Terms: If the customer has specific payment terms set, those will be populated here.
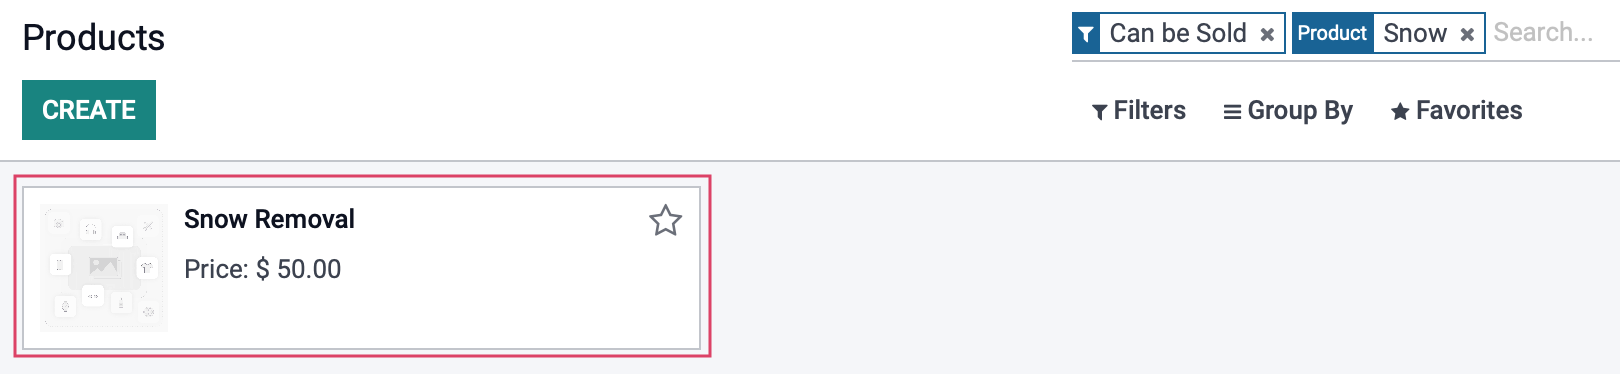
Under the Order Lines tab, click Add a Product and enter the service product you configured above, as well as the Quantity.
Once the line is added, you will see a smart button relating to the Project you set on the product.
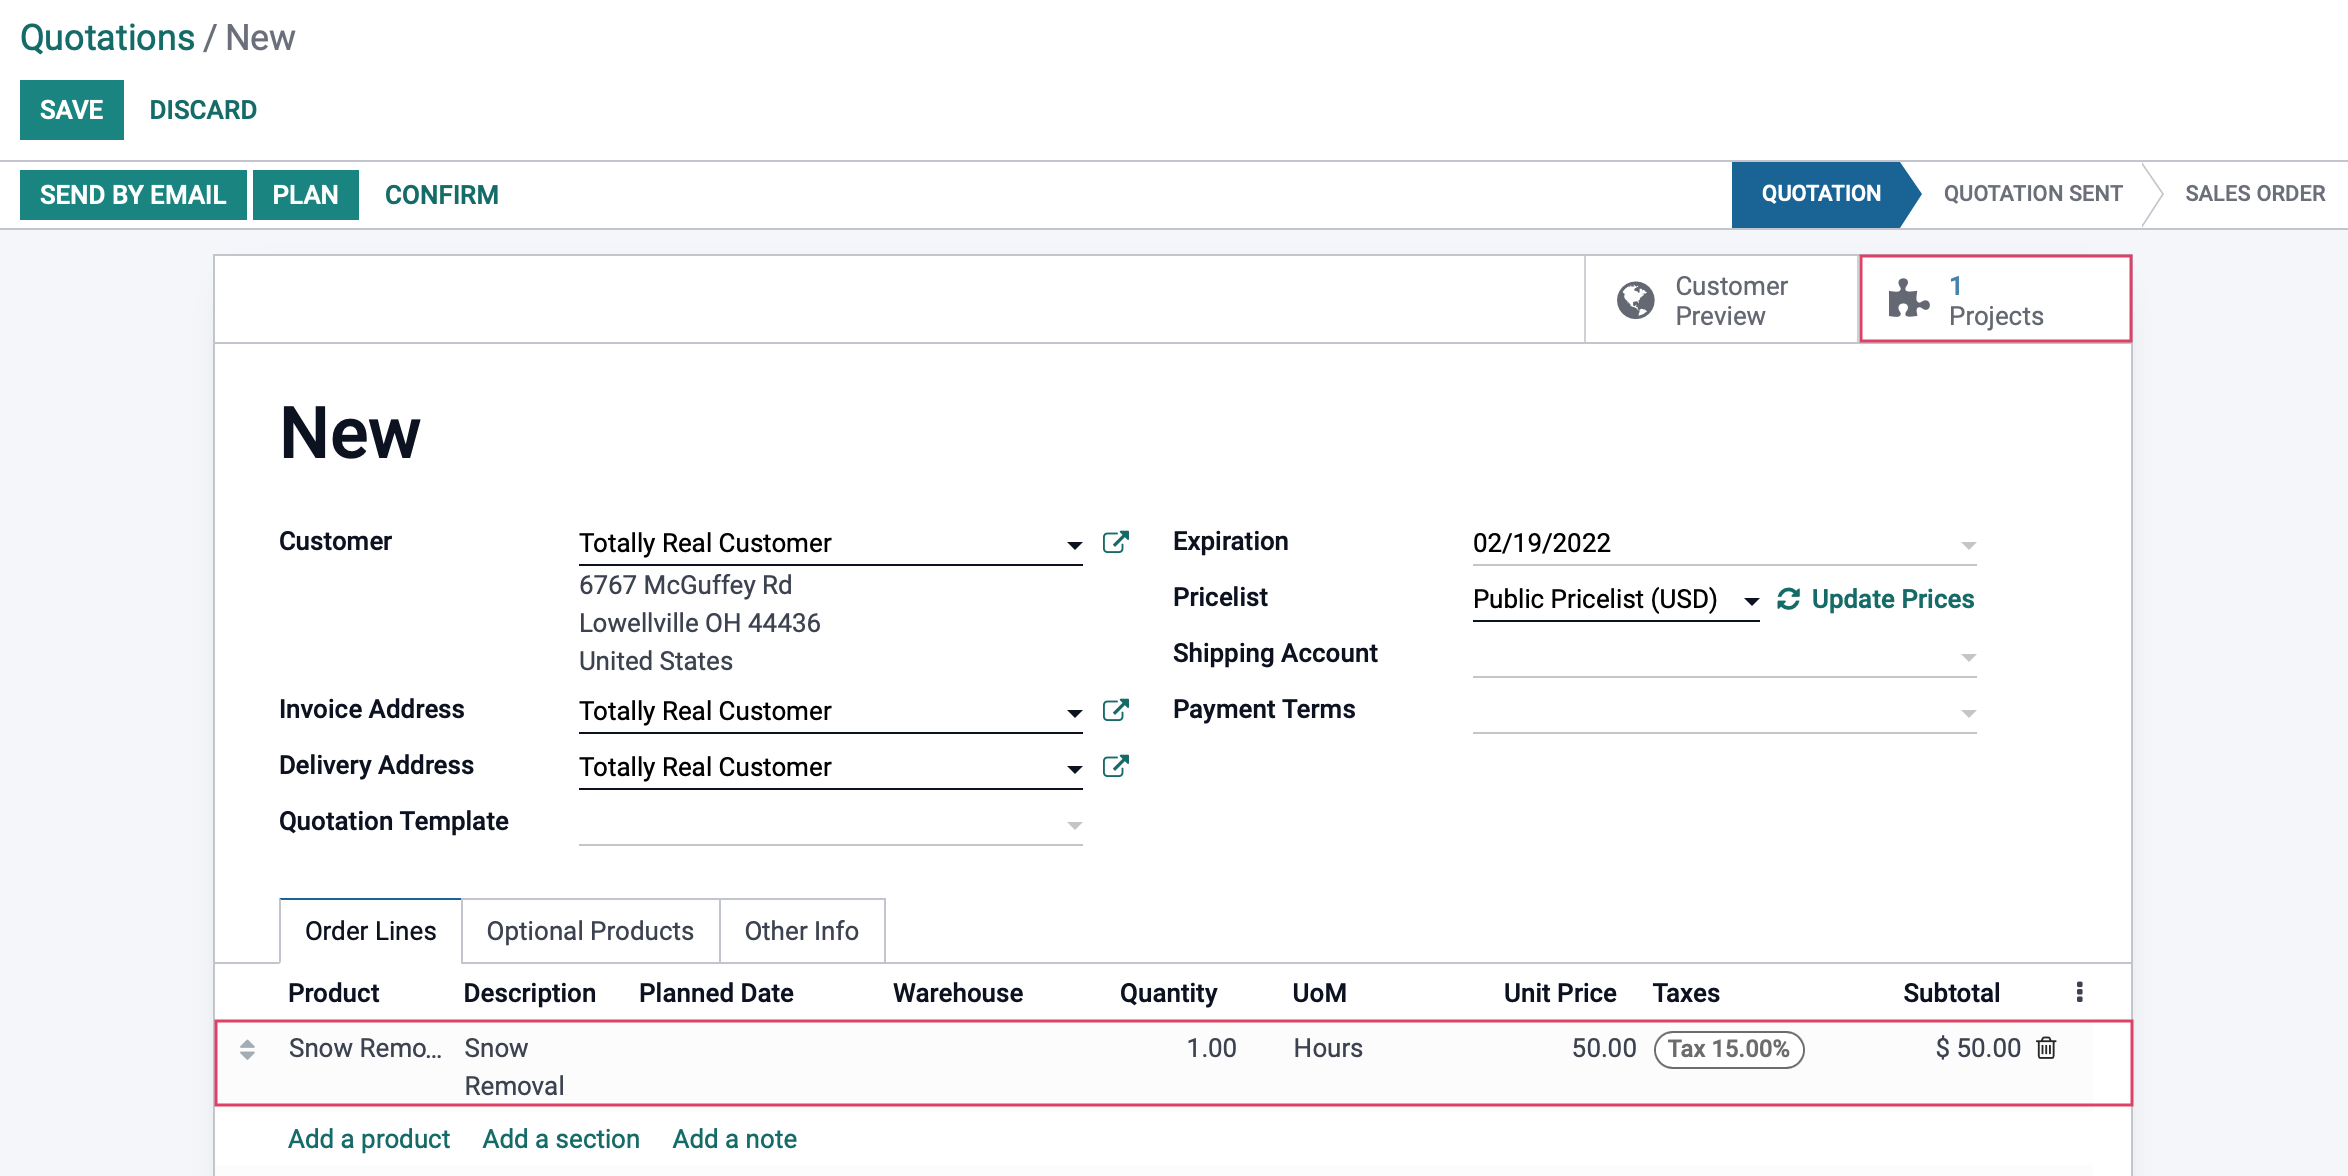
After the product and quantity are added, click Save then click confirm.
Review the Created Task
After confirming the Sale Order, the page will reload.
At the top of the Sale Order, you'll see a new smart button added.
Projects takes you to the new project that was just created from this Sales Order.
Tasks will take you to the specific task created under that project.
Click Tasks.

This brings you to the task that was created under the newly created project. You will see that the Project field is populated with the original Sale Order.

Good to Know!
Ordered Hours Become Planned Hours
Under the TIMESHEETS tab, you'll see Initially Planned Hours listed as 03:00. This is because we added three hours of this service product to the original Sales Order.
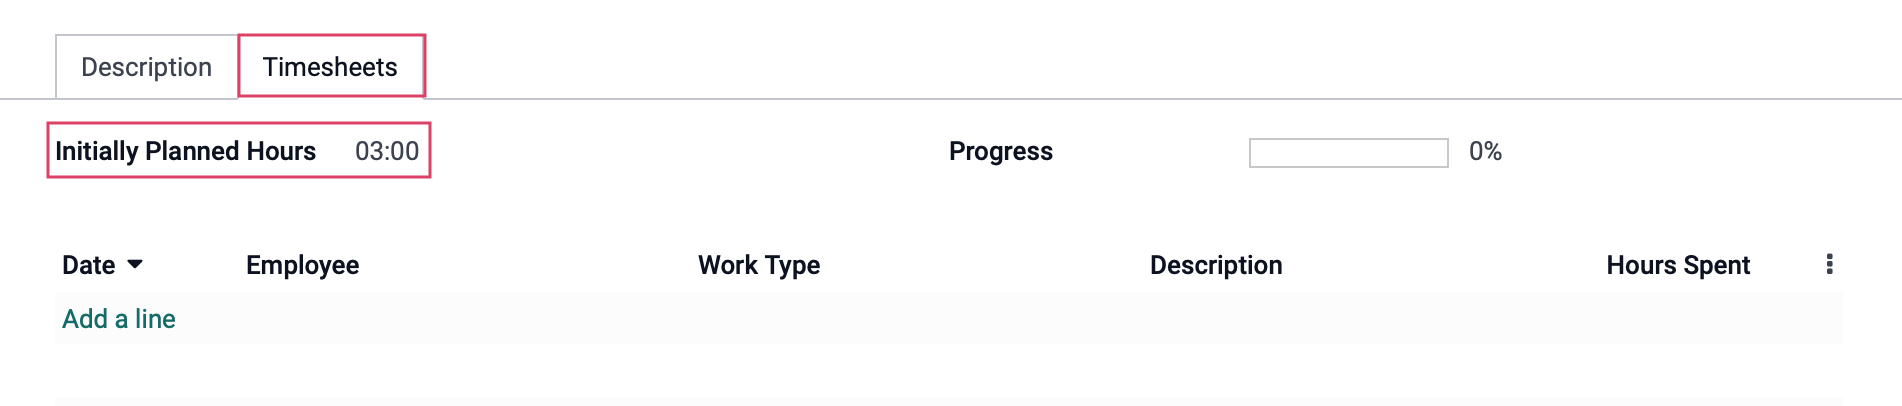
Changing the Initially Planned Hours on the task does not change the quantity ordered on the Sales Order. It's simply for planning purposes.